You are using an out of date browser. It may not display this or other websites correctly.
You should upgrade or use an alternative browser.
You should upgrade or use an alternative browser.
Gunter - 69' Adventurewagen conversion + Dodge & crewcab projects
- Thread starter thejones's
- Start date


Help Support Early Bay Forum:
This site may earn a commission from merchant affiliate
links, including eBay, Amazon, and others.
thejones's
Well-known member
- Joined
- May 12, 2012
- Messages
- 272
- Reaction score
- 0
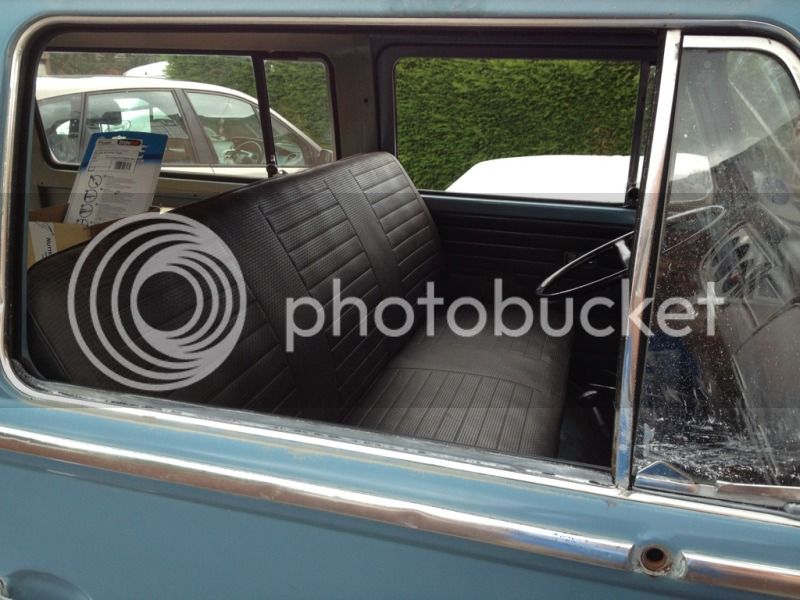
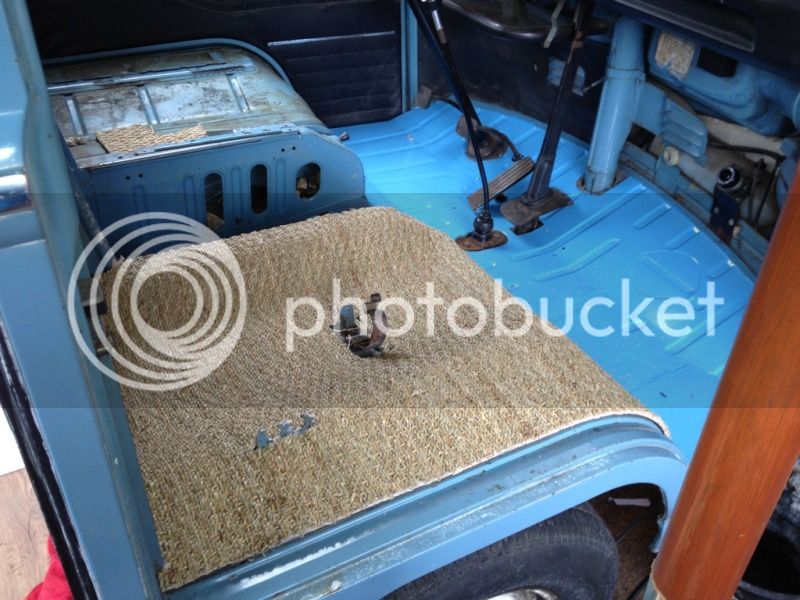
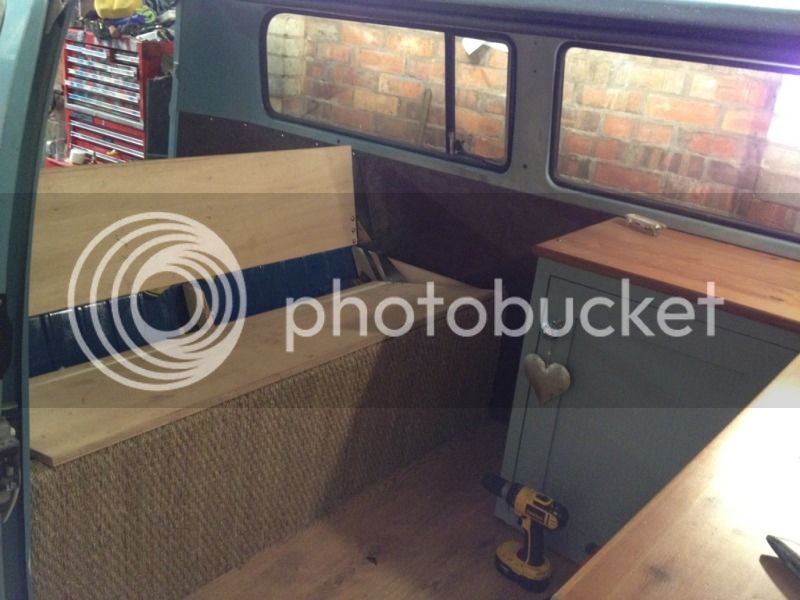
Started fitting the cab mats today - its seagrass carpret (bit like rattan). We bought it off gumtree as a new unused roll for the head lining, but there's enough to sort the cab too - should be a nice contrast to the bench seat
Also, these arrived today!!! Not our first choice (I brought some Original sprintstars off ebay, but on conllecting them, the pitting on the inner rim was horrendous!!!). Still, these have been refurbed to look older and have decent tyres too...
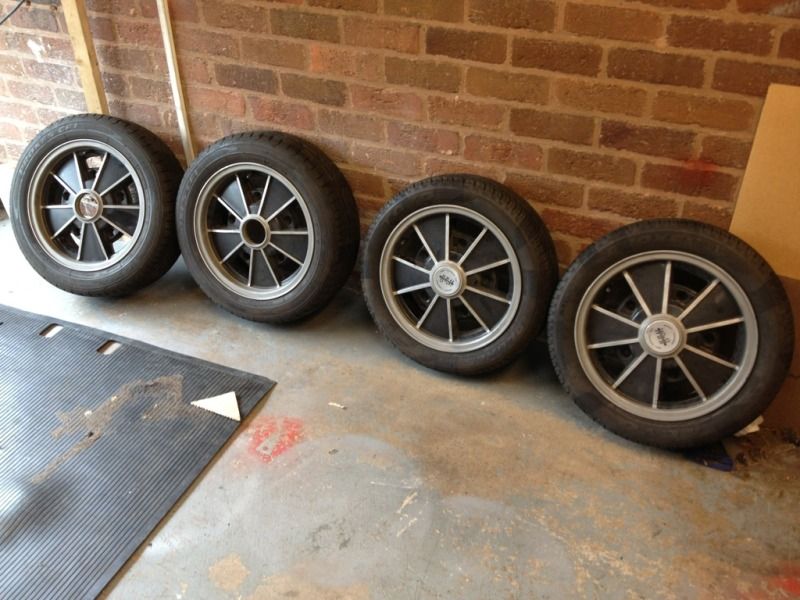
Also, these arrived today!!! Not our first choice (I brought some Original sprintstars off ebay, but on conllecting them, the pitting on the inner rim was horrendous!!!). Still, these have been refurbed to look older and have decent tyres too...
Supertramp
Well-known member
thejones's said:Started fitting the cab mats today - its seagrass carpret (bit like rattan). We bought it off gumtree as a new unused roll for the head lining, but there's enough to sort the cab too - should be a nice contrast to the bench seat
Lovely bus and something like that is exactly what I want in mine, carpet/mat under the seats.
8)
thejones's
Well-known member
- Joined
- May 12, 2012
- Messages
- 272
- Reaction score
- 0
Cheers for all of the +ive comments ")
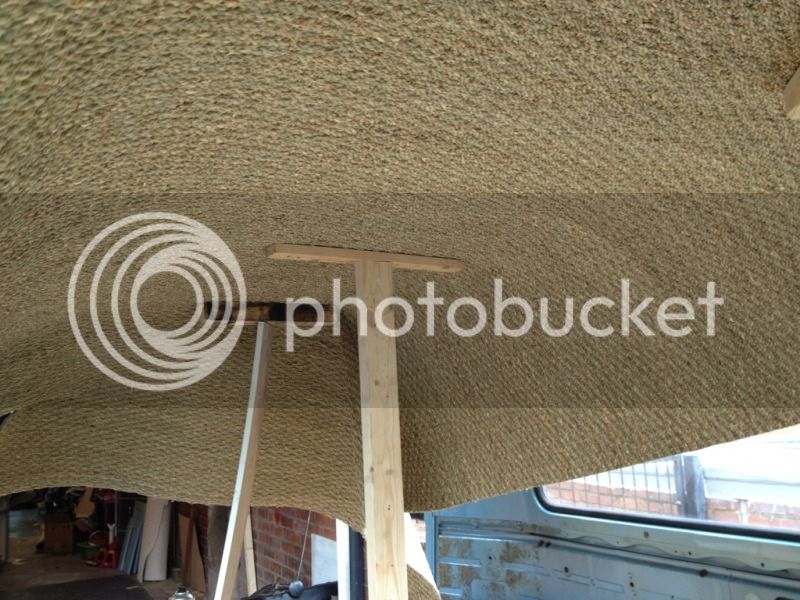
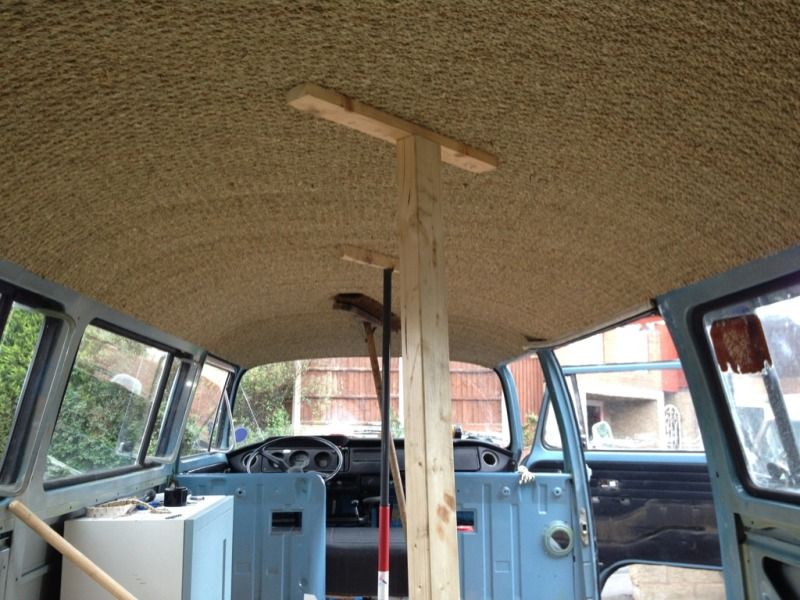
Tackled the headlining today - gotta say, Evostik impact is ace stuff - but right first time is essential - hard to achieve when its just me and Lea holding a 130 x 370m rug above our heads :lol: Still went up fine and the ends trimmed up well so we're debating whether to put any edging up or not bother.
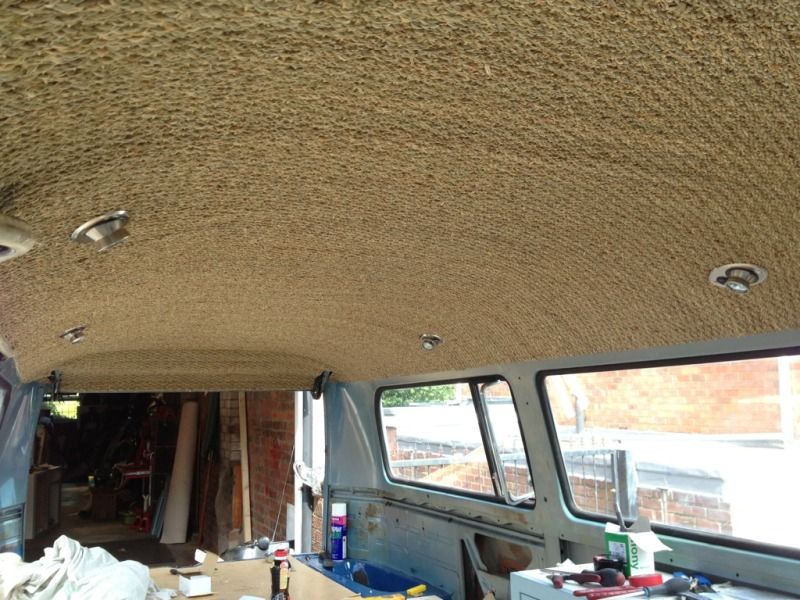
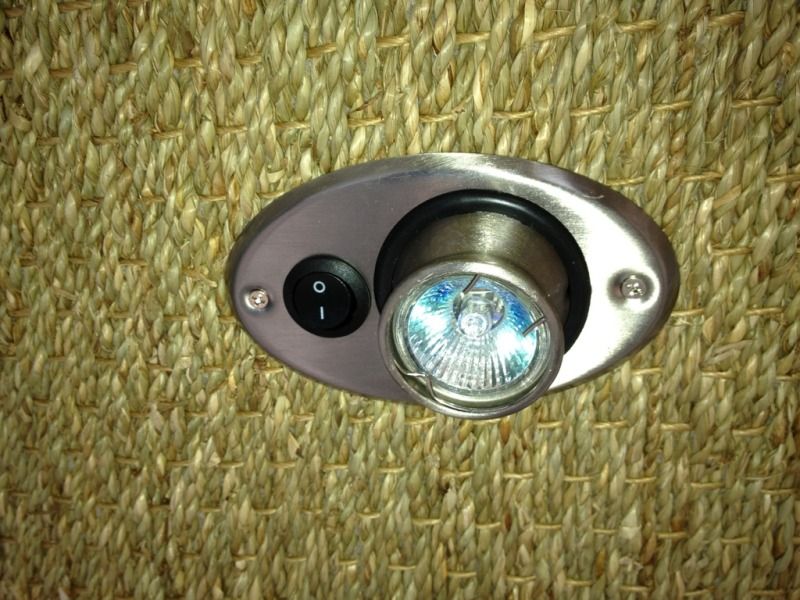
Fitted the light fittings - the wiring was installed last night. Rear view mirror slotted in and the cab mats were finished.
Tackled the headlining today - gotta say, Evostik impact is ace stuff - but right first time is essential - hard to achieve when its just me and Lea holding a 130 x 370m rug above our heads :lol: Still went up fine and the ends trimmed up well so we're debating whether to put any edging up or not bother.
Fitted the light fittings - the wiring was installed last night. Rear view mirror slotted in and the cab mats were finished.
aogrady
Well-known member
Hi!
Awesome work, like that a lot, very well done, did well to get it to stick!
Cheers
Alistair
Awesome work, like that a lot, very well done, did well to get it to stick!
Cheers
Alistair


$124.78
Revell 07009 Volkswagen T1 Samba Bus Model Kit, 1:16 Scale 27.2 cm, Multi-Color, 223
Outstanding Outlet USA


$27.95 ($13.98 / Count)
Marketplace Auto Parts Window Crank Handle Set of 2 - Chrome with Black Knob - Compatible with 1968-1978 Volkswagen Beetle
Parts Geek LLC


$28.56
$32.43
Airfix Quickbuild Volkswagen Light Blue Camper Van Brick Building Model Kit, Multicolor
Amazon Global Store UK


thejones's
Well-known member
- Joined
- May 12, 2012
- Messages
- 272
- Reaction score
- 0
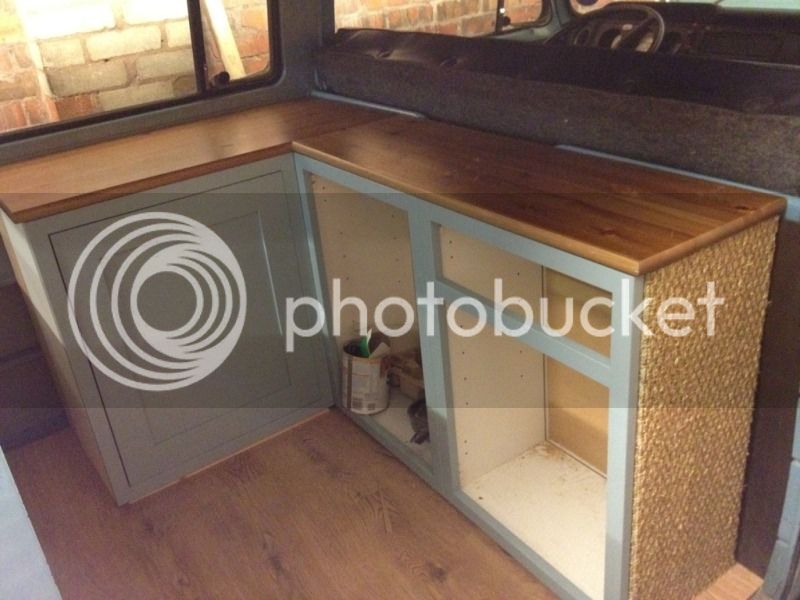
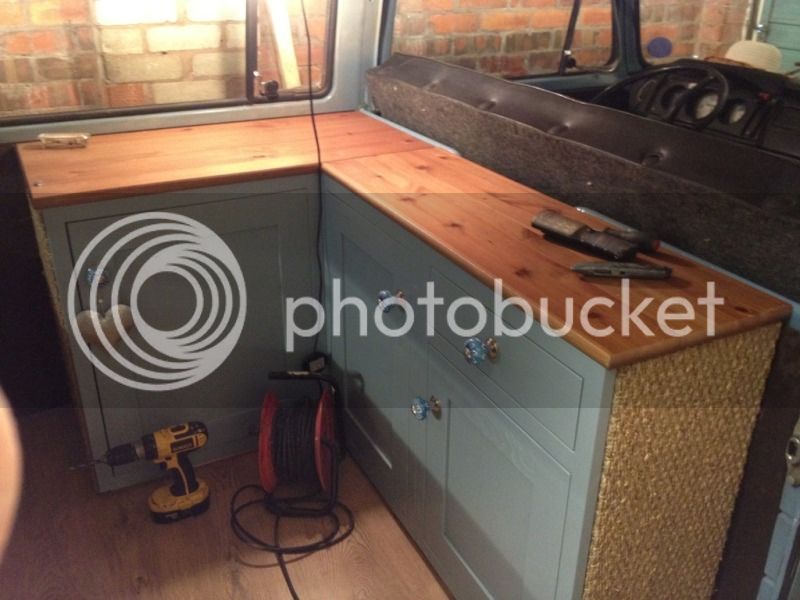
Had a few days stuck at work since fitting the headlining. Spent today bolting the units in and making/fitting the worktops. The whole interior is being done on a budget (the previous owners of our last bus had spent £4500 on a campershack interior - which to be fair, was poor at best!). So far the units, doors, worktops (old ikea coffee tables) have cost us less than £105
Heres how it was left tonight
All of the wiring has now been run, and the remaining doors/drawers, insulation & doorcards will go in tomorrow all being well...
Heres how it was left tonight
All of the wiring has now been run, and the remaining doors/drawers, insulation & doorcards will go in tomorrow all being well...
aogrady
Well-known member
Hi,
Excellent work, well done, looks great! 8)
Cheers!
Alistair
Excellent work, well done, looks great! 8)
Cheers!
Alistair
thejones's
Well-known member
- Joined
- May 12, 2012
- Messages
- 272
- Reaction score
- 0
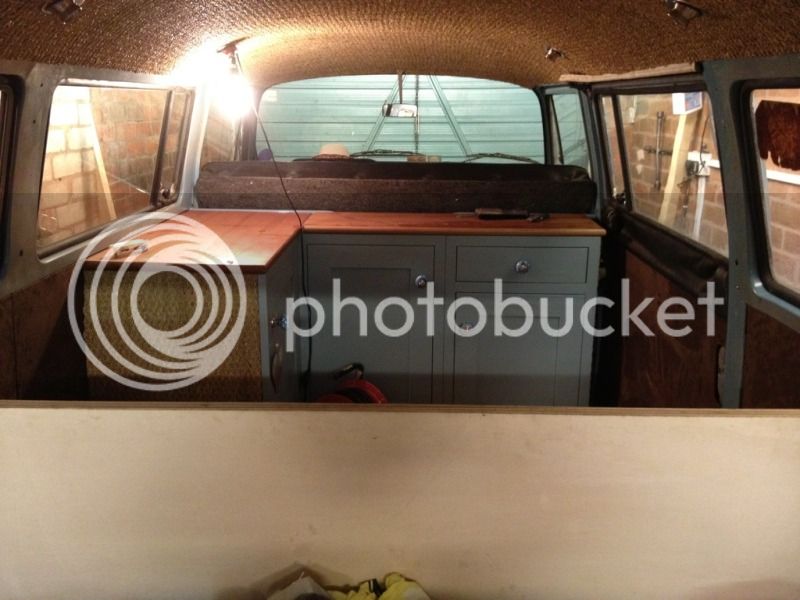
Few more bits done today. Homemade doorcards fitted really well!
thejones's
Well-known member
- Joined
- May 12, 2012
- Messages
- 272
- Reaction score
- 0
:lol: my wife has gone to town on 'designing the interior' - she wanted something that felt like it had our stamp on it - She says, I do!! :roll:
thejones's
Well-known member
- Joined
- May 12, 2012
- Messages
- 272
- Reaction score
- 0
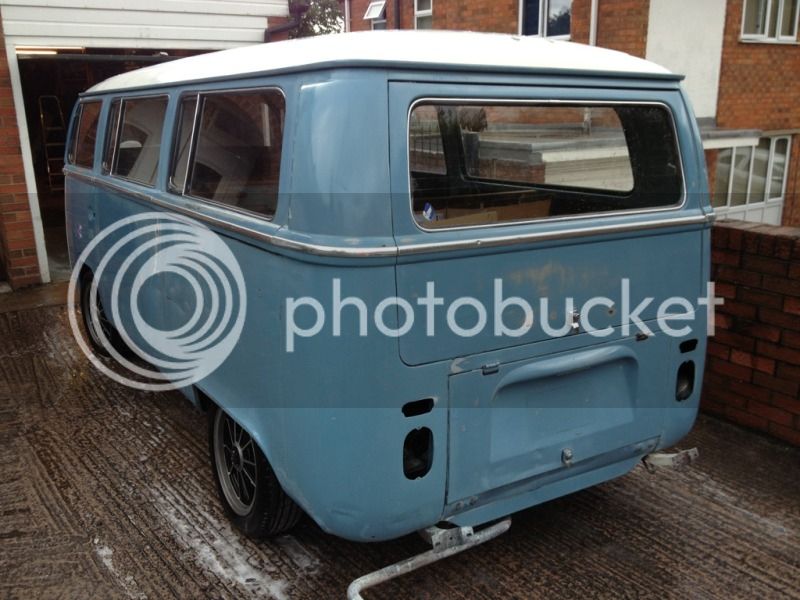
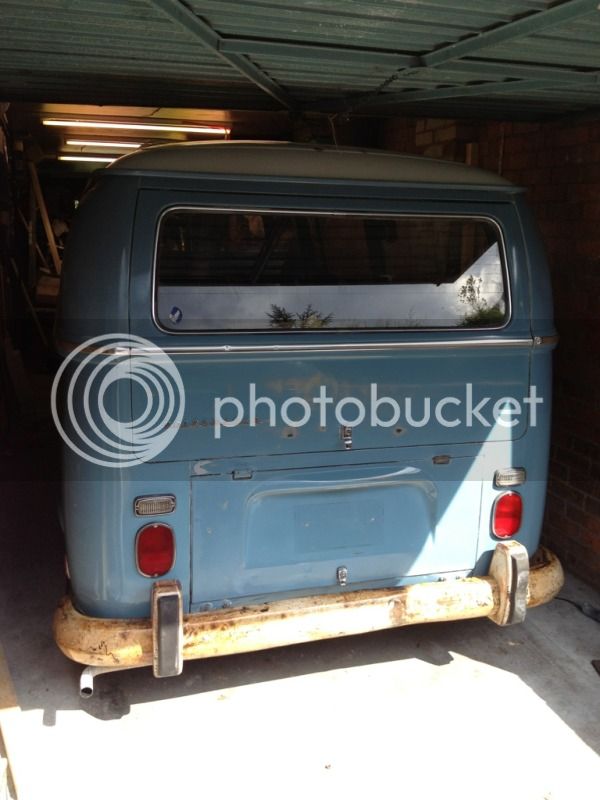
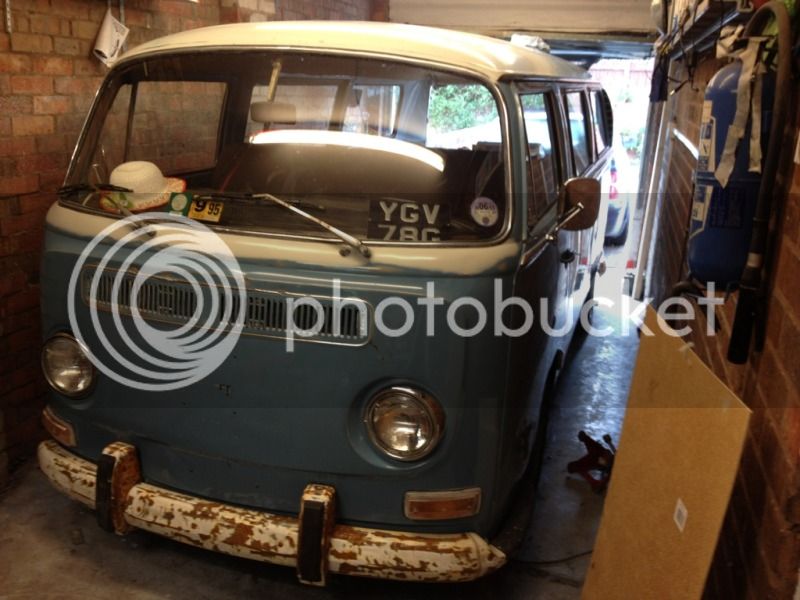
Managed to get a few hours on the bus today. Managed to lower the rear end and get the rear bumper mounted:
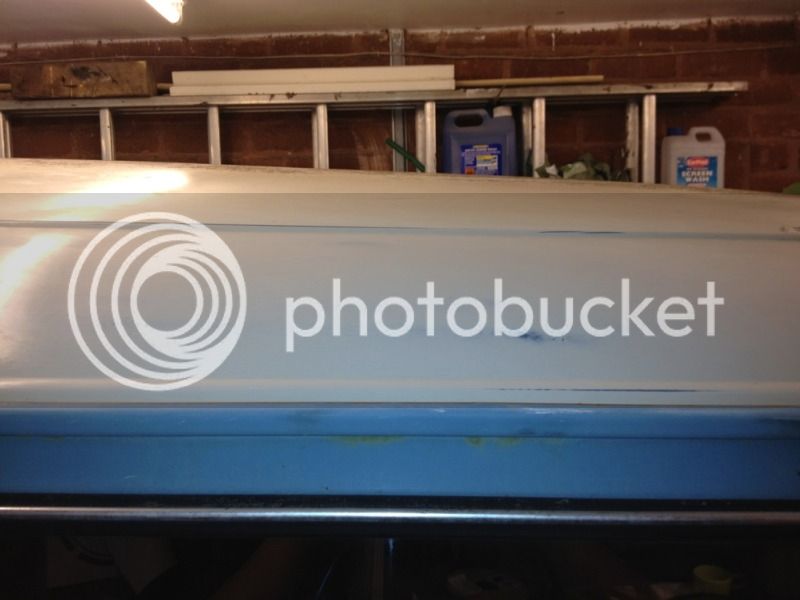
Rear bumper and O/riders mounted - although the new bumper with the original overriders looks a little odd to me!
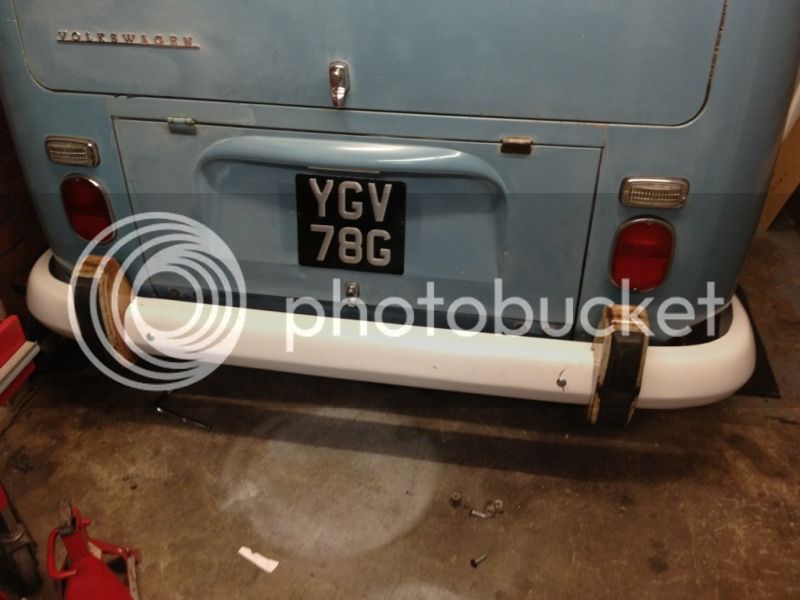
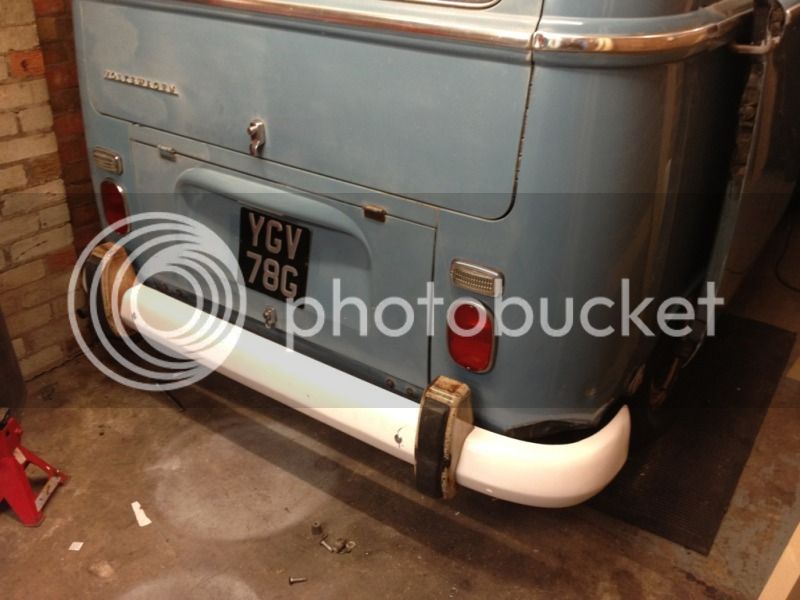
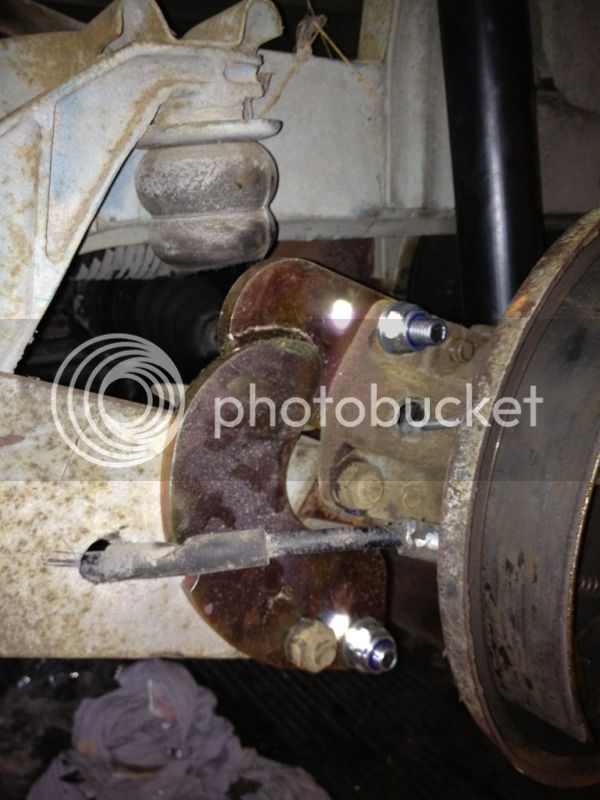
Also fitted the rear horseshoe plates. A doddle TBH - I slotted the springplates to ensure a smooth run for the H/brake cable.
Before
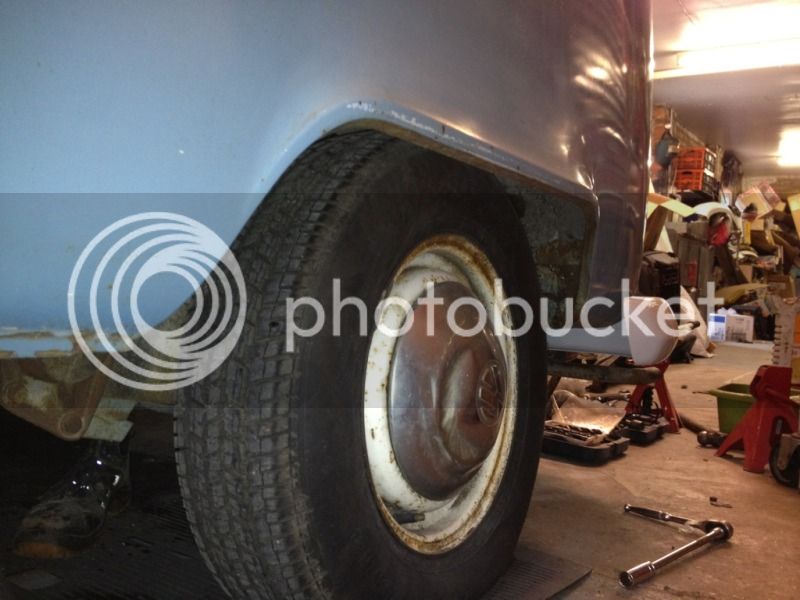
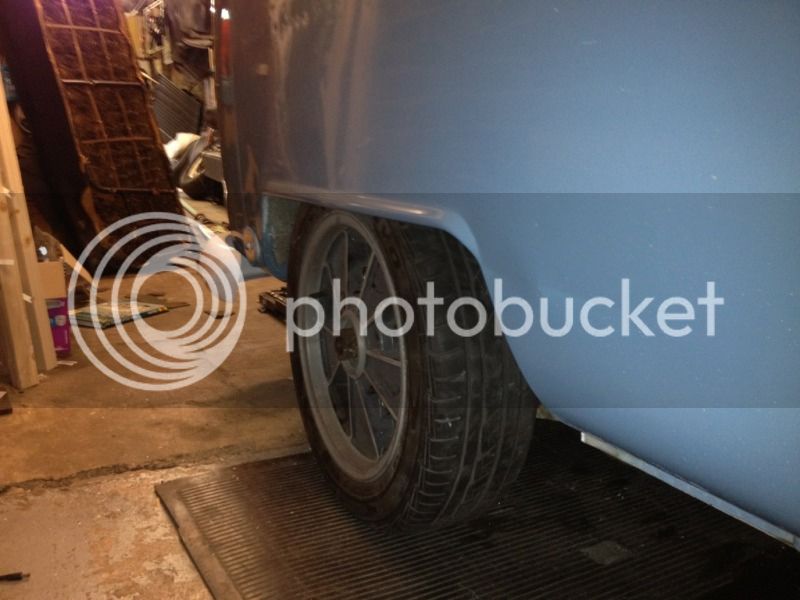
After - although its now settled a little and the rim sits about 3/4" under the arch
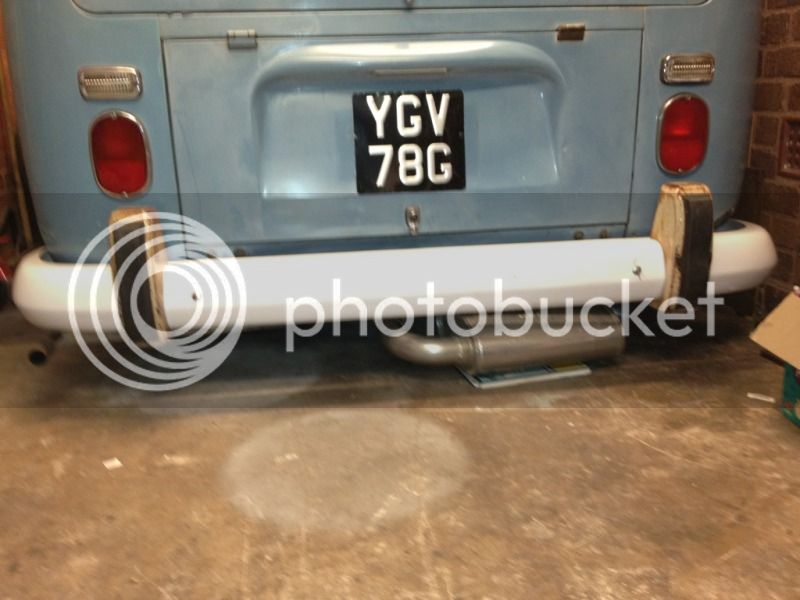
Trial fitted the Mondo silencer (a Tatton park find)
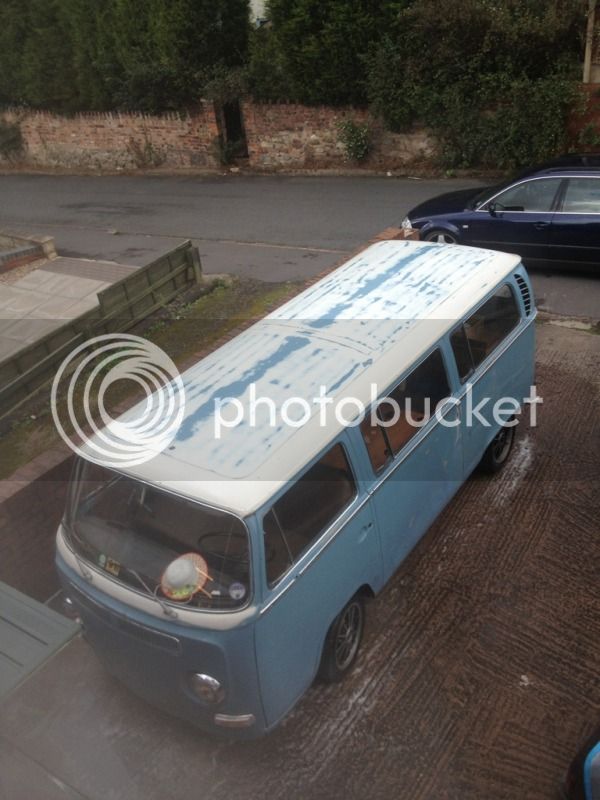
Finally, did a bit of buffing on the N/S rear quarter and spotted a bit of Patina potential on the roof
Neptune blue legs!!! :lol:

Rear bumper and O/riders mounted - although the new bumper with the original overriders looks a little odd to me!
Also fitted the rear horseshoe plates. A doddle TBH - I slotted the springplates to ensure a smooth run for the H/brake cable.
Before
After - although its now settled a little and the rim sits about 3/4" under the arch
Trial fitted the Mondo silencer (a Tatton park find)
Finally, did a bit of buffing on the N/S rear quarter and spotted a bit of Patina potential on the roof
Neptune blue legs!!! :lol:
thejones's
Well-known member
- Joined
- May 12, 2012
- Messages
- 272
- Reaction score
- 0
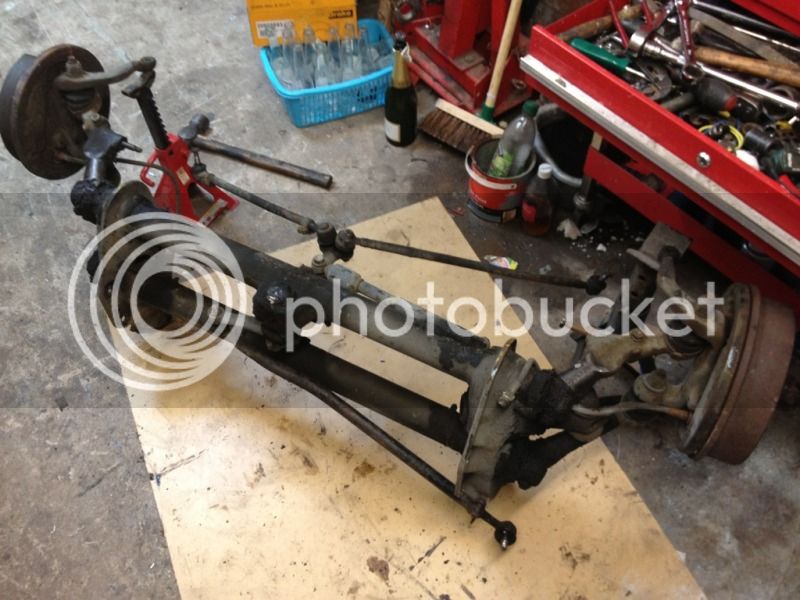
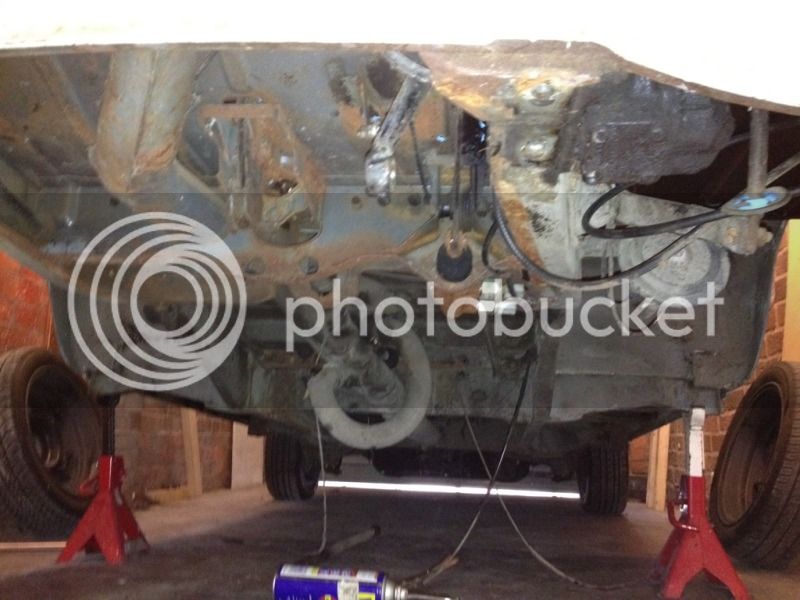
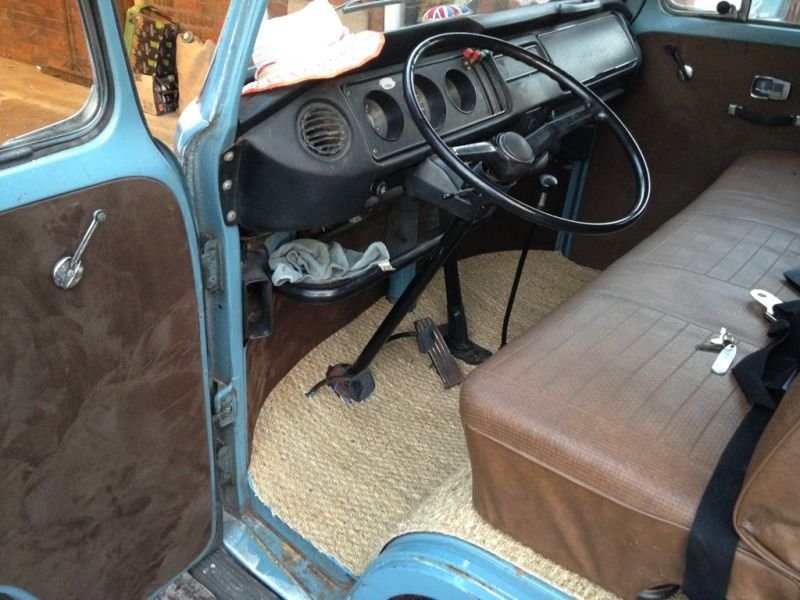
Been real busy at work, but managed to grab a few hours on the bus today. Pulled the front beam off, swapped all of the bits over to the adjustable beam and refitted it - not an easy job to do on your own, but 5 hrs later it was done, and I was filthy... Sits with a nice, slight nose down stance now, but still high enough to drive onto a field for random camping...only pics of the job half done atm, but will get some 'stance' pics when its out of the garage.
Nice rust free floor
We've also recovered the front seat with an original brown basketweve cover to match the rest of the interior until we can afford to have it recovered to match the R&R bed. Will post up some more pics asap.
Nice rust free floor
We've also recovered the front seat with an original brown basketweve cover to match the rest of the interior until we can afford to have it recovered to match the R&R bed. Will post up some more pics asap.
dubscum
Well-known member
cool bus
thejones's
Well-known member
- Joined
- May 12, 2012
- Messages
- 272
- Reaction score
- 0
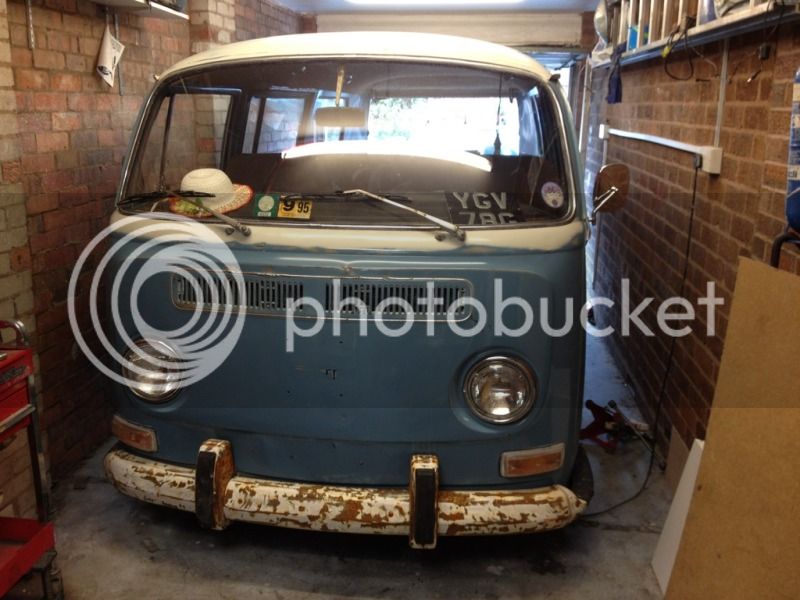
Managed a full day today and got the following done:
Washed
Waxed
Front and rear bumpers assembled and fitted (bumpers have been in the garden for a few weeks to
get them to there present state - rear has been laqured to keep it as is. When the fronts ready, I'll do the same to that)
Lights, handles and number plate fitted
Rear seatbelts fitted - 2x retractable and a centre lap belt ( all from a 205 gti)
Wing mirrors fitted
Braked bled
Washed the original seatbelts for the front - came up really nice!
Pics -


Still have a few bits to do:
Front door cards to make/cover
Leisure electrics to finish off
Get the R&R bed cushions covered - current guy is messing us about!
Fit the mondo exhaust once we find a cheap second hand header
Cab mat to cut out
Then the usual little niggles that get left to the end like edging trims etc
Washed
Waxed
Front and rear bumpers assembled and fitted (bumpers have been in the garden for a few weeks to
get them to there present state - rear has been laqured to keep it as is. When the fronts ready, I'll do the same to that)
Lights, handles and number plate fitted
Rear seatbelts fitted - 2x retractable and a centre lap belt ( all from a 205 gti)
Wing mirrors fitted
Braked bled
Washed the original seatbelts for the front - came up really nice!
Pics -
Still have a few bits to do:
Front door cards to make/cover
Leisure electrics to finish off
Get the R&R bed cushions covered - current guy is messing us about!
Fit the mondo exhaust once we find a cheap second hand header
Cab mat to cut out
Then the usual little niggles that get left to the end like edging trims etc
thejones's
Well-known member
- Joined
- May 12, 2012
- Messages
- 272
- Reaction score
- 0
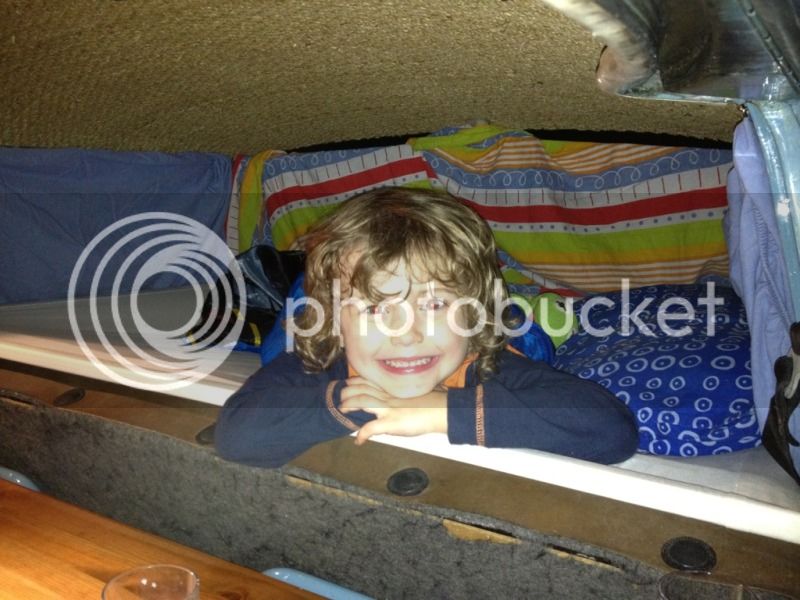
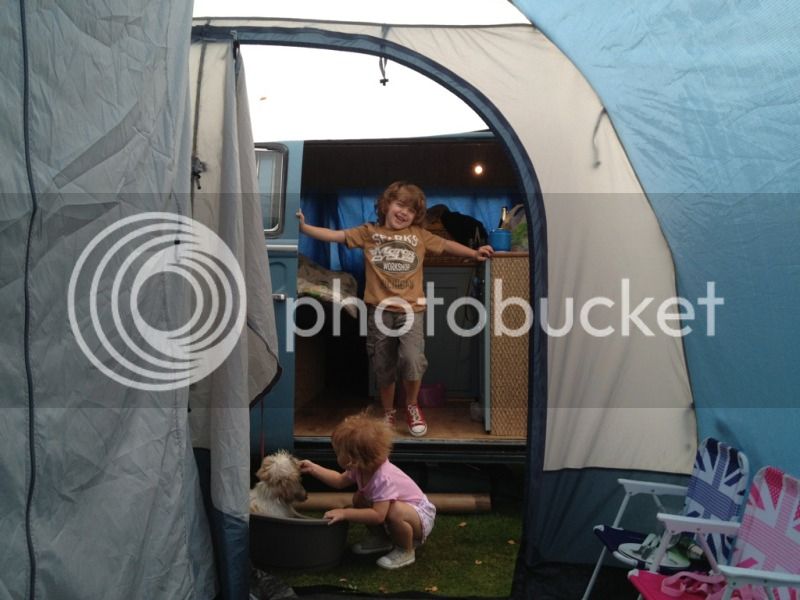
At long last, we finally used the bus for camping! Coped well considering its a tintop - with 2 adults, 2 kids and a dog! really comfy and we all got a great nights sleep Best of all, the Mrs and kids loved it - was there 1st time 'camping'.
Struggled on some of the hills on the way when fully loaded but to be expected with the original singleport motor pushing it along - think a twinport with a few tweeks may be in order over the winter months...depending on cashflow...
She buggered off with the kids while i strggled with the new (used) awning on my own, with no instructions - a bit of light amusement for the surrounding pitches, but it only fell on me twice! :lol:
Cant wait for the next time out!!!! PICS:
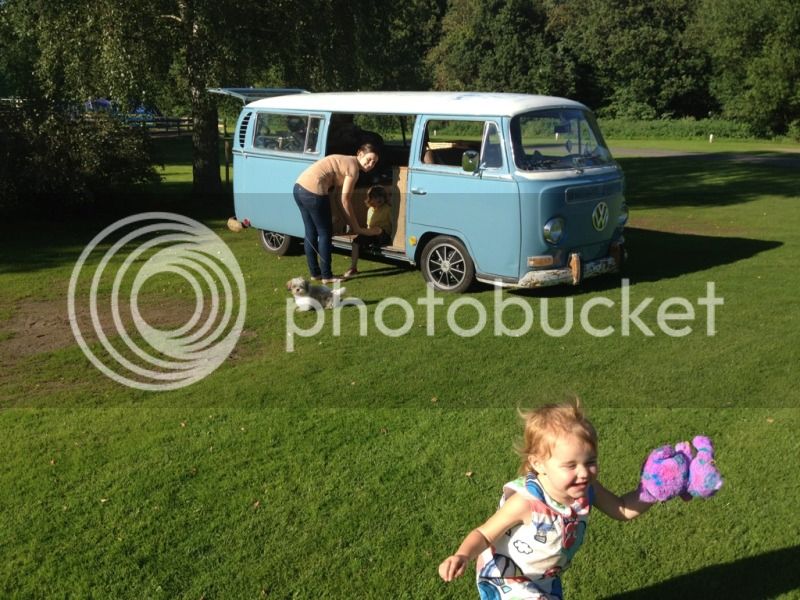
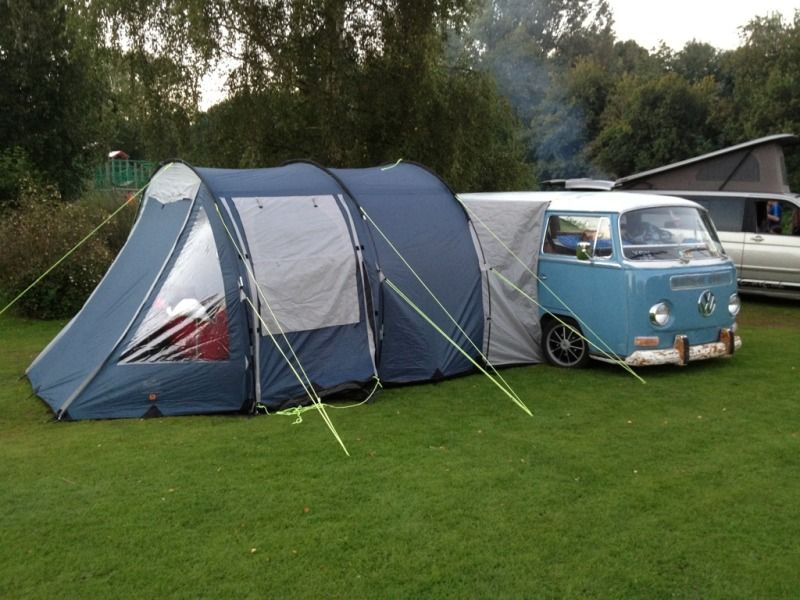
Best of all, the Mrs and kids loved it - was there 1st time 'camping'. Struggled on some of the hills on the way when fully loaded but to be expected with the original singleport motor pushing it along - think a twinport with a few tweeks may be in order over the winter months...depending on cashflow...
She buggered off with the kids while i strggled with the new (used) awning on my own, with no instructions - a bit of light amusement for the surrounding pitches, but it only fell on me twice! :lol:
Cant wait for the next time out!!!! PICS:
68_early_bay
Well-known member
8) happy days
thejones's
Well-known member
- Joined
- May 12, 2012
- Messages
- 272
- Reaction score
- 0
Grazy said:Nice work fella , the rear bumper looks as if it's always been on there
8)
Cheers, still some work to do on the front to get it to match :?
thejones's
Well-known member
- Joined
- May 12, 2012
- Messages
- 272
- Reaction score
- 0
Spent some time on the cab today. Made and covered some new doorcards and kick panels and got some more matting down
Similar threads
- Replies
- 4
- Views
- 2K
- Replies
- 1
- Views
- 1K
- Replies
- 0
- Views
- 1K
- Replies
- 0
- Views
- 1K