Indicators, fuel gauge and horn not working

Early Bay Forum

Help Support Early Bay Forum:

This site may earn a commission from merchant affiliate links, including eBay, Amazon, and others.

lewishw

New member
Joined
Jan 11, 2025
Messages
2
Reaction score
1
Location
Lancashire
Year of Your Van(s)
1971
Van Type
unsure
M-codes
to add
I am quite new to the forum, sorry if this is posted elsewhere.

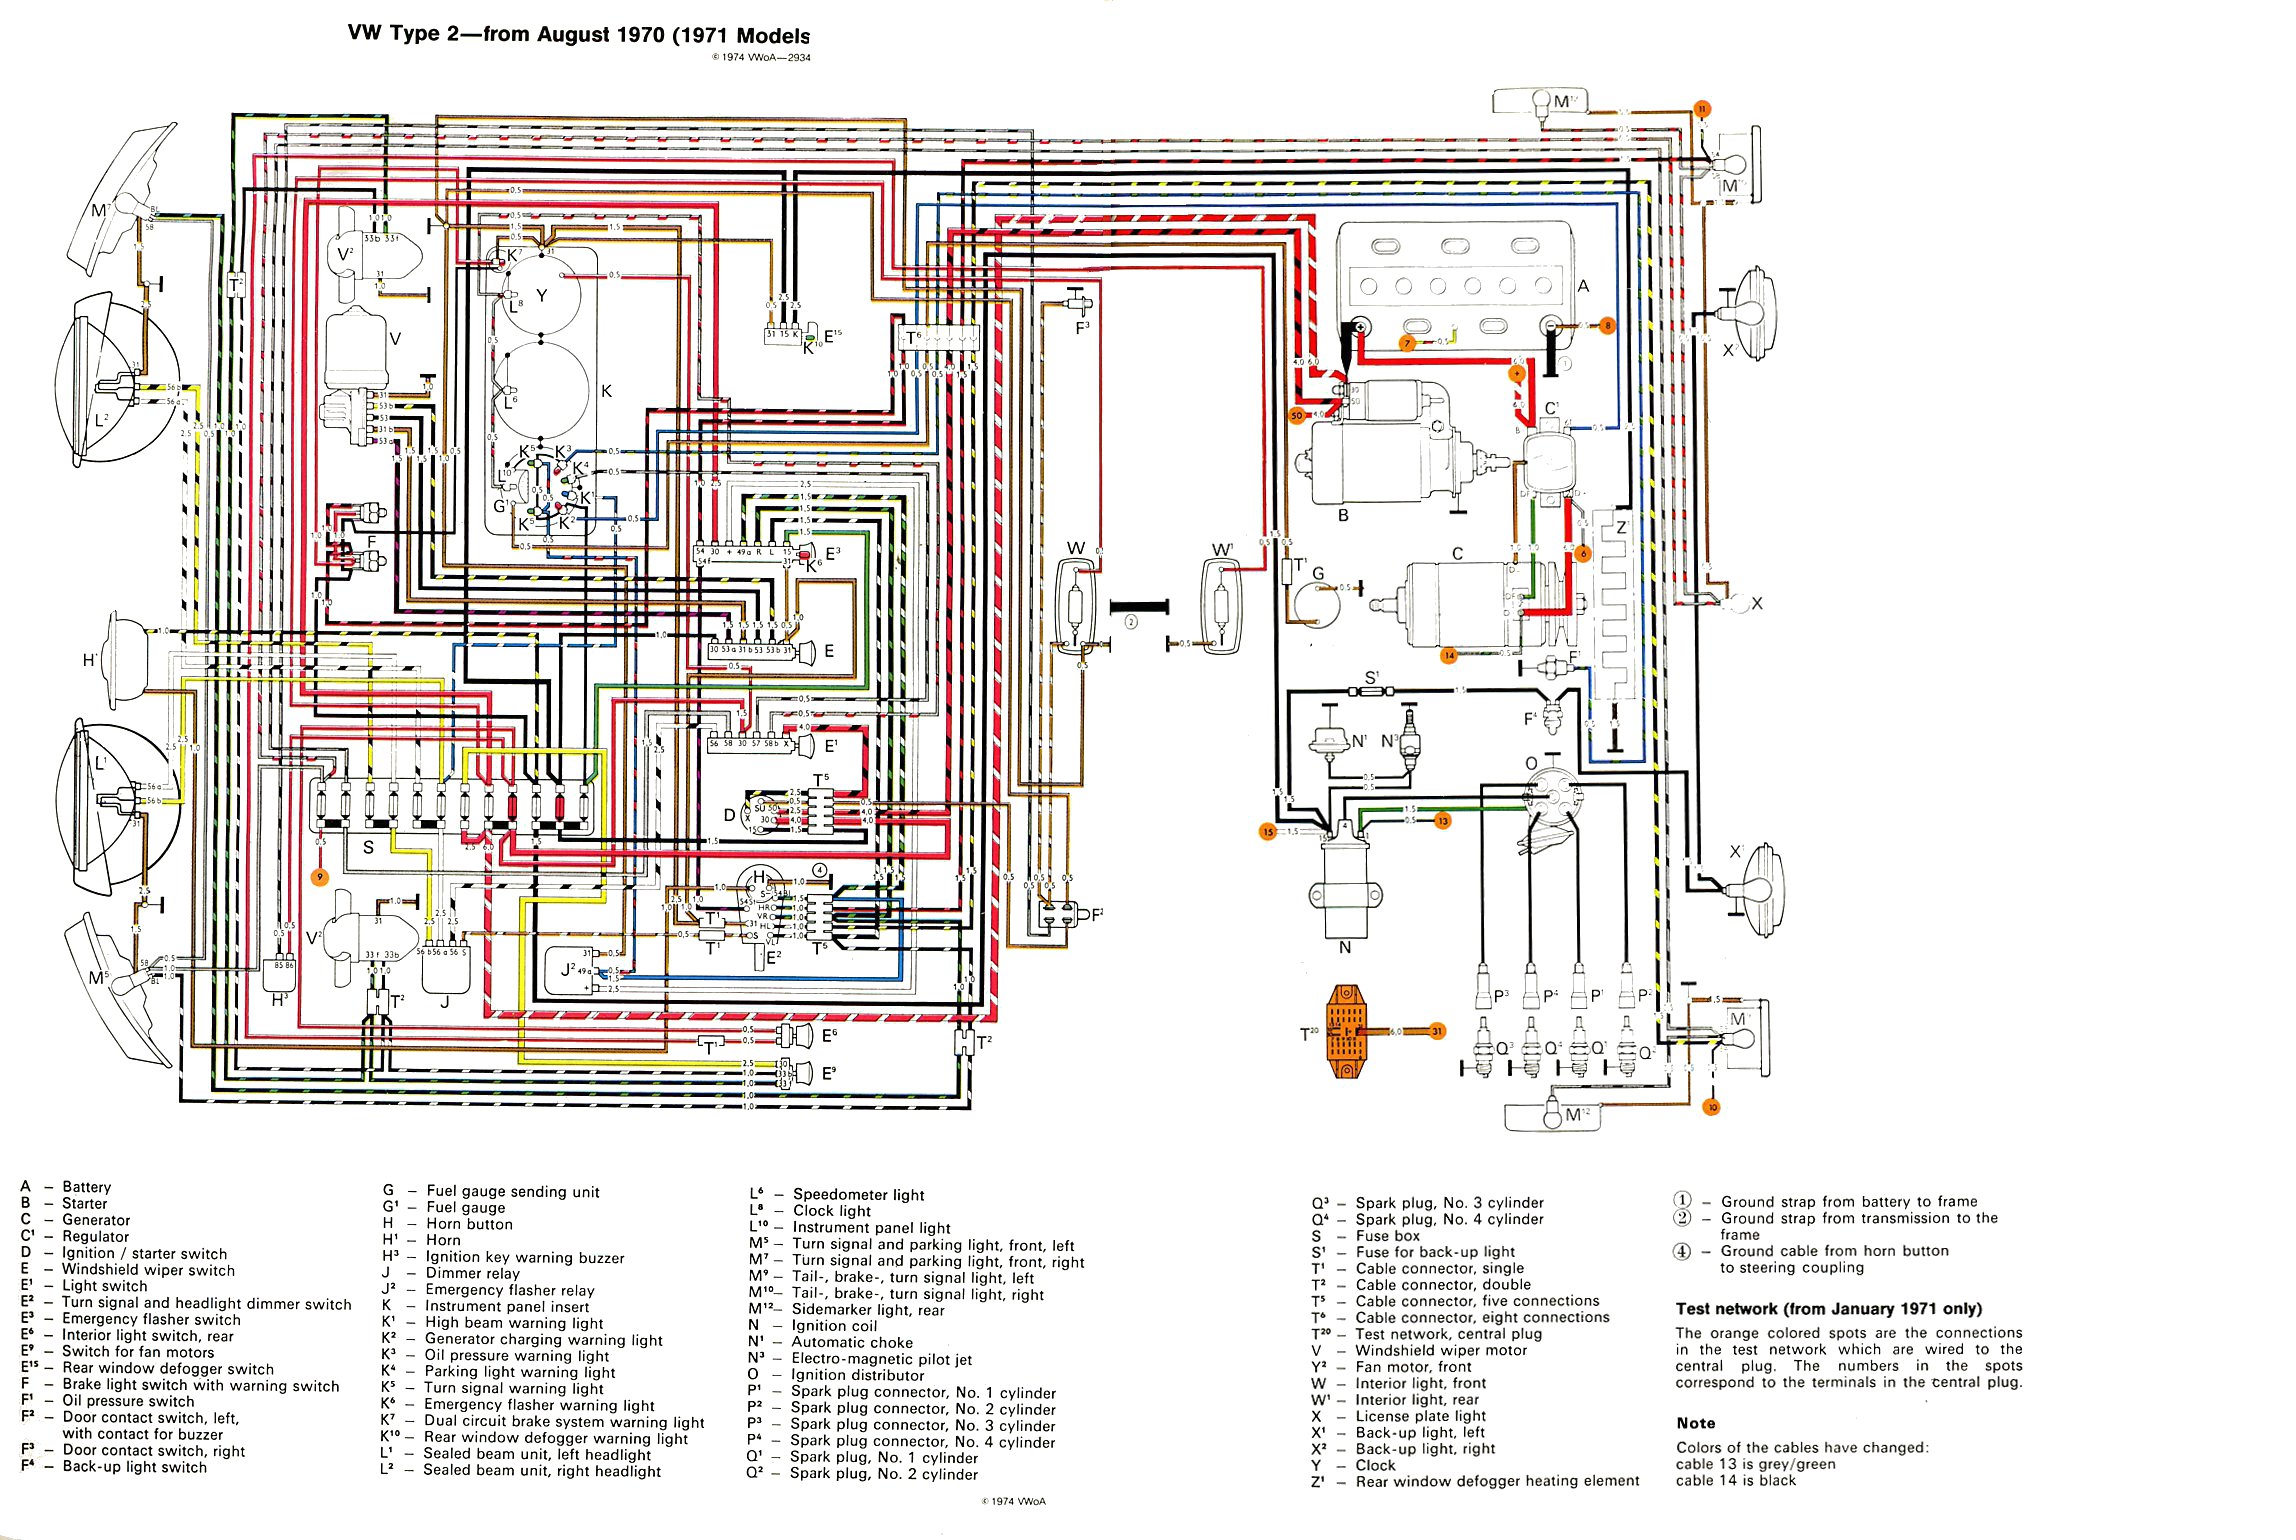
I am having a problem where the indicators, hazards, fuel gauge and horn are not working.

I have checked the ground connection to the bulbs and switches, 12v connection, fuses and relay but have not found the fault

When I tried a new relay and switched the hazards on, the relay was switching very fast followed by the smell of a component burning out inside the relay. I have also tried a new hazard switch, but that did not make a difference.

Looking at the wiring diagrams for lighting I have tested continuity on accessible wires around the dashboard.

When using a turn indicator nothing happens, when switching the hazards on there is sometimes a click from the relay but no lights.

Any ideas on what to try next as I have run out of ideas?
 
Morning bud, welcome to the forum. I’m the last one on earth apart from one other that should be helping with electrical type stuff because I’m what’s classed as an electrical numpty. I do know that there is an earth from behind the dash that is usually towards the top of the heating totem pole and that’s my first look at. But from what you’ve written, it sounds like something live is contacting somewhere that it shouldn’t be. My first look for that one would be around the back of the ignition where the main wire comes up from the battery. Sorry I’m not much use on sparky stuff and hopefully someone with more than our two brain cells will help out imminently. The other place I’d be looking at is the rear of the fuse box, which is easier to see with the glove box liner out and popped somewhere else out of the way. The horn circuitry on these old beasties is a thing of wonder and I’ve been trying on and off for the best part of a decade to get mine to work and have resorted to a separate switch until such time as I fathom it out. The horn is permanently wired live with the ignition on, then , and here comes the best bit, then from the other terminal on the horn, the earth wire goes along the chassis and connects to the bolts that hold the flexi connector for the steering box, then there’s a link wire to the opposite bolt for continuity, then from there it hooks up with a spade on the inside of the outer column and rises to the horn switch and that’s where I get lost mostly.

Ozziedog,,,,,,,,,,Goid luck and welcome again :)
Thanks for the quick reply and welcoming me to the forum.
That is a great place to start, thanks for the advice. I will do some more investigating with my meter.

I forgot to mention that we are the prowd owners of a 1971 T2 early bay.
 
Not sure what to suggest other than some rigorous checking…. The indicators, fuel gauge and horn are all independent of each other after the fuse box. So tackle them one at a time. If you have power going to the hazard switch, then follow that from the switch and see where it goes. The horn problem could well be related to the connections underneath, this case you are chasing an ‘always on 12v cable…. Or at least it should be ‘on’. Fuel gauge…. Give the dash a tap, does it move? It could be the sender unit but you must do continuity testing to be absolutely sure, like 100% before opening that can of worms
 
Get a multi meter and a wiring diagram, electrics are "simple" on a bay. Feed from battery to lights and fuse board, feed to fuse board from ignition switch. Fuse board gets corroded, fuses corrode. Sounds like the wires are wrongly connected on the hazard/indicator, see my first line! all terminals are numbered on switches so easy to follow.
 
baybus_71.jpg
Sounds like you have a couple things wired wrong or some bare wires grounding out. The wires are a rats nest under there, but you can check that you have everything plugged in where it should be, and you have the correct switches and relays for your year. I had problems with crap reproduction parts not functional and wrong parts sent when I was working on my 71 . Use your phone to take pictures of the switches and relays to make sure you are plugged into the right terminal and they have all the correct terminals . And check the lights themselves to make sure they are plugged into the correct terminal
I have sheets of paper with the switches and the terminals all hand written with the terminal numbers of the corresponding wire colors so I have a reference to check. I had the whole harness out to repair and add wires, so I was starting from scratch
IMG_5241.jpeg
 

Latest posts

Top