


- Joined
- Nov 28, 2012
- Messages
- 926
- Reaction score
- 51
- Location
- Herne Bay, Kent
- Year of Your Van(s)
- 1970
- Van Type
- Devon
I generally don't like red vehicles, but this one....wow. Very very nice indeed.
Hi Graham,Mr Brightside said:So a small update on what we have been doing recently.
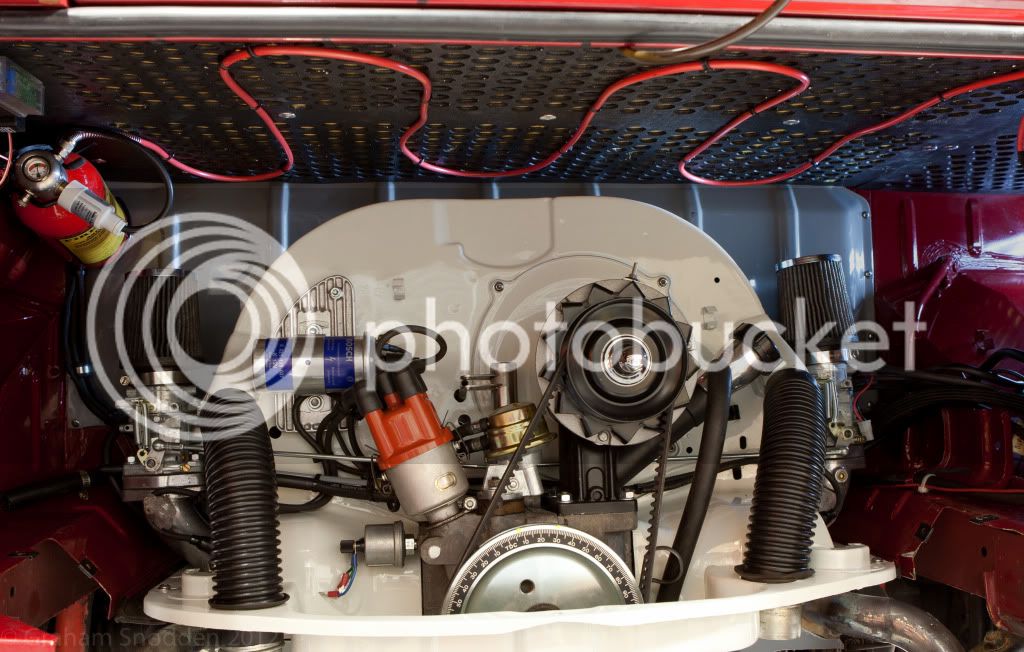
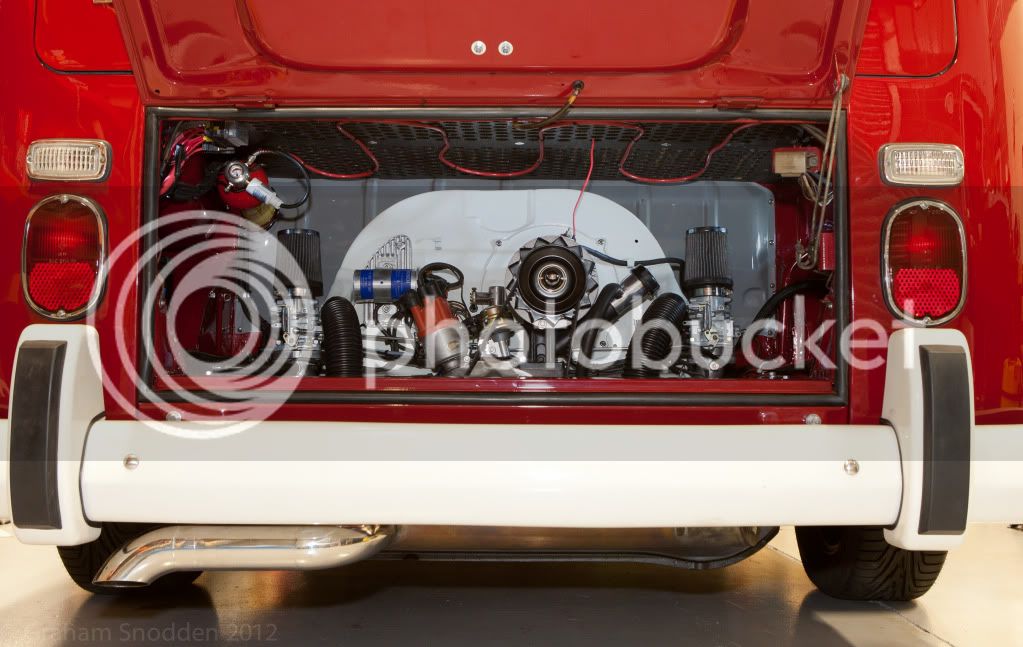
The engine tinware was starting to look a little tired, so I removed the engine, took the tinware to the boys at MPW, I think it looks great.
I also shortened the tailpipe of the Vintage speed exhaust as I could not fit the over riders previously as they fouled the tailpipe.
I cut out a section about 100mm, the welded the last part back on, but turned it towards the floor, no more bumper staining for me.
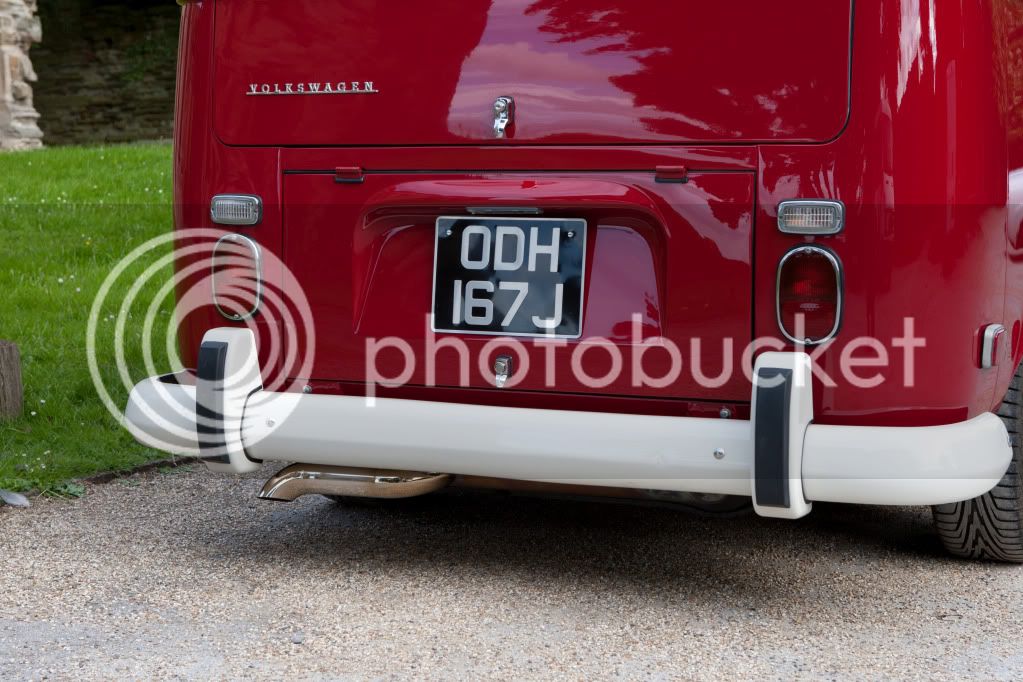
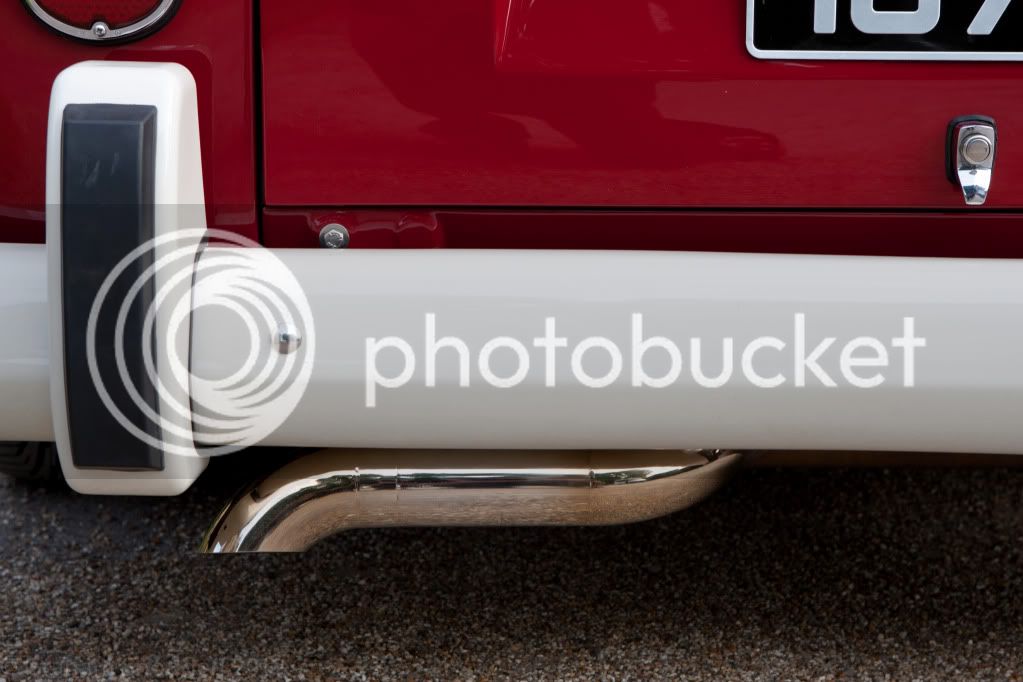
It still sounds just as quiet !
Cheers
graham
Lordain Volley said:Hi Graham,
Can you tell me where you bought the "ceiling" to the engine bay? The plastic type boards with the holes in them? They look identical the the original ones .
Thanks,
LV
Mr Brightside said:Lordain Volley said:Hi Graham,
Can you tell me where you bought the "ceiling" to the engine bay? The plastic type boards with the holes in them? They look identical the the original ones .
Thanks,
LV
Its from Rackhams Ipswich, its actually Fire treated plyboard, but looks spot on.
G

Mr Brightside said:


The original stuffing was perfect so I used that.magoo said:Mr Brightside said:
Whilst I have my engine out, I'm planning to install one of the Rackhams engine boards. Did you put Dynamat or stuffing etc underneath the wood?
I dunno really ;0magoo said:So what's a good replacement for the stuffing? Is it fibreglass?
Mr Brightside said:
magoo said:Another question regarding the Rackham's Engine Board. That one you have with the holes is actually for a late bay. I prefer that style also and just wanted to ask if there were any fitting problems and did you have to modify anything? How did you attach it?
Cheers.
Enter your email address to join:


