my 1971 danburyfalia pop top project

Early Bay Forum

Help Support Early Bay Forum:

This site may earn a commission from merchant affiliate links, including eBay, Amazon, and others.
its not too bad. it just looks a bit like milk rolling around the inside of the tyre. i suppose that the tyre wouldnt be usable when you'd squirted it in.

nothing takes up less room than my aa card :D
 
had a rare oppertunity to get on the van today. these moments are becoming rarer by the week.

i know that its not the most popular choice but my bus is going down the (darkside) i spent the day fitting these


rad9.jpg


rad10.jpg


rad11.jpg


rad7.jpg


the initial plan was to fit two full sets of range rover p36 fans but after having a fiddle decided on just one pair


rad8.jpg


rad12.jpg


rad13.jpg


rad14.jpg


decided although the four fan setup would be great when running, it would probabl stop air flow in normal running and end up kicking in all the time.

two fans should be less busy and i now have a spare set just in case.
 
That looks very professional 8)

Where's this being strapped too then (probably told us, but can't be bothered looking back through your post :lol: )
 
managed to get a full day on the van today. want to get the engine started and tested soon so i can move on to other things

here's a few pics on the progress


rad15.jpg


rad16.jpg


rad17.jpg


rad18.jpg


rad19.jpg


rad21.jpg


rad22.jpg


rad20.jpg


rad23.jpg


rad24.jpg


rad25.jpg


rad26.jpg


rad27.jpg


rad28.jpg


rad29.jpg


rad30.jpg


rad31.jpg


rad32.jpg


rad33.jpg


rad34.jpg


rad35.jpg


just got to order pipes, bends, metal grill to protect the rads etc then its time to get the engine started :D
 
WOW :eek: - nice bit of fabrication going on there ;)

Looking forward to the next installment :D
 
pushing on with the van between vowo and the easter weekend when i will be in the father in laws caravan for four nights. should be a nice rest and a chance to finish off the ice instal in the t4 as ive now sourced all the bits for it on ebay.

back to the van


welded some stainless steel bearing hinges to the rads


rad44.jpg


rad36.jpg


rad37.jpg


rad42.jpg


rad43.jpg


rad48.jpg


finnally found my pop riveter

rad45.jpg


bent another sheet of ally to make the lower scoop


rad39.jpg


rad41.jpg


rad40.jpg


tried it back on the van


rad38.jpg


then welded on some brackets


rad47.jpg


rad49.jpg


rad50.jpg


rad52.jpg


rad51.jpg


temp held in place with welding wire but when finally in situ i will have to cables inner and outer made that will run up to my dash. these will be connected to the no longer required heater levers on my dash. this should give me a two inch adjustment of the bottom flap when im cruising around town. then drop it down for a romp on the motorway


rad46.jpg


also happened to be passing a local metal shop the other day and dropped in to see what was in their skip ;)
ten pounds later into the lads coffee kitty and ive got three lengths of 33mm steel tube. now how lucky is that


rad53.jpg


found a decent supplier of silicone pipework on the web. think im going down the moody black route rather than the motorsport blue pipes. should get all coolant hoses and boost pipework for the charge cooler for reasonable money then should get it topped up and started
 
a little experimental at the mo as i dont know how well it will bend due to me not having any bending equipment. it will be a mix of solid metal pipe running along the rear chassis with a little bend in it. then silicone over the torsion tube. back to metal through the rear cross member and into the rad box through a small silicone section..

im in two minds about trying to get the box to sit higher up. if i channel a strategic dent in the top, it will go up another 10mm. if i go for bespoke rerouted handbrake cables and clutch cable it would go up another inch and allow for extra lowering 8)
 
cheers johnny. the adjustable flap and air assist shocks should see me clear most of the speed bumps where i live. it needs to be usable. in years to come i am sure that air ride will be cheap and the norm and we'll look back and think how did we get on without it, but for now i cant justify £2k on top of what i have already spent on suspension.
 
andewilson said:
...im in two minds about trying to get the box to sit higher up. if i channel a strategic dent in the top, it will go up another 10mm. if i go for bespoke rerouted handbrake cables and clutch cable it would go up another inch and allow for extra lowering 8)

I'd definitely get at high as possible if you can - it'd be a shame to catch that lovely aluminium on a sleeping policeman!!

;)
 
Agree - needs to be as high as you can.

Nice fabrication again :mrgreen:
 
cheers for the compliments lads, ive been totting up what i need to get it piped up. its guna cost about £170 in silicone hosing including all boost pipes to charge cooler so might have to come in two chunks due to funds unless someone buys my stereo gear :D

mr dubscum, no this aint what i do for my day job. i am the maintenence manager at the holiday inn at junction 25 of the m1. i spend my days cleaning grout, re sealing bathroom, and giving fire training to staff members who dont want it :D .

however if all goes well i should be building a new workshop soon so watch this space Dubworx may be open for business in the next few years. knocking out a few jobs for the local vw crew
 
cheers johnny. they looked at me very odd when i got on the plane with a 165 45 15 tyre as hand luggage as only one of them fitted in my suit case. :roll:


on the van i have hit a bit of a wall, a shortage of ready cash means that i have no play money for the van and since my bonus at work came in £1.5 light things are a going to be a bit slow till i get the vans spray money back together.

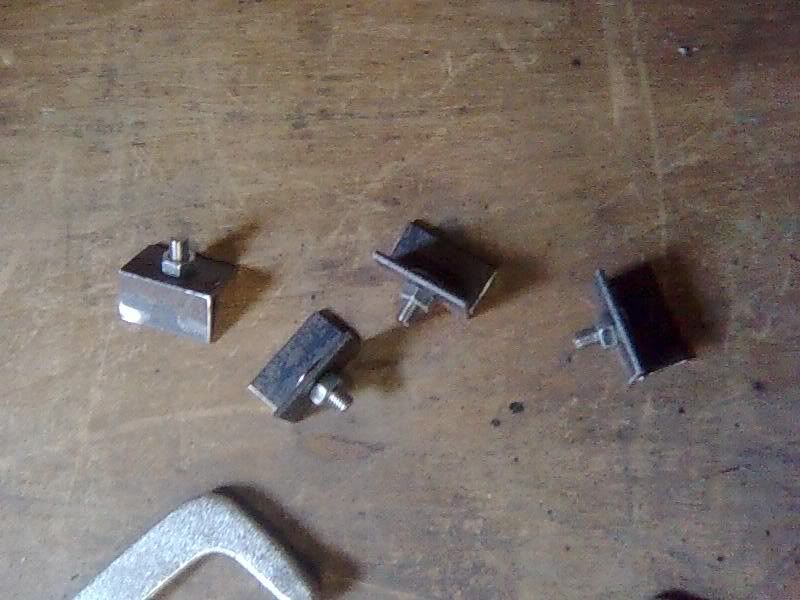
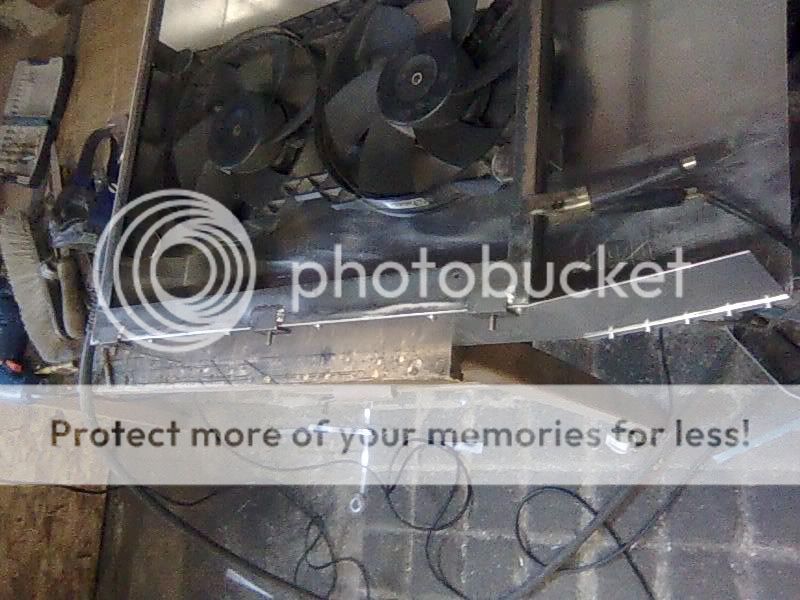
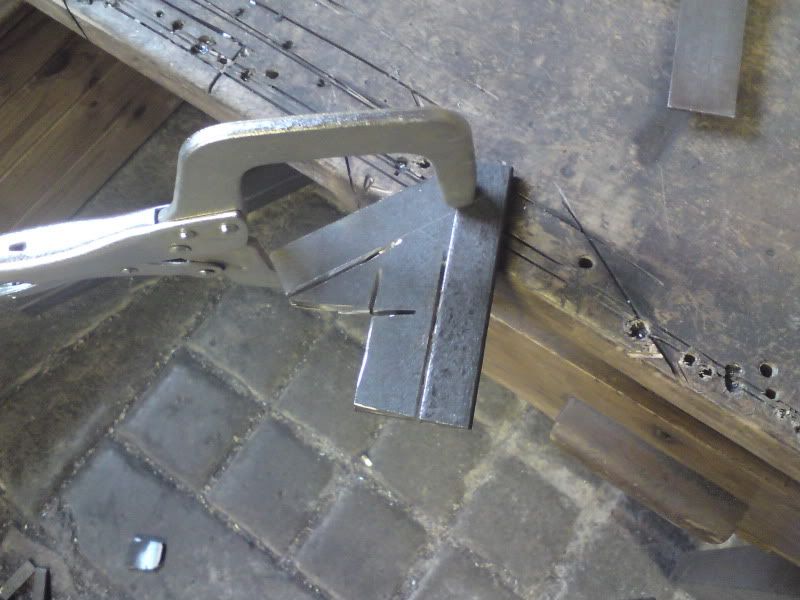
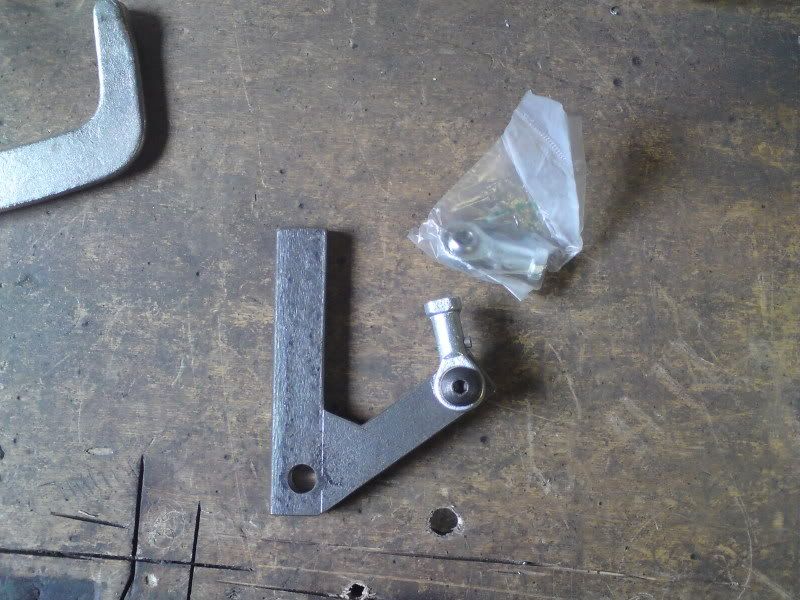
as my bus had rotted away everywhere, the accelerator linkage was useless. after having a look at what repair kits there are about for them i decided to have a go at improving on the original theme.


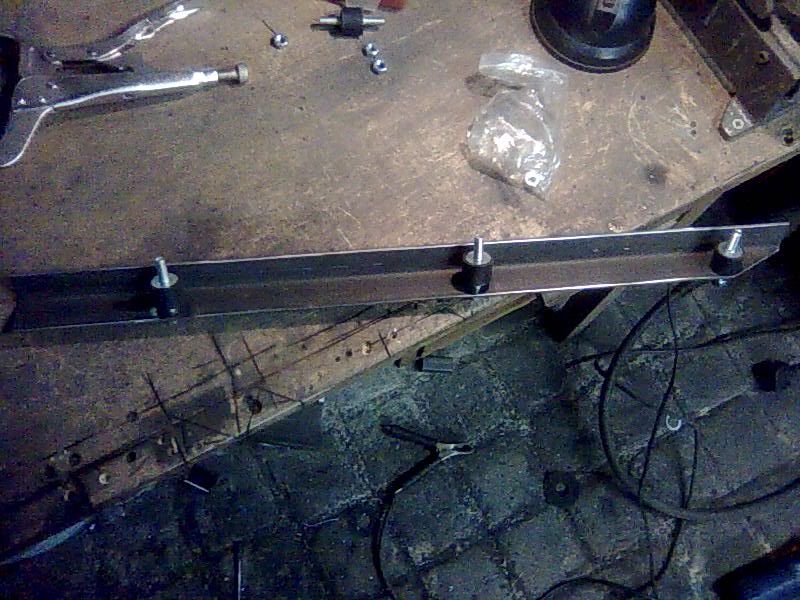
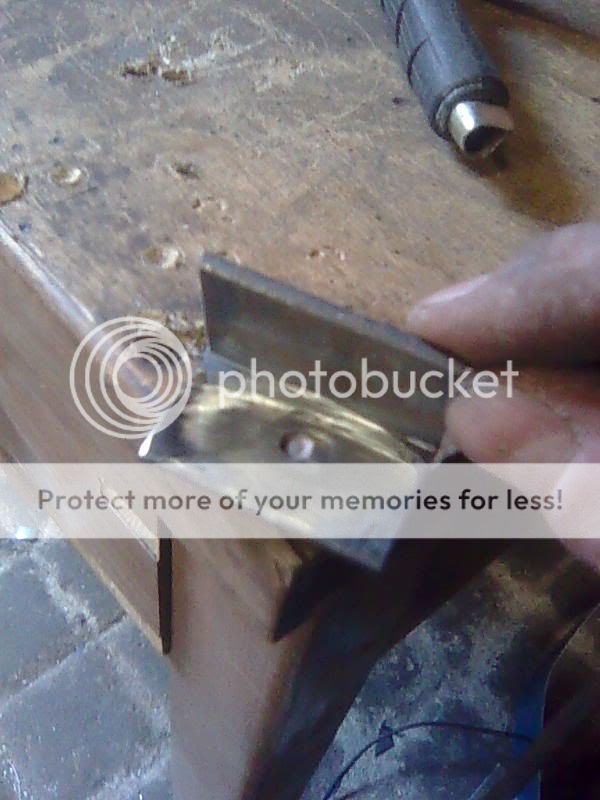
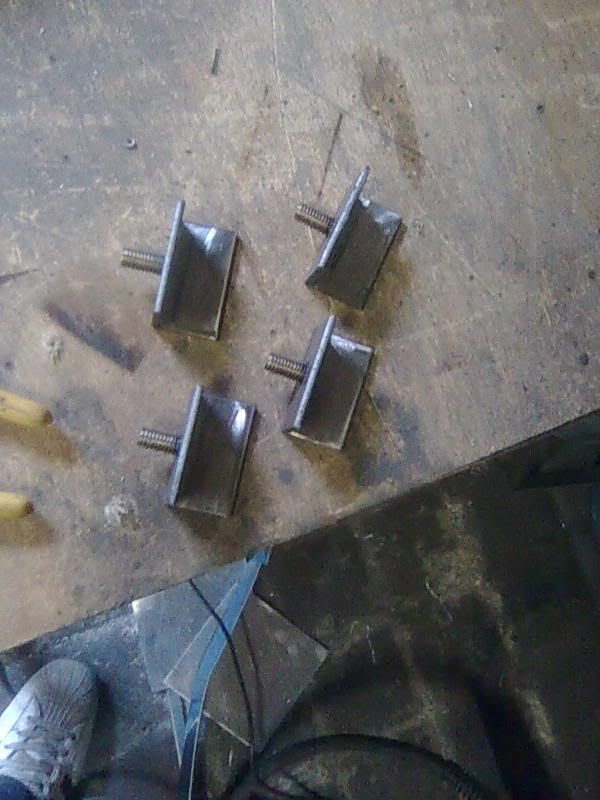
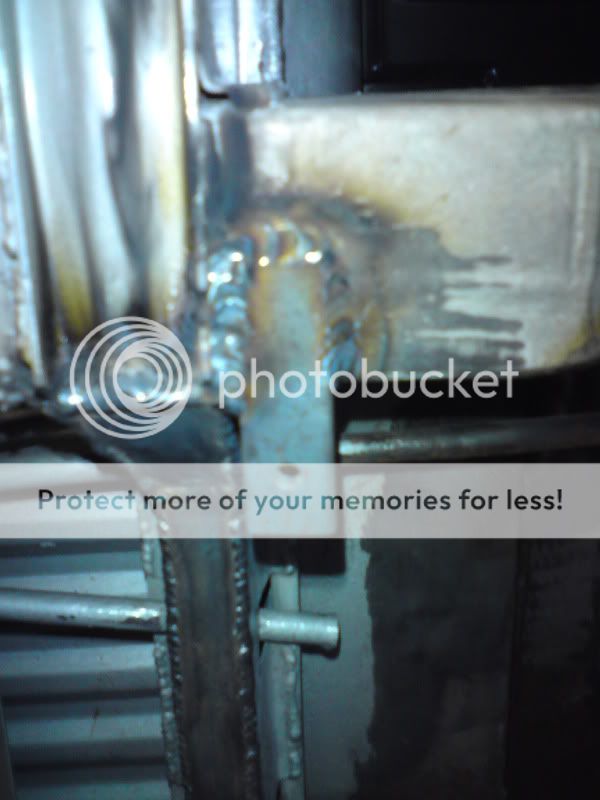
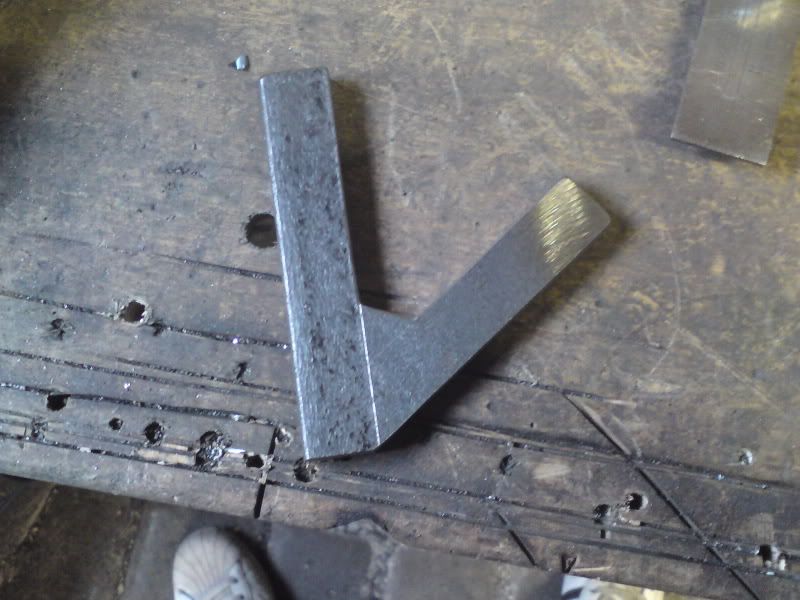
used a bit of large 10mm thick angle iron i had around and made a little l shape


aclin2.jpg


aclin1.jpg


drilled 10mm and 6mm holes


aclin4.jpg


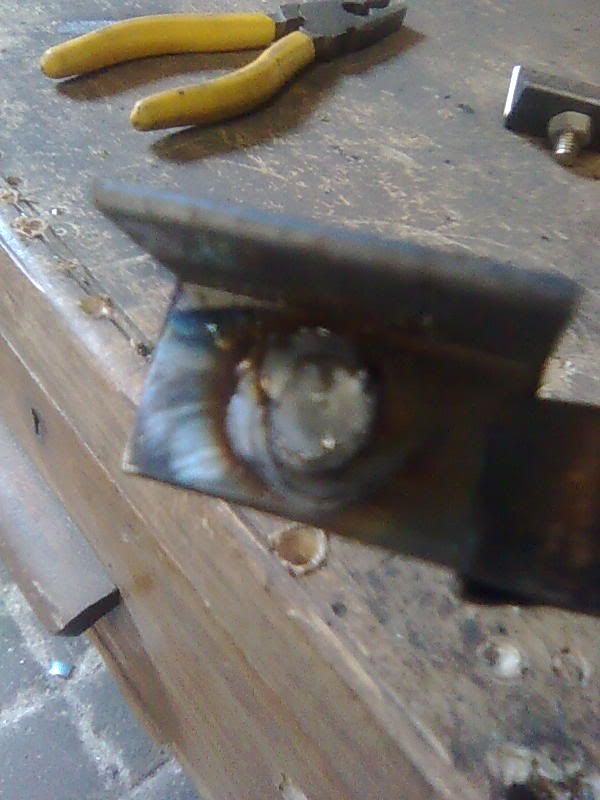
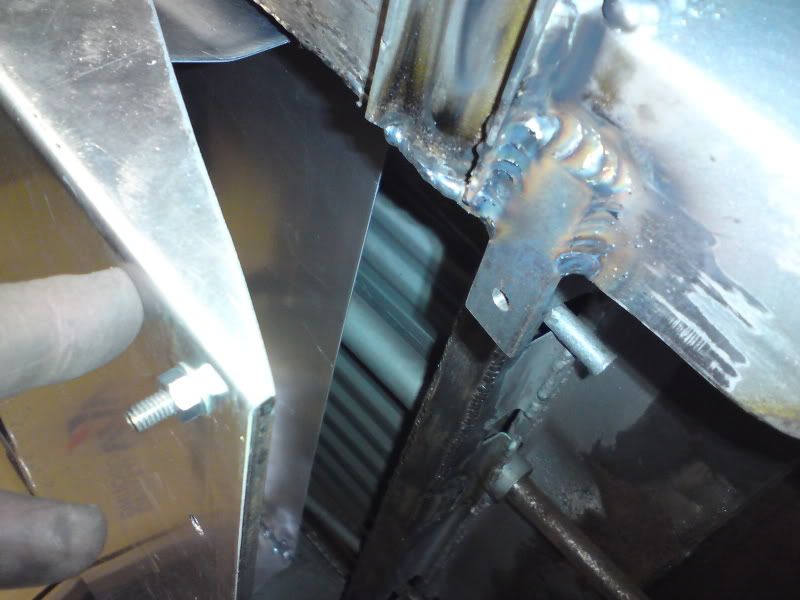
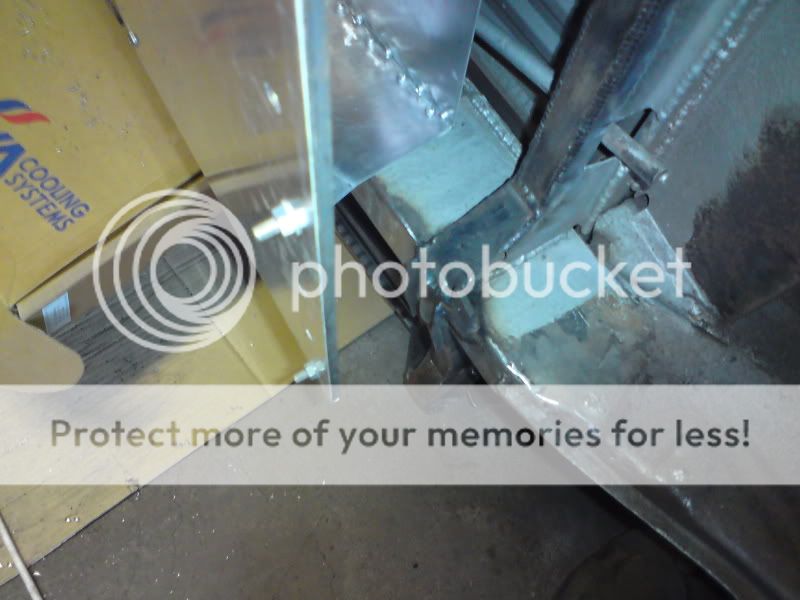
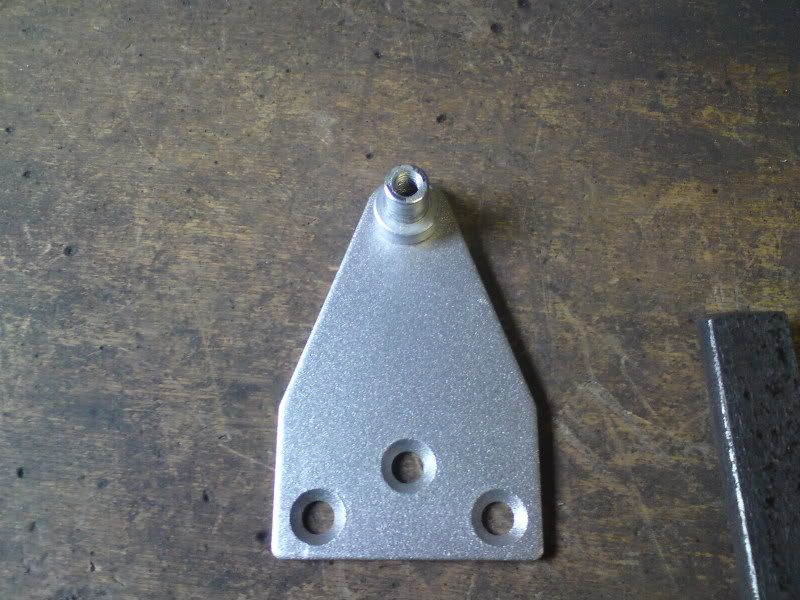
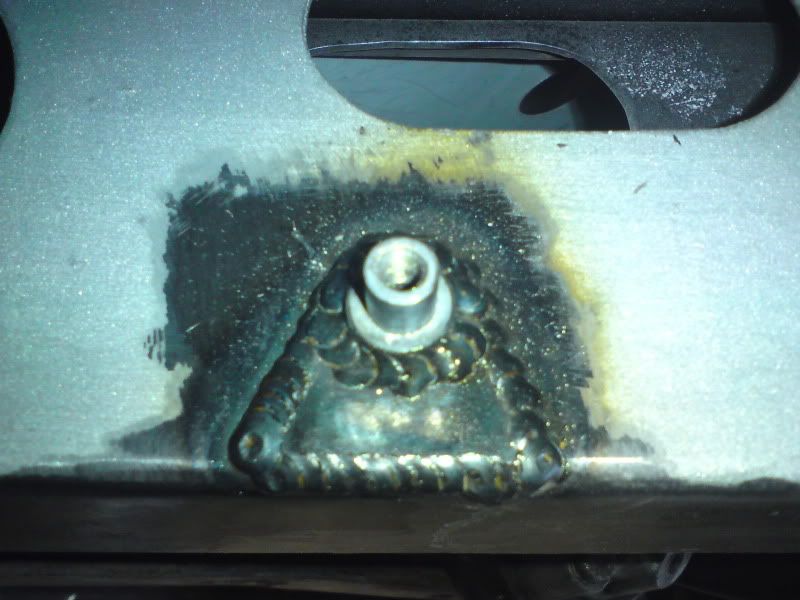
after having a sleepless night about where i was going to get the bush from to rotate the linkage on. i went to work the other day and discovered this on my work bench. it is basically what is left over after fitting a new door closer to a door at work


aclin3.jpg


aclin7.jpg


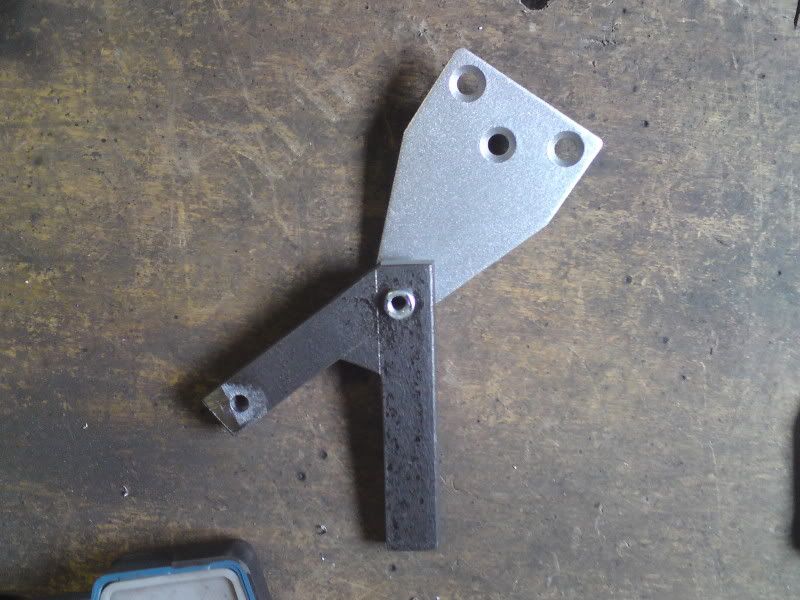
trimmed and welded in place


aclin6.jpg


fitted a 6mm uniball end i got from ebay


aclin5.jpg


aclin8.jpg


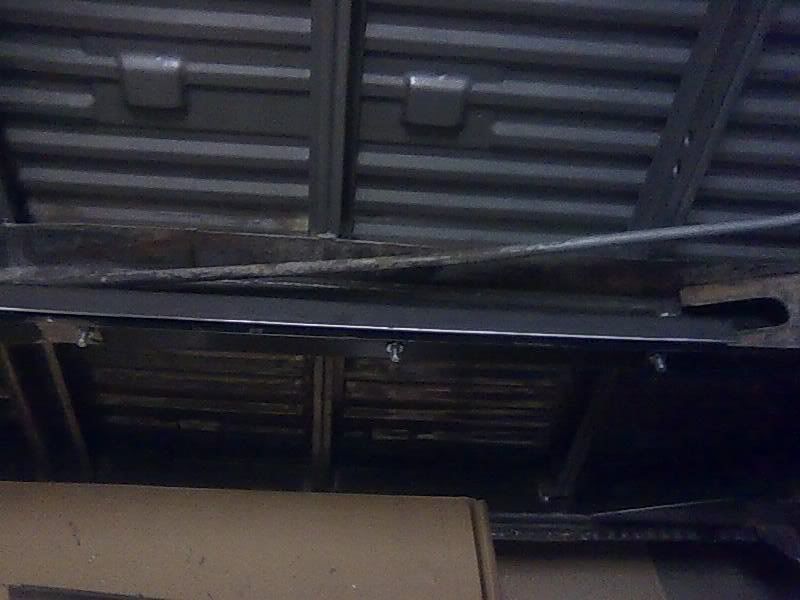
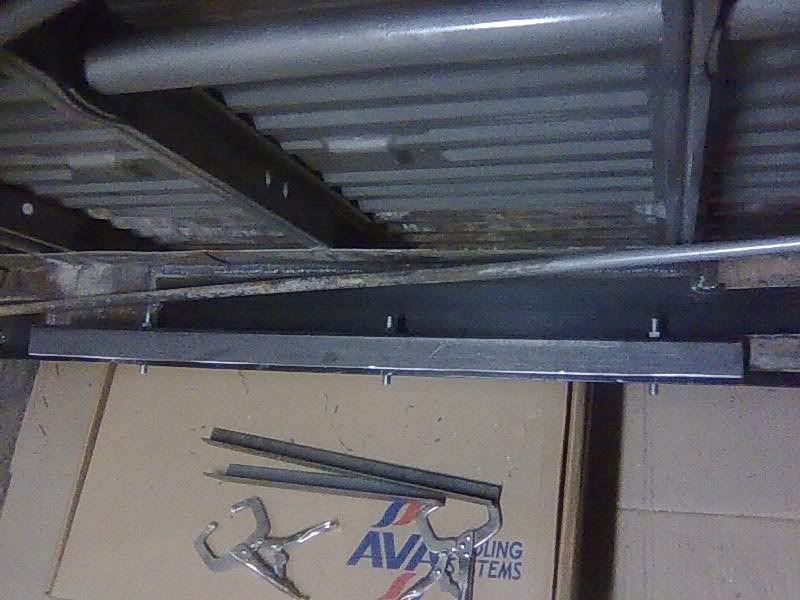
i am now just waiting for a 6mm stainless threaded rod to arrive from ebay that will link to the uniball on the accellerator pedal. i can then do a little tweaking, fit the stop for the linkage then run the cable.
 

Latest posts

Top