You are using an out of date browser. It may not display this or other websites correctly.
You should upgrade or use an alternative browser.
You should upgrade or use an alternative browser.
my 1971 danburyfalia pop top project
- Thread starter andewilson
- Start date


Help Support Early Bay Forum:
This site may earn a commission from merchant affiliate
links, including eBay, Amazon, and others.
Justin & Muttley
Well-known member
Nice neat work there, those doors look like they fit really well!
Nice progress!
")
Nice progress!
andewilson
Well-known member
engine plans are vw pd 130bhp engine coupled with the 091 gearbox i bought today. suspension should be weadeater beam dropped spindles and adjustable rear. brakes are undecided as of yet porsche or vw passat disks and callipers depending on what i can get. wheels are a choice of five (ebay obsession and sucker for a bargain), boxster s twist fronts 7x17, boxster standard twist fronts 7x17, cayenne 7.5x17, cookie cutters 6x15, or chrome teledials 6x15. tyres will be 205/40/17 on the 17's. 195/50/15 rear 165/50/15 fronts for the 15's
- Joined
- Apr 2, 2007
- Messages
- 478
- Reaction score
- 26
- Location
- Berkshire
- Year of Your Van(s)
- 1972
- Van Type
- Danbury
Justin & Mutley said:Nice neat work there, those doors look like they fit really well!
Nice progress!
Great work.... and carrying on from J&M's comment about the doors. Looks like they are brand new-replacement cab doors as oppossed to rust free used ones. I'm considering going this route also but have a few questions that perhaps you could help me out with?
You said they took ages to fit but looks like you got a good fit in the end...... how tricky was the adjustment process? Was it just a case of trial and error or did you have to bend/twist/manipulate the doors in anyway?
Also, do the hinges on these replacement doors marry straight up with the early bay set up or do you need any adapters etc? Finally, do these doors have a hole on the inside top for a door lock pull button (as fitted to later buses but not to early ones)?
Cheers :wink:
andewilson
Well-known member
yes mate they have a hole foe the top lock pull. same as te doors i took off. i did a bit of a thread on the doors in the technical section. fit is straight forward realy adjustment up and down/ in and out is easy. back and forward however is a case of making packer (as on my passenger door), or grinding the back off the hinge and adjusting the a pillar mount (big hammer) on the drivers. have a look at the "my doors dont fit thread" for more pics
- Joined
- Apr 2, 2007
- Messages
- 478
- Reaction score
- 26
- Location
- Berkshire
- Year of Your Van(s)
- 1972
- Van Type
- Danbury
Thanks for the tip off to your other thread!
Just looked...... I'd heard rumours that the genuine doors were a pain to fit right and it looks like they were!
Top marks to you for sticking with it as they certainly look spot on now. And thank god the bus hadn't twisted/moved as you had first feared.... :wink:
Think I might see if I can find a decent imported pair or as a last resort try fixing up my current ones (as they aren't too bad)?
Anyhow, that's more than enough of my dilemas.... this is your thread so sorry for chipping in with a question.
Best of luck with the rest of the resto, your doing a cracking job and keep the pictures coming!!!!!
Cheers
Dan


$10.00
Volkswagen Genuine VW Driver Gear VW Logo Specifications T-Shirt Tee - X-Large - Black
wolframitersqga

$31.80
Airfix Quickbuild Volkswagen Light Blue Camper Van Brick Building Model Kit, Multicolor
Amazon Global Store UK


$24.61
Airfix Quickbuild Volkswagen Camper Van Red Brick Building Plastic Model Kit J6017, Multicolour
Amazon Global Store UK


$7.94
$15.10
Door Panel Clips, for VW Aircooled Door Panels, 50 Pieces, Compatible with Dune Buggy
Appletree Automotive


$9.37
Empi 4429 Ivory Sun Visor Clips for Vw Bug 1965-1967/ Vw Bus 1968-1979, Pair
MOORE PARTS SOURCE


andewilson
Well-known member
did a bit more on the camper thise weekend to try and get it somewhere near.
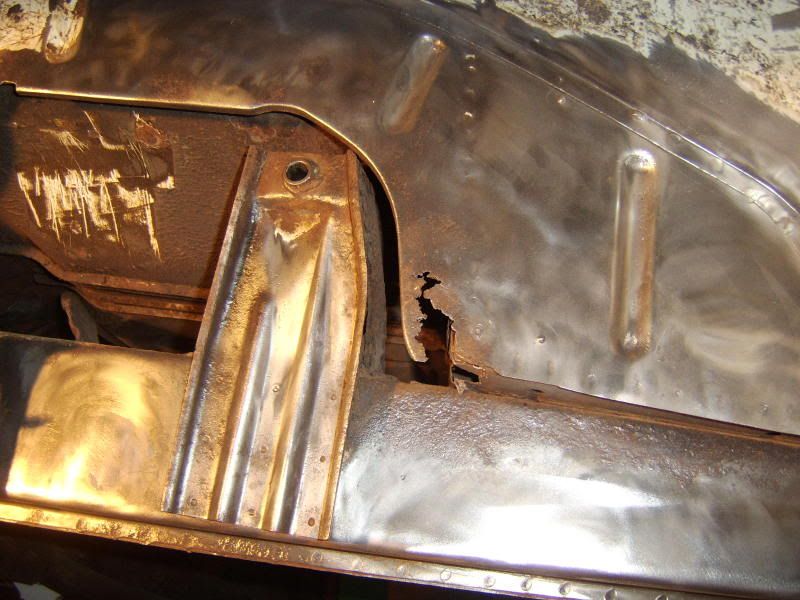
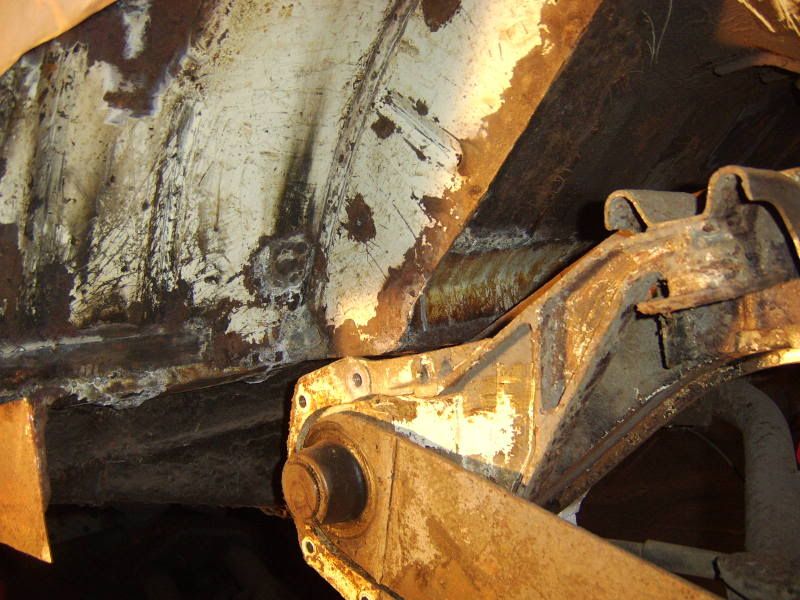
did a bit more paint strripping and unearthed a bit more dreaded rust.
did a bit more paint strripping and unearthed a bit more dreaded rust.
andewilson
Well-known member
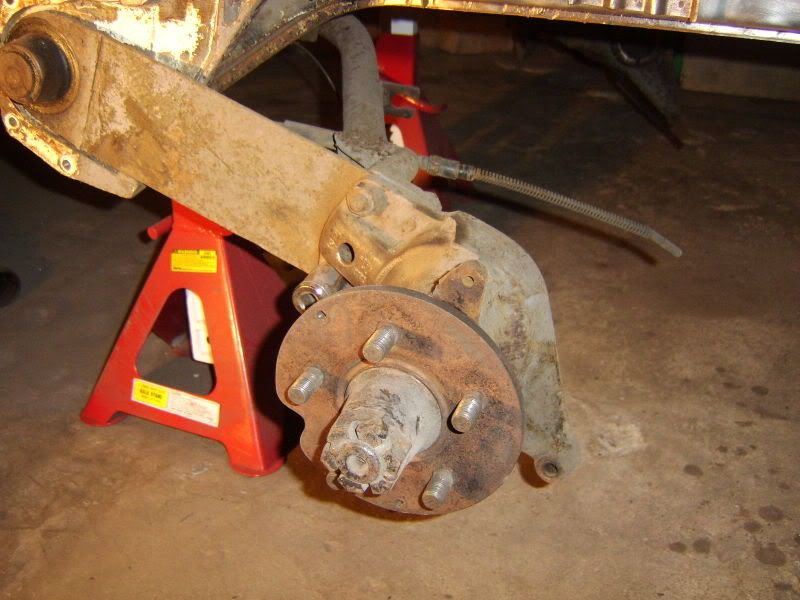
bit more work but struggling to find the time. sniped a set of audi a4 tdi brake for the bus so did a bit of stripping off of the old brakes. thank god i did, they were fubarred. more rust than metal. now the tricky job of making the rear calliper adapters begins
- Joined
- Apr 2, 2007
- Messages
- 478
- Reaction score
- 26
- Location
- Berkshire
- Year of Your Van(s)
- 1972
- Van Type
- Danbury
Great work.... and real neat too!
You must spend hours cleaning up the metal work that bright, what do you use?
You must spend hours cleaning up the metal work that bright, what do you use?
andewilson
Well-known member
Camperdan said:Great work.... and real neat too!
You must spend hours cleaning up the metal work that bright, what do you use?
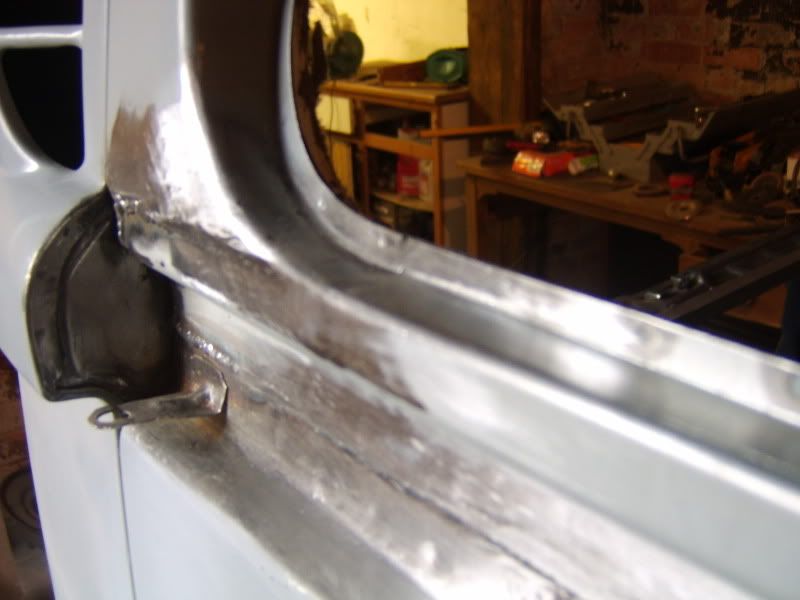
cheers. i buff the hell out of every bit of metal that i am going to weld to as my welder is a bit of a cheapo and doesnt like rust.
andewilson
Well-known member
went to bus types today and got inspired so i went round to my workshop and got a bit more done on the camper
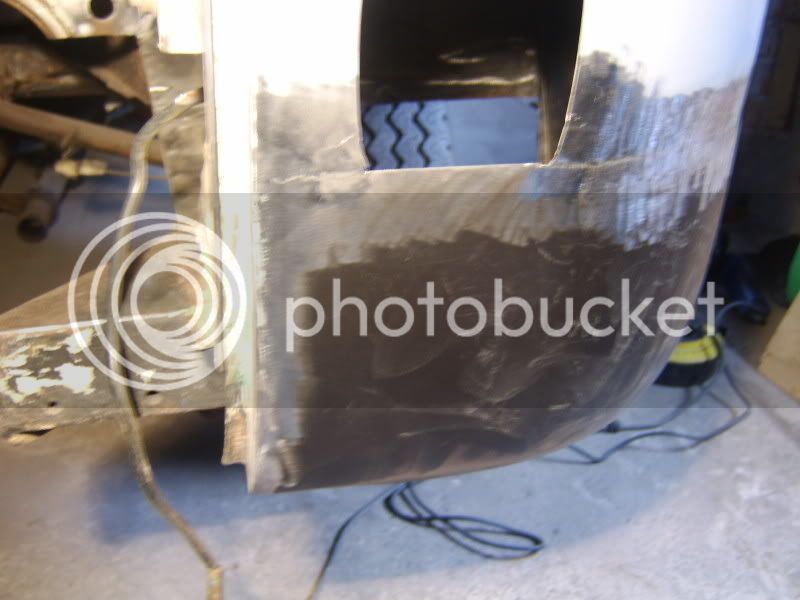
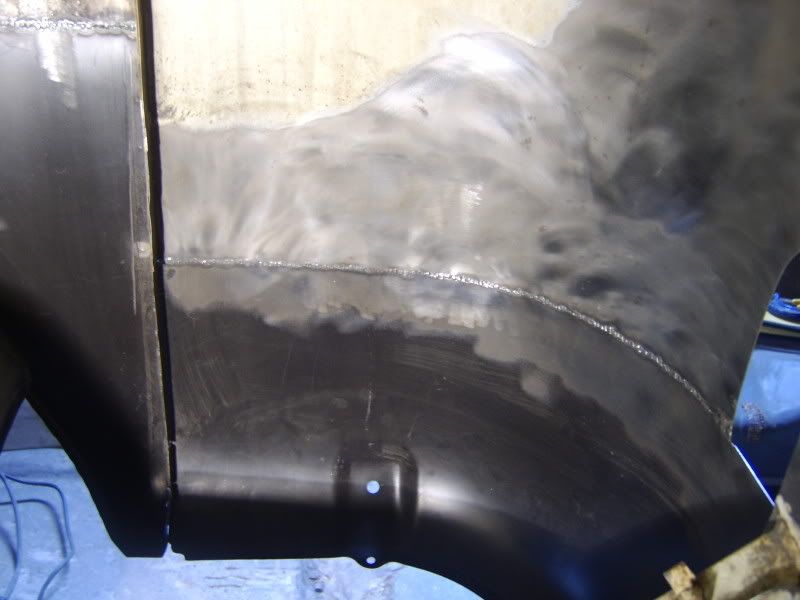
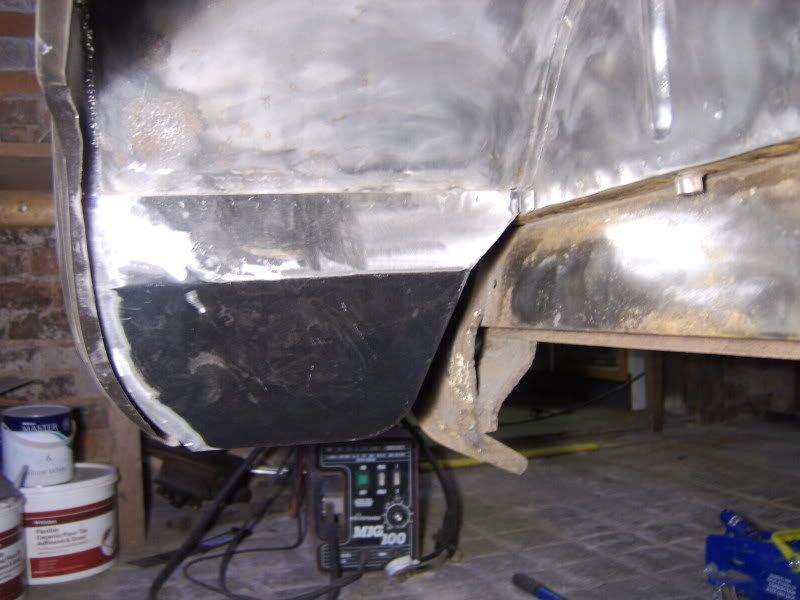
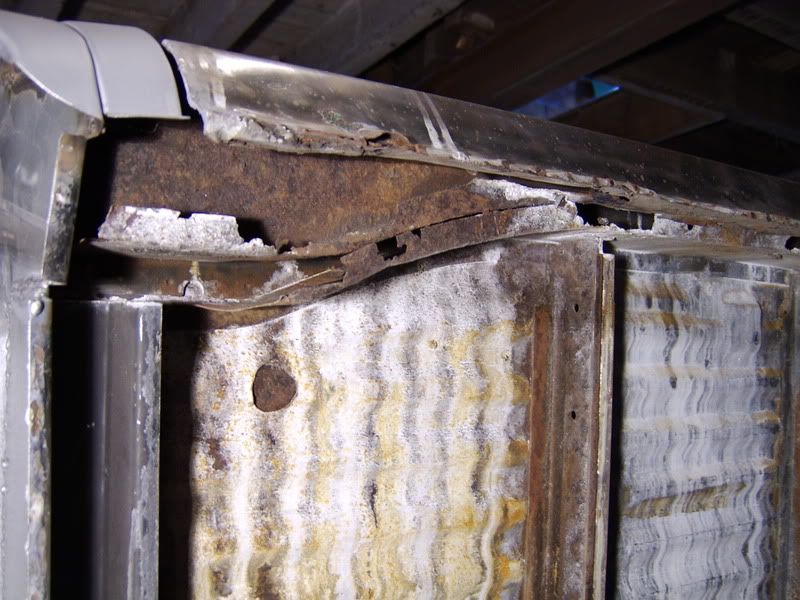
ended up having to replace both lower window frames on the back windows. not overly impressed with the shape of the repair panels as they didnt match up to well with the original shape. but these will be hidden by the sliding door track covers
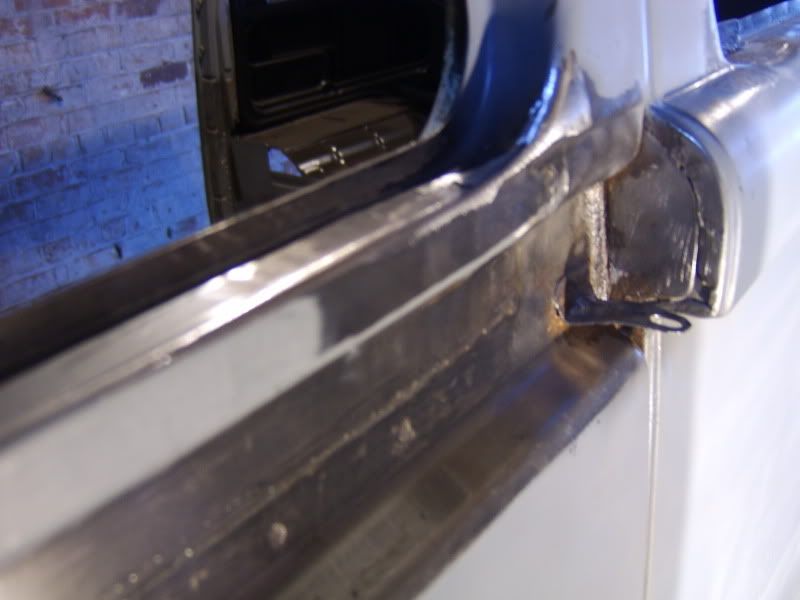
ended up having to replace both lower window frames on the back windows. not overly impressed with the shape of the repair panels as they didnt match up to well with the original shape. but these will be hidden by the sliding door track covers
andewilson
Well-known member
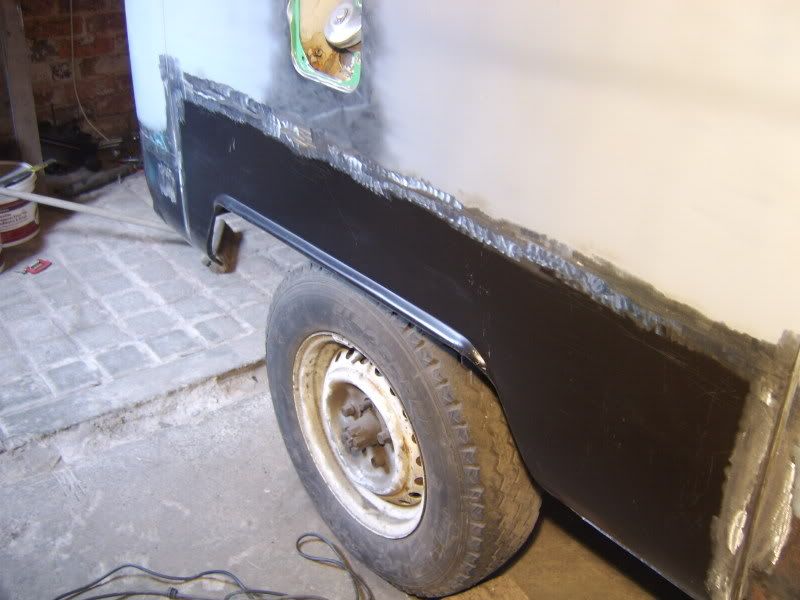
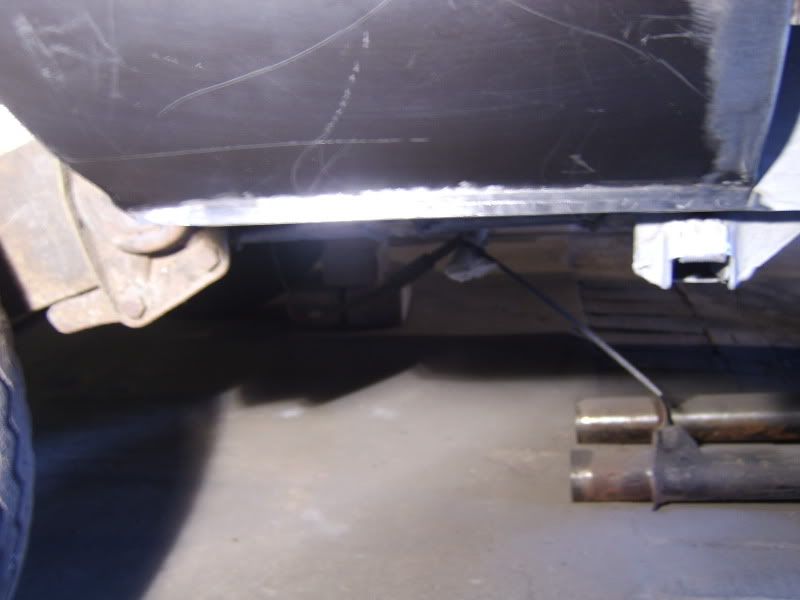
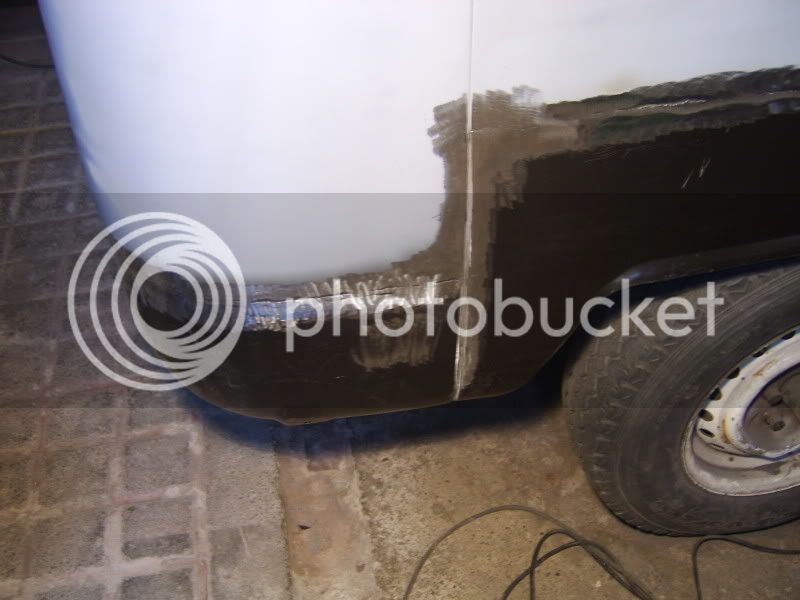
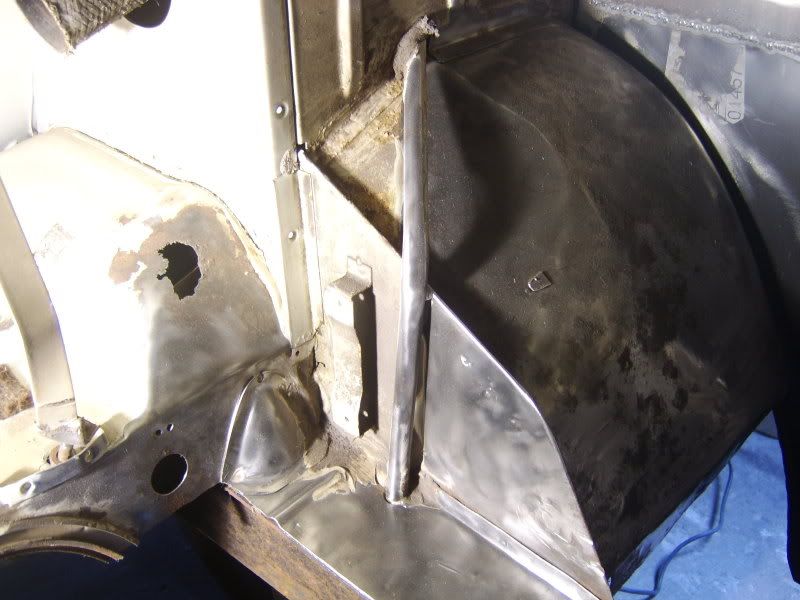
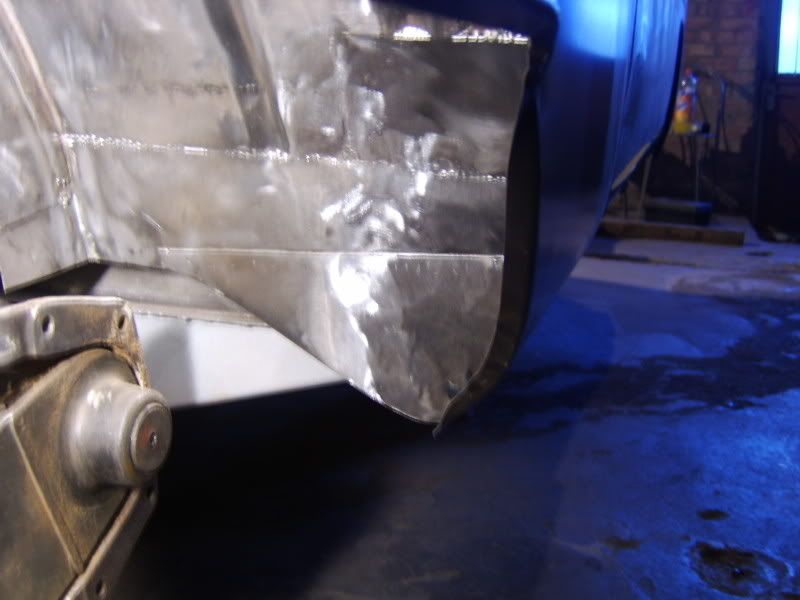
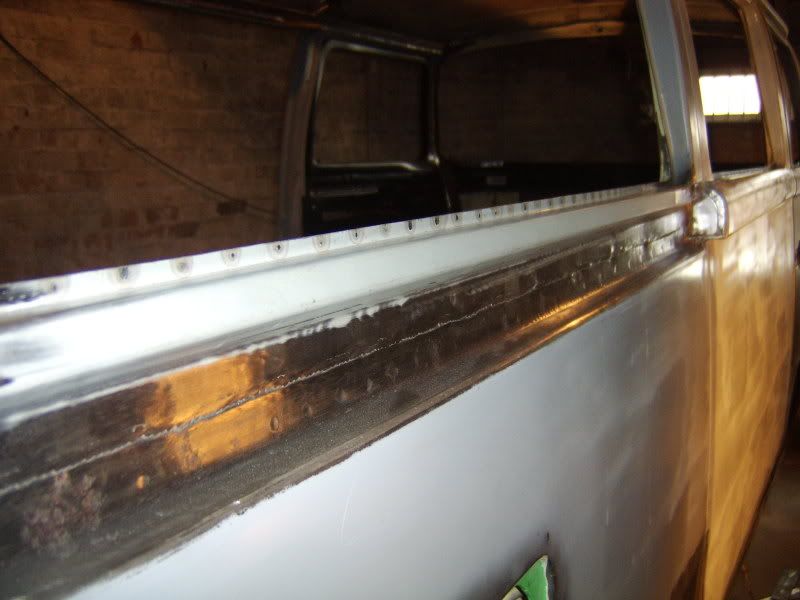
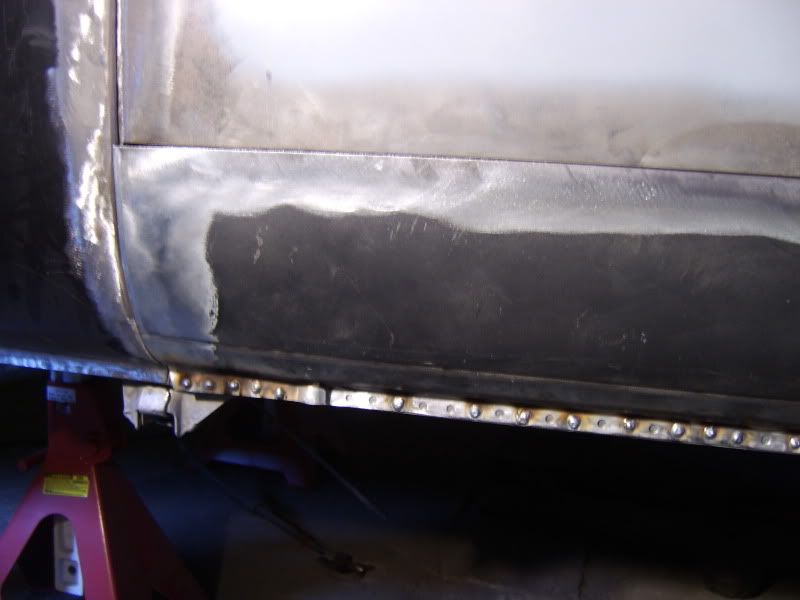
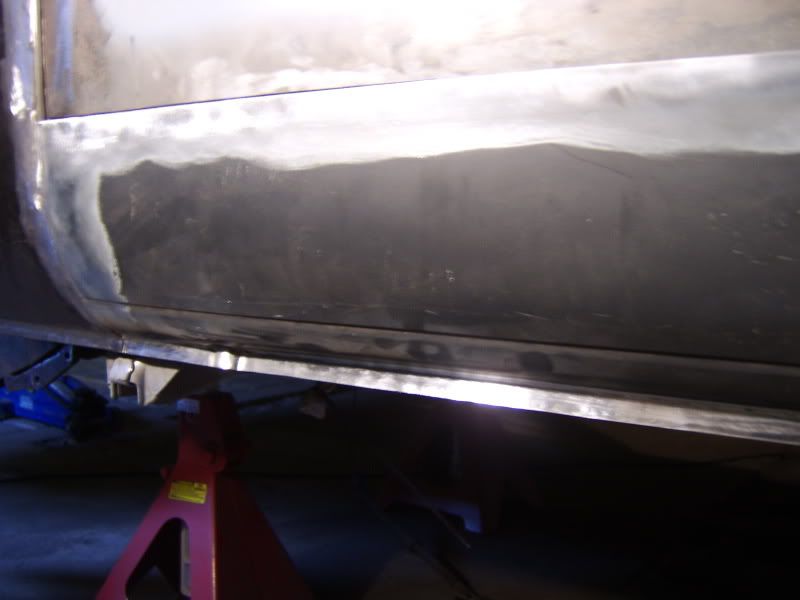
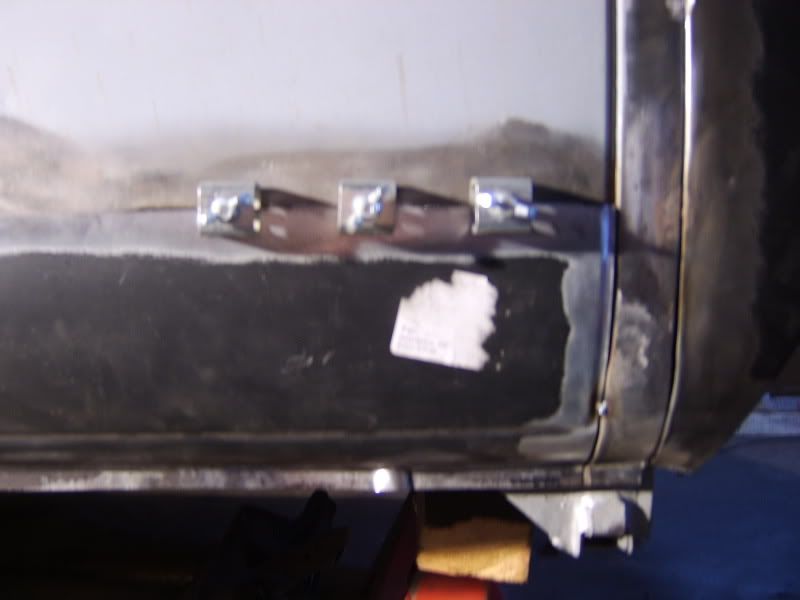
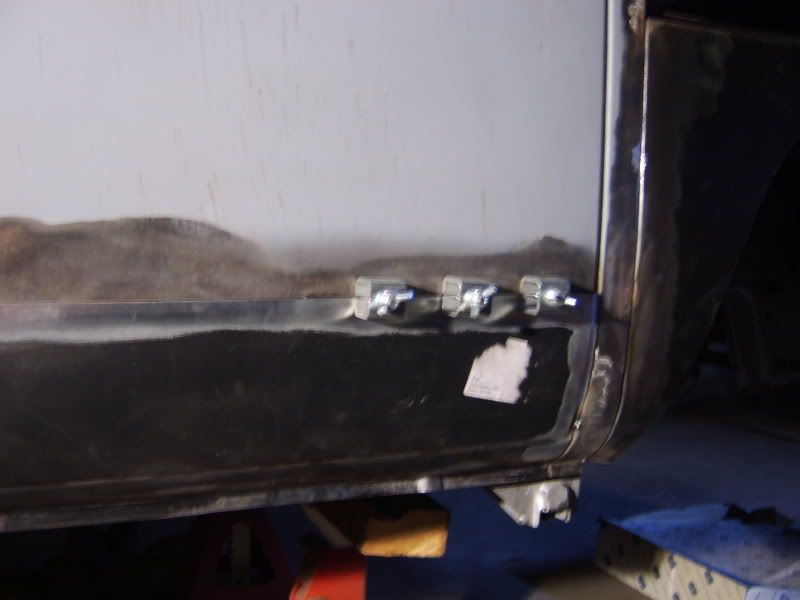
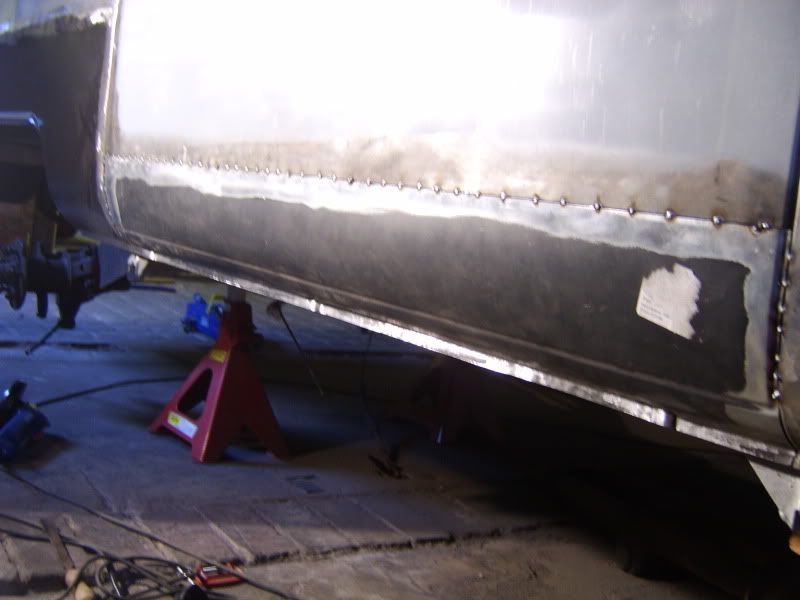
replaced the outer sill on the drivers side. so the drivers side of the bus is now almost complete, just got to seam weld it. then it will require hours of prep (which i know nothing about)
T2-Nate
Well-known member
Keep it going strong fella, just keep in mind that the prep is one of the last things to do before it gets a coat of paint :lol:
You're doing a helluva job there!
You're doing a helluva job there!
G
Guest
Guest
im starting a full resto and definitely getting inspiration fro your thread, nice sork so far.
I found that "How to paint your car on a budget" book, pretty good at explaining about prep in an easy to understand way.
I found that "How to paint your car on a budget" book, pretty good at explaining about prep in an easy to understand way.
andewilson
Well-known member
the project took a bit of a twist this week as i bought an aaz mk3 golf tdi 1.9 diesel engine this week on ebay. i do plan to drive my van a lot when it finnaly gets on the road so 45 - 50 mpg and reliability is key. im going to get my 091 gbox rebuilt at cogbox to make the most of the new engine. so 70mph will be 2.5k revs with the turbo spooling up.
got my new ce narrowed beam this week and adjustable rear plates. so the pile of bits to be fitted is growing. if only i had the time and skill to fit them
got my new ce narrowed beam this week and adjustable rear plates. so the pile of bits to be fitted is growing. if only i had the time and skill to fit them
- Joined
- Apr 2, 2007
- Messages
- 478
- Reaction score
- 26
- Location
- Berkshire
- Year of Your Van(s)
- 1972
- Van Type
- Danbury
Good progress and nice neat work.
Where did you get the lower rear window frame replacement panels from?
Where did you get the lower rear window frame replacement panels from?
andewilson
Well-known member
cheers. i got the rear window repair panels from schofields. they arent the best match in shape but they are galv so hopefully this is the last time this work will ever need to be done on this van.
71Dormobile
Well-known member
Tidy job keep the work up and the pics coming .......
What beam option did you go for??
What beam option did you go for??
andewilson
Well-known member
i went for a creative eng ball joint beam. 4 inch narrowed. the guys at cool air say that they will be selling forged drop spindles for b joints in 5 months so i'm holding out for a set of them. tried to remove my old ball joints yesterday. 6 tonnes and they aint budging.
andewilson
Well-known member
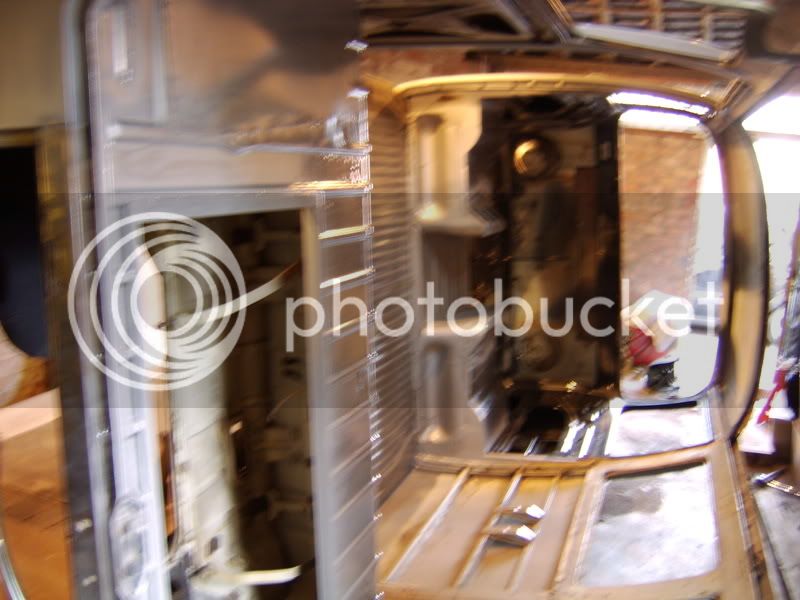
slow progress on the van the past few weeks.
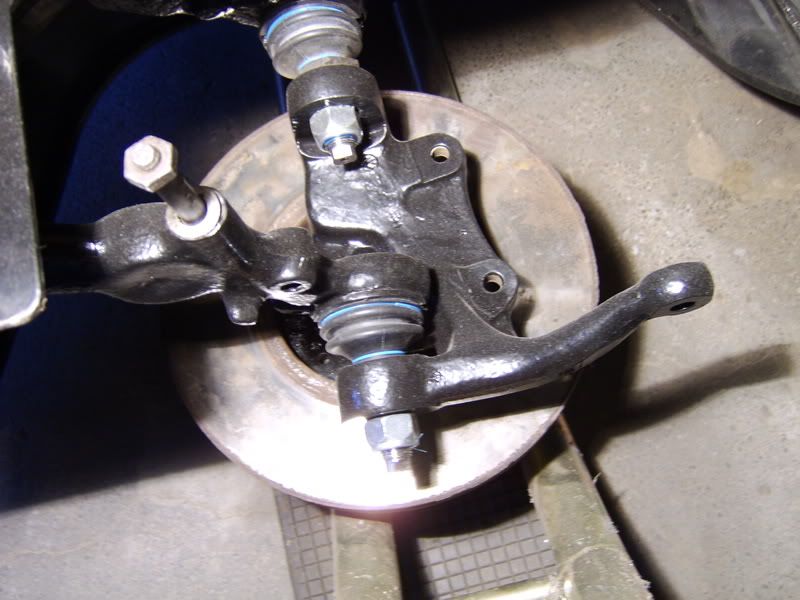
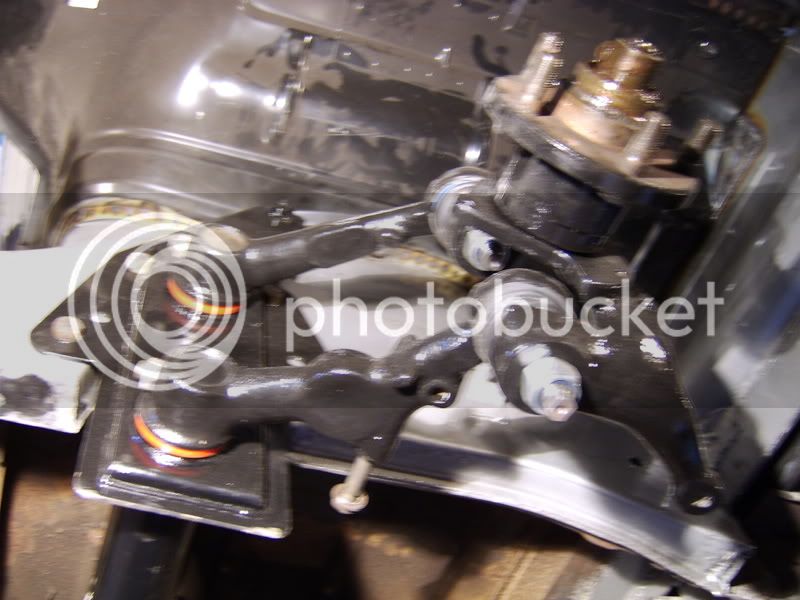
refurbed the front suspension arms with new balls and paint.
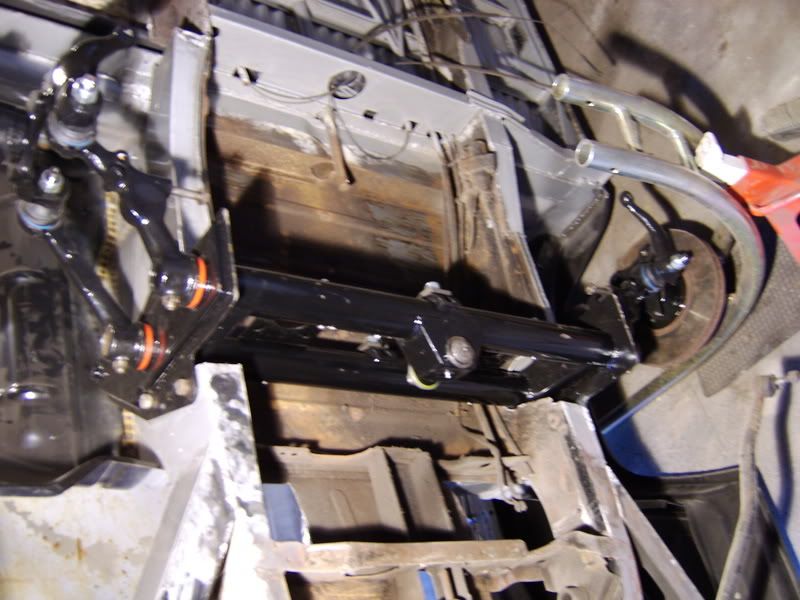
fitted the new beam from ce, great fit.
finished the welding on my mate vw caddy (so i could get my roll ovr bars back).
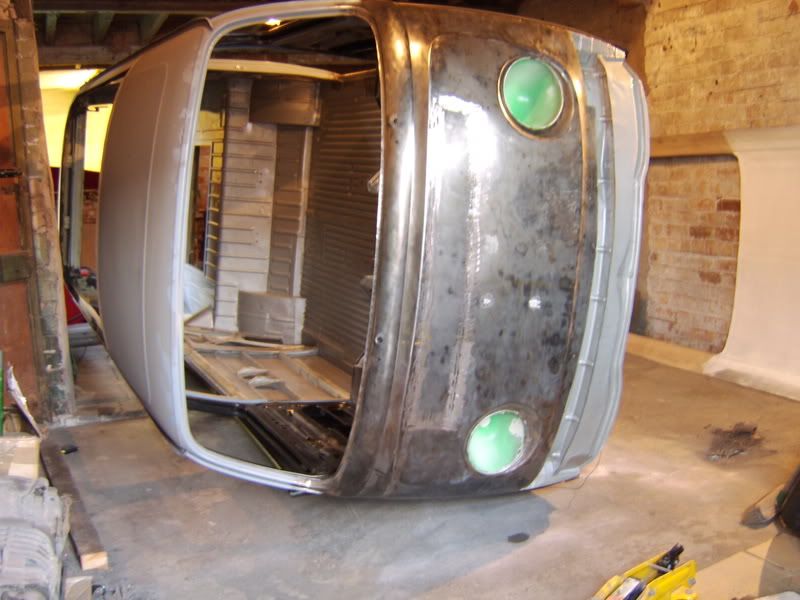
then today recruted some local marra's to flip the bus back over (the opposite way to last time)
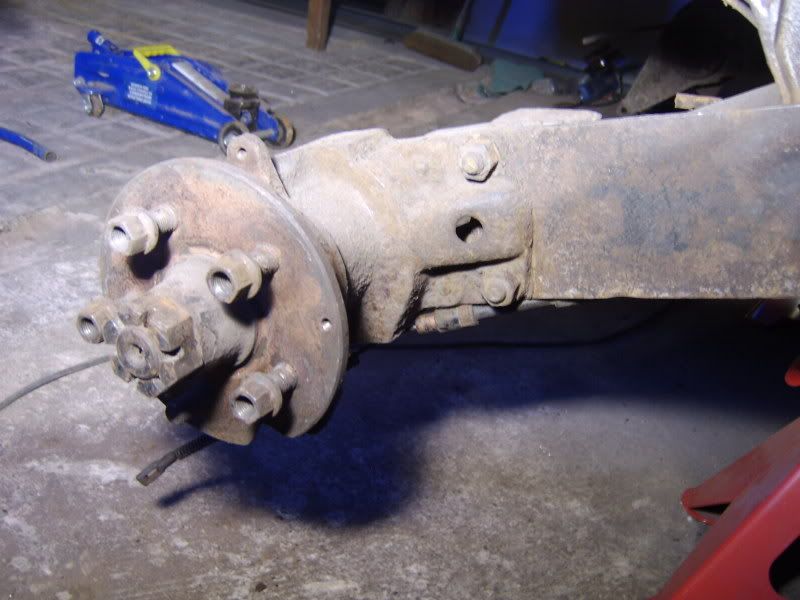
one of my new disks 288mm vented audi. still waiting on caliper brackets
beam
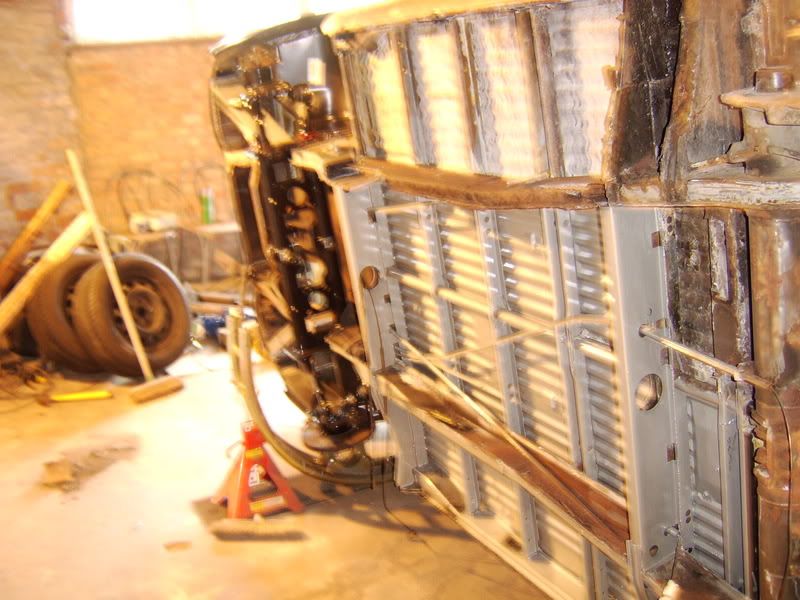
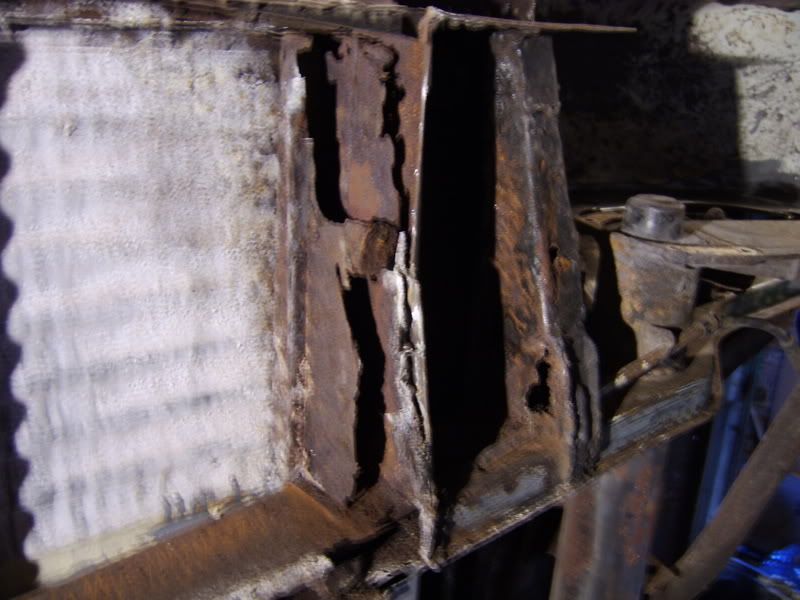
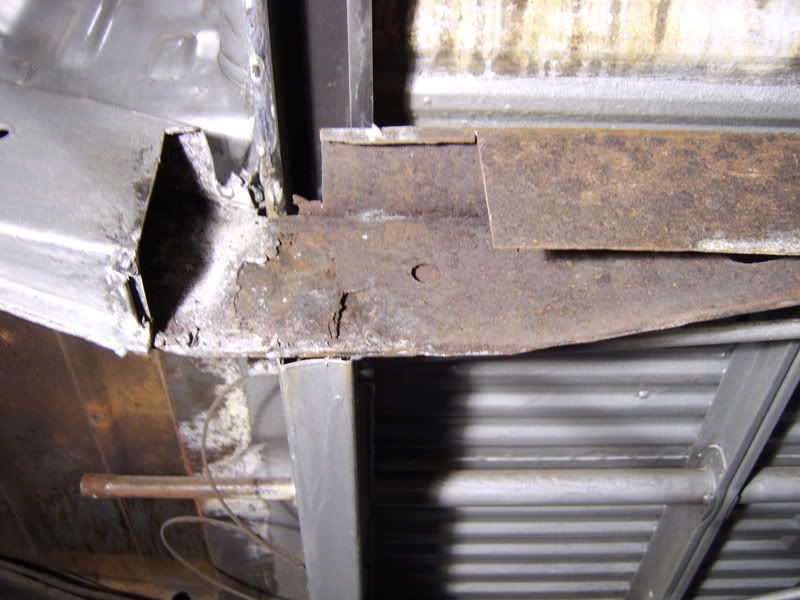
more rot
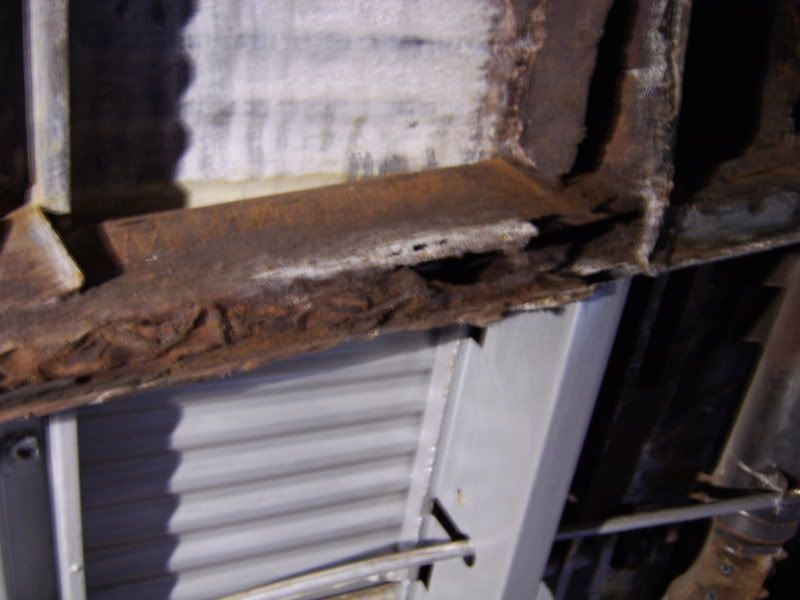
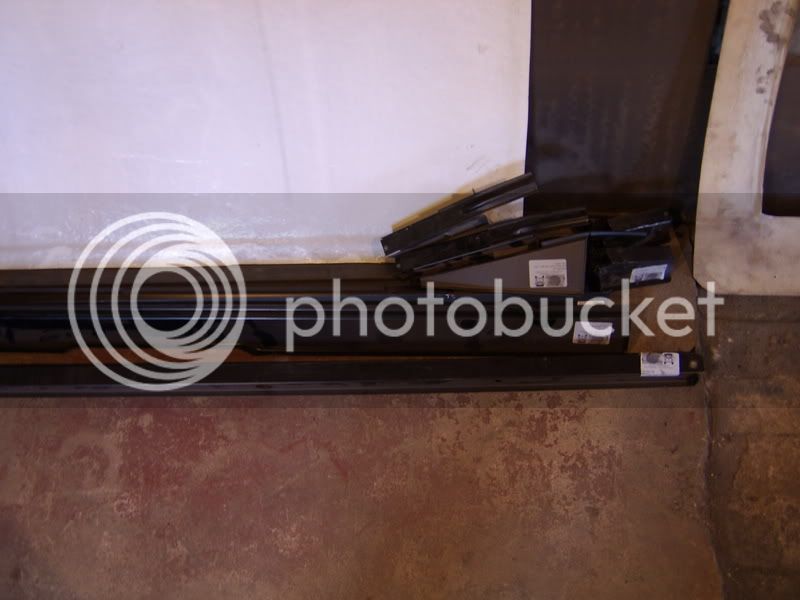
and a pile of alan schofields finest
looking forward to cutting the rest of the rot out and getting it solid again
refurbed the front suspension arms with new balls and paint.
fitted the new beam from ce, great fit.
finished the welding on my mate vw caddy (so i could get my roll ovr bars back).
then today recruted some local marra's to flip the bus back over (the opposite way to last time)
one of my new disks 288mm vented audi. still waiting on caliper brackets
beam
more rot
and a pile of alan schofields finest
looking forward to cutting the rest of the rot out and getting it solid again