My 72 Danbury

Early Bay Forum

Help Support Early Bay Forum:

This site may earn a commission from merchant affiliate links, including eBay, Amazon, and others.
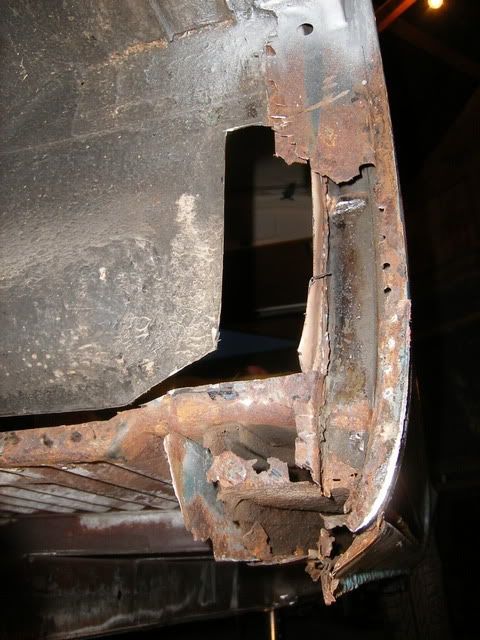
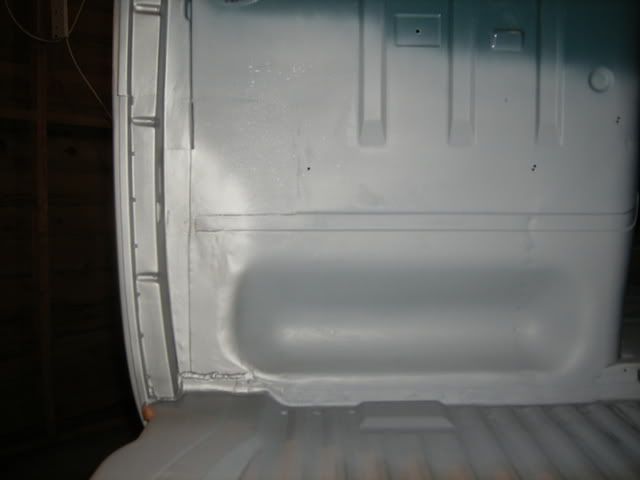
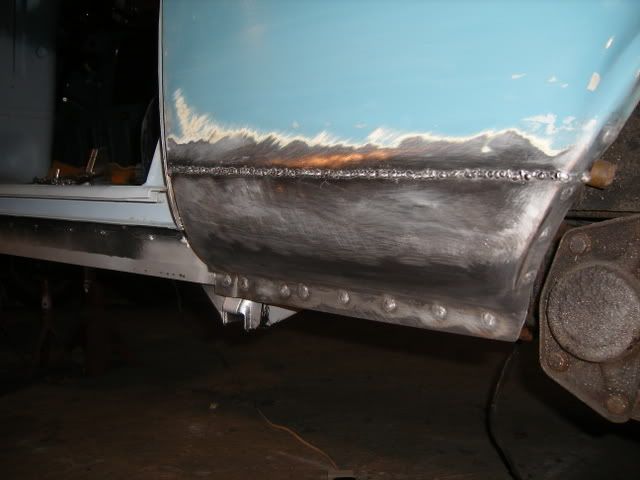
Repaired the holes in the bulkhead this weekend then trimed to shape and prepared the outer B post repair panel also. With this offered up, checked all my measurements before fully welding in the inner B post.

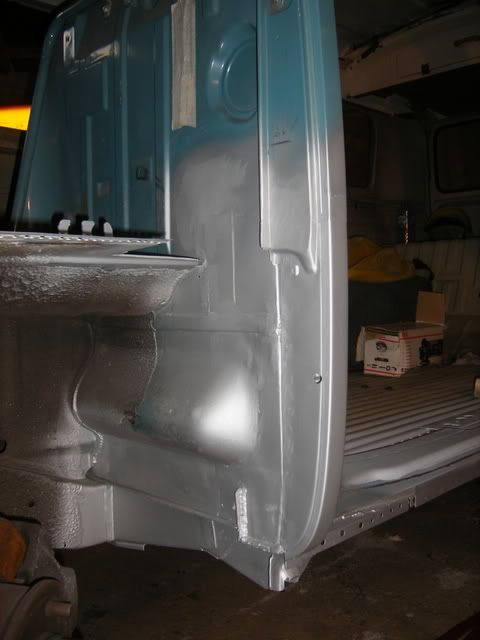
Still need to grind back and tidy all the welds but the post is begining to take shape again:

DSCF1134.jpg


DSCF1133.jpg


DSCF1136.jpg


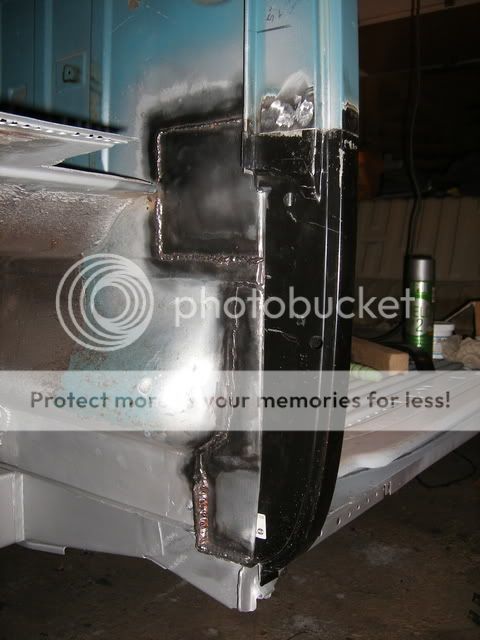
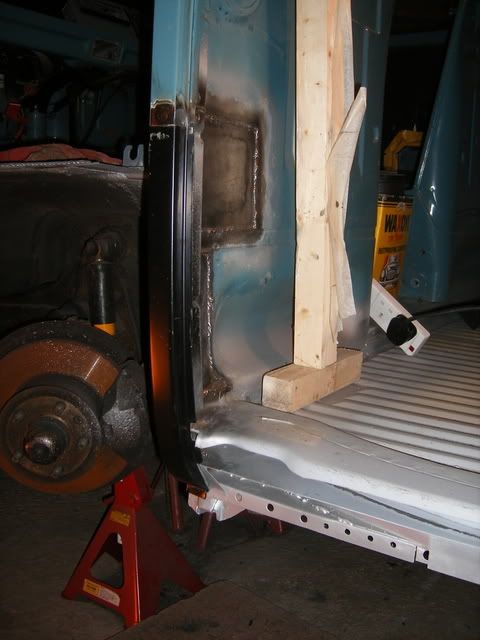
Still plenty to do! :shock:
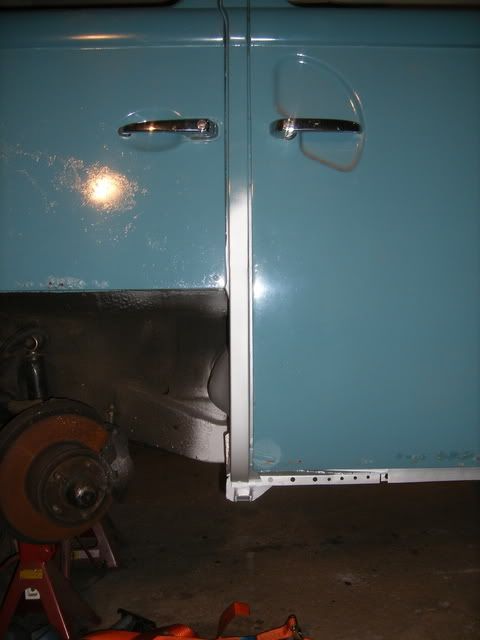
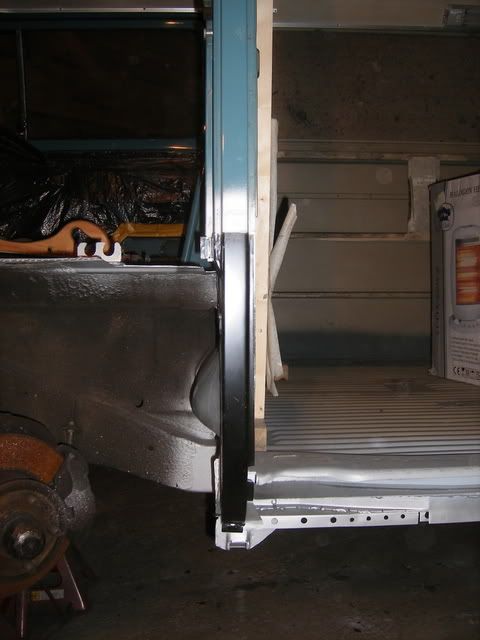
 
I think you are making a top effort on your bus Camperdan - You should be really satisfied with progress.

Keep it up.

Will.
 
cool as f**k mate looking good. best of luck to you. its a bold move to take a van that looks good on the outside and tuck into it to make it right
 
nice work fella, well worth all the effort 8)
 
Nearly had heart failure this week, as before I finally fully welded in the outer part of the nearside B post, I just thought it best to refit the front cab and sliding doors to check the alignment......... bloody good job I did as the front door would not shut and the gap for the sliding door was all wrong! :shock:

After nearly 2 hours of panic (thinking that my bus was now just scrap metal) and frantically removing, refiting and adjusting the front door..... I finally figured out that the B post had bowed just very slightly in the middle!
Thankfully, and with the gentle assistance of two ratchet straps and a piece of timber wedged in the sliding door frame - everything lined up nicely again and the cab door opened and closed as should..... phew :roll:

Now that I was happy - I fully welded in the outer part of the B post, tidy the welds and put some primer on, just to keep things protected until the later when I do all the prep.

When I look back at the terrible state of this B post and bulk head when I first cut it all back, I remember how worried I was that I wouldn't be able to repair it... but looking at the before and after pictures now... I think it came out ok.

Before:
DSCF0493.jpg


After:
DSCF1164.jpg

DSCF1162.jpg

Alignement check:
DSCF1158.jpg


Next it's the passenger fron arch!
 
Progress has been slow of late but n/s arch is now fully welded in and seam sealed. Also welded in the seat belt mount repair too:

DSCF1315.jpg


Now it is just the outer sill and the rear arch front closing panel remaining to weld on and the n/s welding is finished!
 
awsome mate i dont know whether that silver paint is magic camera paint but every repair you do looks bloody mint
 
Welded on the rear arch front closing panel and the outer sill today:

After loads of trimming and fetling, I 'spotted' the lower arch repair panel to the quarter panel in a string-of-pearls fashion to prevent distortion and plug welded the lower edge to the middle sill - still need to grind the welds back but was pleased with the final fit and shape:

DSCF1450.jpg


The outer sill was a Schofield item and I have to say that I was a little disapointed with the shape/profile of this panel - it didn't seem to have enough curve to follow the shape of the B Post and the rear arch panel.... it was more diagonally flat? I tried adding a lilltle more shape to it but must admit that I have much to learn when it comes to hammer and dolly work.... so after adding a little more curve as well as several dents... I conceeded to fitting it as was.
I still need to grind the plug welds back etc but it was nice getting the final piece added to the passenger side:

DSCF1452.jpg


Off to Stanford Hall tomorrow to see if I can find myself some rust-free front cab doors to match my Aussie slider that I'm due to collect too!
 
really tidy welding! 8)

would you say, overall, you were happy with the fit of the schofield panels?
 
Could you give me a brand name on this zinc-rich primer? I've tried googling it but to no avail.

Great job you're doing mate, I fear the day I have to tackle the side with the sliding door.
My front wheel arch was as bad as yours, only it was covered in rust AND filler.

Very good effort! :lol:
 
would you say, overall, you were happy with the fit of the schofield panels?

Overall, yes, I would say that of the pattern panels I have used generally Schofield's have been a good general fit and good value for money. However, I would add that personally I would be prepared to pay a little more for better..... if it existed?

Could you give me a brand name on this zinc-rich primer? I've tried googling it but to no avail.

The Zinc Primer I've been using is intended for between welded panels, I bought it for this purpose but just so happens that I also find it good for protecting bare metalled areas whilst I finish all the welding. Once the welding is all done I will be going round the whole van again prepping and re-applying an Etch Primer in readiness for the top coats. The Zinc primer is U-POL Weld #2 and is available from Halfords:
http://www.halfords.com/webapp/wcs/...1_productId_170878_langId_-1_categoryId_70054

Cheers
Dan
 
so it's only zinc-spray then? I already use it but only on small spots.
So you just coat the whole bus in this stuff?
Won't you better use epoxyprimer?
 
T2-Nate said:
So you just coat the whole bus in this stuff?
Won't you better use epoxyprimer?

I just use it between welded panels as anti-corrosion protection and then as a light dusting coat to 'temporarily' protect any bare metalled areas around the repairs and prevent them from rusting whilst I move onto the next repair.
Once all the welding and repairs are complete on the entire van I will be going round the whole van again bare-metalling, prepping and etch priming the entire bodywork (incl all the repaired areas) in readiness for delivering the van to a friends bodyshop for a professional final prep and the final colour top coats etc.
 
Well Dan, i've just read this thread through from the start, and have to say i'm impressed with the proffesional way in which you have tackled this project.

This is what i do all day long as my day job (see link in sig) and you have done every task just as i would, and with good attention to detail too.

Well impressed with your work, and those front arches i do a pair of those mods every few months, the only answer other than NOS panels (which was a lovely and rare sight i might add) is genuine late arches, and cut the cab step off and fab the early style on.

All the other arches are made incorrectly as the radius in the arch to step area is too tight and the step height is 10mm too short from top to bottom.
Also the sliding door sill is of late rubbish and i have to modify every single one to get the curve tighter.

So well done fella much respect to you. 8)
 
Dan, I quite agree with BJ on the quality of your work. I have to say I have no bodywork/welding skills at all, but I do have an eye for good workmanship, and I can see the attention to detail you are giving this restoration.

You will end up with a beautiful Danbury, and you shall be wearing a big smile on your face for a long time to come with your bus! :D

Doug
 

Latest posts

Top