- Joined
- Apr 2, 2007
- Messages
- 478
- Reaction score
- 26
- Location
- Berkshire
- Year of Your Van(s)
- 1972
- Van Type
- Danbury
Thanks for the comments.
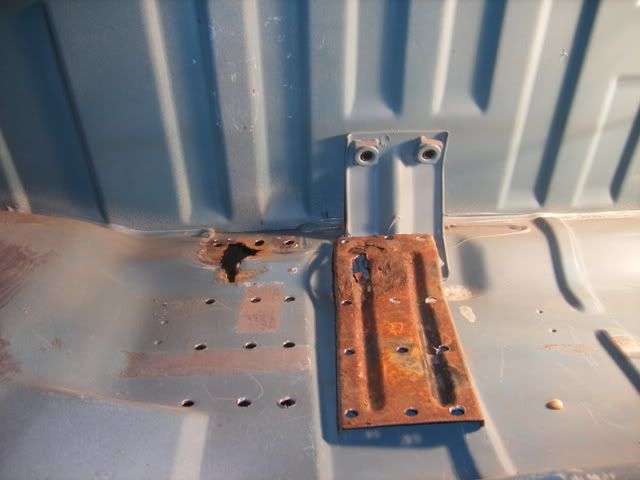
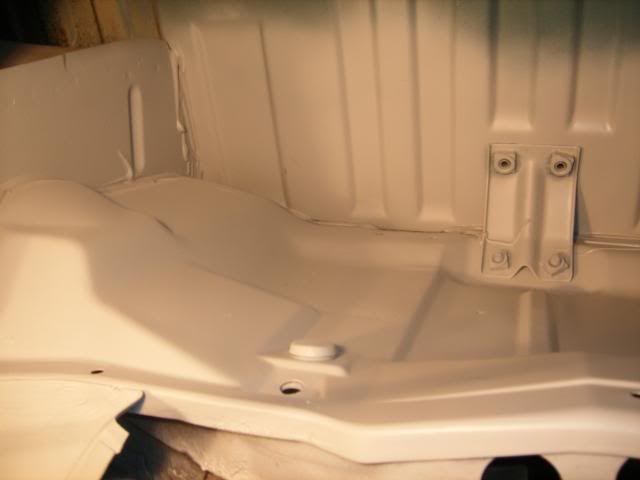
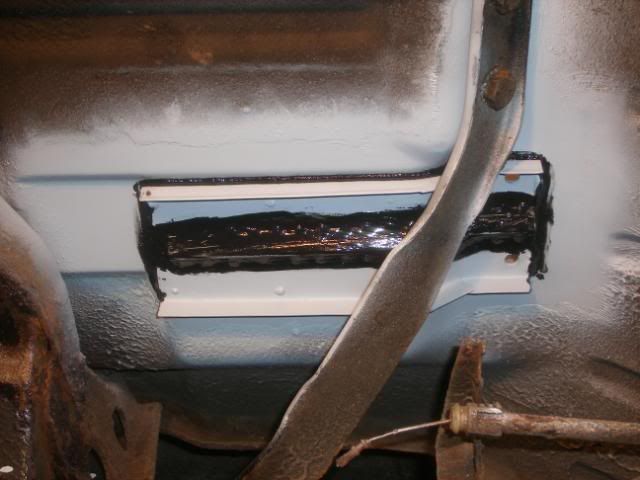
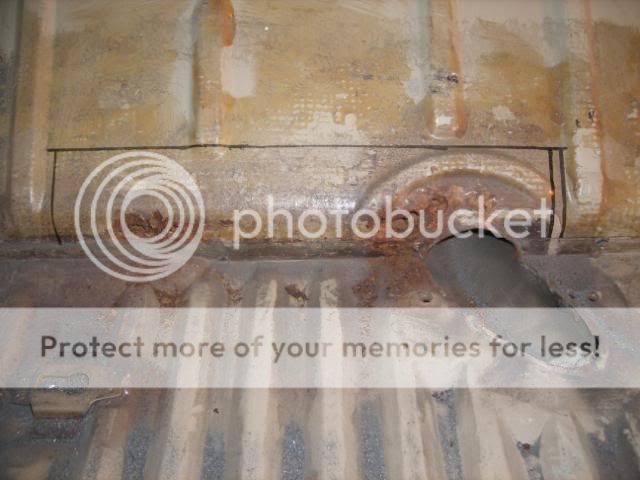
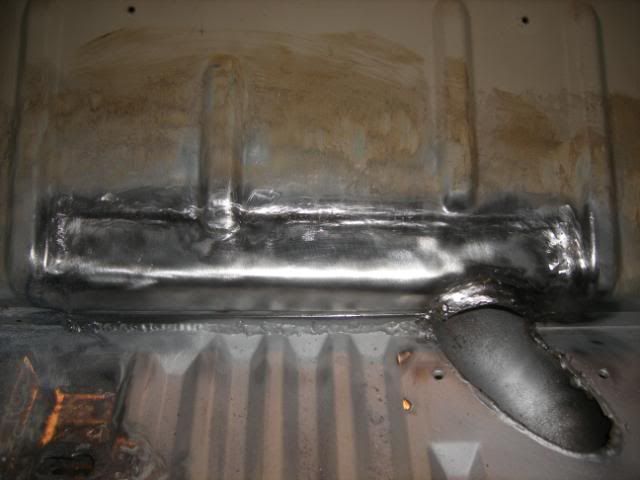
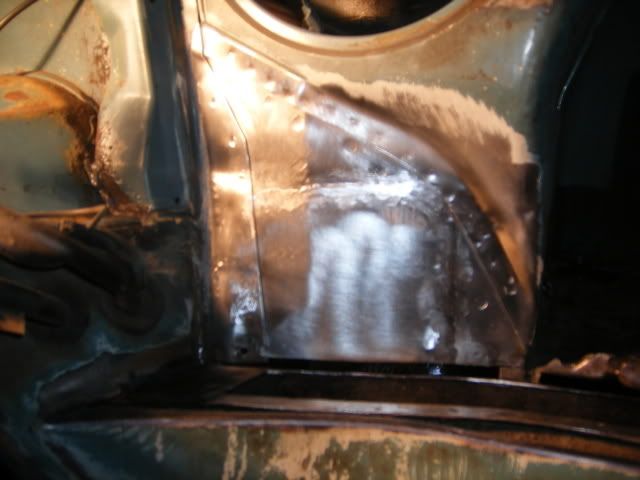
Now with the nearside engine bay chassis leg top all repaired and in primer, I've started the same repair on the offside.
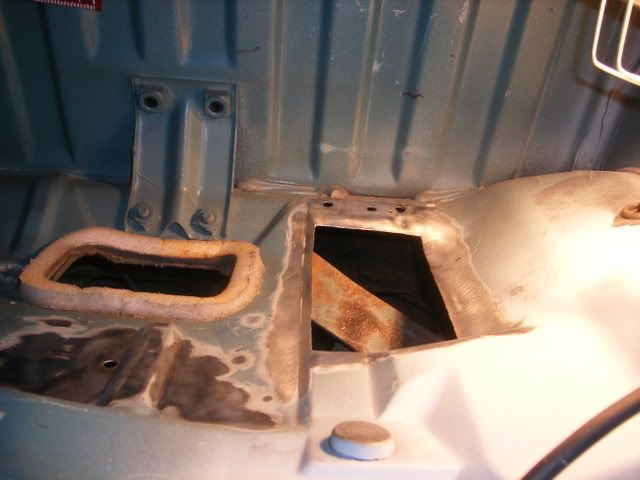
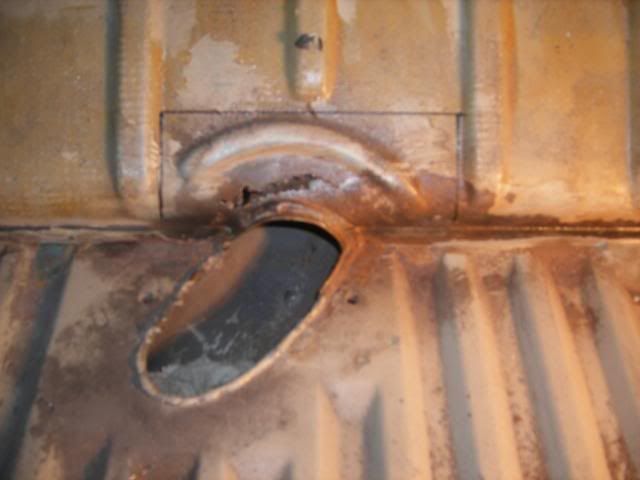
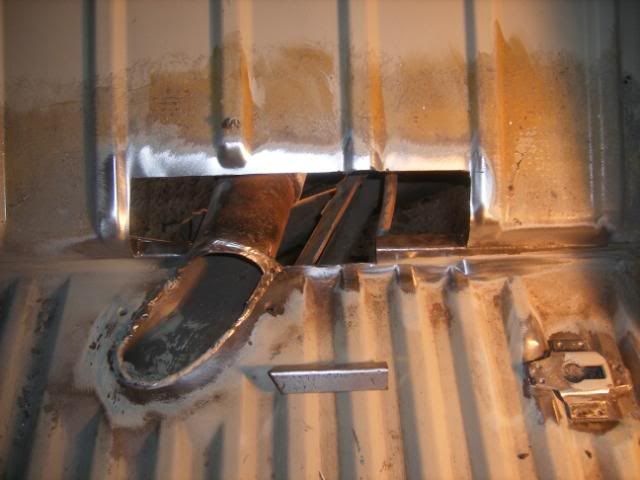
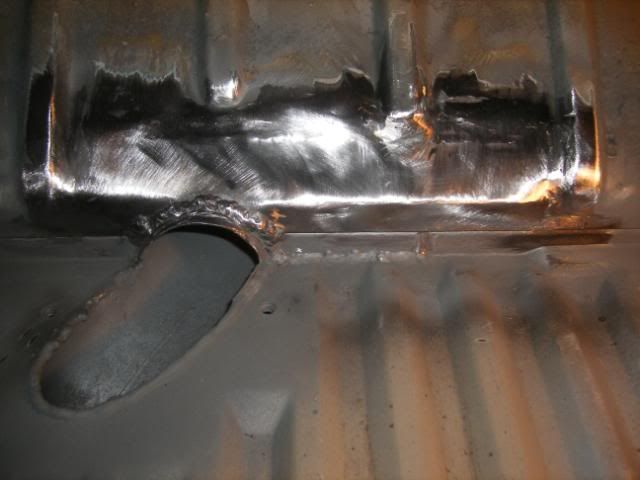
This side was a little worse and so I've had to cut more of the top cover part back, however once removed and all the loose/surface rust cleaned off it was only a similar size area as the nearside that needed cutting out of the chassis leg. The battery tray and rear corner will also need replacing but I've left them in for now as a reference for when I put in the new top cover part/patch once the chassis is repaired:

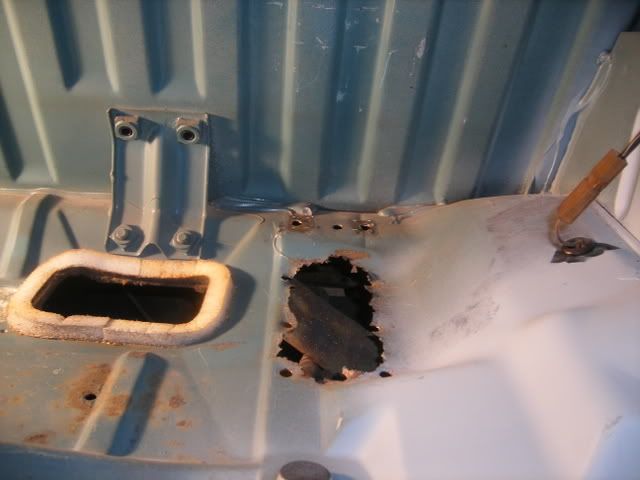
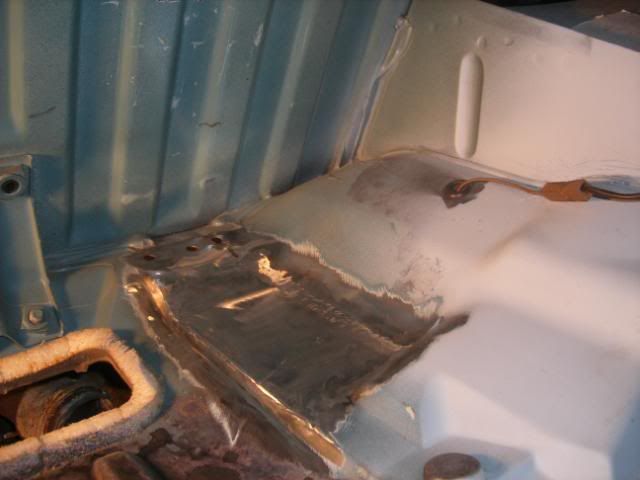
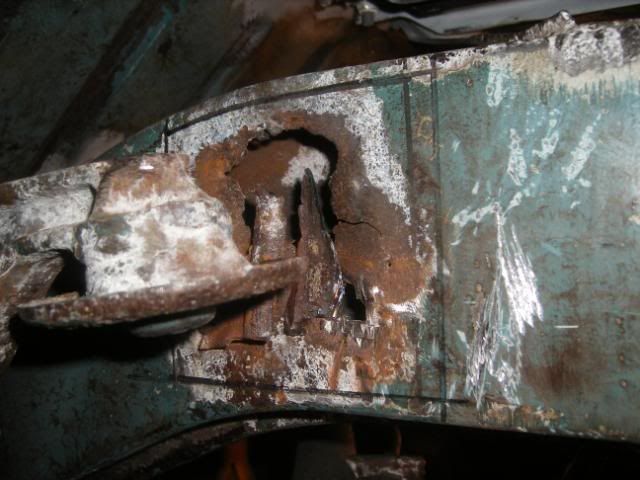
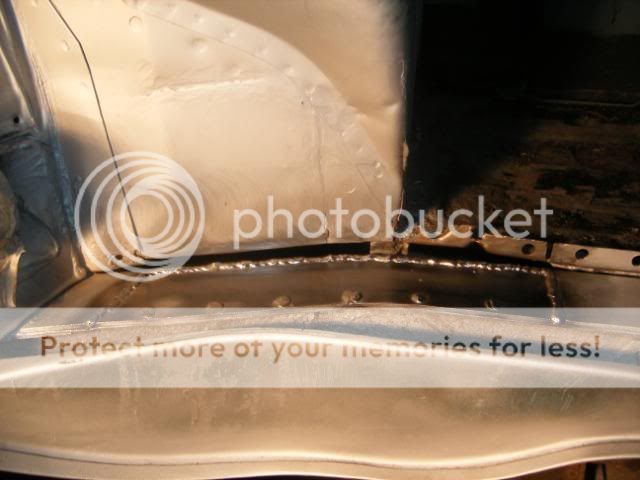
You'll see in the above picture that the side panel part to the front right of the engine bay was also a little rusty and damaged - this was my fault as a few years back I poorly removed the original stand for the air-filter for room for the twin carbs. As the engine was in at the time, rather than neatly drill out the spot welds I kind of just pulled the stand off taking some of the metal and paint with it, which left a rather messy looking panel. So whilst in this area I decided to replace this part too with a panel I cut to size and shaped:
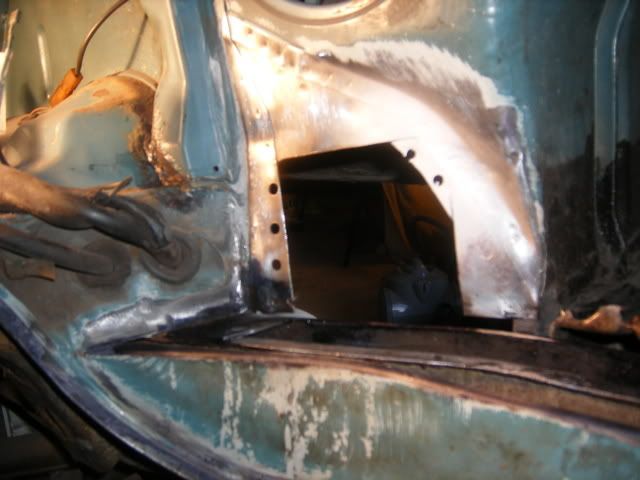
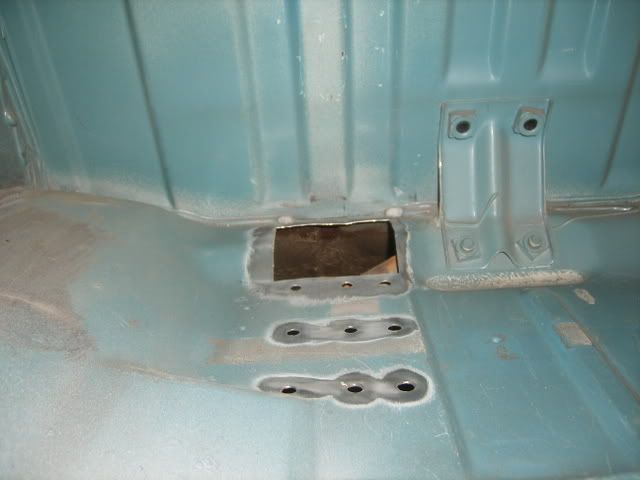
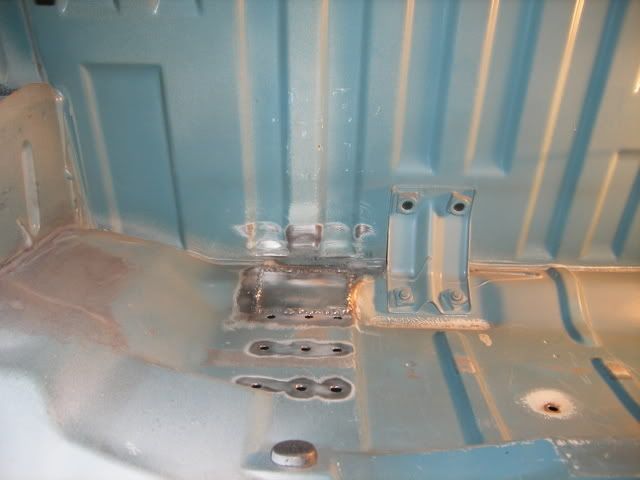
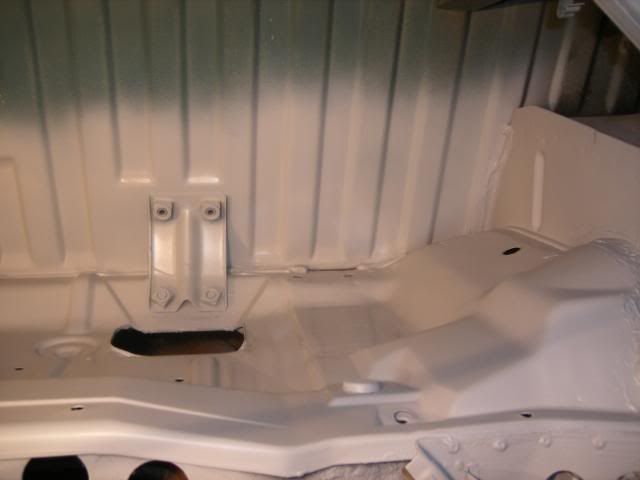
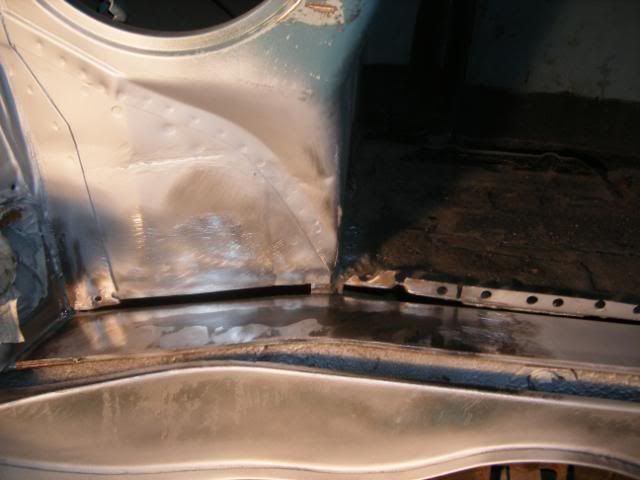
Once the chassis top repairs are complete I'll pop a light skim of filler over this area and hopefully it will look like I never touched it?
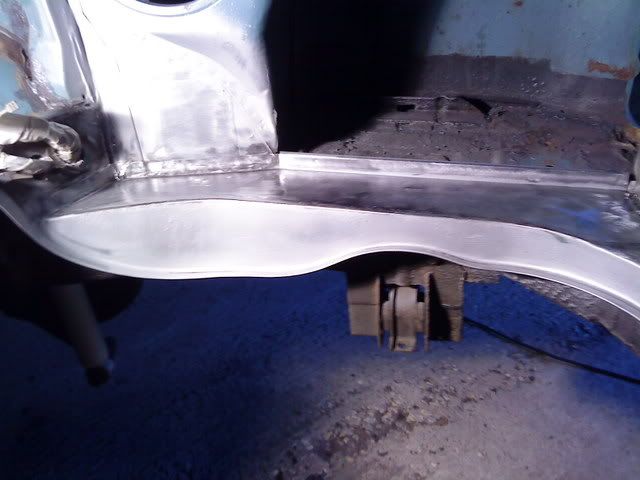
Other than the above repairs I've had a bit of a dilemma this week - whilst taking a good look at the rear corners and checking to see if these need repair or replacing - I've discovered that both have been replaced before, this would explain why they did not appear to be too rusty - however after closer inspection I can see that they have been replaced so poorly that they are buried under some deep filler and already showing signs of corrosion again - as such I'm definitely gonna have to replace the offside one, if not both, again?
But that's not the worst of it - I've also discovered that now with the fuel tank removed and taking a good look at the inside of the offside rear quarter panel, I can see that the prior repaired accident damage down that side (which I already knew was there but appeared minor from the outside) was in fact pretty damn serious and worst still, had not really been repaired at all but instead it would seem has simply been left beaten in with a sheet of metal then spot-welded over the damage from the outside and fillered over!!! Why? :evil:
So it looks like to do this properly I am gonna have to dig it all out and take a much closer look - maybe, just maybe it will be repairable without the need to replace the complete offside rear quarter panel, however at the moment I suspect not. So preparing myself for the worst and the possible need to replace the complete offside rear quarter panel and possibly the middle side panel too... I started researching the parts and I've discovered that the only panels available are for LHD vans and as such will need modifying to fit my RHD van? Also, as the new panels are for later vans the fuel filler is all wrong so I would need to work out some solution for that too?
Either way, its gonna be lots of work which means lots more time, money and effort!
Will I ever get to drive my van again I'm starting to wonder? :roll:
If anyone on here reading this has faced this same or similar dilemma and already replaced the offside quarter and middle side panels before - please reply or PM me as I've plenty of questions as to how to go about it?
Cheers.
Now with the nearside engine bay chassis leg top all repaired and in primer, I've started the same repair on the offside.
This side was a little worse and so I've had to cut more of the top cover part back, however once removed and all the loose/surface rust cleaned off it was only a similar size area as the nearside that needed cutting out of the chassis leg. The battery tray and rear corner will also need replacing but I've left them in for now as a reference for when I put in the new top cover part/patch once the chassis is repaired:
You'll see in the above picture that the side panel part to the front right of the engine bay was also a little rusty and damaged - this was my fault as a few years back I poorly removed the original stand for the air-filter for room for the twin carbs. As the engine was in at the time, rather than neatly drill out the spot welds I kind of just pulled the stand off taking some of the metal and paint with it, which left a rather messy looking panel. So whilst in this area I decided to replace this part too with a panel I cut to size and shaped:
Once the chassis top repairs are complete I'll pop a light skim of filler over this area and hopefully it will look like I never touched it?
Other than the above repairs I've had a bit of a dilemma this week - whilst taking a good look at the rear corners and checking to see if these need repair or replacing - I've discovered that both have been replaced before, this would explain why they did not appear to be too rusty - however after closer inspection I can see that they have been replaced so poorly that they are buried under some deep filler and already showing signs of corrosion again - as such I'm definitely gonna have to replace the offside one, if not both, again?
But that's not the worst of it - I've also discovered that now with the fuel tank removed and taking a good look at the inside of the offside rear quarter panel, I can see that the prior repaired accident damage down that side (which I already knew was there but appeared minor from the outside) was in fact pretty damn serious and worst still, had not really been repaired at all but instead it would seem has simply been left beaten in with a sheet of metal then spot-welded over the damage from the outside and fillered over!!! Why? :evil:
So it looks like to do this properly I am gonna have to dig it all out and take a much closer look - maybe, just maybe it will be repairable without the need to replace the complete offside rear quarter panel, however at the moment I suspect not. So preparing myself for the worst and the possible need to replace the complete offside rear quarter panel and possibly the middle side panel too... I started researching the parts and I've discovered that the only panels available are for LHD vans and as such will need modifying to fit my RHD van? Also, as the new panels are for later vans the fuel filler is all wrong so I would need to work out some solution for that too?
Either way, its gonna be lots of work which means lots more time, money and effort!
Will I ever get to drive my van again I'm starting to wonder? :roll:
If anyone on here reading this has faced this same or similar dilemma and already replaced the offside quarter and middle side panels before - please reply or PM me as I've plenty of questions as to how to go about it?
Cheers.


")