You are using an out of date browser. It may not display this or other websites correctly.
You should upgrade or use an alternative browser.
You should upgrade or use an alternative browser.
My '72 devon....
- Thread starter Gwar72
- Start date


Help Support Early Bay Forum:
This site may earn a commission from merchant affiliate
links, including eBay, Amazon, and others.


Gwar72
Well-known member
- Joined
- Oct 21, 2011
- Messages
- 723
- Reaction score
- 0
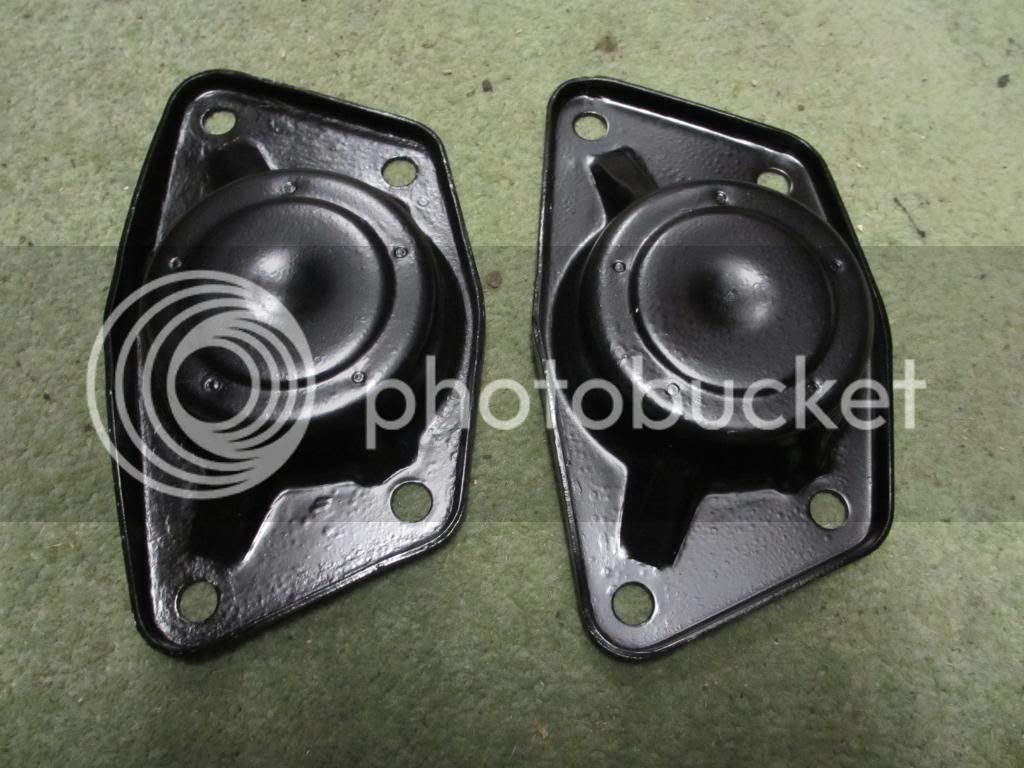
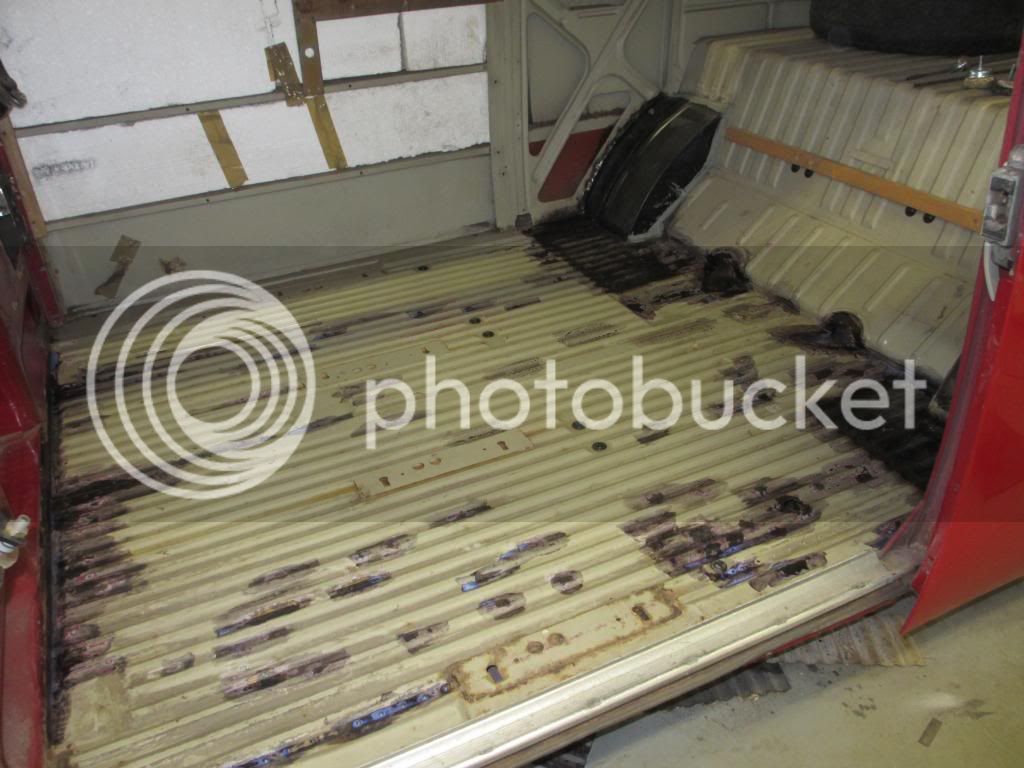
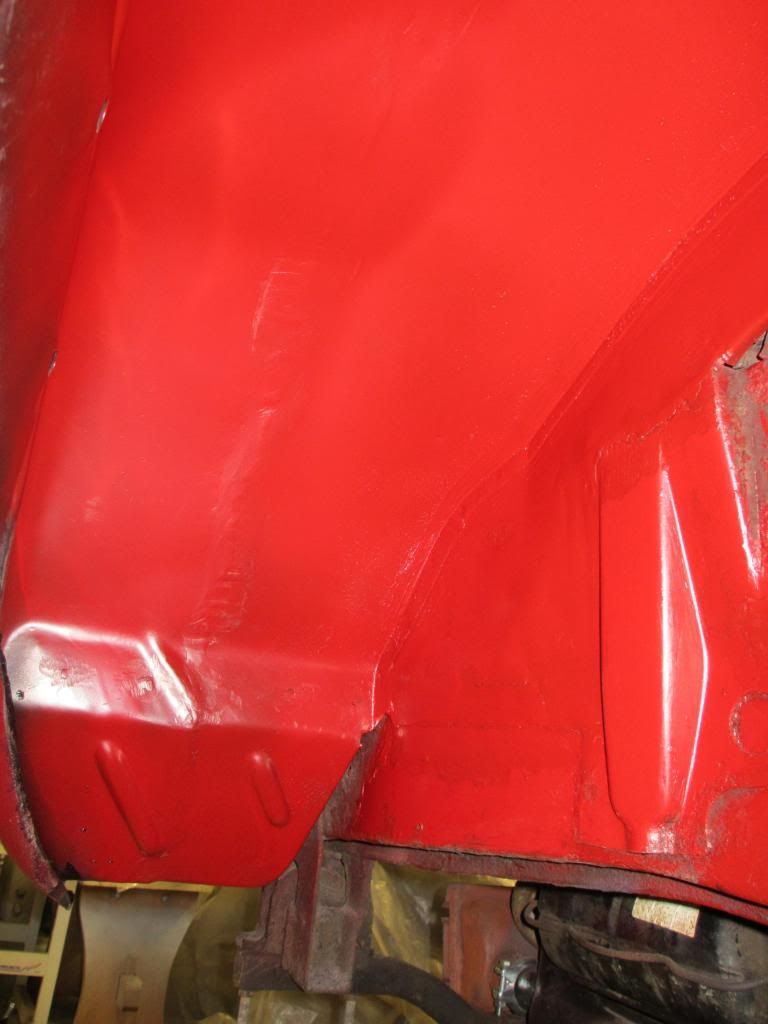
Now painted and ready to go on..!! 
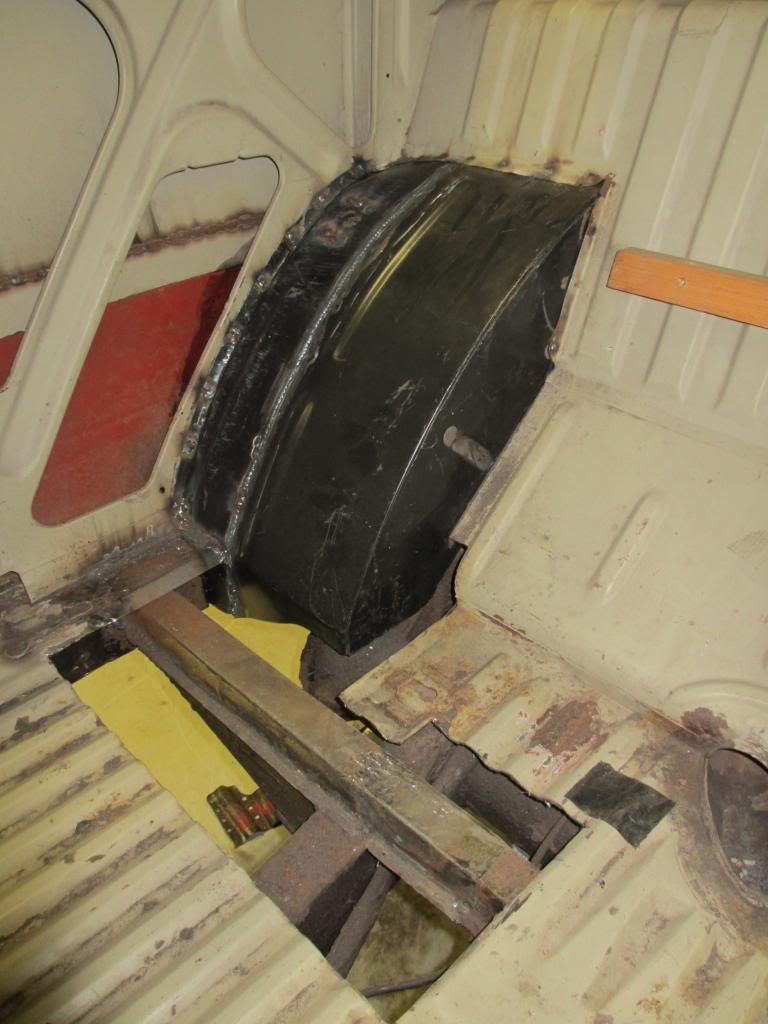
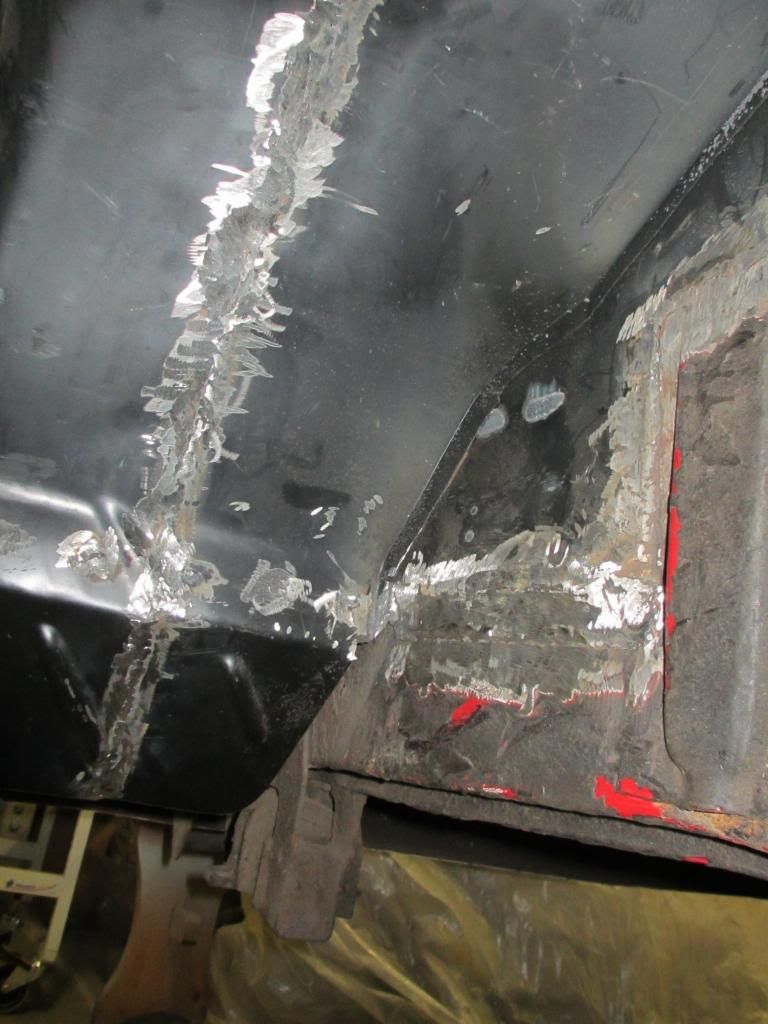
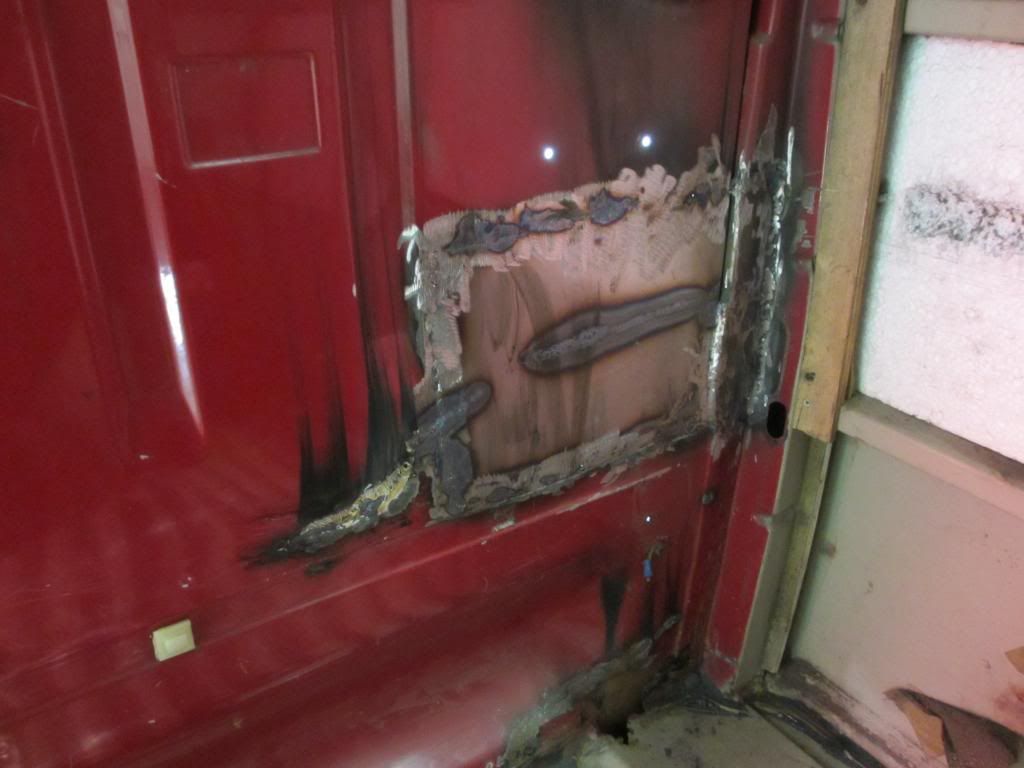
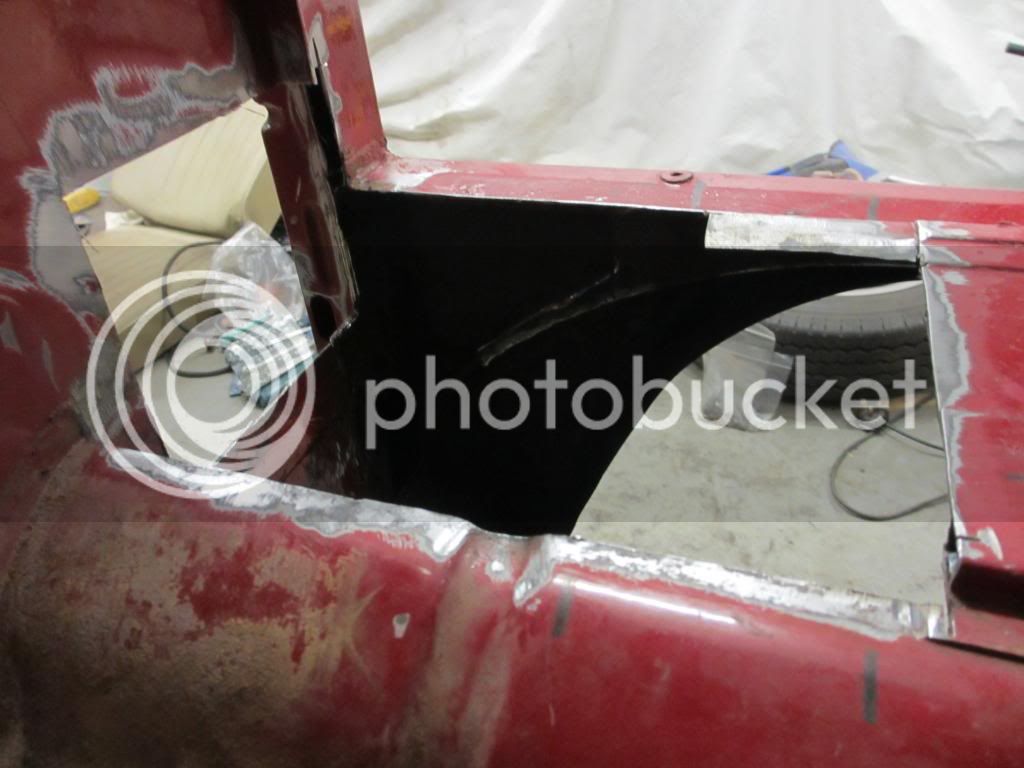
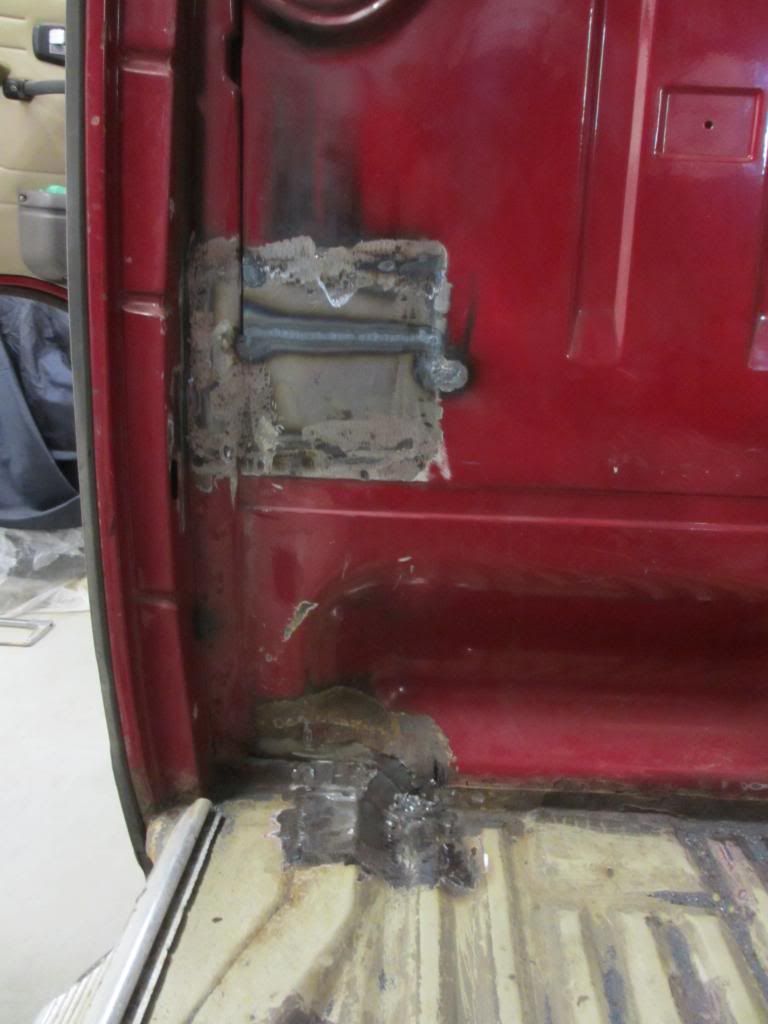
Also found a big patch on the left next to the rear right side rear bump stop bracket (which is coming off any how's) so investigated it a little..!?? :?:
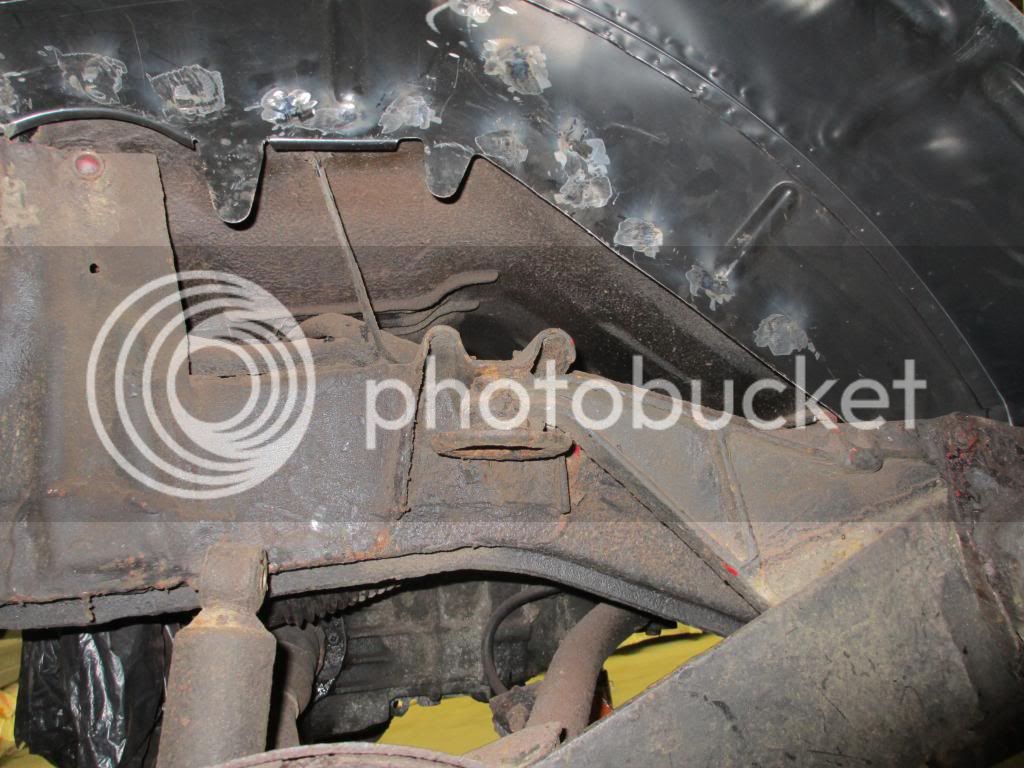
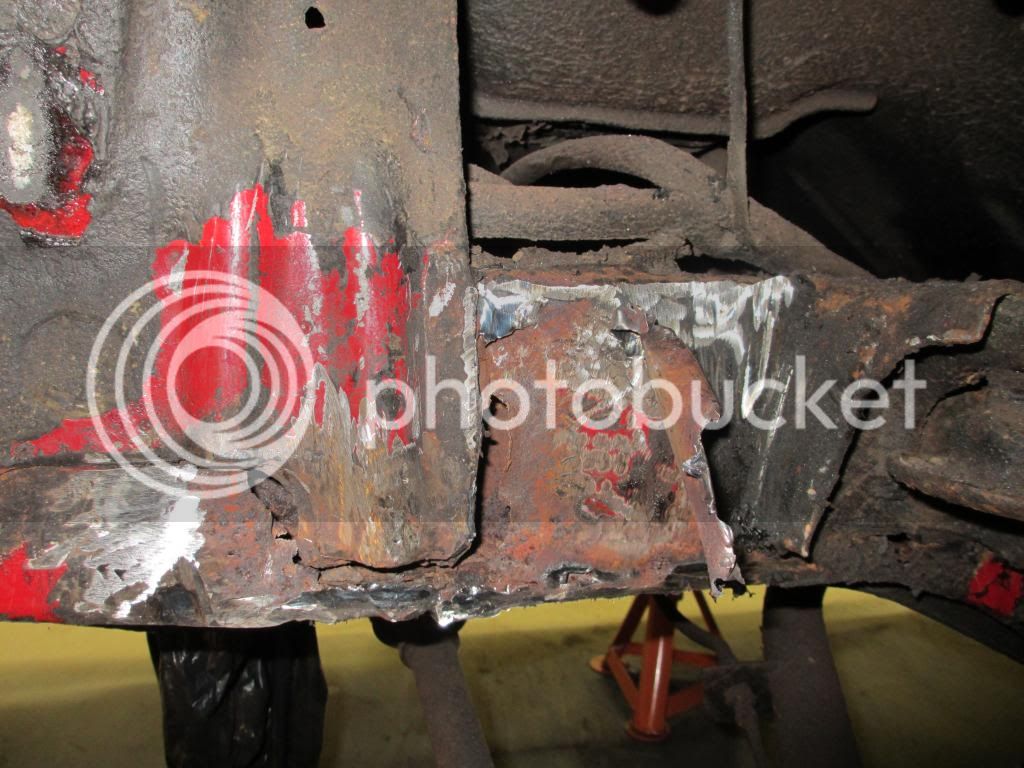
So that'll be a new piece of metal to go in then there to..!! :roll:

Also found a big patch on the left next to the rear right side rear bump stop bracket (which is coming off any how's) so investigated it a little..!?? :?:


So that'll be a new piece of metal to go in then there to..!! :roll:

Gwar72
Well-known member
- Joined
- Oct 21, 2011
- Messages
- 723
- Reaction score
- 0
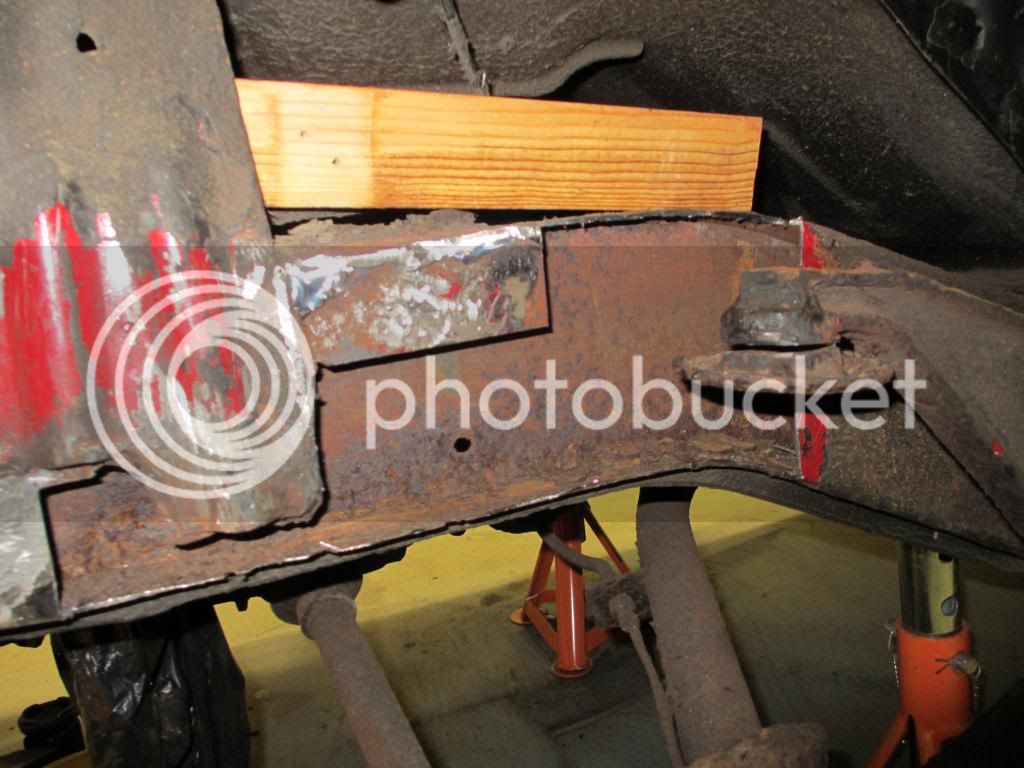
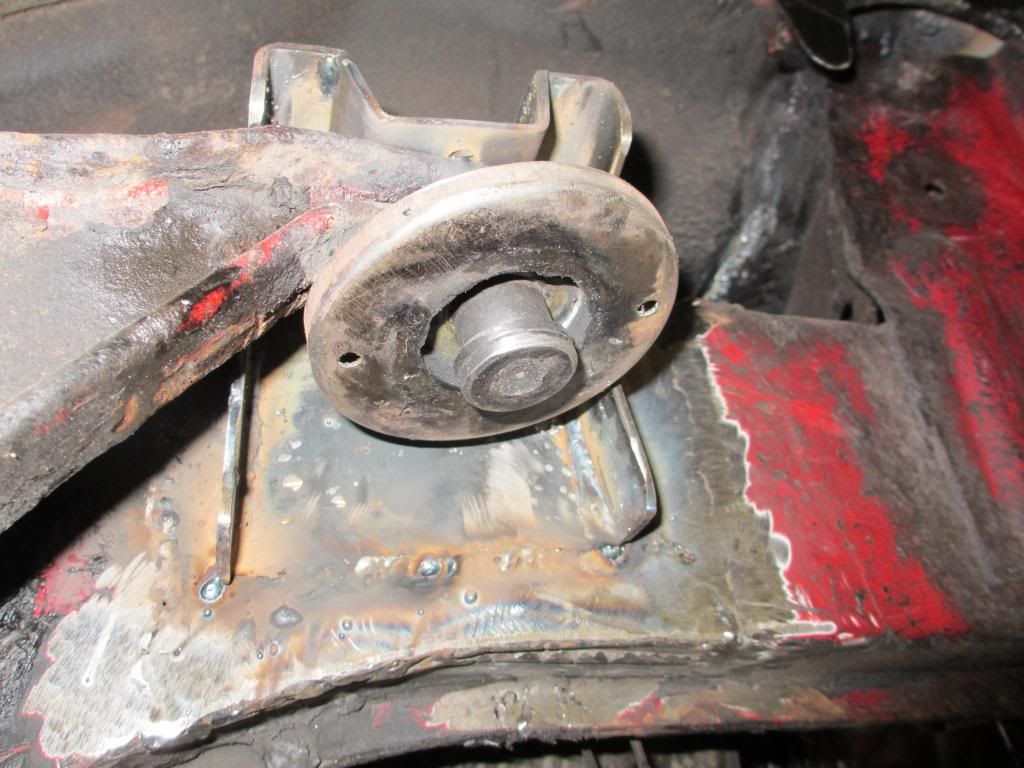
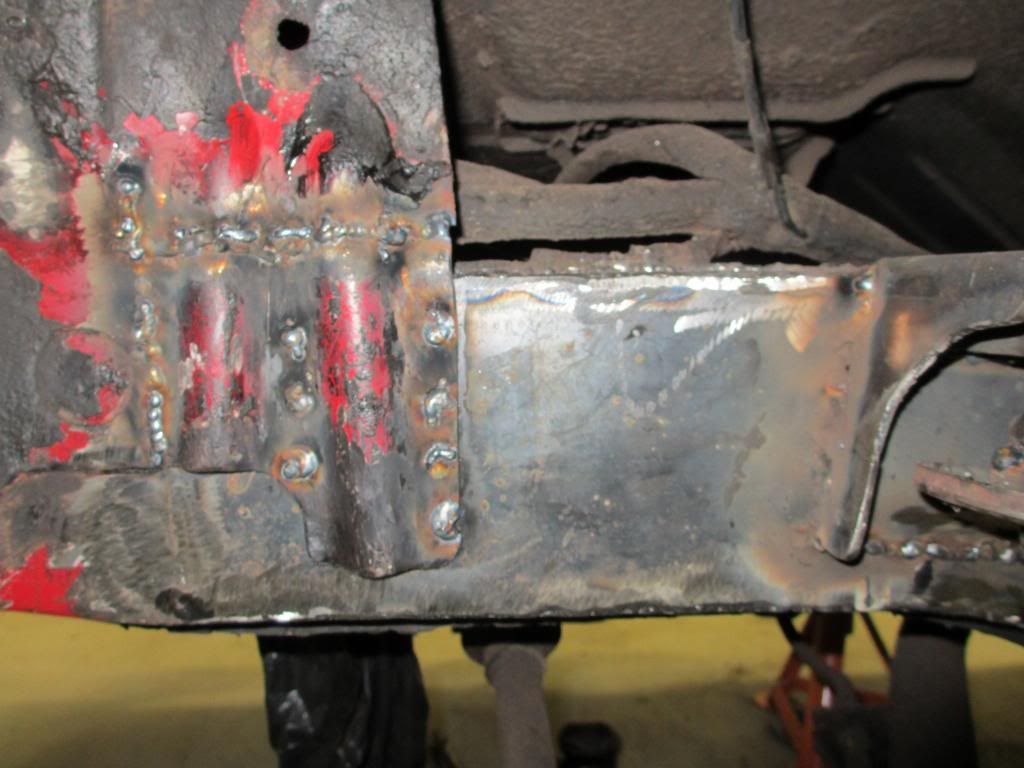
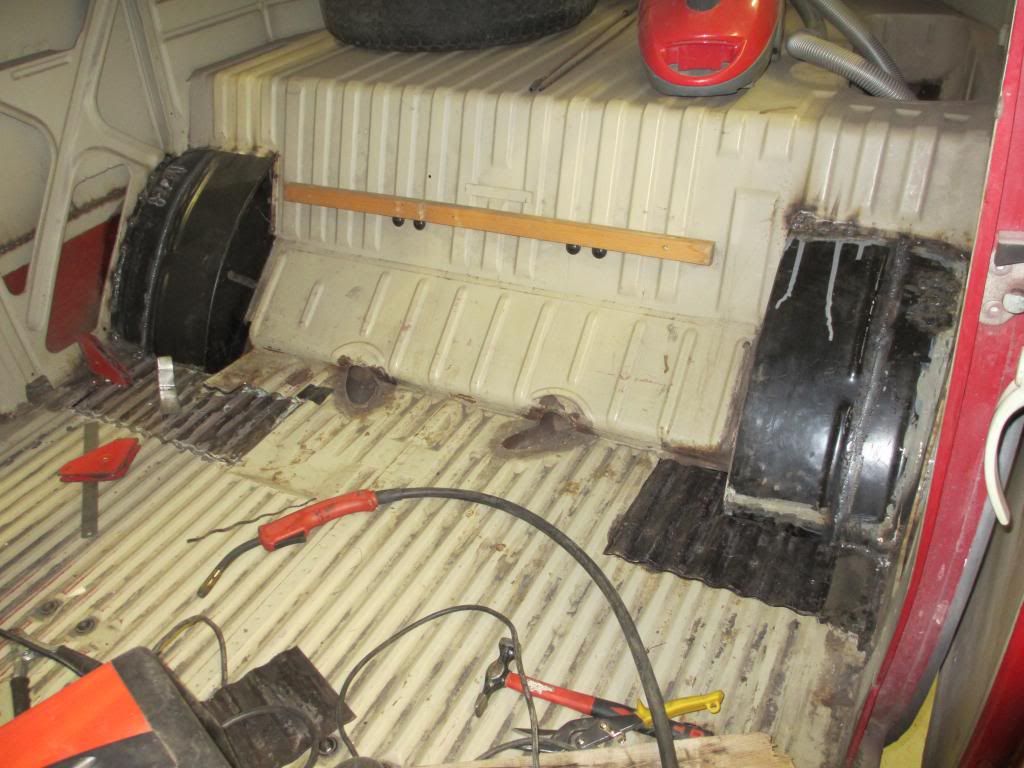
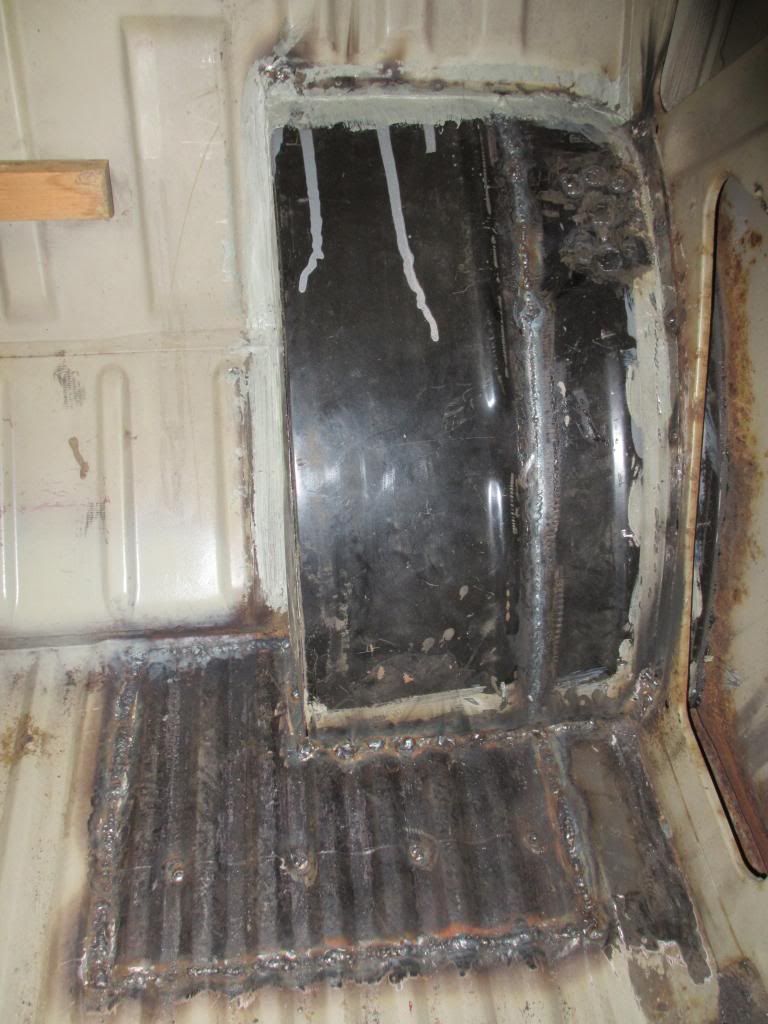
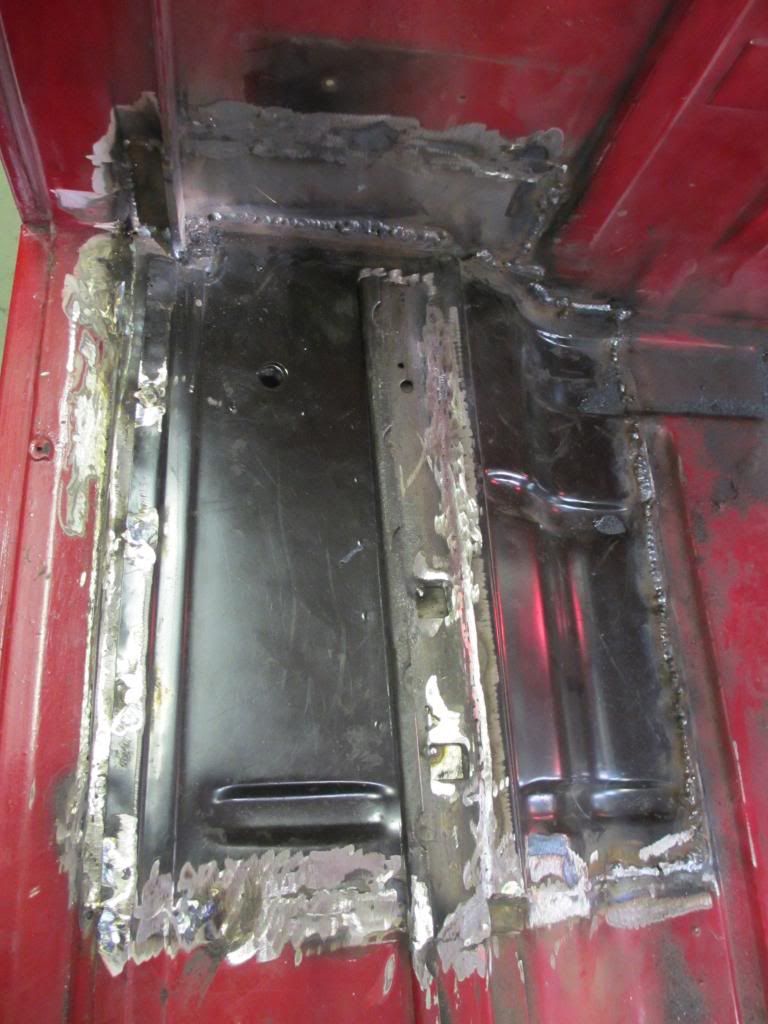
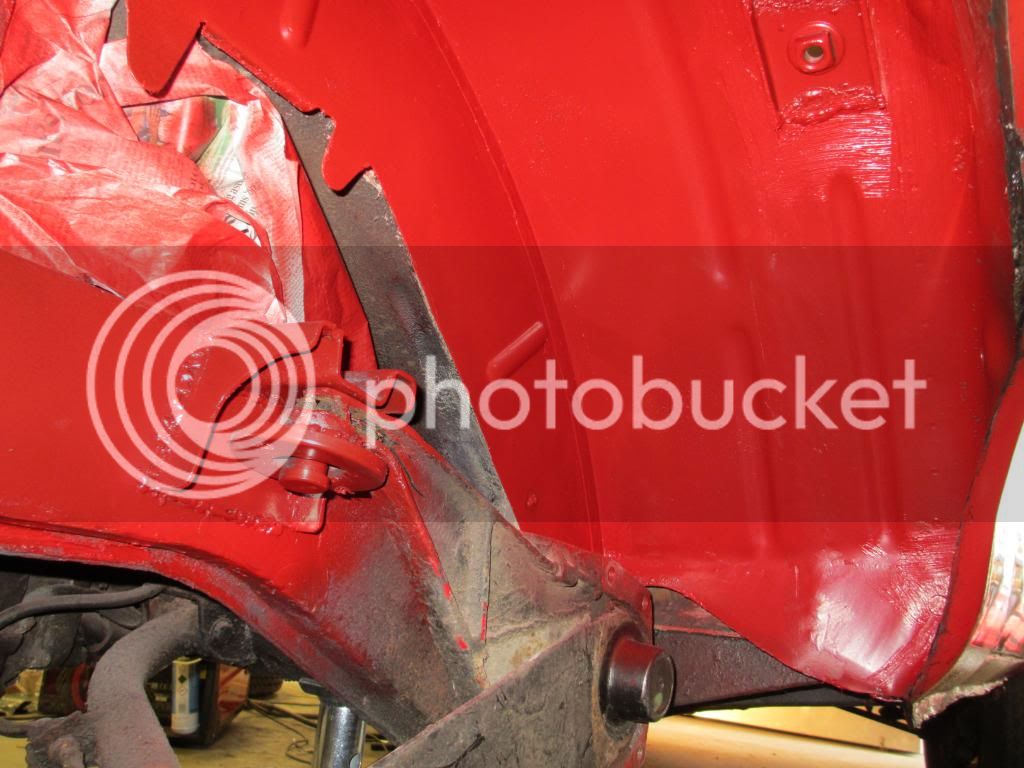
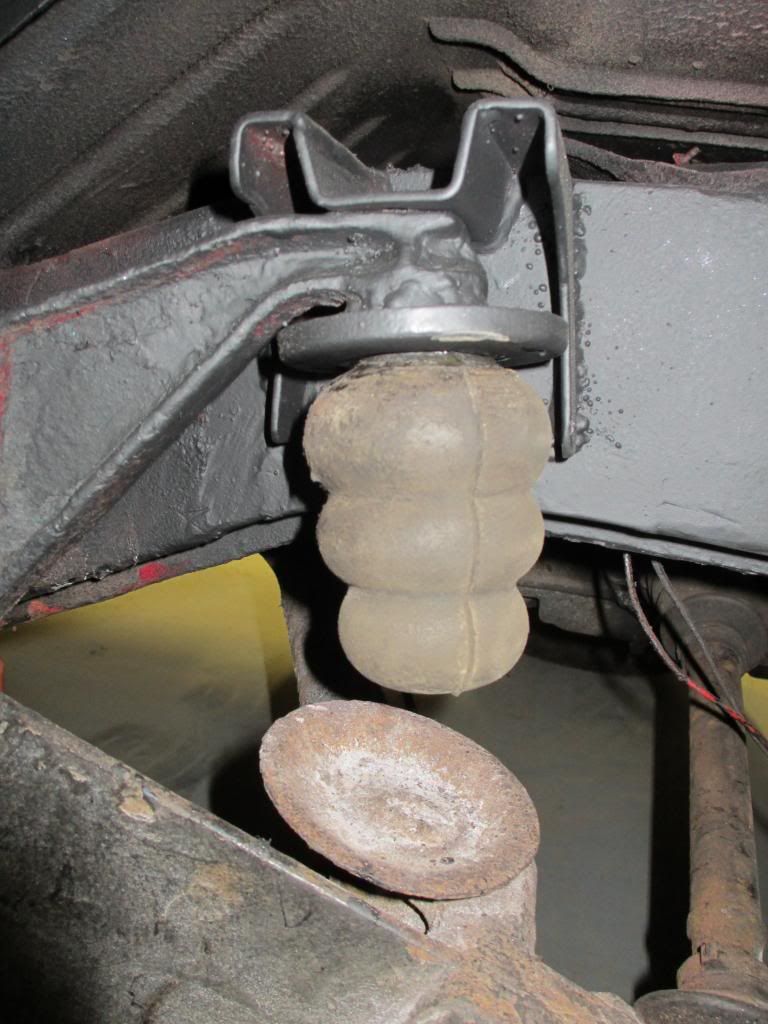
Still working on rear right bump stop area....
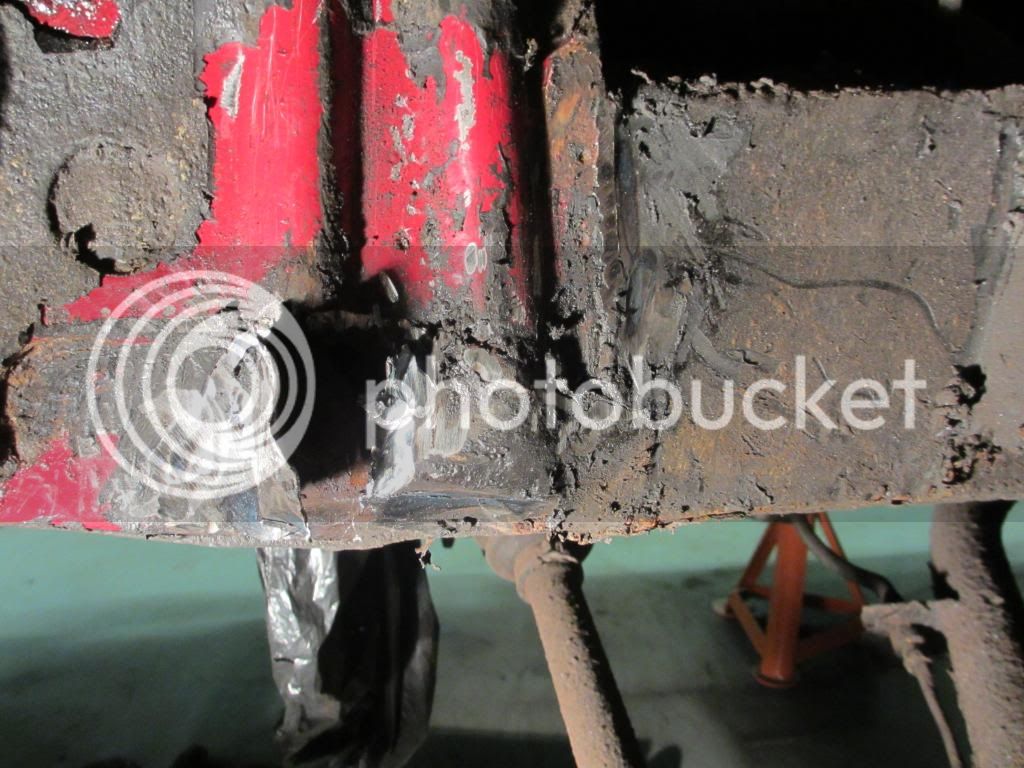
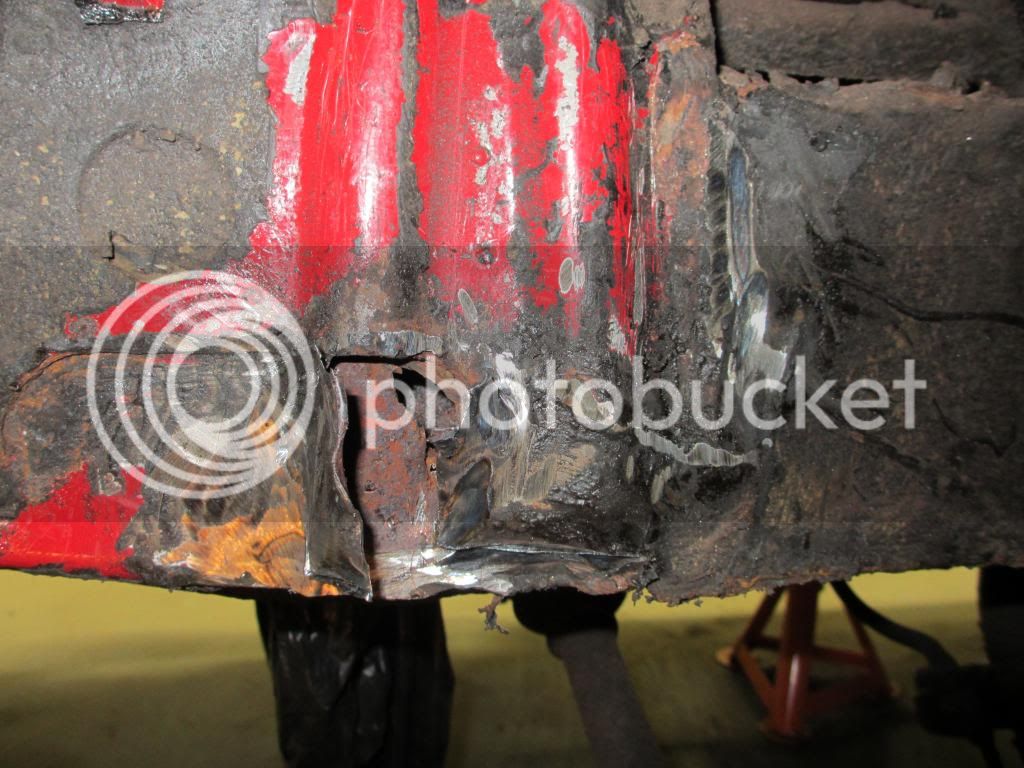
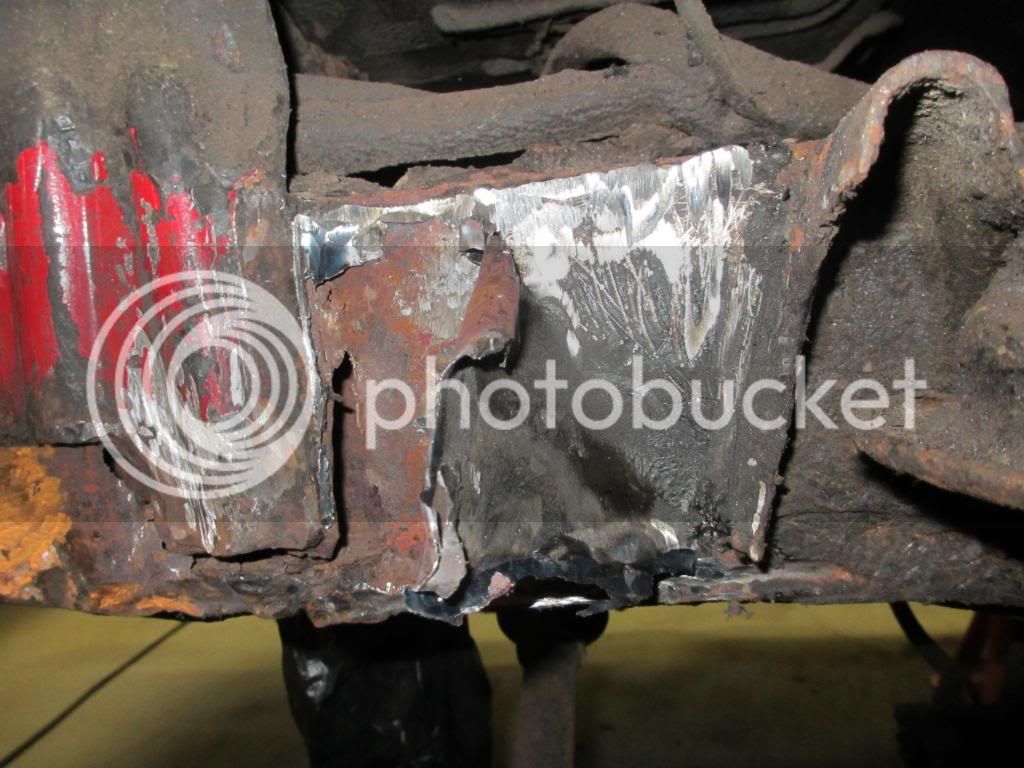
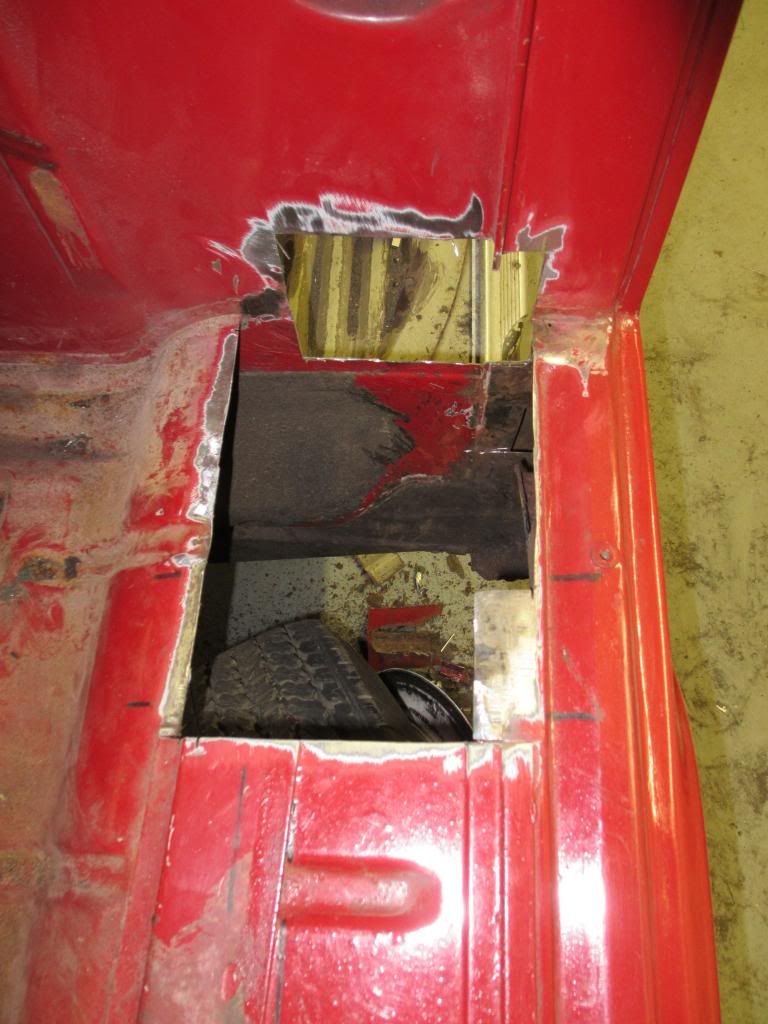
Got the patch off and then cut some old metal out.....!! Look at all the waffer rust that was trapped behind..!! :shock:
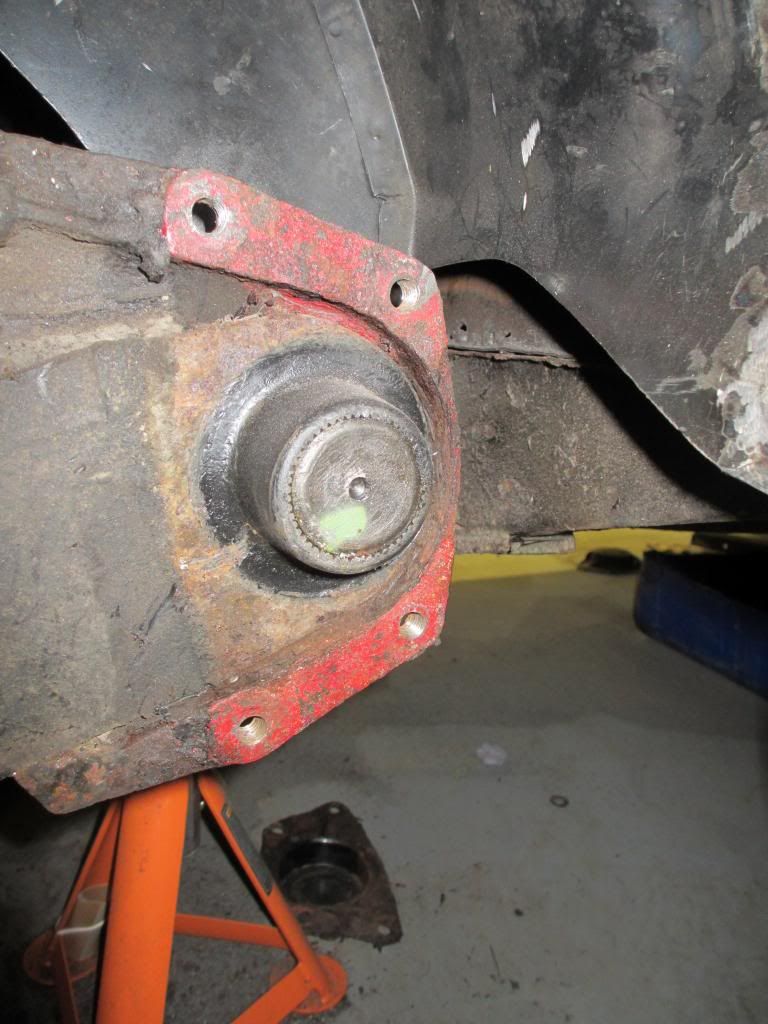
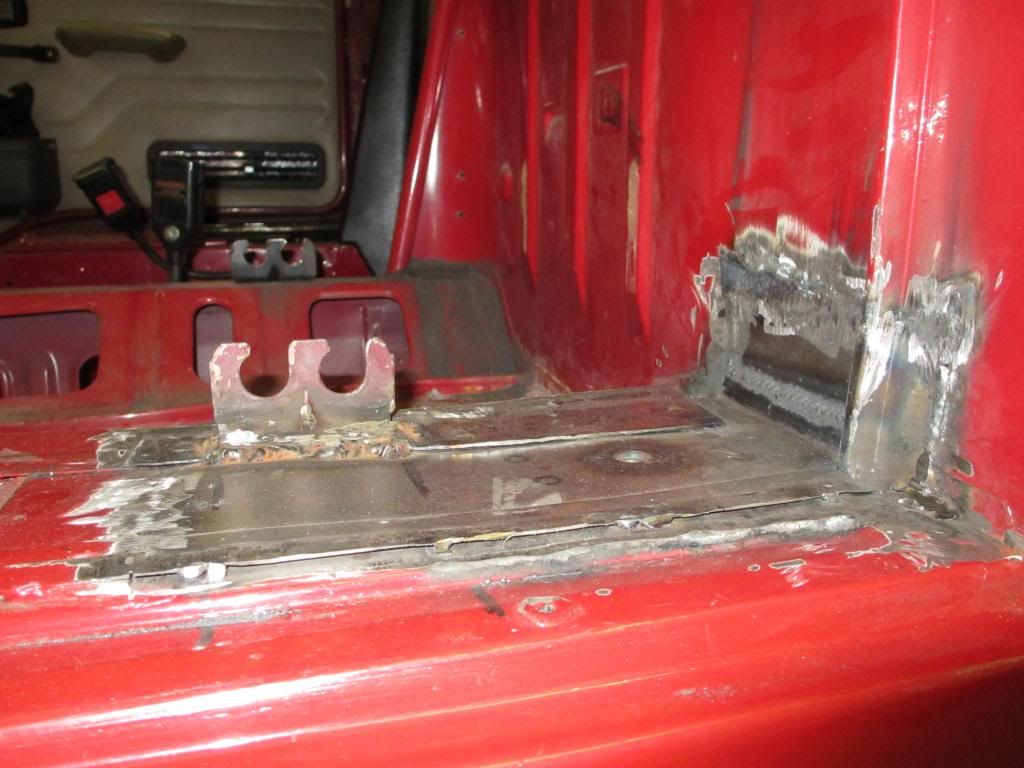
Bracket off and just cutting off bump stop holder..
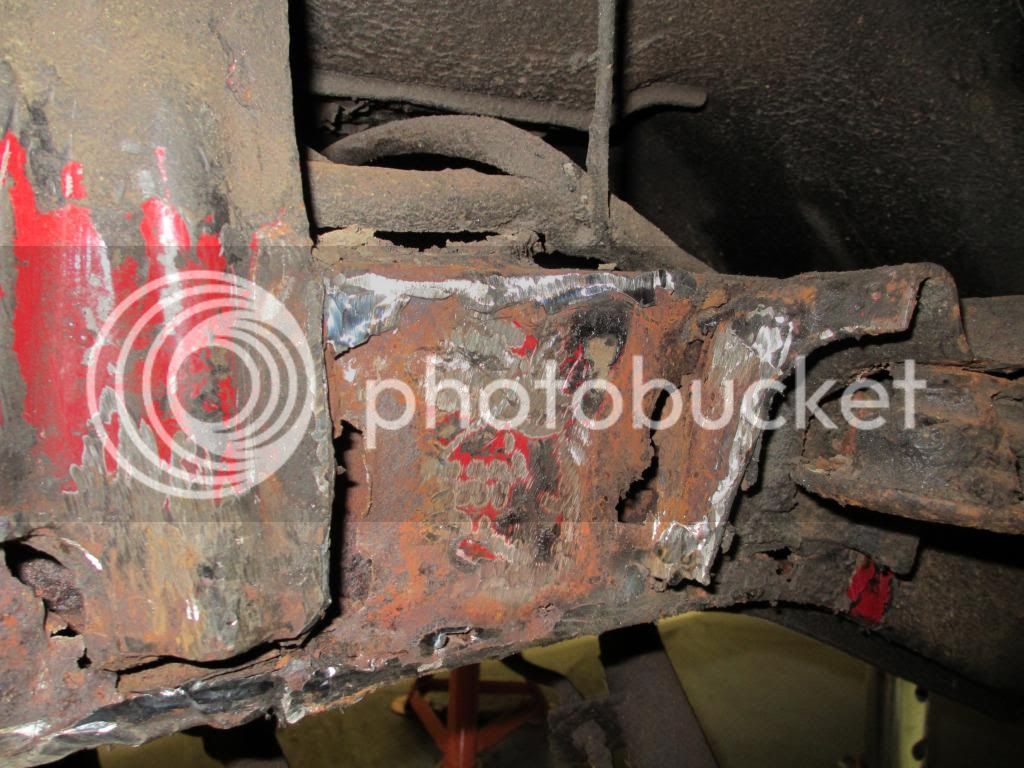
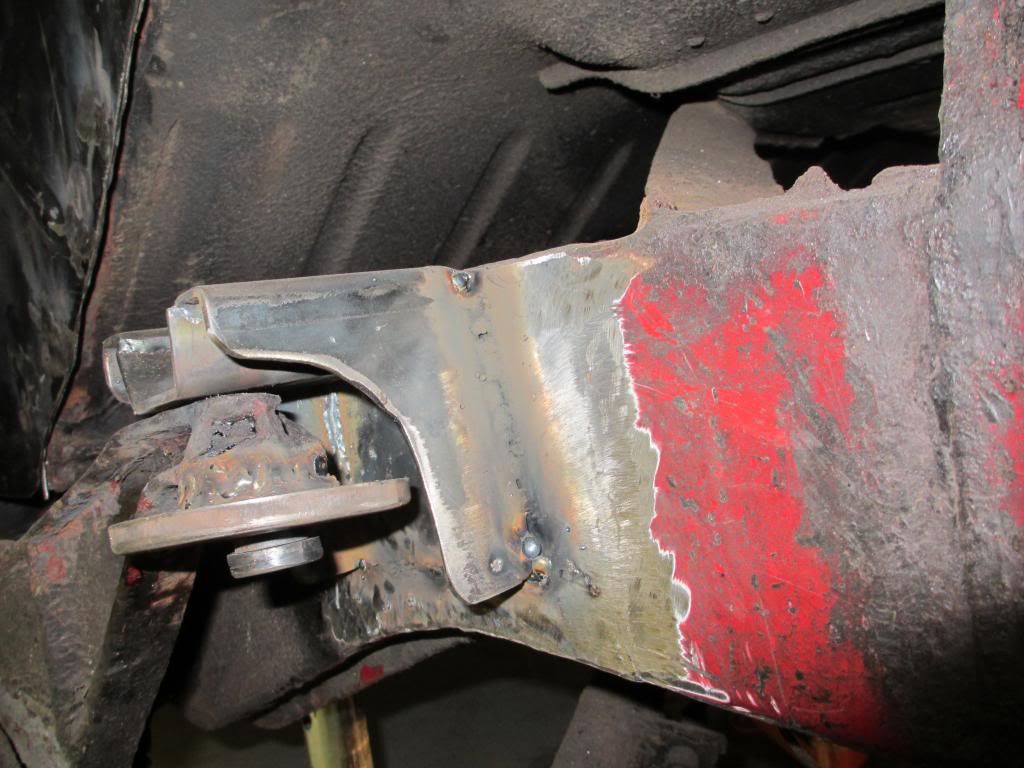
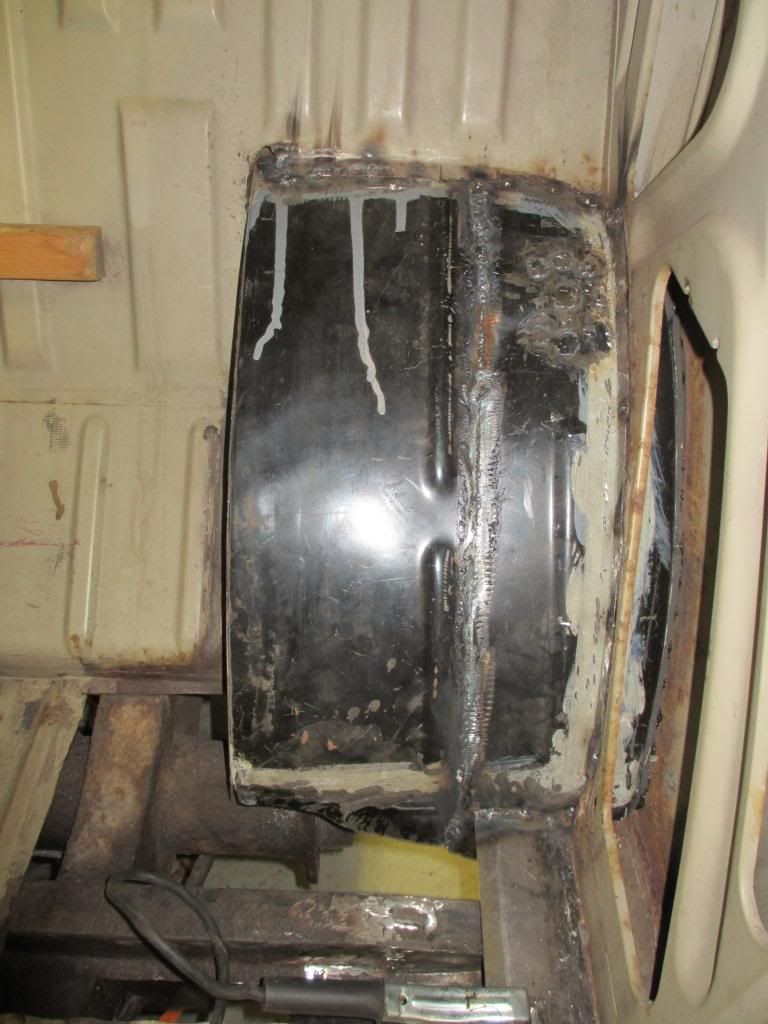
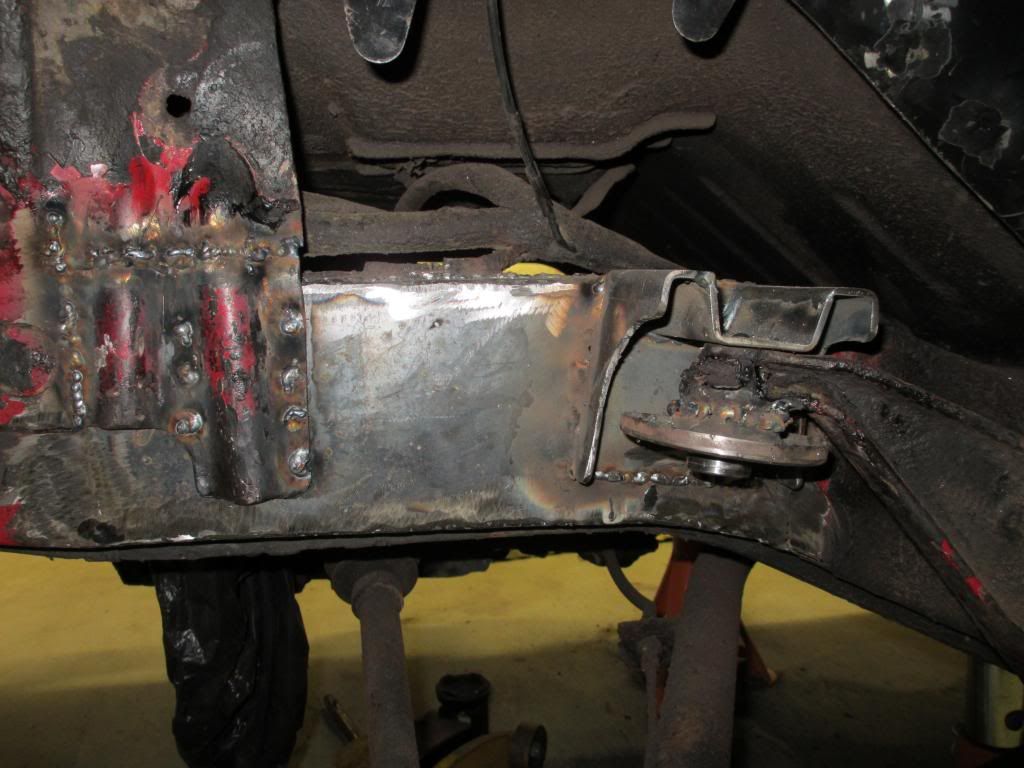
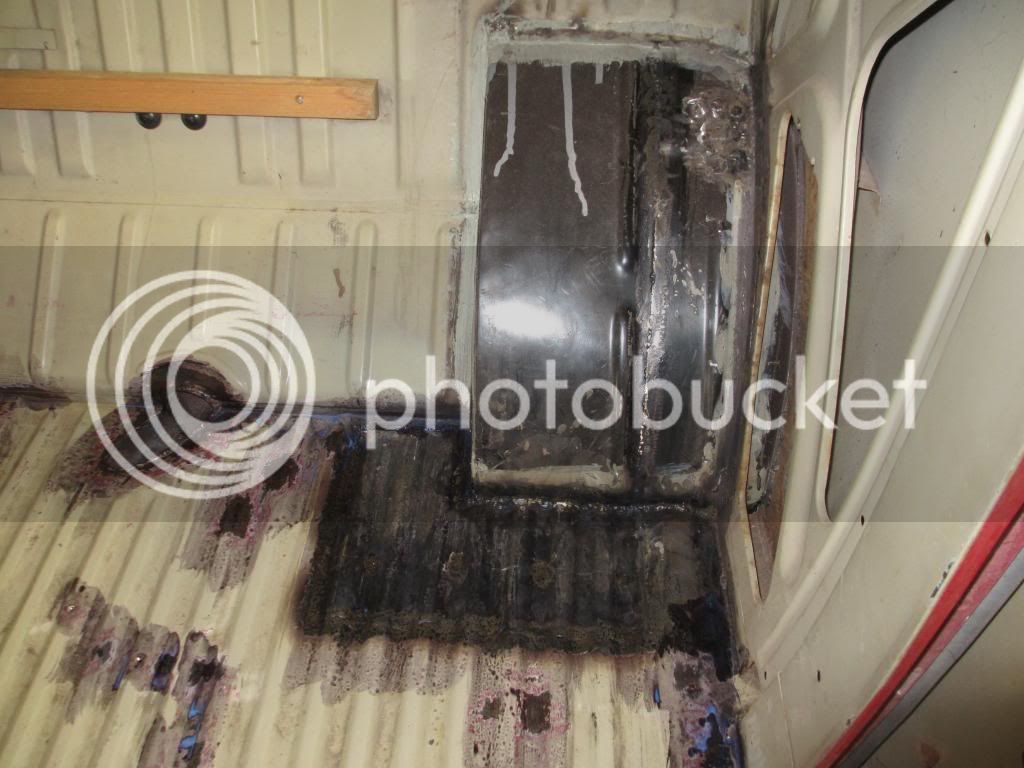
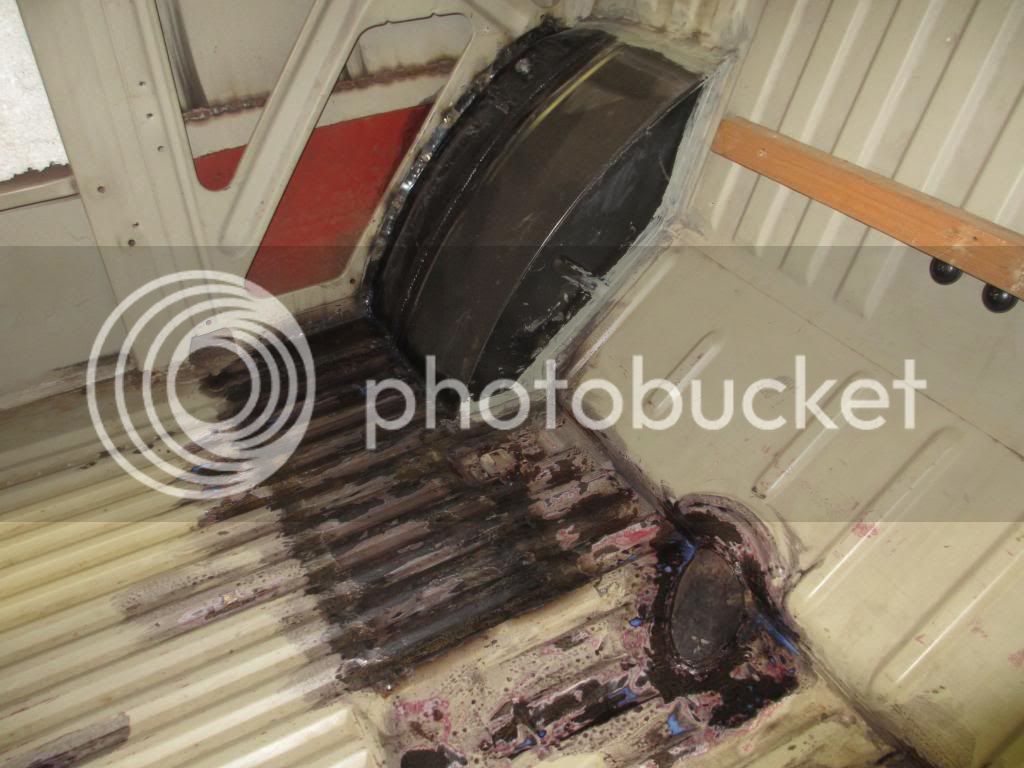
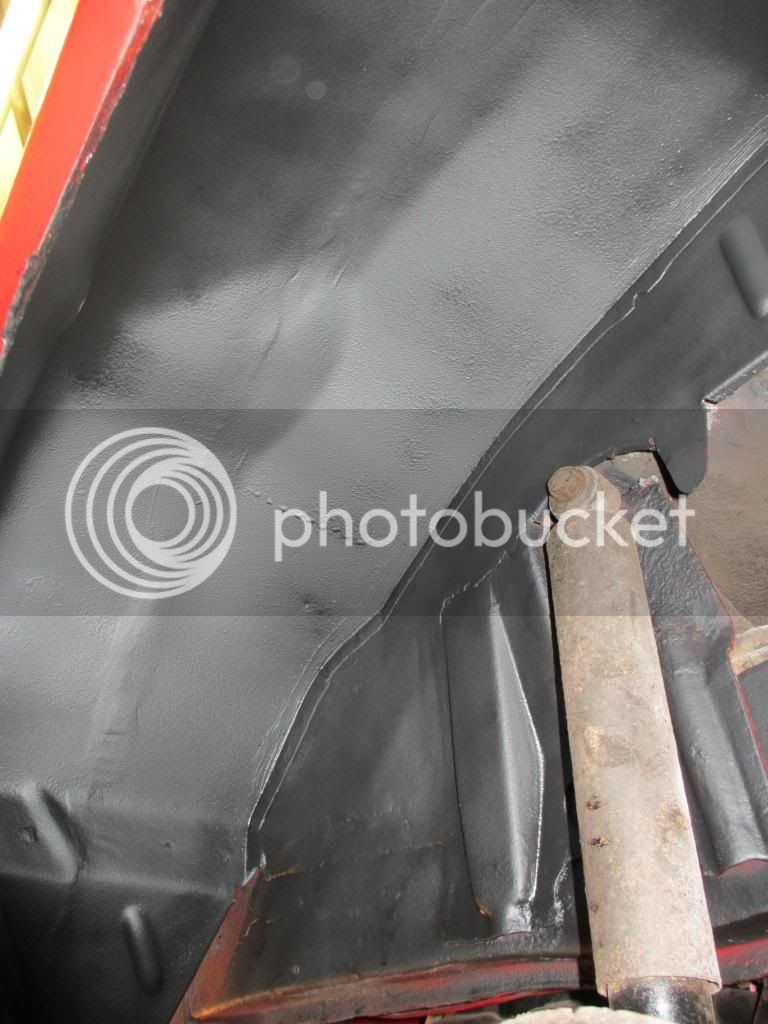
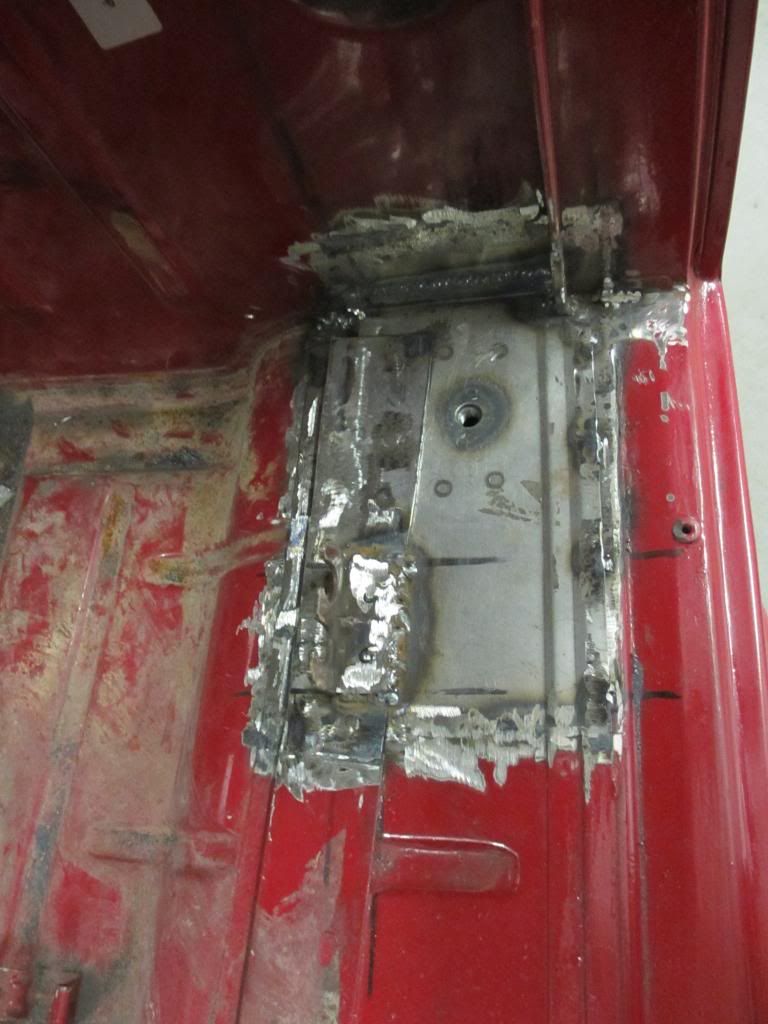
Then took some more photos of the left side all welded in....!! Well happy with it..!!
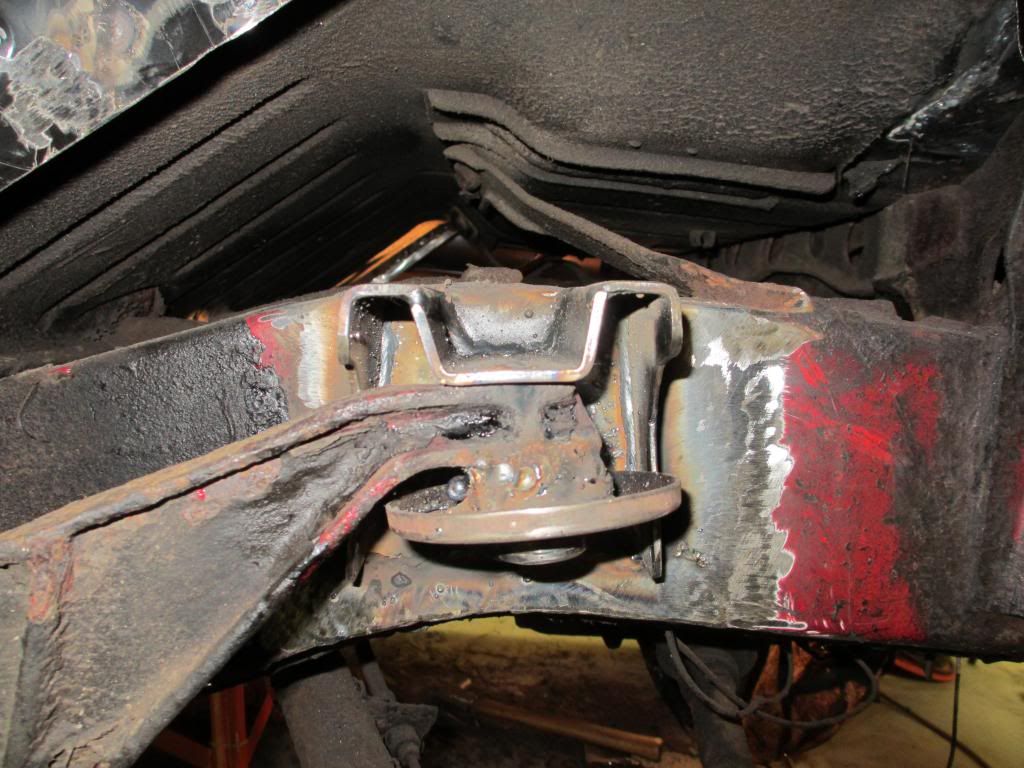
Drill hole in top of bracket to allow water to clear and not be trapped...
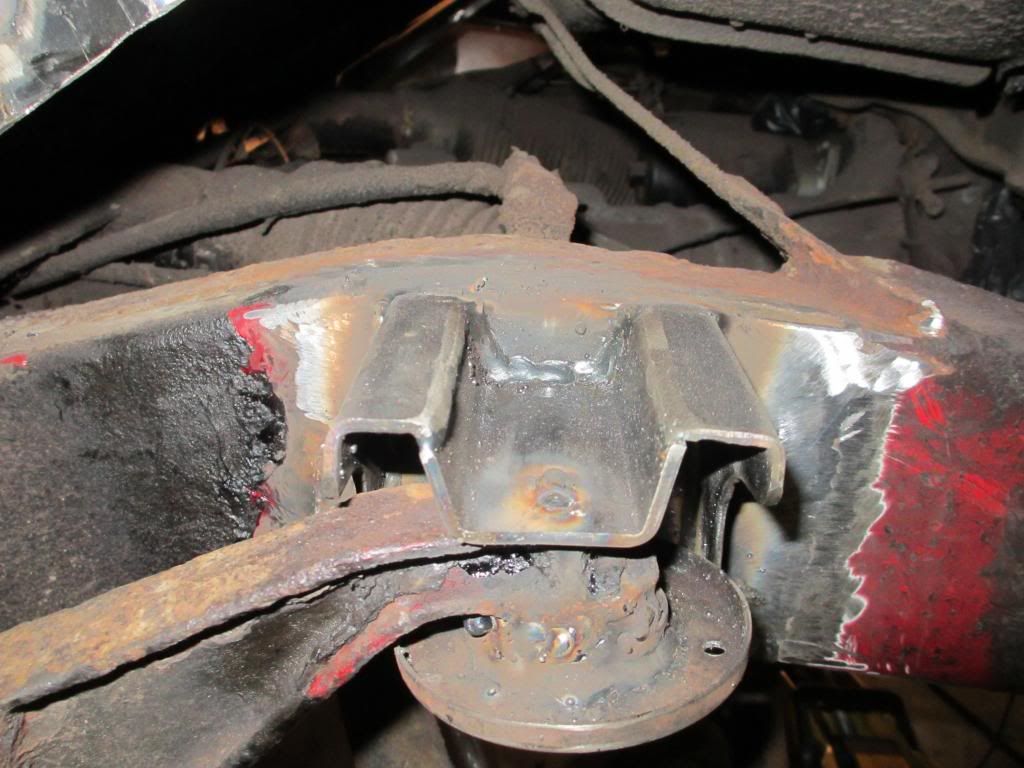
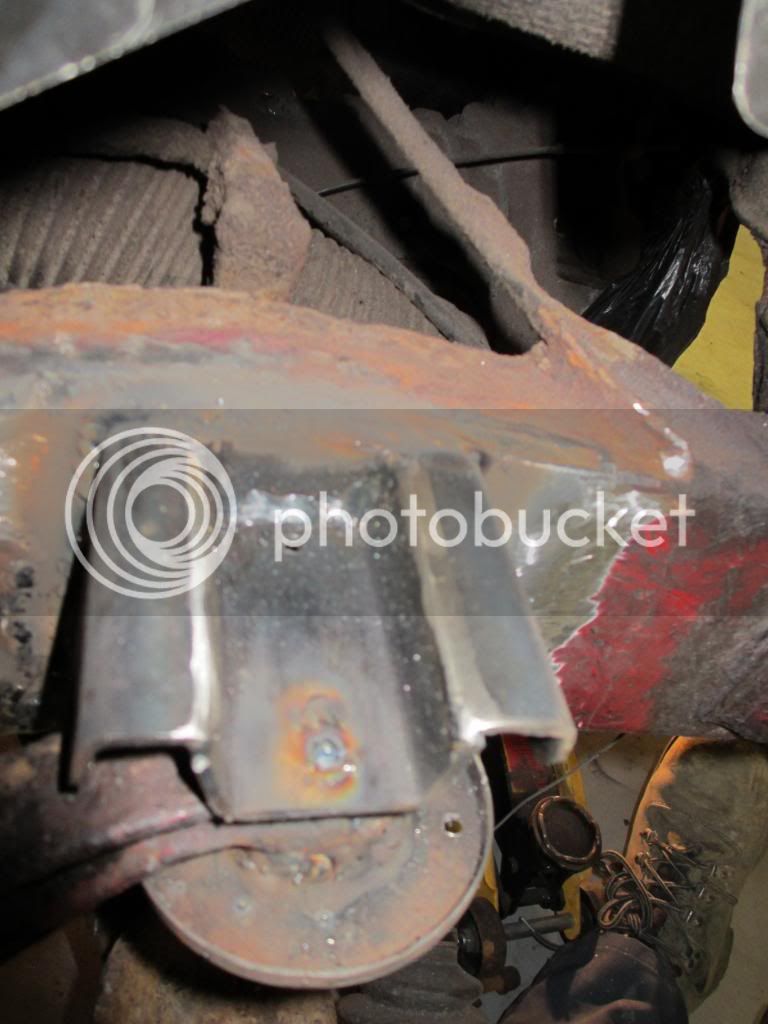
Also drilled holes in bump stop holder...

Got the patch off and then cut some old metal out.....!! Look at all the waffer rust that was trapped behind..!! :shock:

Bracket off and just cutting off bump stop holder..

Then took some more photos of the left side all welded in....!! Well happy with it..!!


Drill hole in top of bracket to allow water to clear and not be trapped...


Also drilled holes in bump stop holder...

Gwar72
Well-known member
- Joined
- Oct 21, 2011
- Messages
- 723
- Reaction score
- 0
A little up-date.......
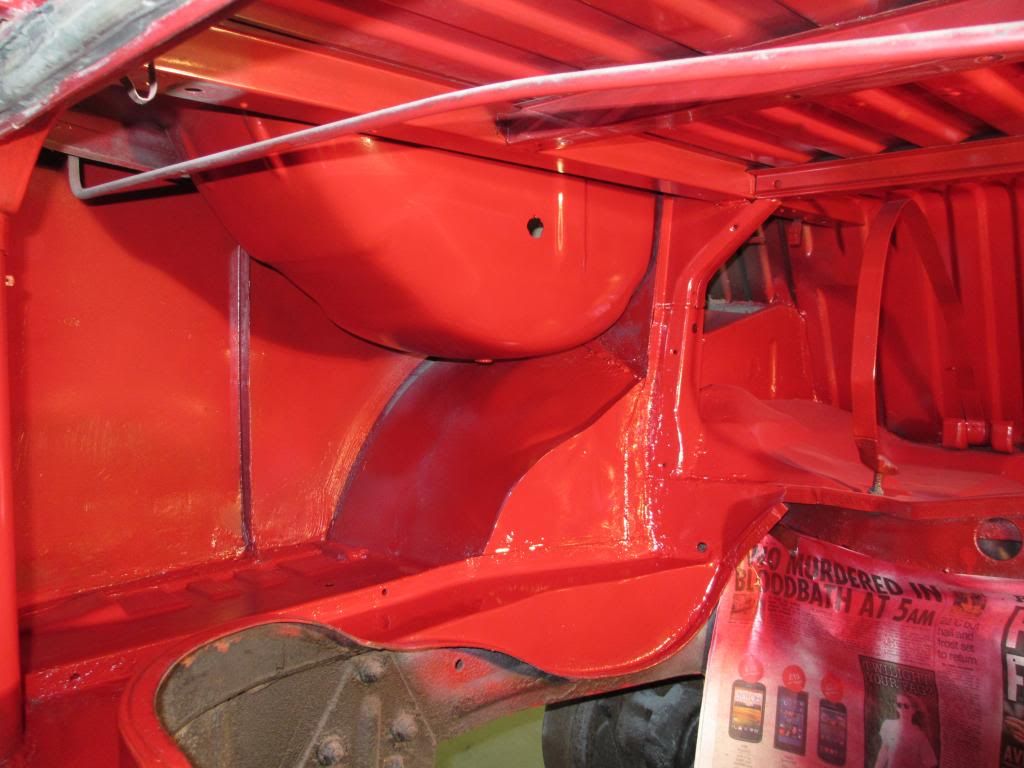
The rear ARCHES are IN.....!!!!!arty0009:
Seam welded back together.... :bliss:
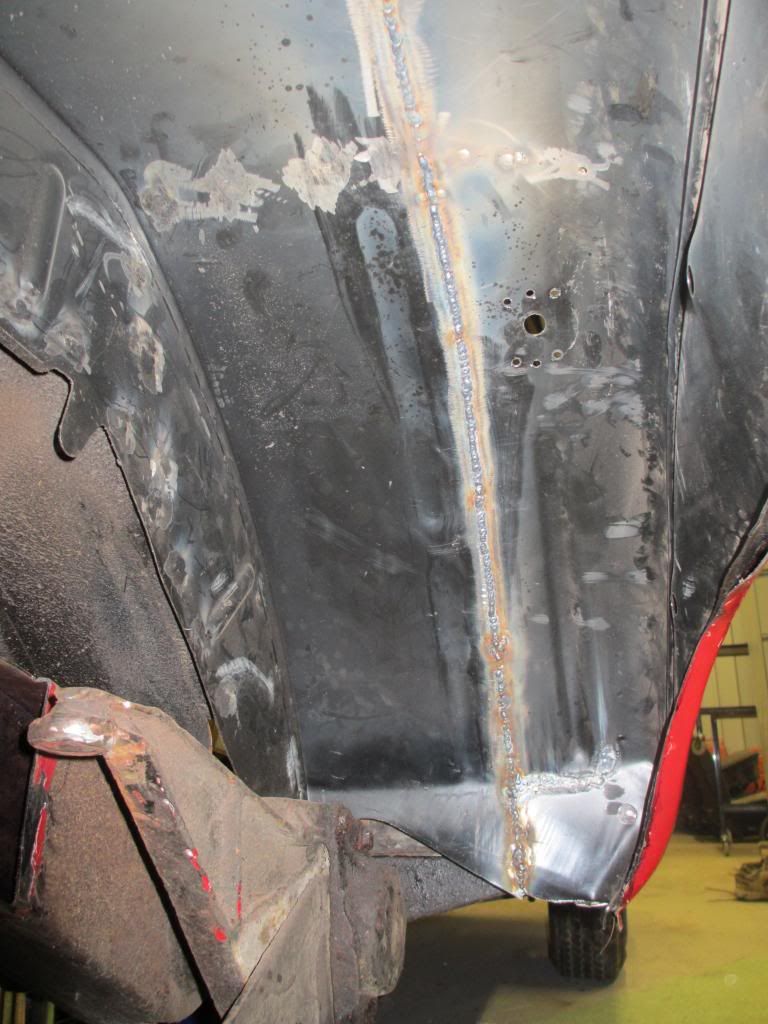
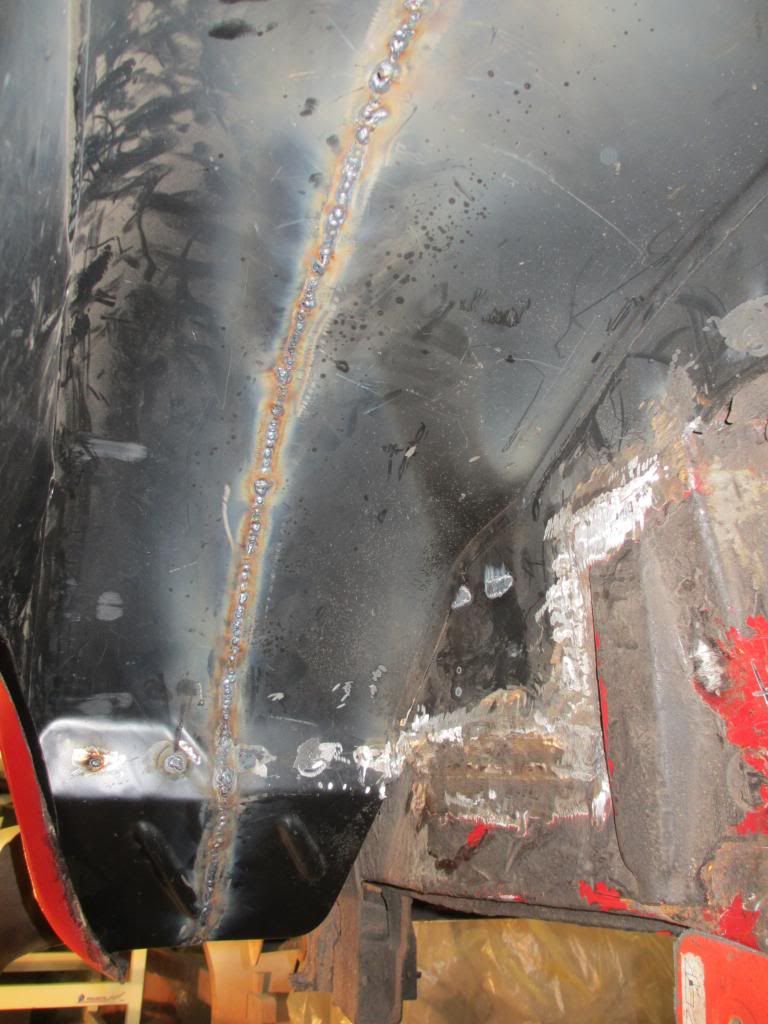
From inside....
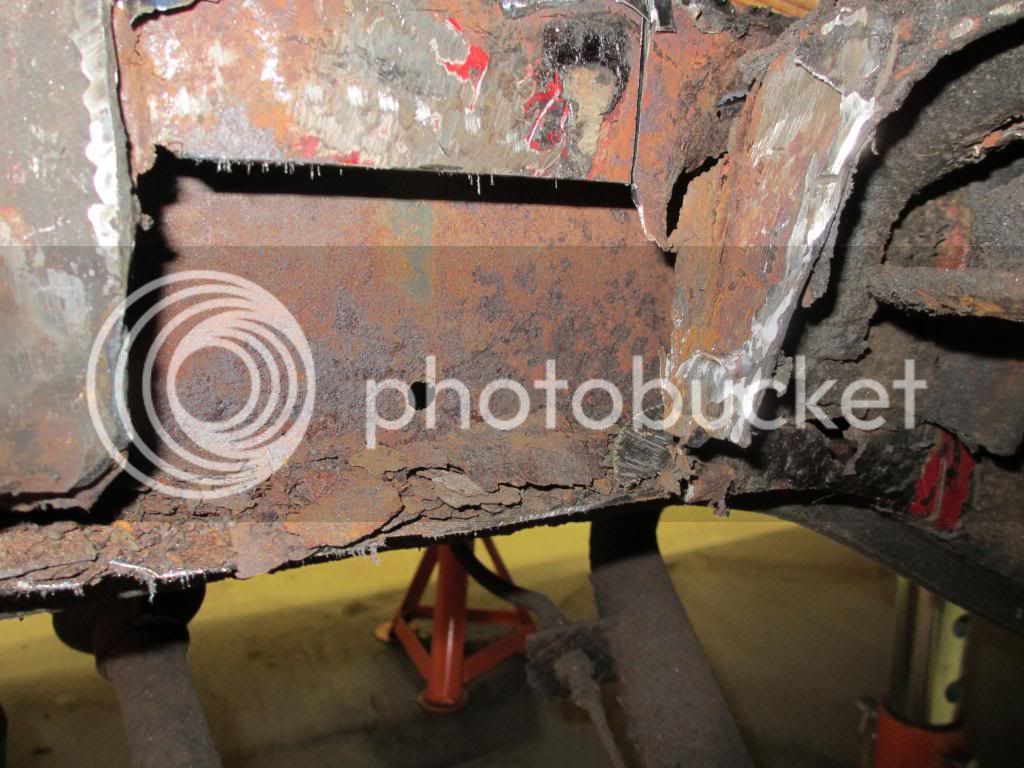
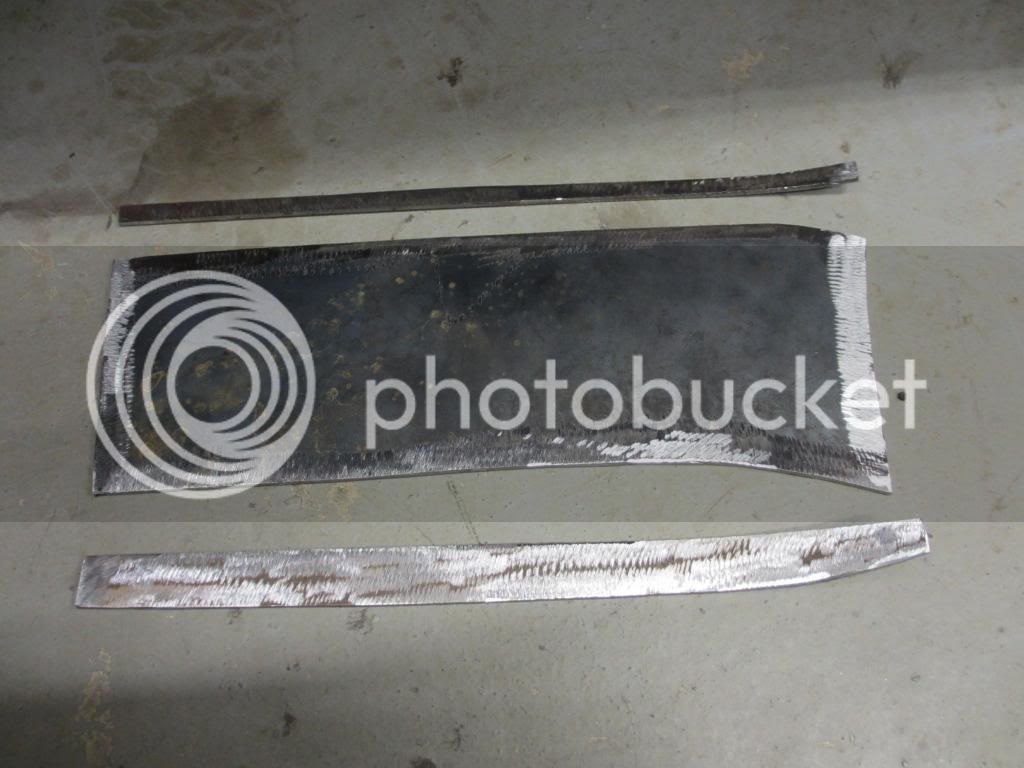
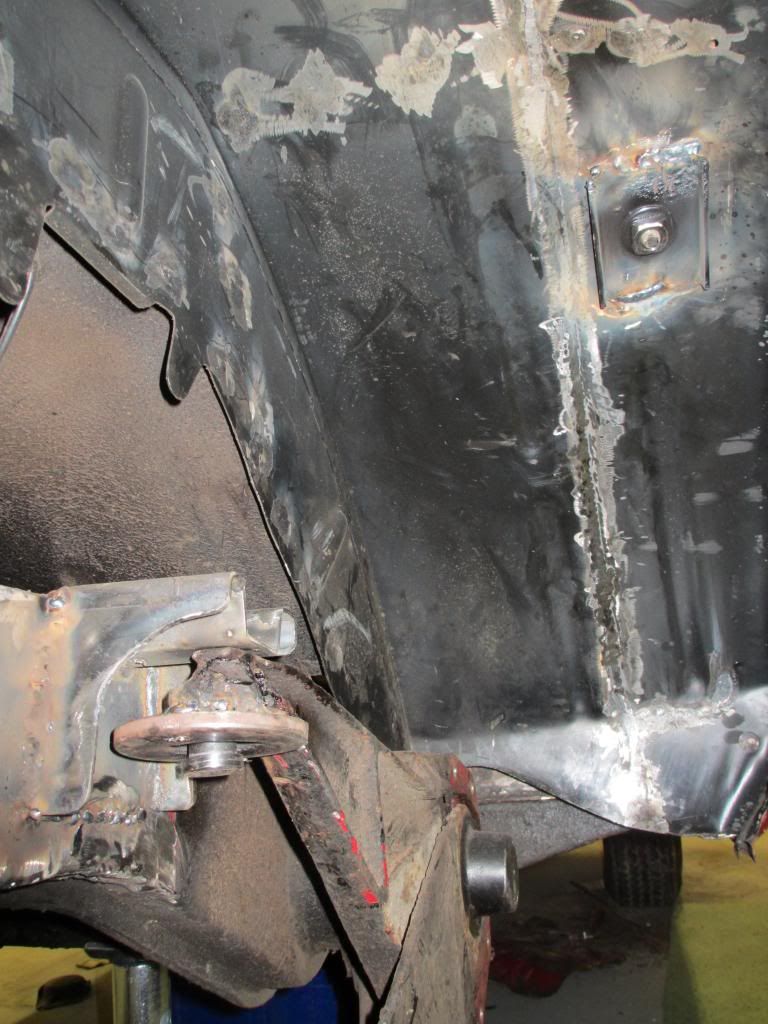
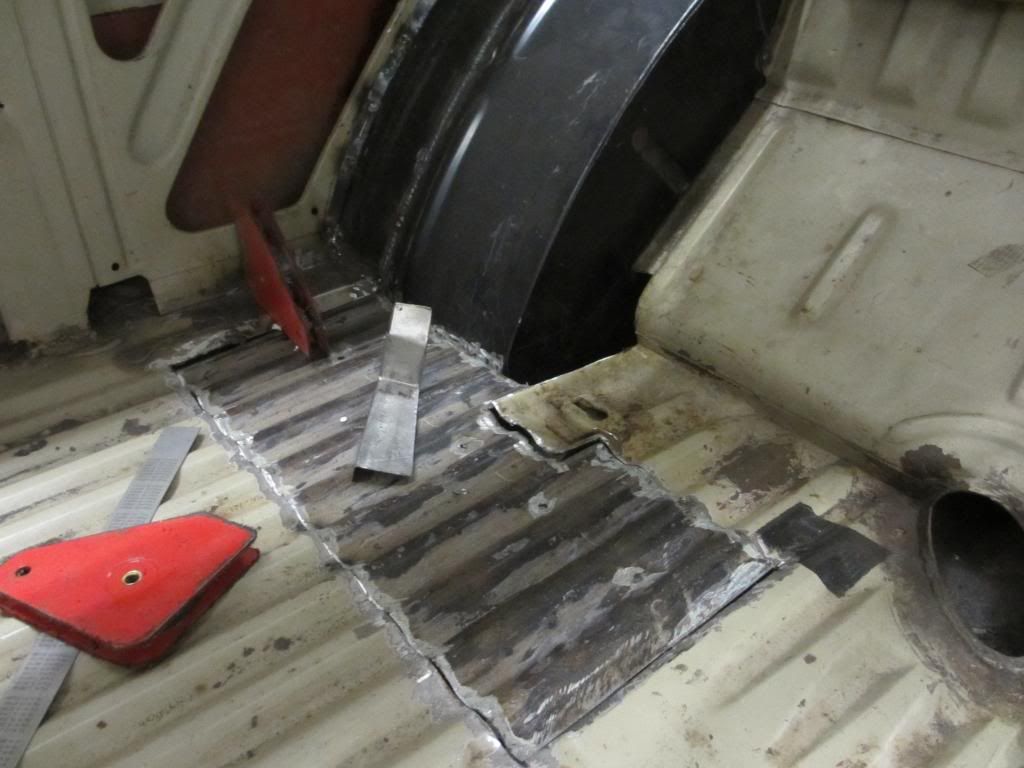
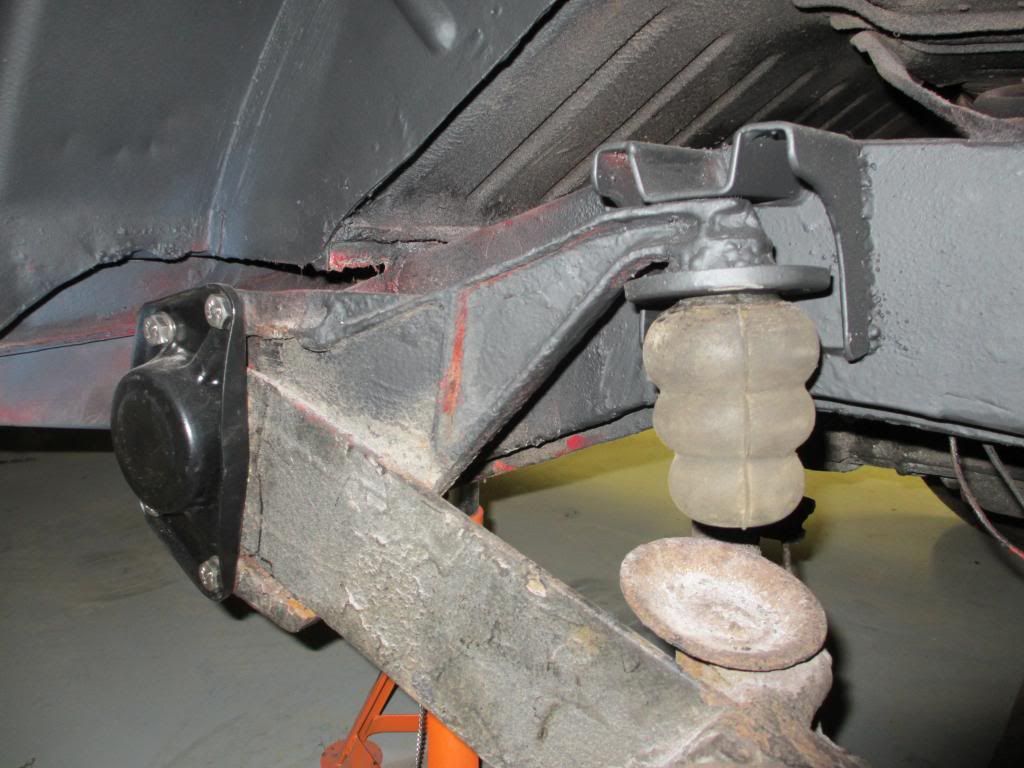
then had to cut some more out of the chassis by the bump stop bracket.... :shock:
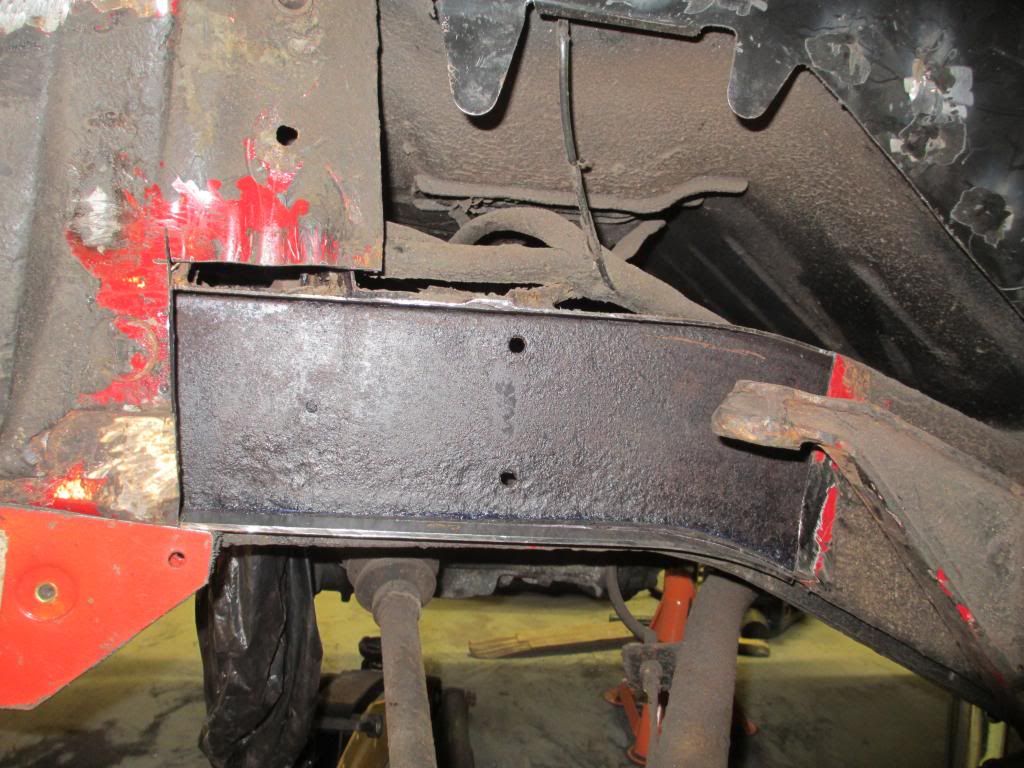
And then made up some new bits to weld back in...
A GOOD bank holiday weekend in the unit.....!!!!!arty0047:
The rear ARCHES are IN.....!!!!!
arty0009:Seam welded back together.... :bliss:


From inside....


then had to cut some more out of the chassis by the bump stop bracket.... :shock:

And then made up some new bits to weld back in...

A GOOD bank holiday weekend in the unit.....!!!!!
arty0047:Gwar72
Well-known member
- Joined
- Oct 21, 2011
- Messages
- 723
- Reaction score
- 0
It's good to be back EB site..!!! Missed you..!!! arty0046:
Well done jonny for sorting it all out...!!! :worship:
Now for some updates....
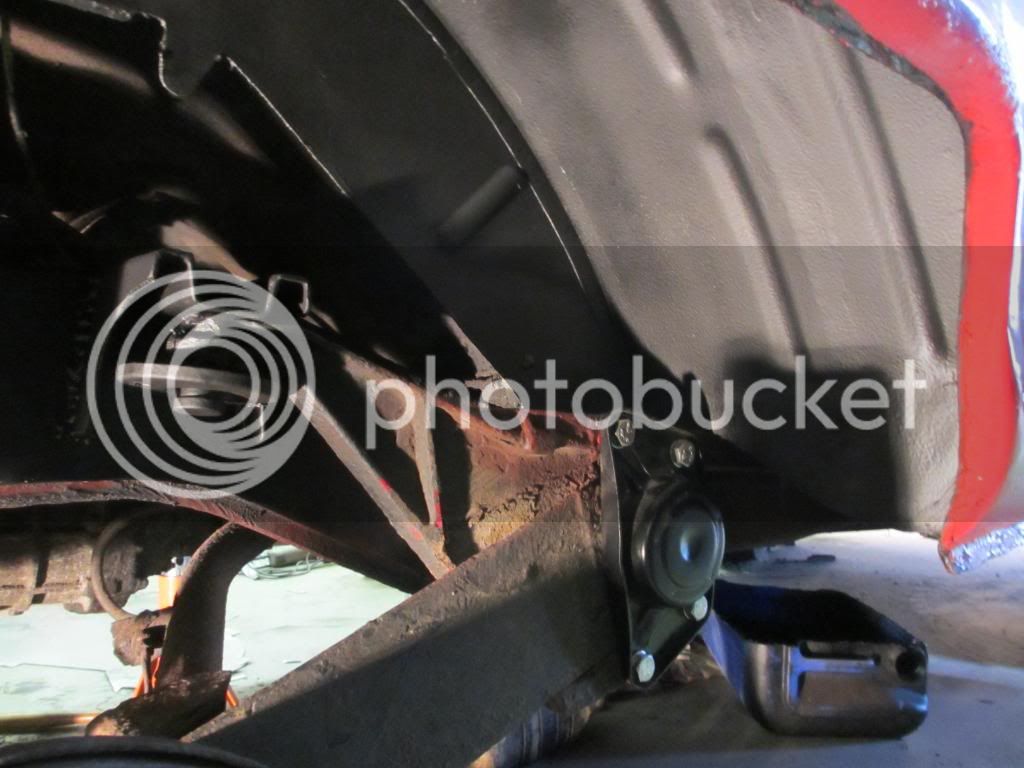
Chassis hole welded up......
Bump stop barcket on.....

Drivers side spring plate cover off...!! Only took me 3hrs..!! I had to cut off all 4 of the bolt heads and drill out and re-thread..!!! :roll:
Ground off welds along seam....
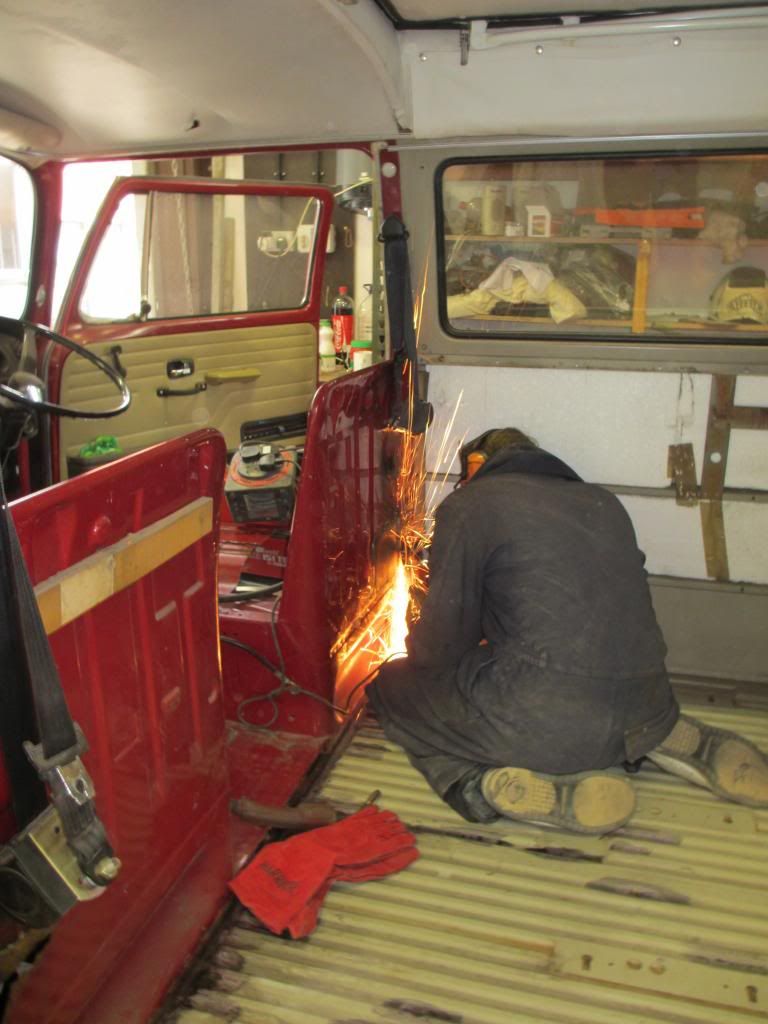
Then Stu started to get floor panels cut ready top go in..
Then he ran out of Gas (argon/Co2 that is!! :lol: ) so he did this to the drivers seat bulk head...!!! :shock:

arty0046:Well done jonny for sorting it all out...!!! :worship:
Now for some updates....
Chassis hole welded up......

Bump stop barcket on.....


Drivers side spring plate cover off...!! Only took me 3hrs..!! I had to cut off all 4 of the bolt heads and drill out and re-thread..!!! :roll:

Ground off welds along seam....


Then Stu started to get floor panels cut ready top go in..


Then he ran out of Gas (argon/Co2 that is!! :lol: ) so he did this to the drivers seat bulk head...!!! :shock:


$24.61
Airfix Quickbuild Volkswagen Camper Van Red Brick Building Plastic Model Kit J6017, Multicolour
Amazon Global Store UK


$9.37
Empi 4429 Ivory Sun Visor Clips for Vw Bug 1965-1967/ Vw Bus 1968-1979, Pair
MOORE PARTS SOURCE

$10.00
Volkswagen Genuine VW Driver Gear VW Logo Specifications T-Shirt Tee - X-Large - Black
wolframitersqga

$41.88
$46.95
Billet Window Crank, for All Years VW Beetle, Pair, Compatible with Dune Buggy
✅ Dune Buggy Warehouse


$9.94
$10.95
Empi 00-4428-B VW Bug, Beetle, Sun Visor Clips, Type 1, 68-79, Black, Pair
MOORE PARTS SOURCE


Gwar72
Well-known member
- Joined
- Oct 21, 2011
- Messages
- 723
- Reaction score
- 0
Cheers Nickj..!!
Yours is coming along well to..!! 8)
New edge in.....
More metal to go in....
Panels cut..
Rear floor sections in..

Welds ground down and a liberal dose of Kurust..!!
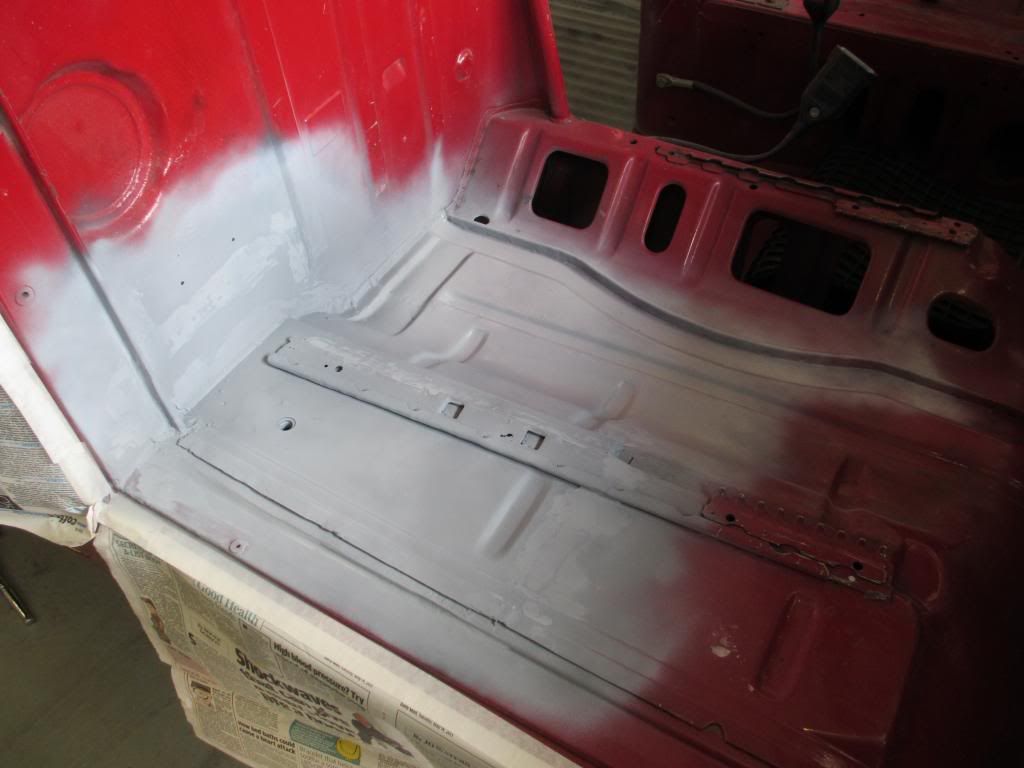
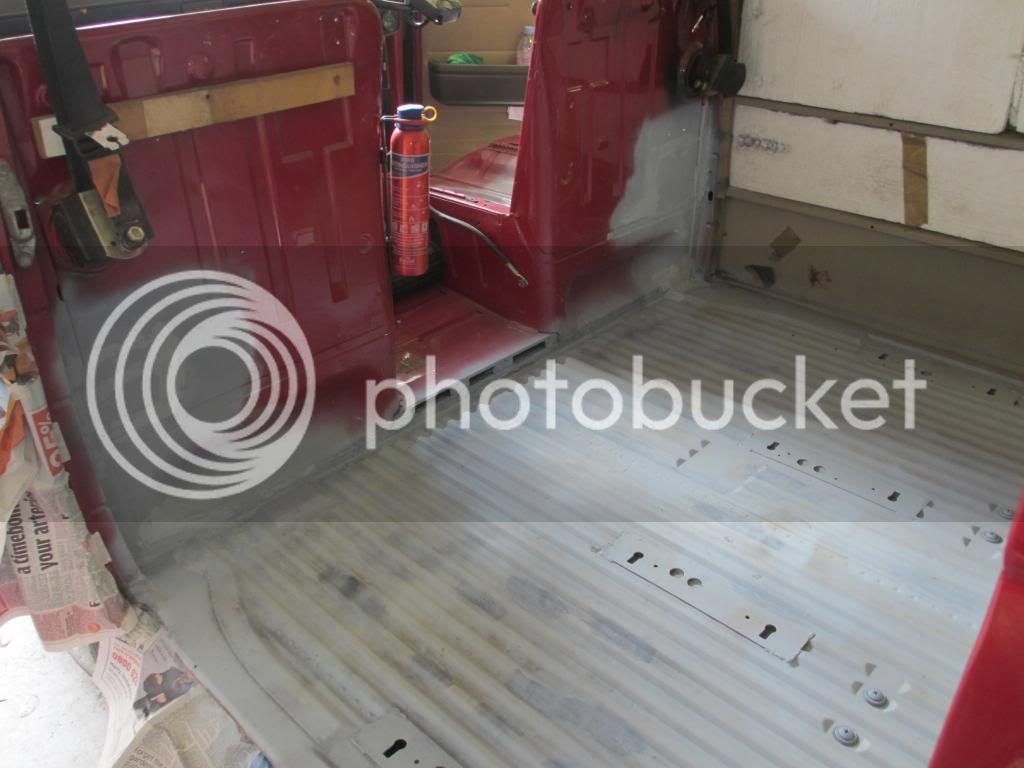
Main floor de-rusted and Kurust treated
While stu worked on the front....
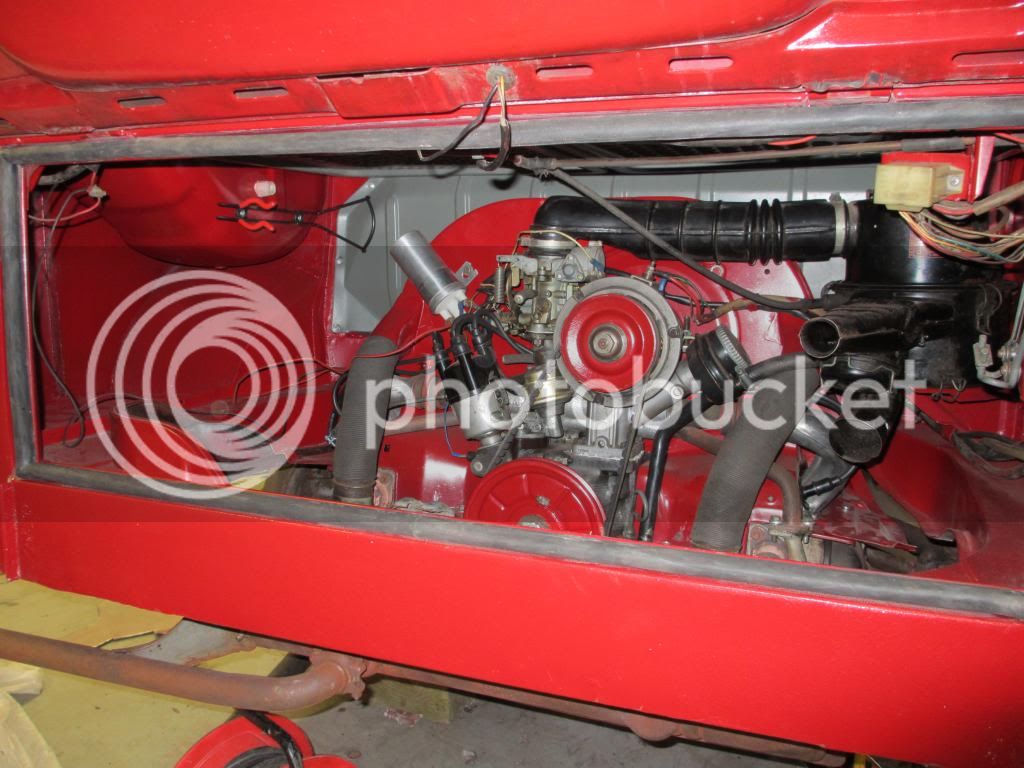
I was laying paint in the engine bay...!!!!
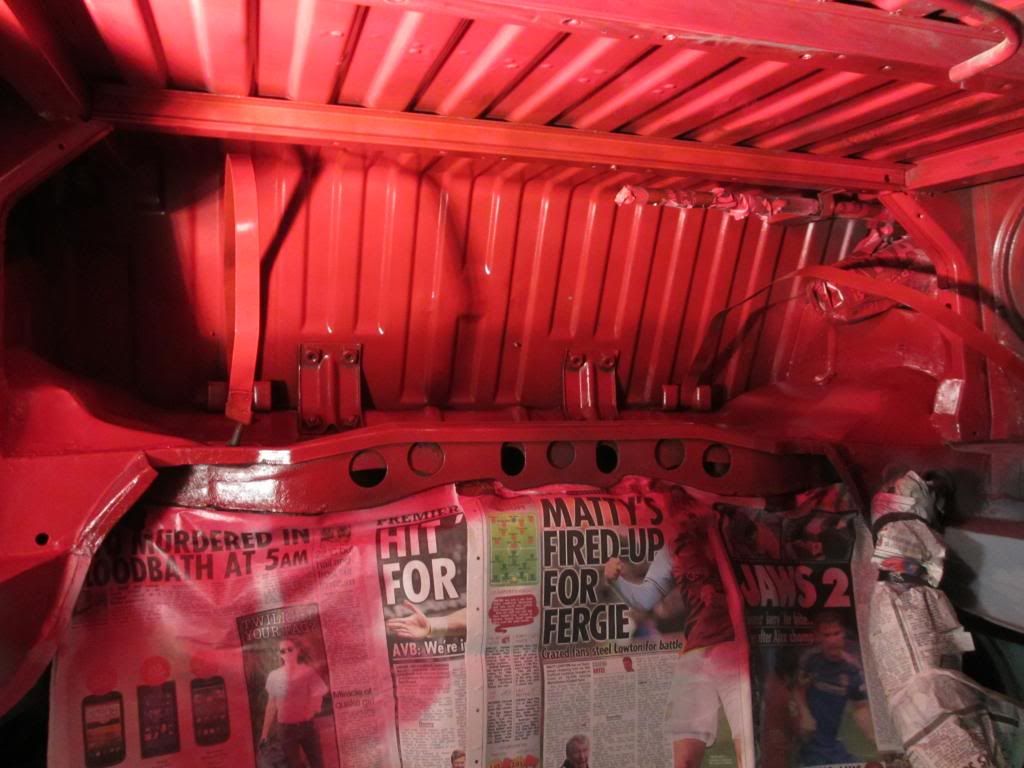
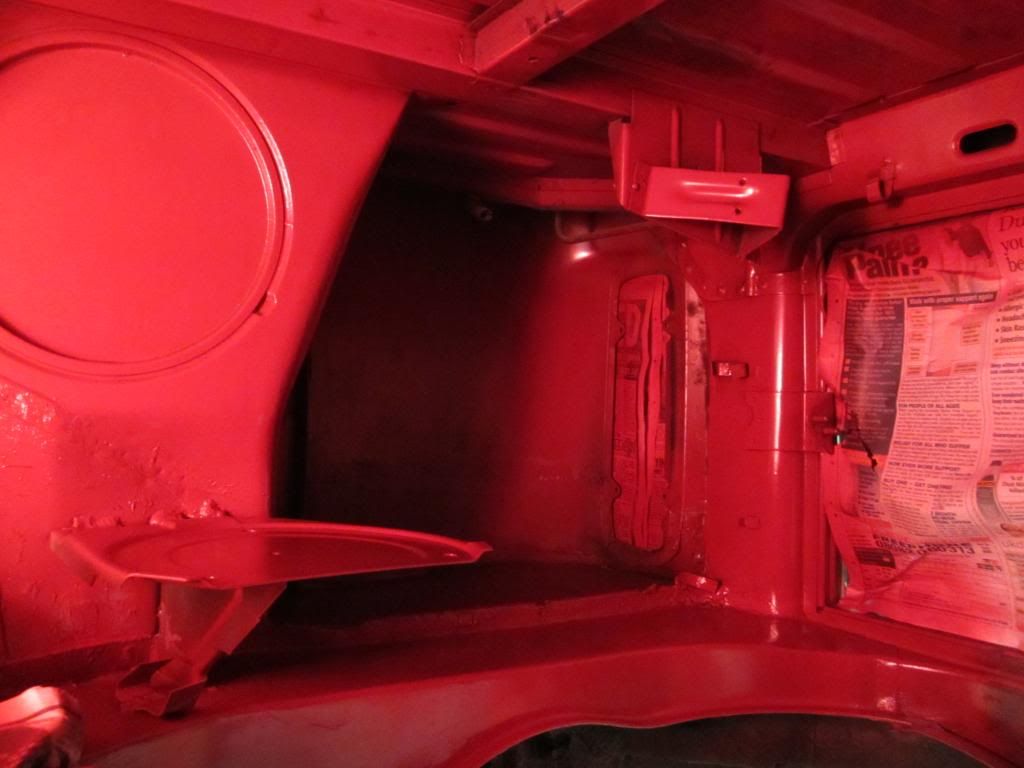
arty0009: Well happy with the result...!!! arty0009:
And more going in on the driver seat bulkhead...
A VERY GOOD weekend....!!!!! 8) 8)
Yours is coming along well to..!! 8)
New edge in.....

More metal to go in....

Panels cut..

Rear floor sections in..


Welds ground down and a liberal dose of Kurust..!!


Main floor de-rusted and Kurust treated

While stu worked on the front....

I was laying paint in the engine bay...!!!!


 arty0009: Well happy with the result...!!! arty0009:
And more going in on the driver seat bulkhead...


A VERY GOOD weekend....!!!!! 8) 8)


Gwar72
Well-known member
- Joined
- Oct 21, 2011
- Messages
- 723
- Reaction score
- 0
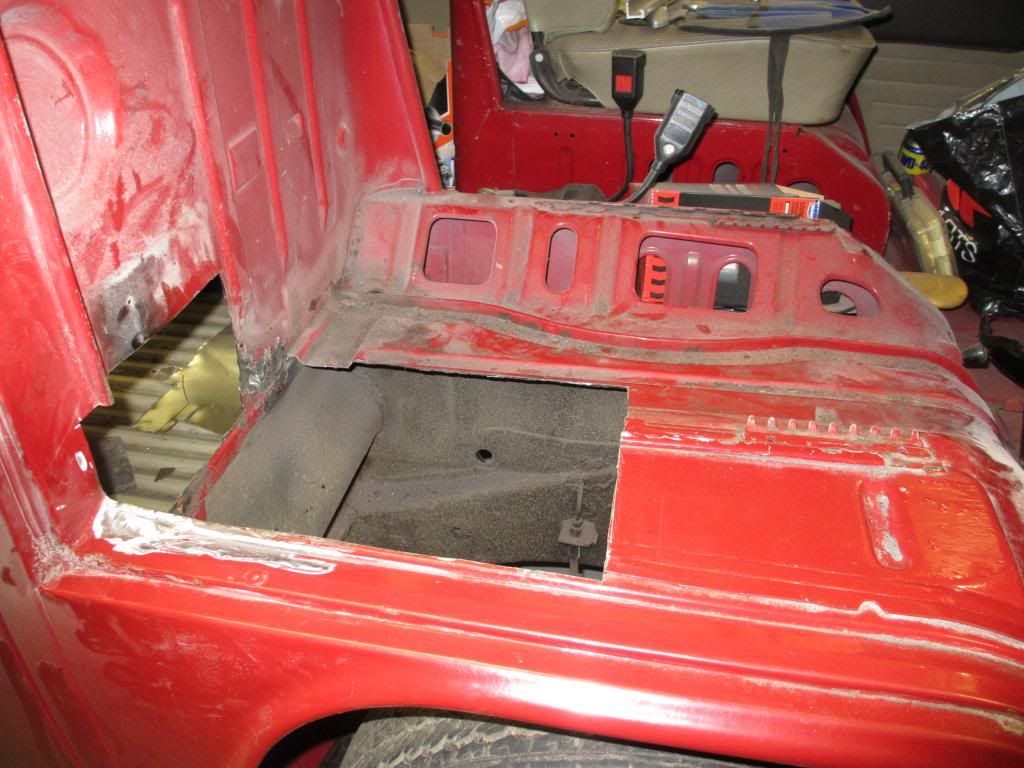
jobs done over the Bank holiday weekend....
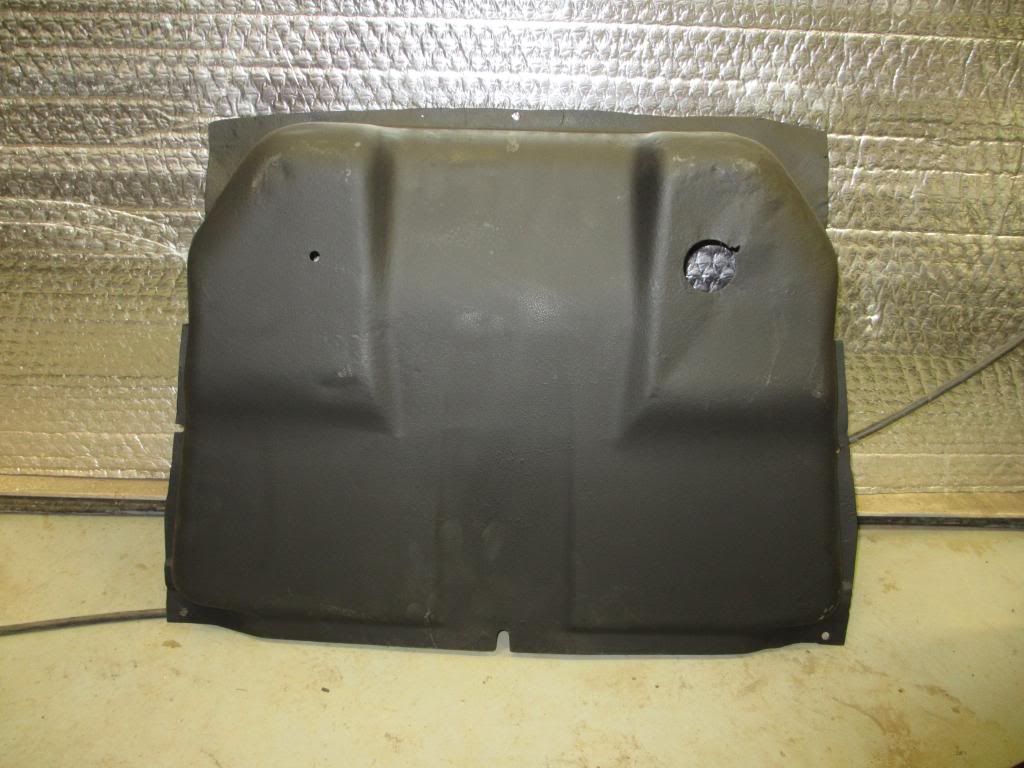
Fire wall in, engine roof lining in, firetec bracket fixed.......
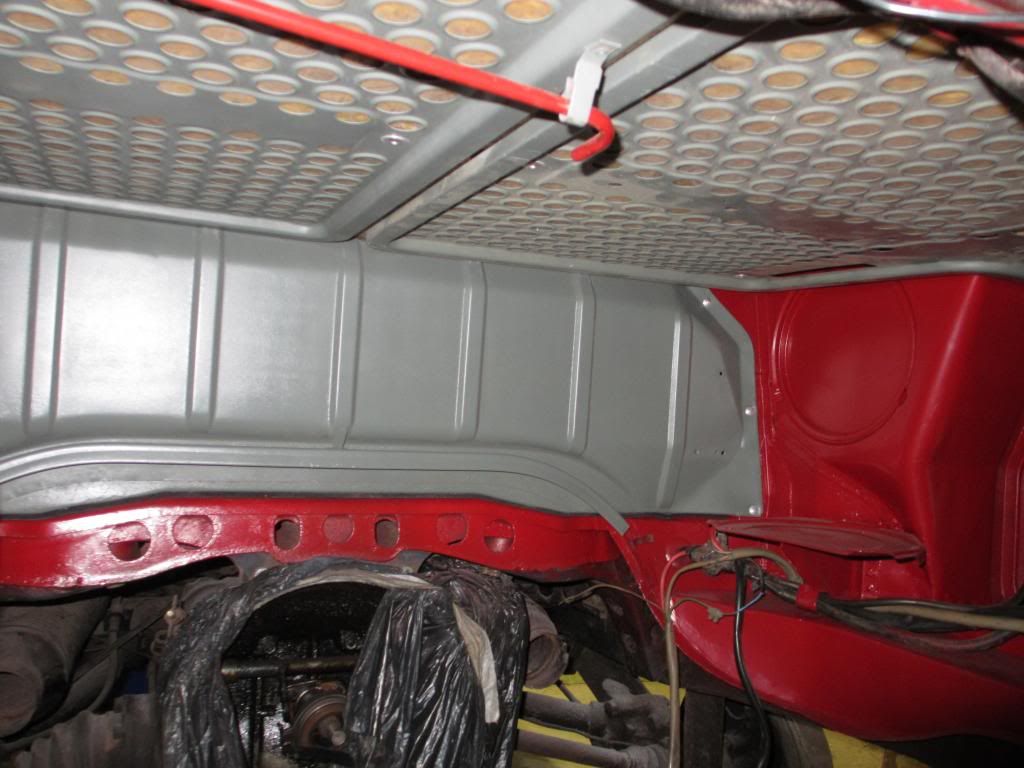
Rear archs painted...

Then while those were drying in went the ENGINE......!!!!!!arty0049:
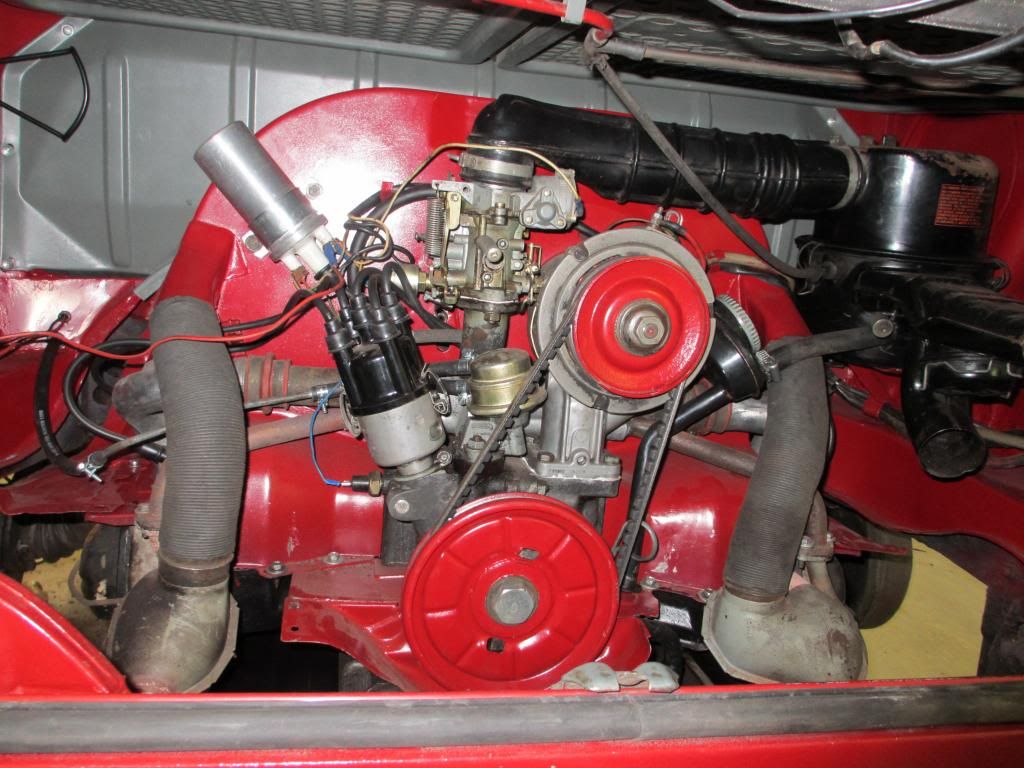
Still got to tidy up the wires and put in the rear tinware and engine seal. But Well happy...!!!
Then Black stone chipped the archs....
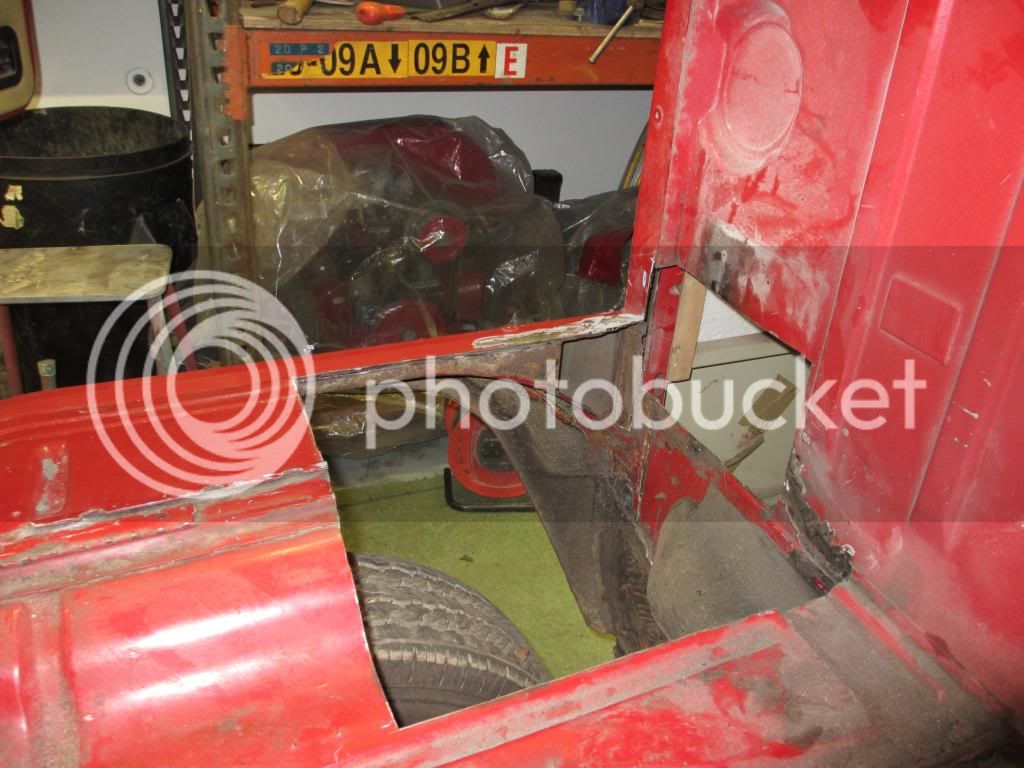
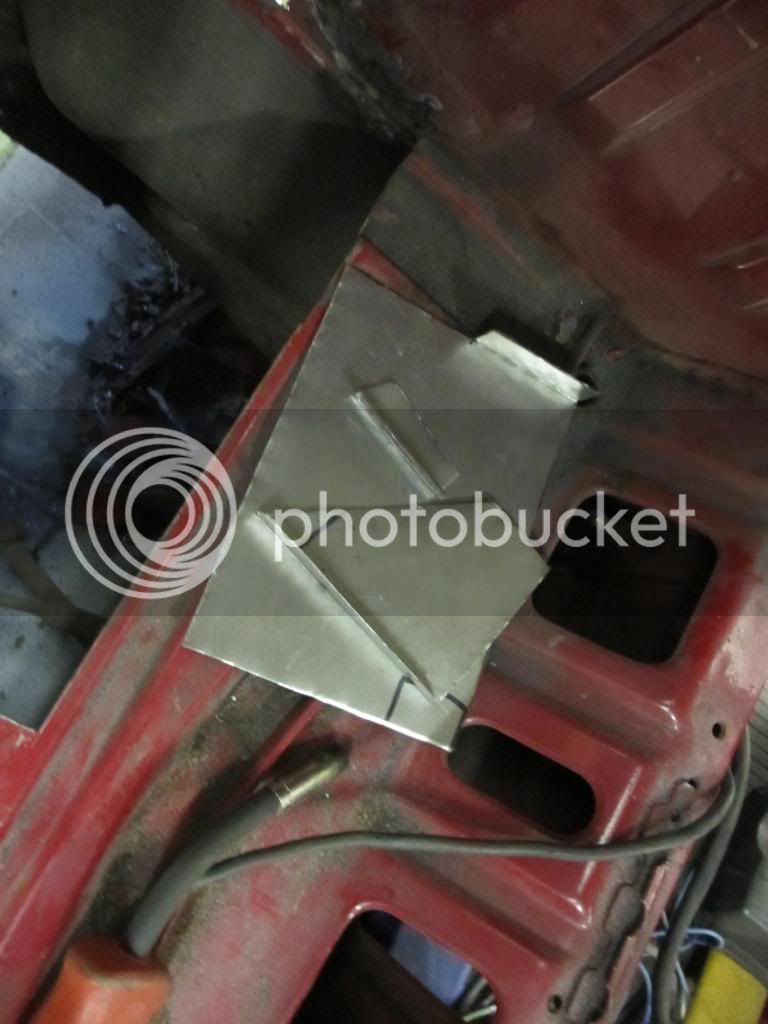
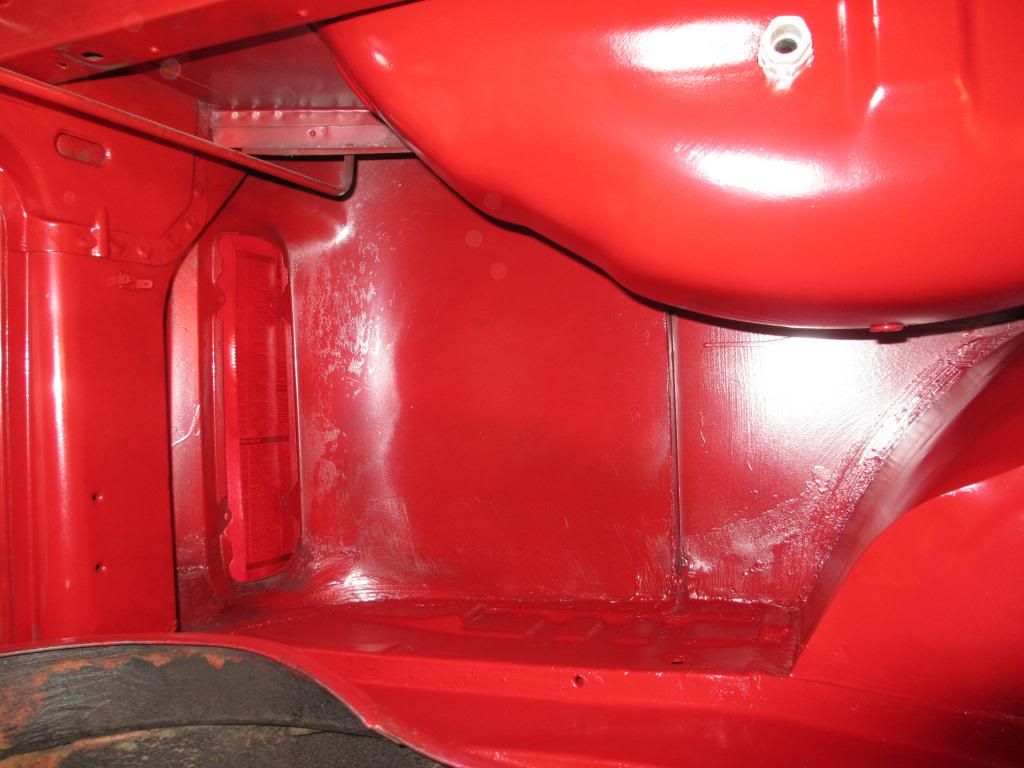
While that was going on more work went on at the front of the bus, on the passengers seat mount...

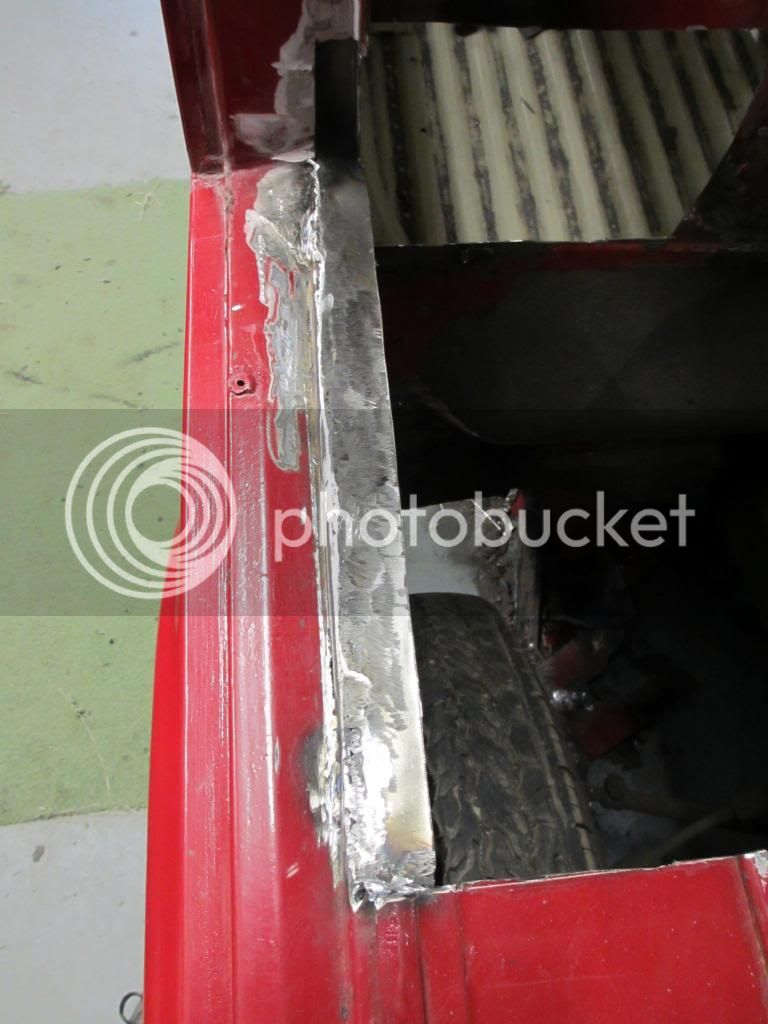
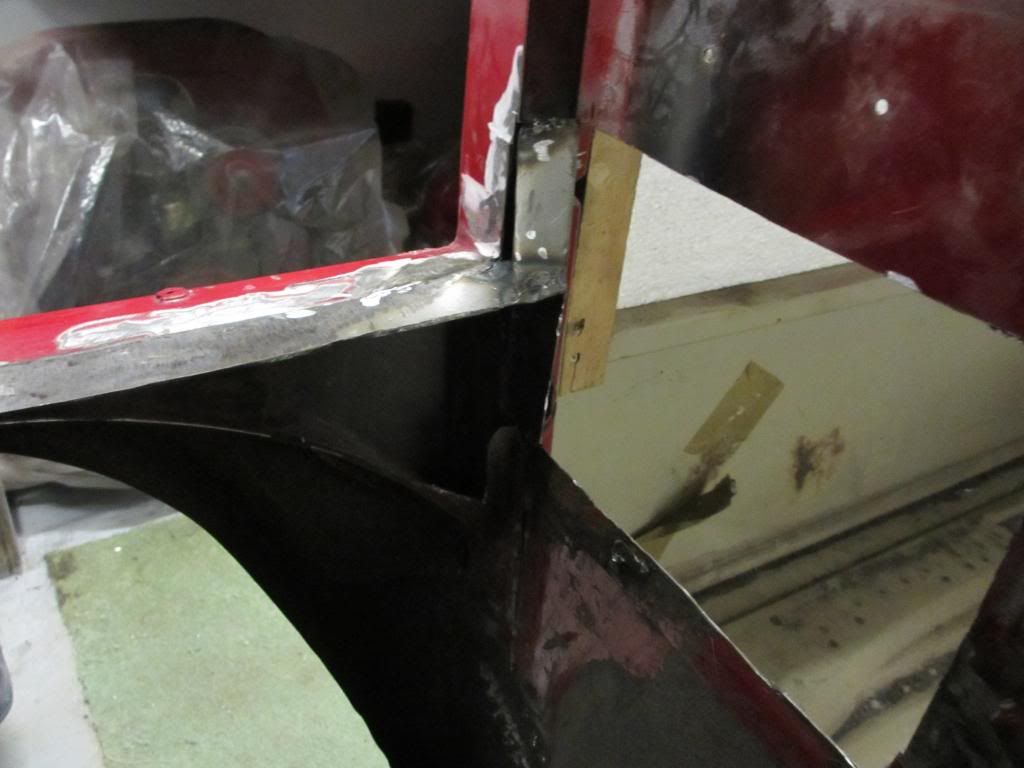
And then in went the new metal.....
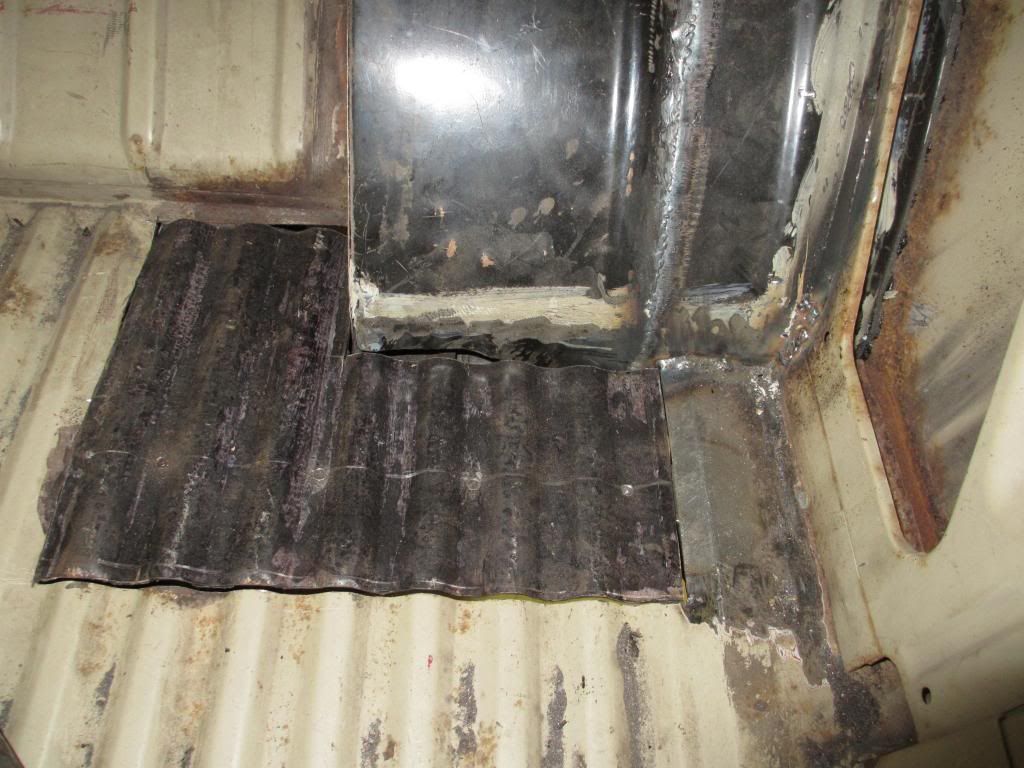
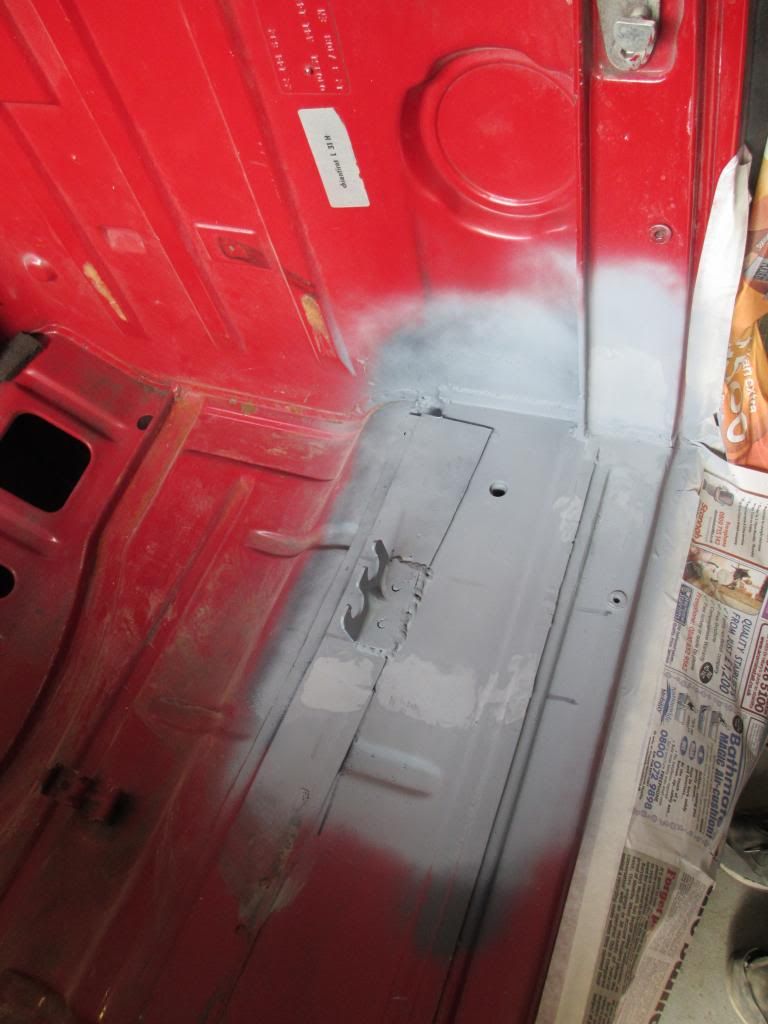
Rear view and repair to cargo floor in the corner....
So that's all the welding done for now and it's onto getting Her ready for an MOT......!!!!! :shock:
Fire wall in, engine roof lining in, firetec bracket fixed.......


Rear archs painted...


Then while those were drying in went the ENGINE......!!!!!!
arty0049:

Still got to tidy up the wires and put in the rear tinware and engine seal. But Well happy...!!!
Then Black stone chipped the archs....


While that was going on more work went on at the front of the bus, on the passengers seat mount...


And then in went the new metal.....


Rear view and repair to cargo floor in the corner....

So that's all the welding done for now and it's onto getting Her ready for an MOT......!!!!! :shock:
Airtime
Well-known member
Great progress, well done! 8)


Gwar72
Well-known member
- Joined
- Oct 21, 2011
- Messages
- 723
- Reaction score
- 0
A few things done before the MOT...!!!
Front pedal pan to go on....
Bump stops back on....
Engine tinware all in and air pipes on, Firetec installed......
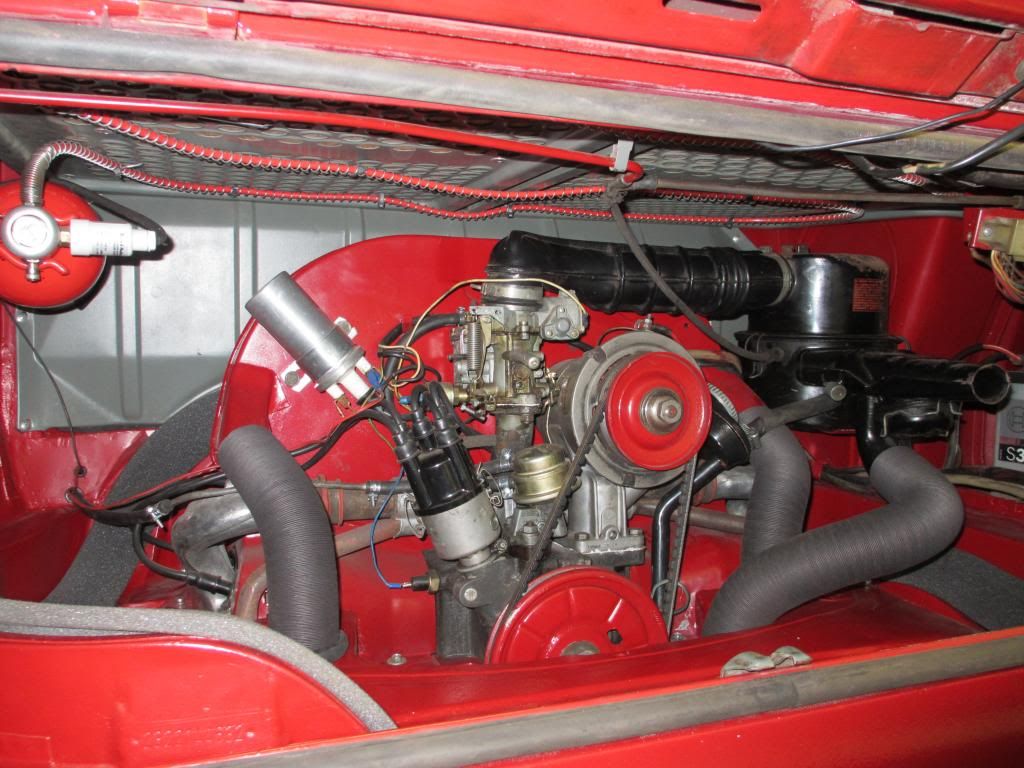
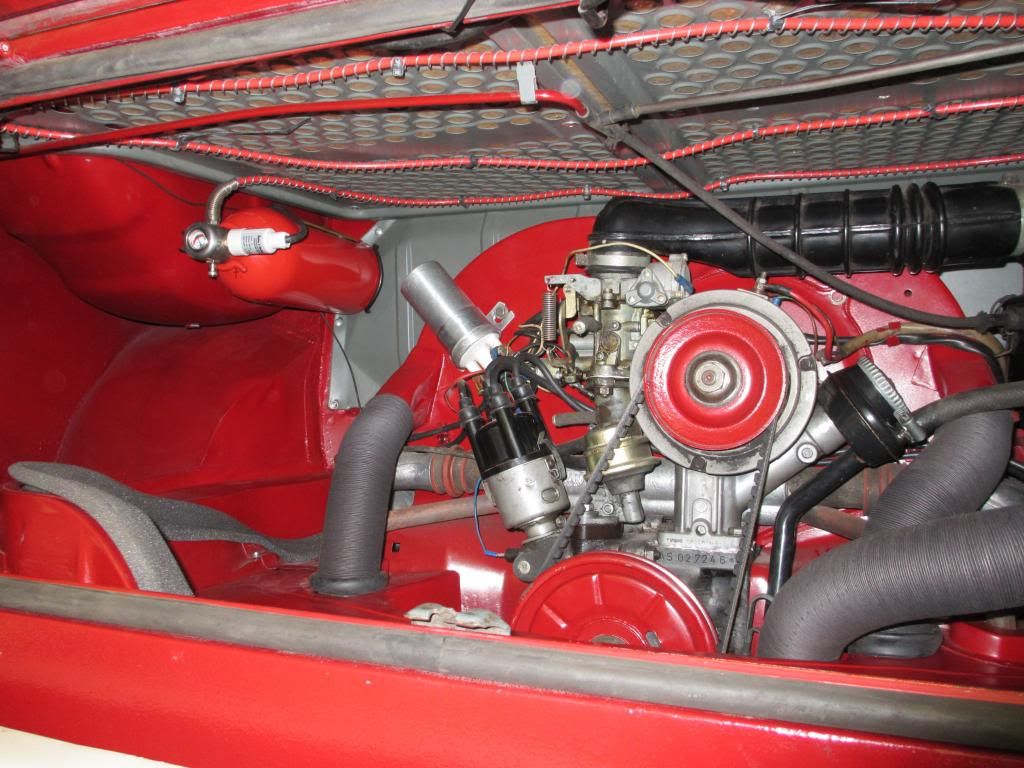
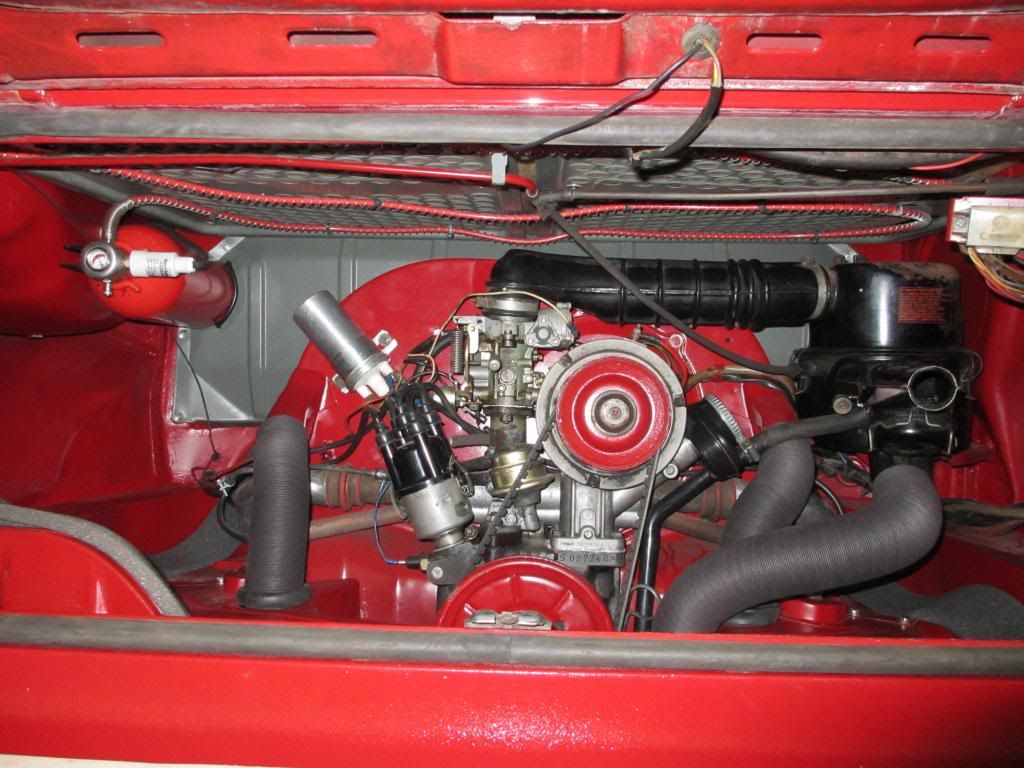
Photo before a quick jet wash to wash off the grinder dust and off she went...
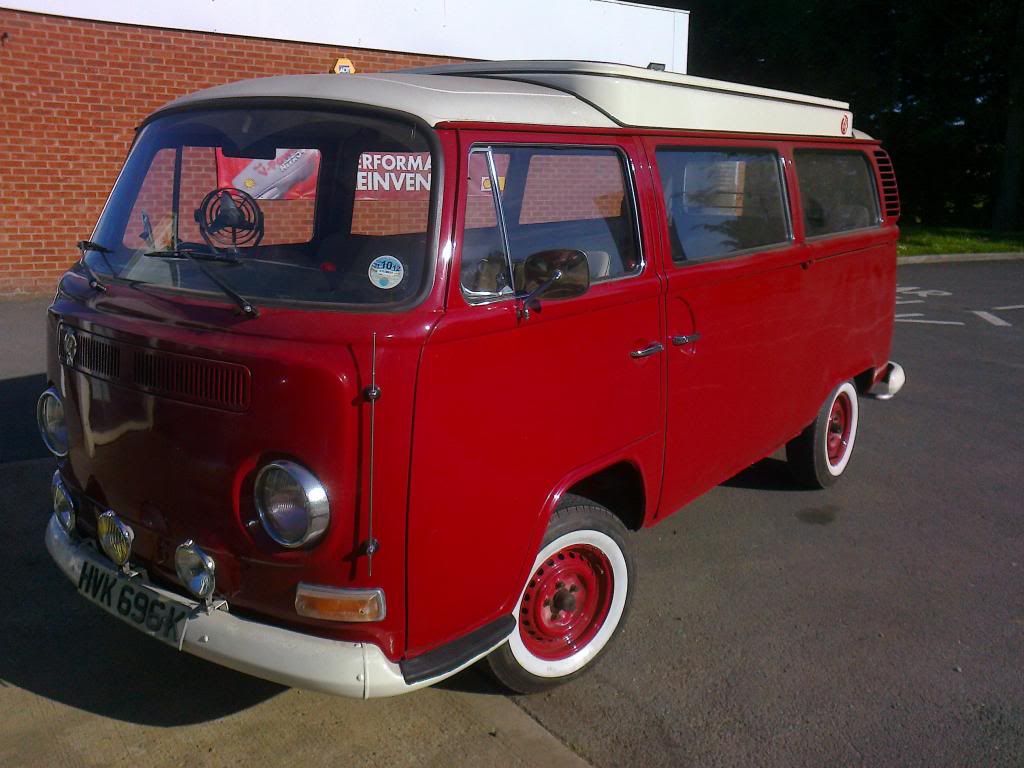
AND she PASSED....!!!
With only having to tighten up front wheel bearing and handbrake.arty0023:
Front pedal pan to go on....

Bump stops back on....


Engine tinware all in and air pipes on, Firetec installed......


Photo before a quick jet wash to wash off the grinder dust and off she went...

AND she PASSED....!!!
With only having to tighten up front wheel bearing and handbrake.
arty0023:Gwar72
Well-known member
- Joined
- Oct 21, 2011
- Messages
- 723
- Reaction score
- 0
Cheers Nickj..!! I was so relieved that she got through the MOT..!!
Jobs done this weekend were....
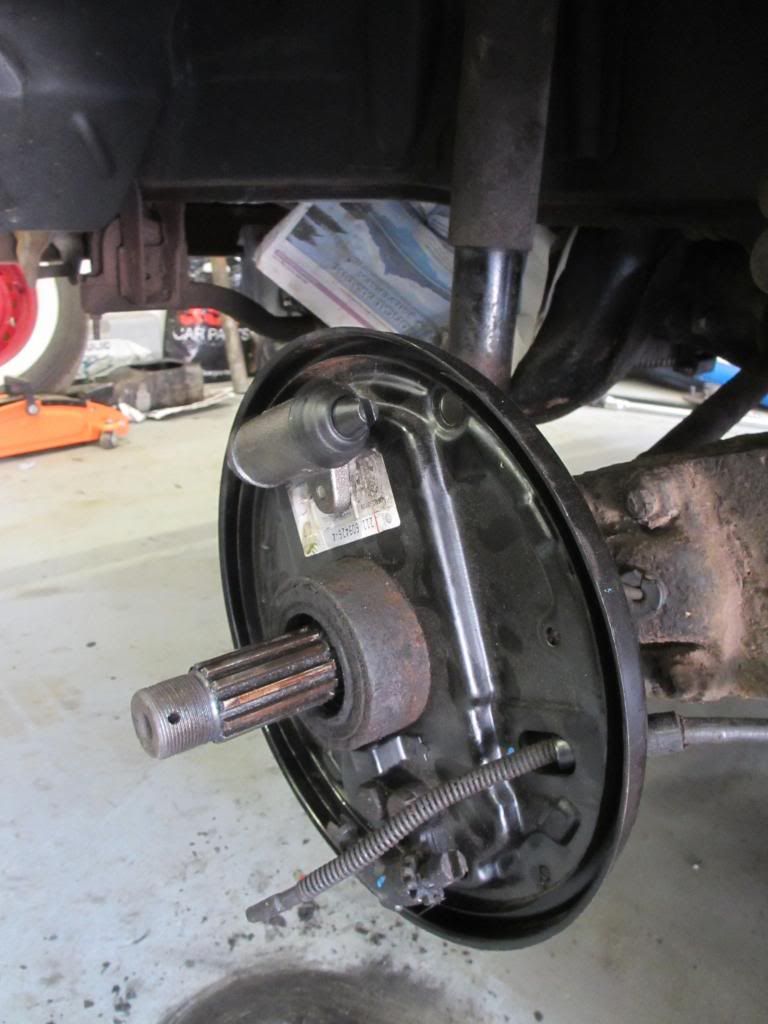
New backing plate to off side rear and new brake cylinder and both rears. Had to change the hard line pipe off the back of them as the neck of the bolts were rounded. So took lines off back to under the bus by the sleeve were the bolts were not rounded off. Never bent or done brakes before so was a bit worried about doing it but followed the bible (H manual) and all went smoothly ( did the silly thing of starting to bend pipe without moving the locking nuts to either end though..!!? :roll: :lol: ) but all came good.....
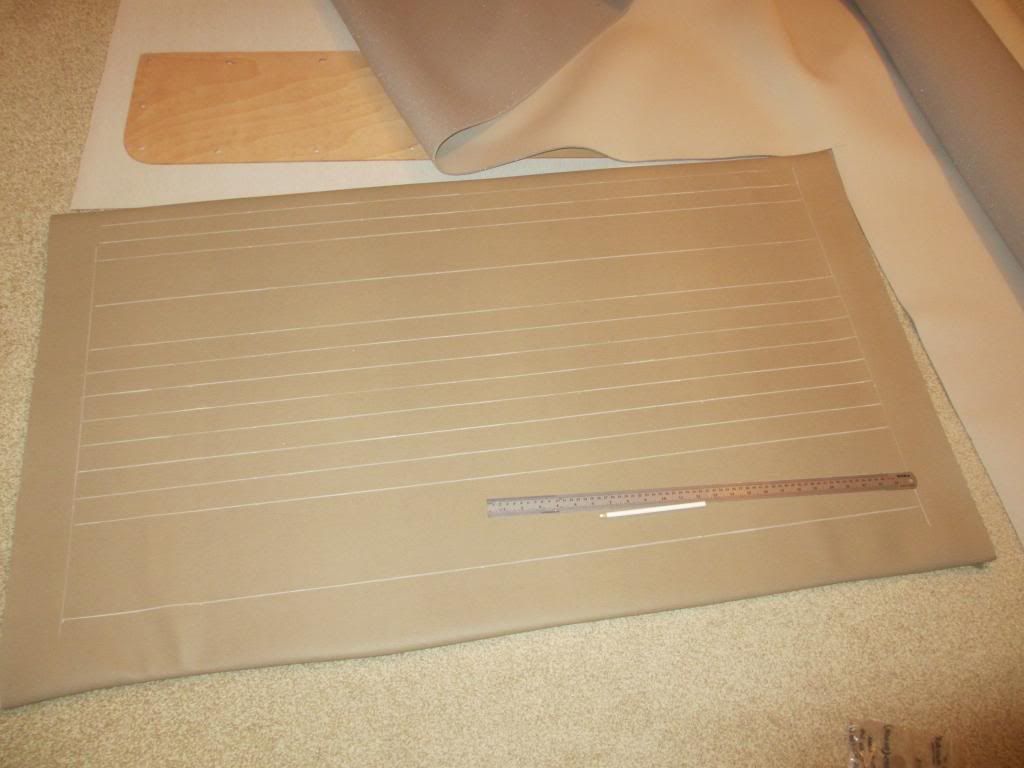
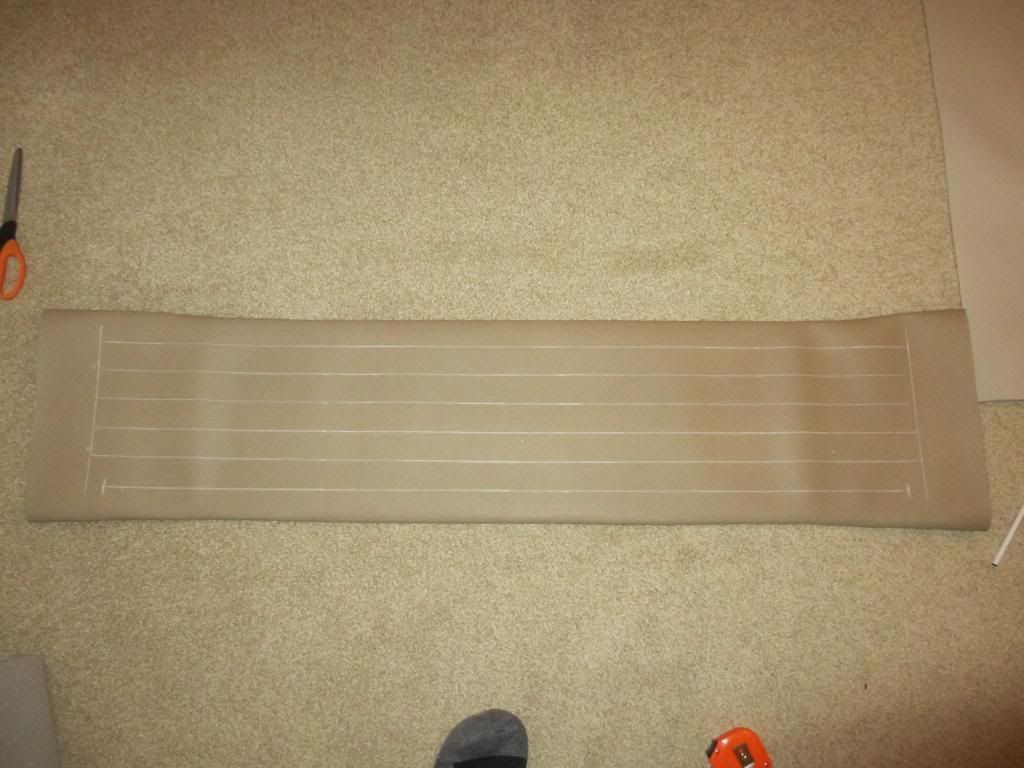
When i got home started to cut out the vinyl and scrim for the panels and mark out the stitching lines in china craft pencil...
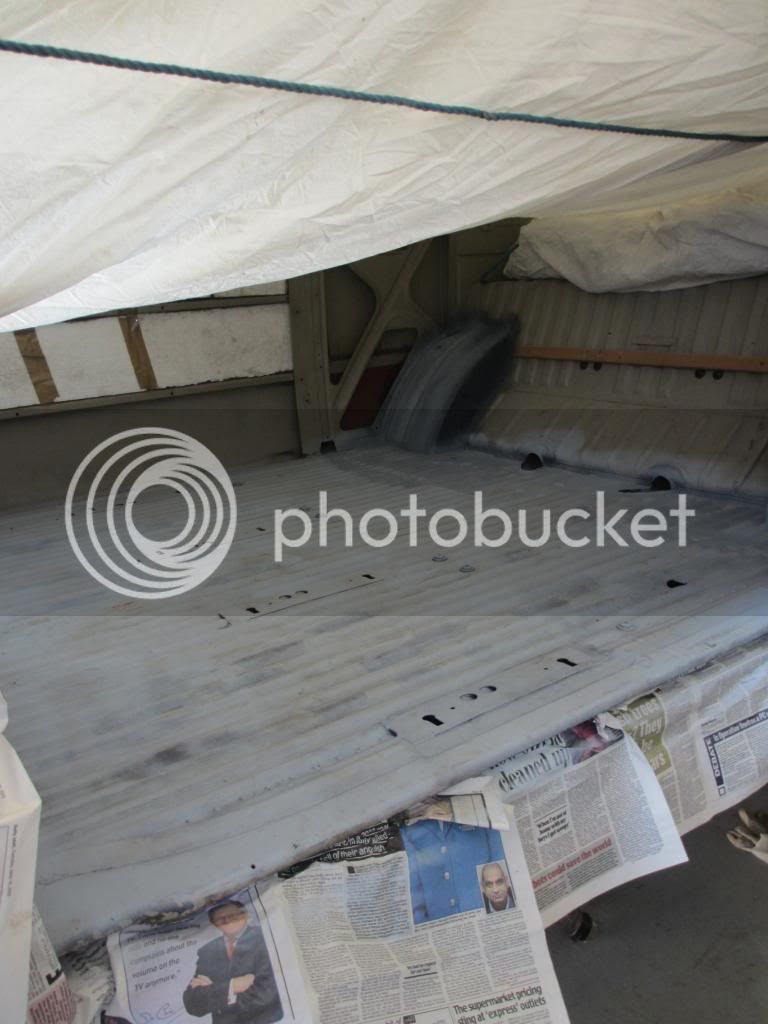
Next day. Primer went on to seat bulk heads and cargo floor...
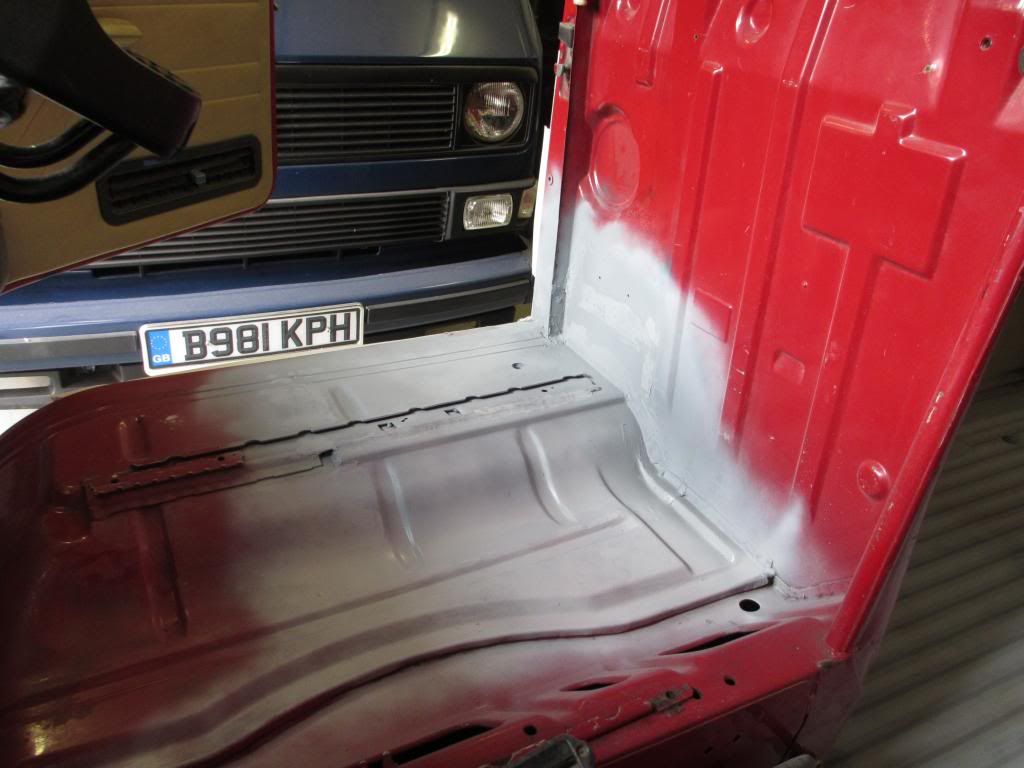
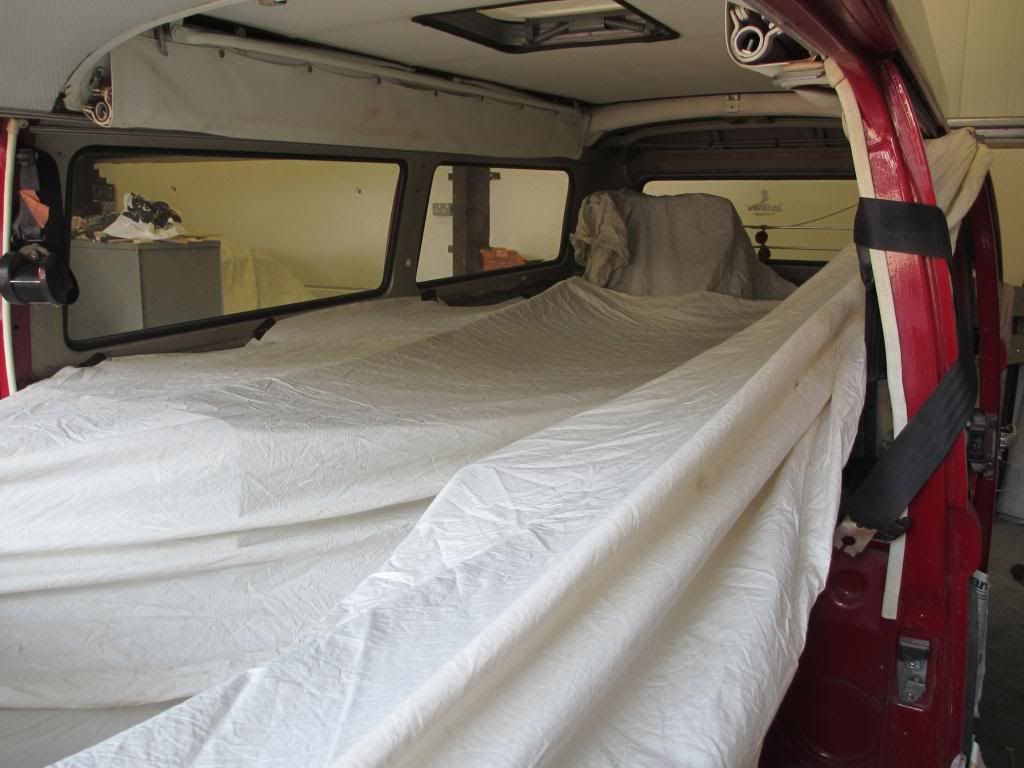
Made a spray awning in the van to keep the spray dust off the glass and dash.... :lol:
Finished at 7pm last night and managed to get one coat of top coat on but camera battery ran out of juice (a bit like me at the time to..!!)
Tonights job is new brake shoes and rebuild rear hubs for bleeding tomorrow night and another coat of top paint..!!! It's all starting to come together..!!
I was so relieved that she got through the MOT..!! Jobs done this weekend were....
New backing plate to off side rear and new brake cylinder and both rears. Had to change the hard line pipe off the back of them as the neck of the bolts were rounded. So took lines off back to under the bus by the sleeve were the bolts were not rounded off. Never bent or done brakes before so was a bit worried about doing it but followed the bible (H manual) and all went smoothly ( did the silly thing of starting to bend pipe without moving the locking nuts to either end though..!!? :roll: :lol: ) but all came good.....

When i got home started to cut out the vinyl and scrim for the panels and mark out the stitching lines in china craft pencil...


Next day. Primer went on to seat bulk heads and cargo floor...


Made a spray awning in the van to keep the spray dust off the glass and dash.... :lol:


Finished at 7pm last night and managed to get one coat of top coat on but camera battery ran out of juice (a bit like me at the time to..!!)
Tonights job is new brake shoes and rebuild rear hubs for bleeding tomorrow night and another coat of top paint..!!! It's all starting to come together..!!


Gwar72
Well-known member
- Joined
- Oct 21, 2011
- Messages
- 723
- Reaction score
- 0
Last nights job....
Some paint on the rear of the bulkheads.....
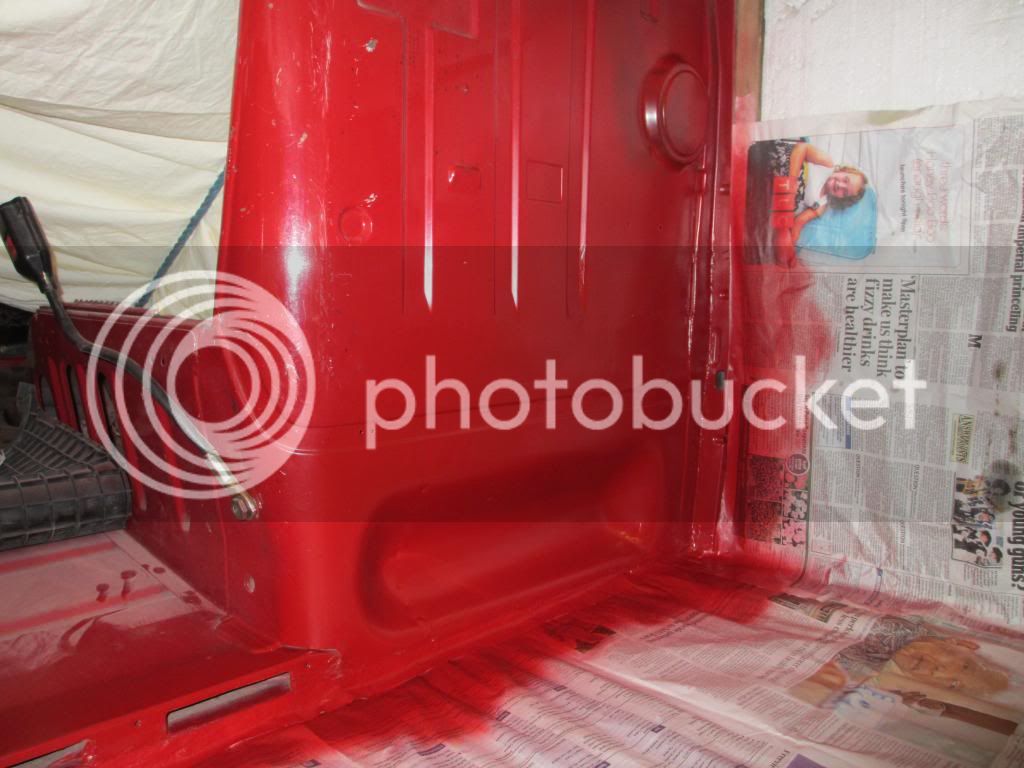
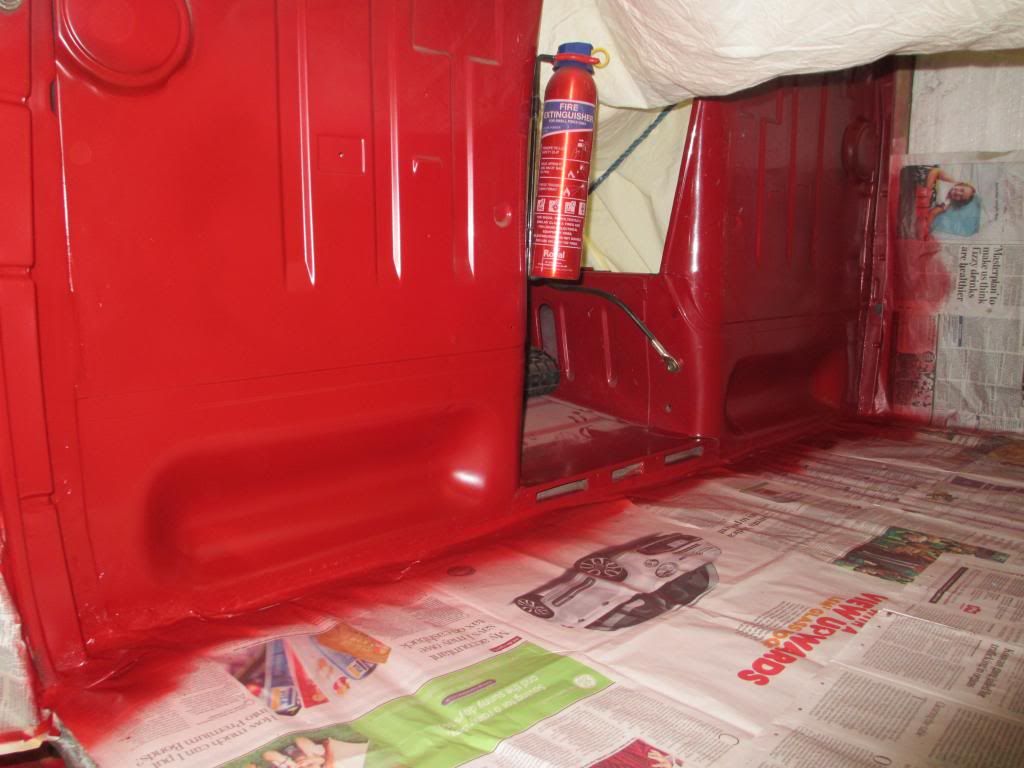
Blended in to old paint only as i'm fitting Dulux bulkhead trim and cards so only the bottom bit will be showing. May even wrap that later on with a black rubber trim set.?
Some paint on the rear of the bulkheads.....


Blended in to old paint only as i'm fitting Dulux bulkhead trim and cards so only the bottom bit will be showing. May even wrap that later on with a black rubber trim set.?
davechorlton
Well-known member
- Joined
- Jan 9, 2010
- Messages
- 333
- Reaction score
- 1
Great thread, and nice to see another Red/White crossover. Given me some great ideas for tricky repairs...Mines a Dormobile and I am yet to discover all of the rot so am a way behind. looking at doing a fair bit of bodywork soon - what paint have you been using, and which supplier?
cheers,
Dave
cheers,
Dave
- Joined
- Oct 26, 2010
- Messages
- 3,247
- Reaction score
- 17
- Location
- Leeds
- Year of Your Van(s)
- 1971
- Van Type
- Panel
Congrats on the MOT dude! 8) 8) 8)
Gwar72
Well-known member
- Joined
- Oct 21, 2011
- Messages
- 723
- Reaction score
- 0
gvee said:Congrats on the MOT dude! 8) 8) 8)
Cheers gvee
davechorlton said:Great thread, and nice to see another Red/White crossover. Given me some great ideas for tricky repairs...Mines a Dormobile and I am yet to discover all of the rot so am a way behind. looking at doing a fair bit of bodywork soon - what paint have you been using, and which supplier?
cheers,
Dave
Dave, Glad it has given you some food for thought on your resto. If i can help further just ask away, plenty of peeps on here i've got info off to help mine. Paint wise i got a local paint supplier to Match blend rattle cans to match the original parts (took in the front grill for them to scan) pretty sure they are cellulose (i'm all new to this sort of stuff) :lol: It was from Paint Store, Leamington Spa.
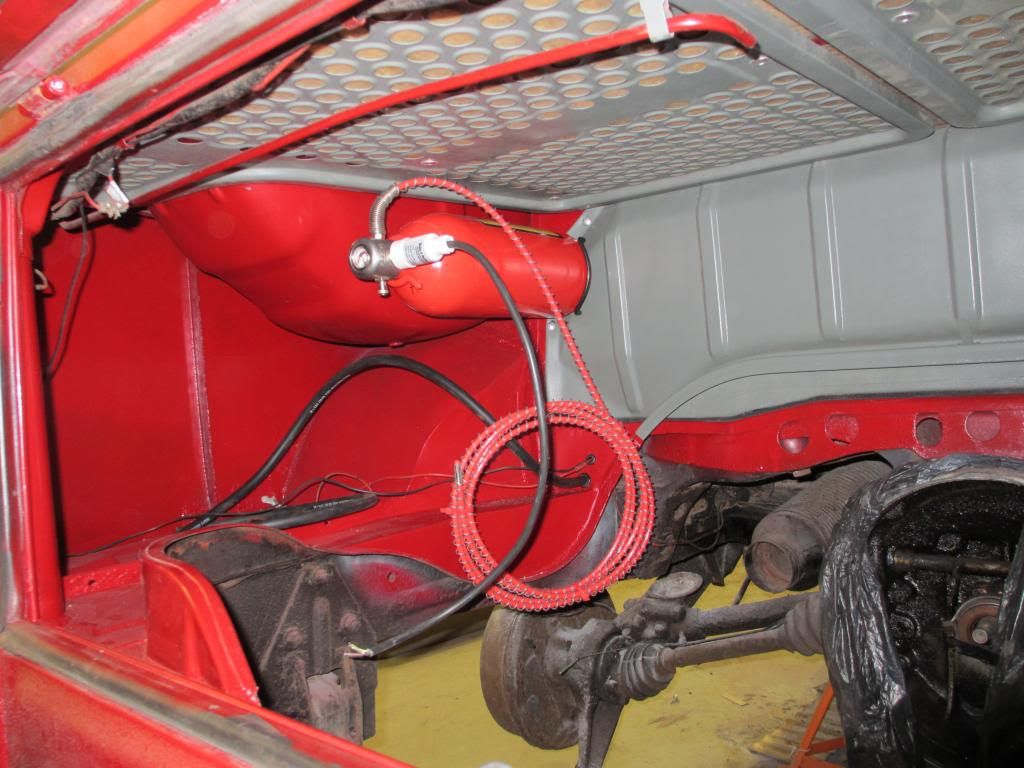
Big push this weekend just gone..!! M-plate put back on with a little meassage underneath to mark why it came off..!!
:lol: 

Bungee thing re-attatched behind passengers seat...


Rear of bulkhead all done...

Rear heater vents in....


Then started to put in the furniture again...!!!!
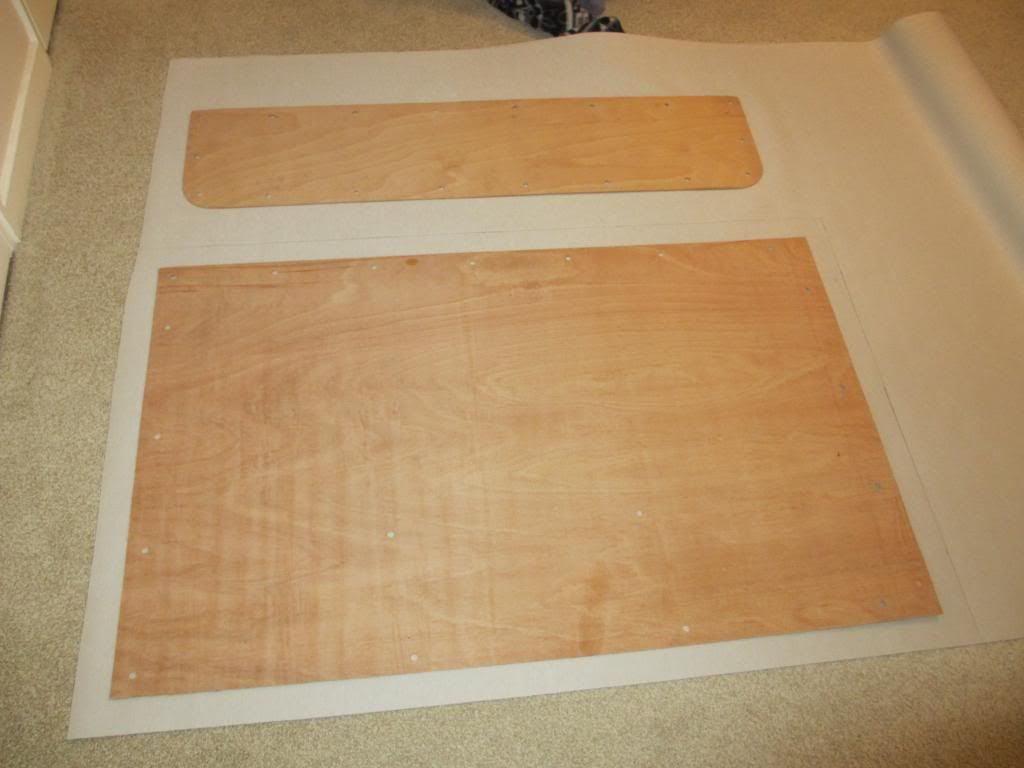
Rear draw unit on new black ply floor panel and wardrobe....

Rear Top locker....

Then heavy grade vinyl flooring cut and glued down....


Then in goes rear side locker and bench seat...

Well chuffed with it all going back in...!!!
And now have my living room and spare room back as they've got NO camper furniture stored in them..!! :lol: :lol:Similar threads
- Replies
- 1
- Views
- 484