Poptop to Tintop - Advice please :)

Early Bay Forum

Help Support Early Bay Forum:

This site may earn a commission from merchant affiliate links, including eBay, Amazon, and others.

geoff

Member
Joined
Aug 25, 2009
Messages
18
Reaction score
0
Location
Derby
Hi, I am planning the resto of a '68 over the autumn & winter months, which includes getting rid of that big hole in the roof...

To set the scene...
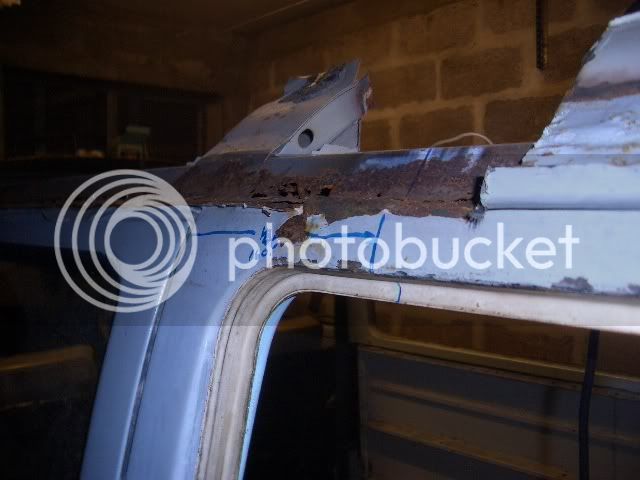
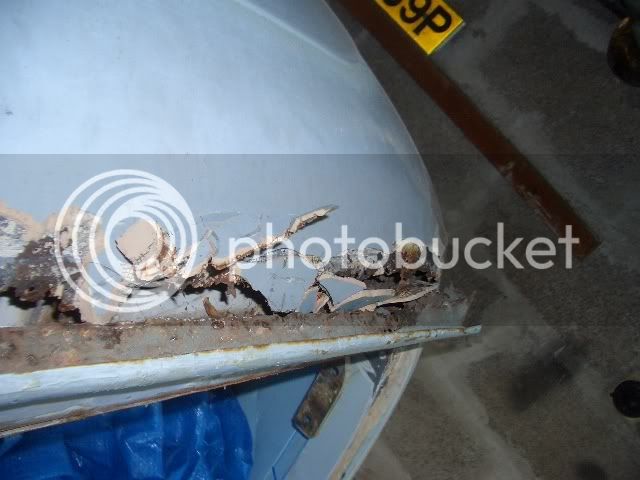
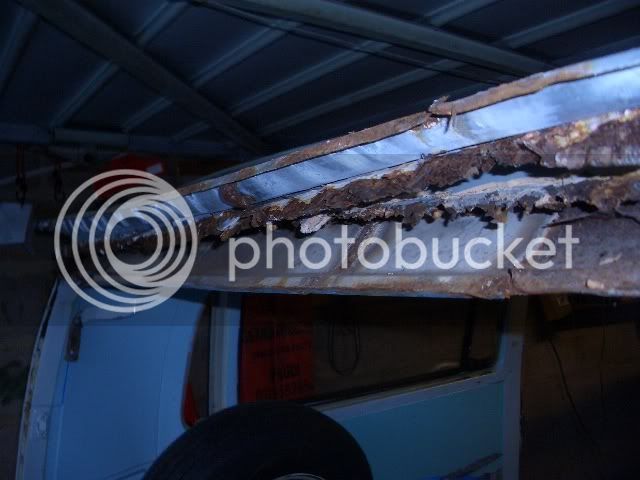
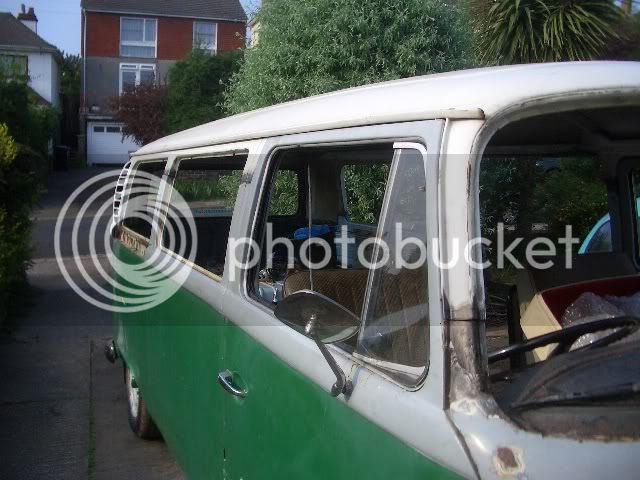
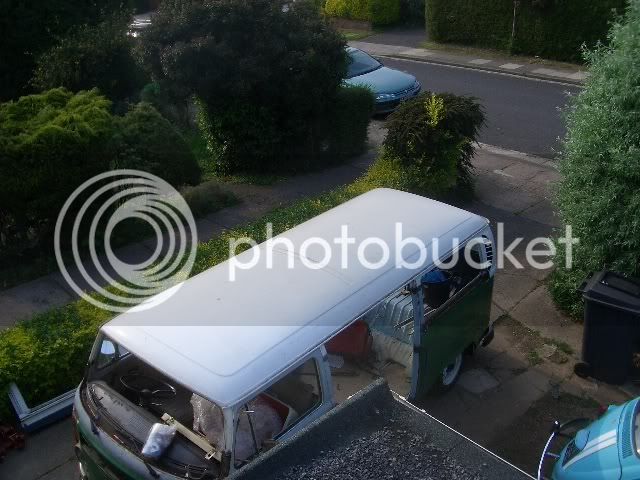
'68 shell - Big hole in roof (poptop long gone), but solid and rust free (gutters, etc are excellent condition)
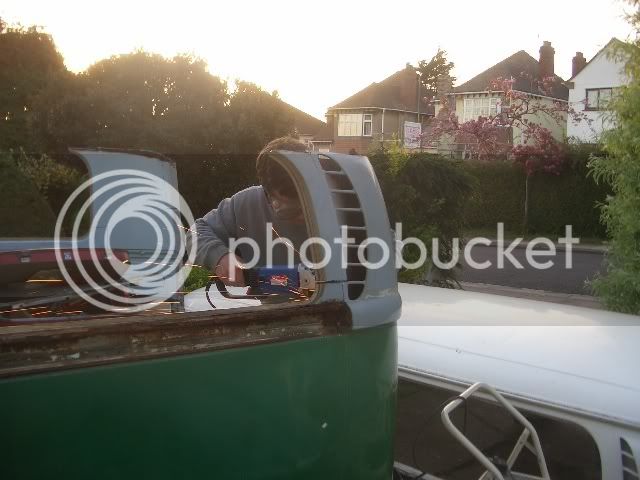
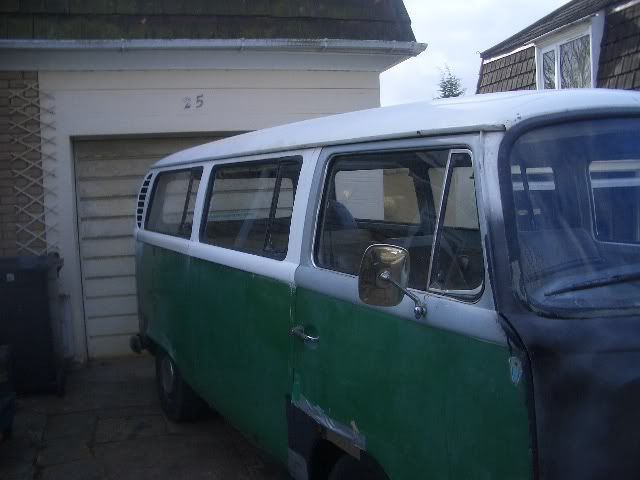
'73 Donor - Nice solid roof, in equally excellent condition

Do I...
(a) Drill out all the spot welds on each roof and replace the tiptop entirely
(in which case how difficult is it to drill them all out?)
(b) Cut out a section big enough from the donor to weld into the hole
(in which case do I butt weld or use an edge setter/joggler to produce an overlapping lip?)

By the way - I'm assuming the roof hasn't changed from '68 - '73, otherwise that would make the decision a little easier!

Anyone with experience who can offer their views would be VERY much appreciated :)

Cheers,
Geoff
 
Tofufi on here is your man for this - he's done a full roof swap (cutting the pillars as I recall).

There are pro's and cons for your options:
If you patch in the hole you'll find it very difficult to get the lines right and the roof wobble free.
Drilling out the spot welds is a good option but very laborious and in no way straightforward.

But, you do have some other options too:
Get yourself a large sheet of aluminium and rivet on a 'lightweight' roof (aircraft style).
Buy a folding sunroof from Paris Beetles - looks the dogs danglies!
Replace your poptop with a fully functioning one and enjoy being able to stand up in your van.

Personally, I'd remove the spot welds - it's definitely the easiest way to get a factory look.

;)
 
Justin & Muttley said:
Tofufi on here is your man for this

You called?

:D

Personally, I'd begin by drilling out all the spotwelds on the roof of the van you're planning on keeping. If the inner structure below the roof frame is good, then do the same to the donor roof, and spotweld/plug weld the whole lot together. Go careful, as I think the '72 onwards roof is different to the pre '72 roof. I am not 100% sure on this, however. Certainly the vents etc changed at the back of the bus - so I'd be doing a lot of careful measuring before you start cutting ;)

Someone I know has just gone from hightop to tintop, and used a donor roof to let in to just fill the hole. I've not seen the end result, but I'd imagine it would be extremely difficult to avoid distortion. Doing it on the gutters should mean you won't even need filler.

I had to do mine at the pillars because the original roof structure was knackered - here are some pics for inspiration (I know it isn't the same as you'll be doing).


CIMG5394.jpg


CIMG5400.jpg


CIMG5401.jpg


Cabrio bay...

CIMG6058.jpg


CIMG6092.jpg


Roof going on

CIMG6249.jpg


CIMG6256.jpg


Spot the joins...

CIMG7495.jpg


CIMG7394.jpg


And on the road now as my daily driver (400 miles on saturday alone) :D

I'll get round to painting it and doing more bodywork after my bug resto is completed. :)

CIMG7603.jpg


I love having a tintop, I don't think I'd ever want a poptop :)
 
Thanks for the info guys - I really do appreciate everything you have to offer

I was kind of drawn to the drilling spot welds idea to keep it neat, though filling the hole seems a lot more straightforward (other than the concern of distortion). Perhaps the act of stepping the edge (for an overlap) would add a little rigidity to the hole to help avoid the distortion (and of course short bursts of weld at intervals and gradually fill up the gaps)

I'm still a little torn between the two... Tofufi, do you know who it was that just filled the hole? Would be great to have their input

Hmm...
 
Although Jeremy (BananaCustard) didn't do his own roof, his was done using the 'fill the hole with a piece from another roof' method - he told me at BeachBuggin' 2007 that he wasn't truly happy with it, although I wouldn't have known if he hadn't pointed it out!!
Why not send him a PM?

;)
 
geoff said:
Thanks for the info guys - I really do appreciate everything you have to offer

I was kind of drawn to the drilling spot welds idea to keep it neat, though filling the hole seems a lot more straightforward (other than the concern of distortion). Perhaps the act of stepping the edge (for an overlap) would add a little rigidity to the hole to help avoid the distortion (and of course short bursts of weld at intervals and gradually fill up the gaps)

I'm still a little torn between the two... Tofufi, do you know who it was that just filled the hole? Would be great to have their input

Hmm...

The person in question isn't on here, I've tried speaking to them but cannot get hold of them at the moment. Will let you know if I hear anything, but they still owe me a few VW bits so the chances of me getting hold of them is low :roll:

Personally, I'd opt for the spotweld method, as although it is more involved, it'll result in a neater job with less filler. If you get any distortion in the roof, it would be a mammoth job to make it straight again. I've got a couple of dents in the tintop roof for my bay simply due to the way I transported it 200 miles to my house (upside down on the roof of a passat) which will be a nightmare to deal with when the time comes. Smoothing the whole panel will be even more tricky.
 
from another experience, i did my buddies several years ago. it was a poptop, with pop missing. it had an unsightly sheet riveted and masticked over the whole. we had a breaker van, both early, so can't comment about roof changes, probably same except rear vents?

anyway we simply cut off the donor roof panel between the two roof body lines (the one just above the gutter and the other a few inches higher up). the other was cut off an inch or so higher, so they overlapped, yeah.

with the donor roof placed in the bus and aligned, we then riveted periodically to locate the roof and keep it in place and keep the ovelapp sheets nice and tight. then working in small sections (few inches) at a time i seamed it all up. working from one corner, then to the next most furthest etc etc. eventually the weld meet up and you haven't been working in one area too long for it to get too hot and distort. i think we may have used damp cloths too, to keep temps down and minimise distortion.

you could 'joggle' it so you get a flush join, not too much hassle really. at the time i didn't have a joggle tool, or probably would have.

anyway, no distortion arised anyway. once ground/cleaned down the minimal of filler is needed, it easy to get the curve, any errors are transparent due to it being a curve. unless they're really bad and you are not very good at bodywork type thing. once primered up it looked sweet, factory. and was really quite easy to do, days work tops. i've done roofchops too, so this was childsplay. we put the braces back in too from the donor.

personally if the gutters/sections are good i would simply replace the roof sheet, very very easy and not doing any unnecessary work.

food for thought?
 
Just seen photos of the one I mentioned earlier, and it looks pretty good. But the pictures aren't large enough to make any distortion clear. He says it is hard to tell when you look at it, but I'm not sure how much of a perfectionist he is (or you, for that matter :) )
 
Thanks again Tofufi and stagger lee - really does help to have the benefit of experience!

Went out earlier to count up how many spot welds are involved... got to a big number and gave up :shock:

I was drawn to the filling section idea to start with, as its an easier job and avoids any issues of sizes changing - especially given that the whole of the roof, gutters and all, are so good (apart from the hole of course!)

I feel a trip to Machine Mart coming on for some jogglers...

Thanks again to you all, will get a thread started in a week or two when I get started :)
 
With the prices bays are fetching now i'd consider selling the donor van complete to get funds and buy a roof section from someone like Scott Wilson or Graham L on here and weld that in place.
 
The the bottom half and the chassis of the donor is shot, which is why I bought it for the roof and all the little bits and pieces (the '68 is just a shell - thats how we got it). We bought the donor van complete as it was far cheaper than collecting all the bits and pieces seperately

I'm glad the donor is as rotten as it is, otherwise it would seem wrong to sacrifice it :)
 
Just done this a few weeks ago when there was some sunshine and filled the hole as opposed to replacing from gutters.

the section I used had a b post beam which I used to replace the missing c post beam, and put patches in the top to avoid upside down welding.

cut the panel big and placed over hole, it is heavy enough to distort the roof sides between the roof supports, and I had to make internal supports to take the weight, cross supports on the inside ribs at the gutter, then some long 2x4s, then wedges until the lines looked right.

put self tappers through both pieces every 6 inches.

used a 1mm slitting disc to cut through both pieces between the self tappers.

Tacked at the middle of each of 4 sides, then worked to the corners, cutting, remove screws, tacking every 12 inches

Even being careful I got some shrinkage on the rear edge, which pulled both the patch and the roof in locally, the front edge is right next to the b post rib and did not distort, the long straight side seams are ok. The shrinkage at its worst point pulled the roof about 2mm out of true, easily fixed with a skim of filler, and not visible inside. There was quite a lot of distortion in my roof at the rear hole corners anyway when I took the pop top re-inforcing bars out, these were not curved to suit the roof line, but straight pieces of square tube with the roof hammered to suit the bars when the pop top conversion was done, so I was expecting to be filling anyway.

I thought the double curvature on the rear edge would give it some stiffness, which it did a couple of inches away from the weld but not enough local to the weld.

It needs an addition metal support beam shaped to fit under the rear panel weld. and I would probably stop welding when the tacks were maybe 1/2 inch apart rather than keep going till no obvious gaps which is what I did on this one. I thought about lapping the two pieces and plug welds and I suspect it would have avoided the distortion, but I would then be worrying about corrosion where the paint cant get to.

If I do it again I would still put a patch in rather than take the whole top of the van, mainly because my van lives outside and I have to work outside, so I wanted to finish in a single weekend once I started cutting. (and I broke the only window I ever tried to replace) but next time I would make ribs to support both curved welds right under the weld lines.
 
Thanks ronmidg - some really useful info

I'm going to go for the stepped edge and overlap idea, but probably seam weld rather than plug to keep the corrosion out
 
if you have a whole good roof panel and you put the cut close to the gutter all round the replacement should hold its shape, I cut the panel more or less to suit the hole which was a mistake.
 
Another thing... if the section of roof you use doesn't include the gutters, you can probably sell the gutters on to someone else who can make use of them :)
 
Just drill the spot welds and do it properly.

A problem with the plugging the hole and joggling is you'll have a water trap on the joggled edge. As anyone who's slept in a bus with no headliner will tell you condensation forms on the roof overnight. Even if you use a good zinc (weld through) primer on your repair and seam seal it afterwards eventually you'll get the rot creaping in. Seam sealer doesn't hold the rot back forever.

Here is my mates roof swap thread on volksmoan
http://www.volkszone.com/VZi/showthread.php?t=336042" onclick="window.open(this.href);return false;
 
Thanks ProfessorWheeto, thats a really useful thread! I like how you put 'just' drill out all the spot welds... about 300 of them!?!

Put me back in 2 minds again now - replacing the whole roof would be the ideal. I'll do some measuring to check the '73 roof is the same as the '68 - that might make the decision for me anyway. Presumably I can drill the spot welds out (both of them), and use the holes to plug weld it back on. Leaves me with an intact pop-top roof to sell on, or easily chop and sell sections (need to recoup money for later ;))

Where did I put that tape measure...
 
Well it does speed things up if you buy a few good quality spot weld drill bits, and if your on cordless a spare battery in the charger ready to go!

IMHO for the extra time it takes its really worth doing the job properly, your only going to do it once so why bodge it?
 

Latest posts

Top