Thanks to a very generous chap who has hired out his chassis rolling frames, I have been able to use them to access the underside of my van and get some pre-winter rust-proofing done - thought ya might like to see some pictures...
Having sorted the front and back of the van, I just had to clean up and re-paint the middle section of the underside. It is all pretty solid, but wanted to be sure. I had got fed up with trying to clean off those corrugated floors when lying underneath the van, and as for welding...
As I don't intend to spend too long on the job, I decided to do it out in the car park. Last week was sunny, so got away with it, but weekends rain has not helped.
Anyway...
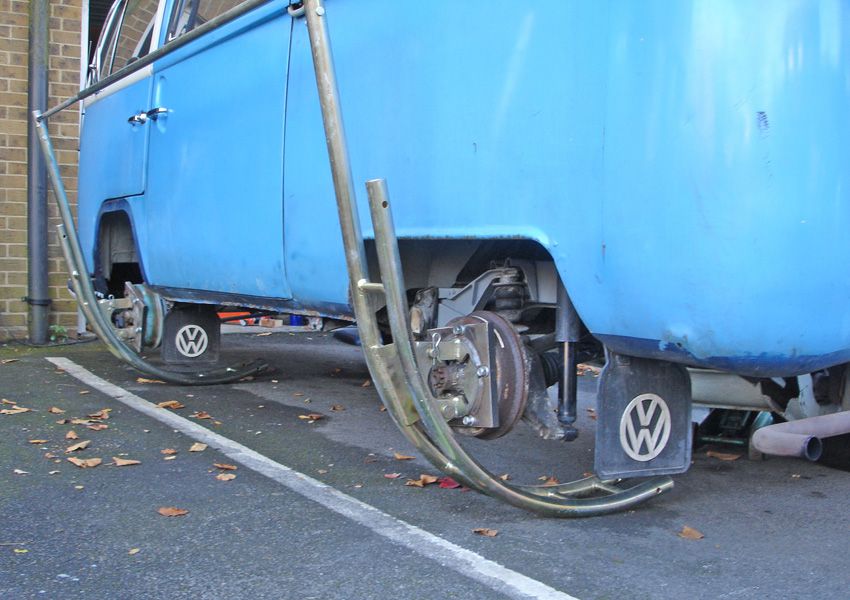
Van on Rollers
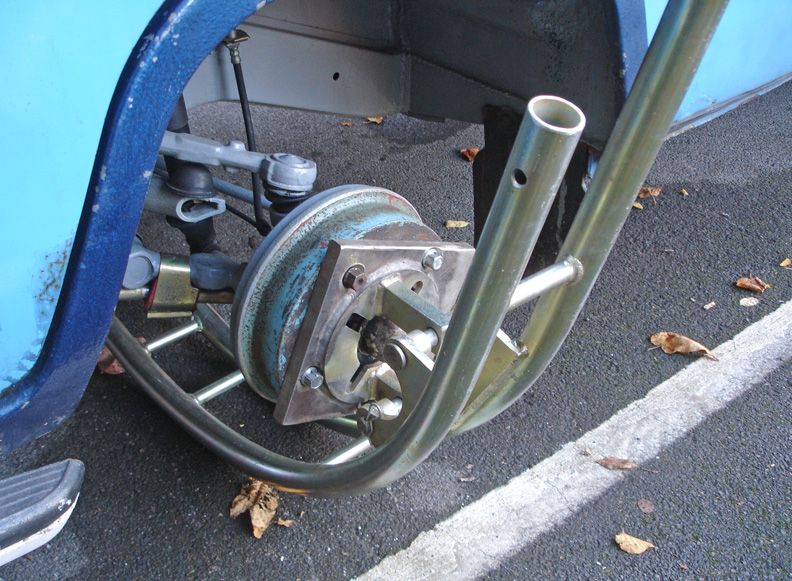
Adapter needed for wide wheel spacing
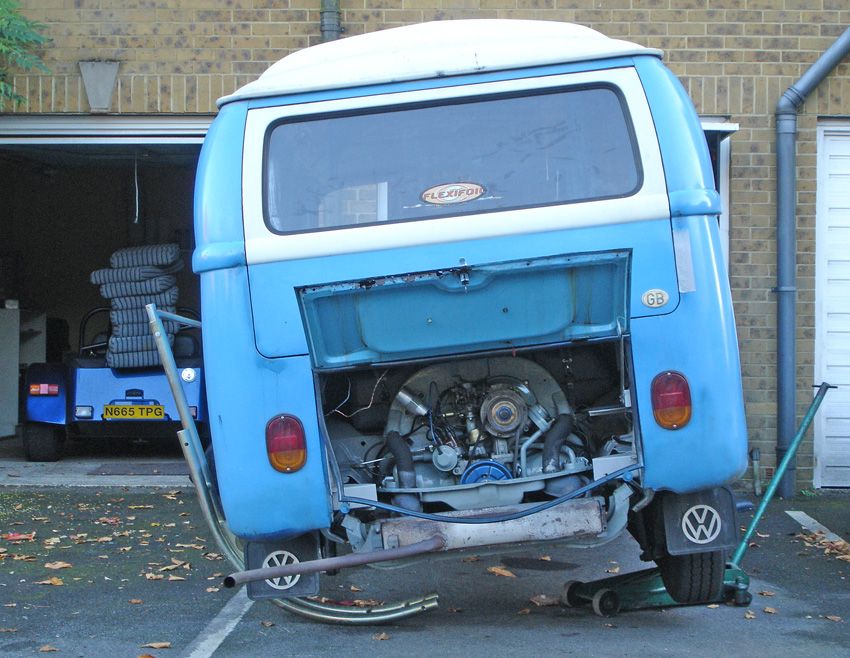
...it's a start!
Now I had no idea how these things were going to work with my van. Van is fully road-worthy and MOT'ed...most pics I have seen have been rolling a shell. Little bit scared about glass cracking, twisting, and the heavy pop-top on my van, so this was going to be a bit of an adventure.
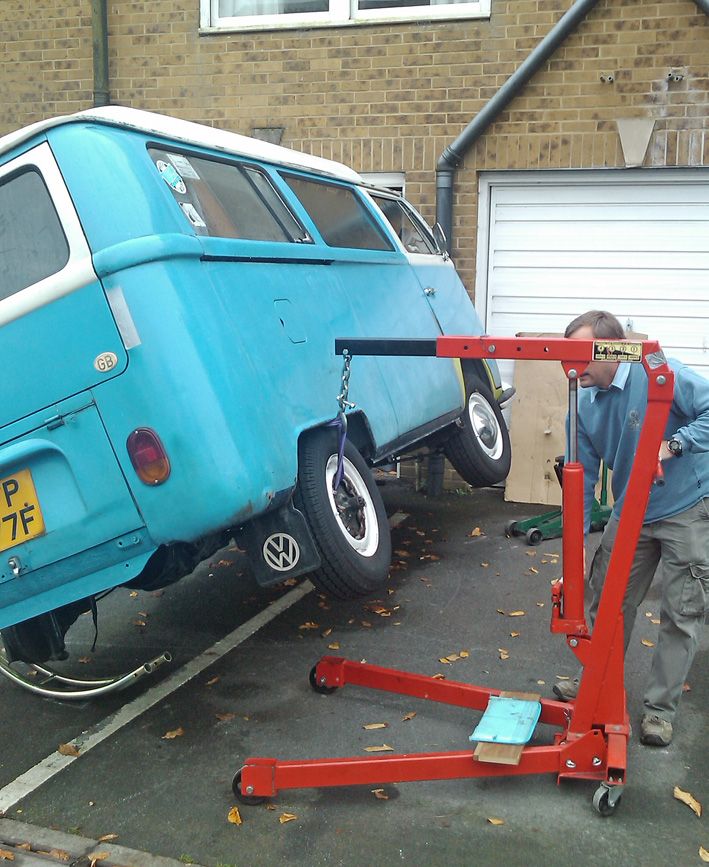
Used and engine crane to lift the van, but where to strap it....? Started up using the rear axle torsion tube bits, but crane clashed with van as we started jacking, so ended up putting the strop through the wheel and bolting back on the van - seems to work really well:
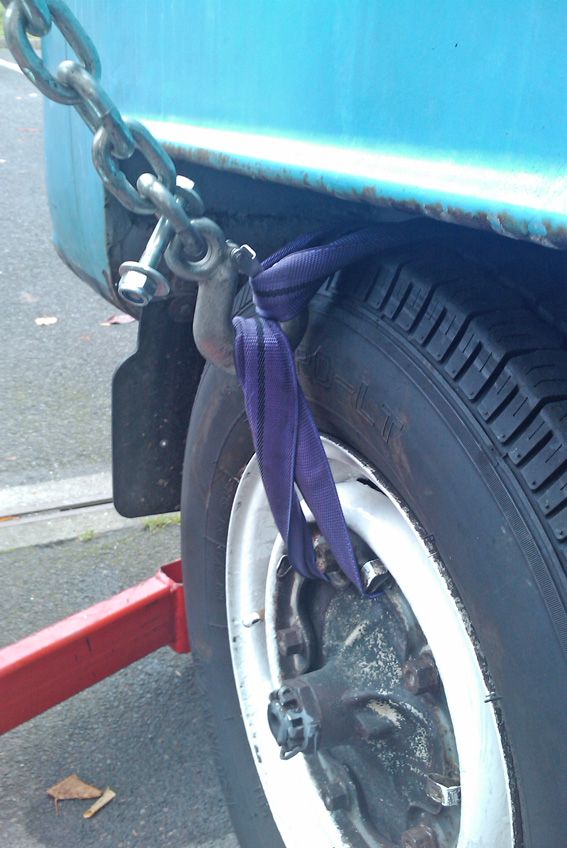
To start the lift off I used a jack at the front of the van at the same time, to help clear the crane arm
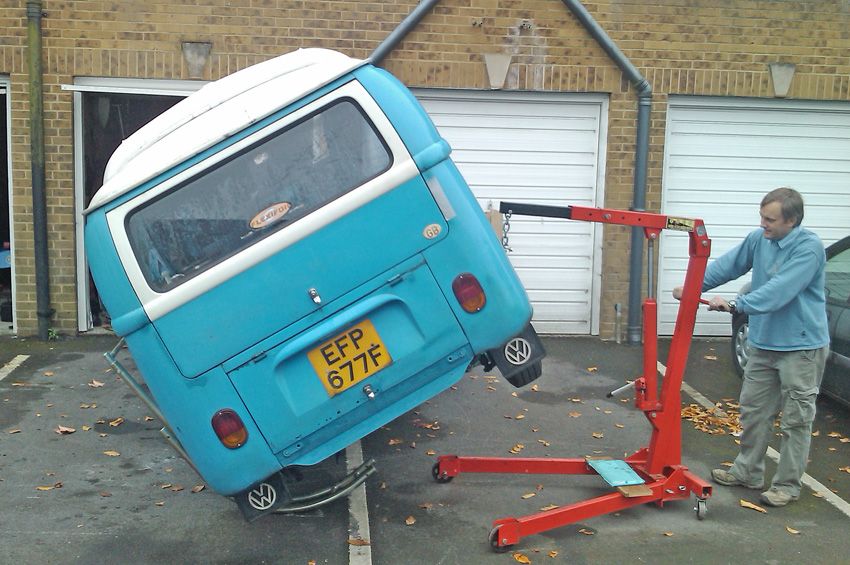
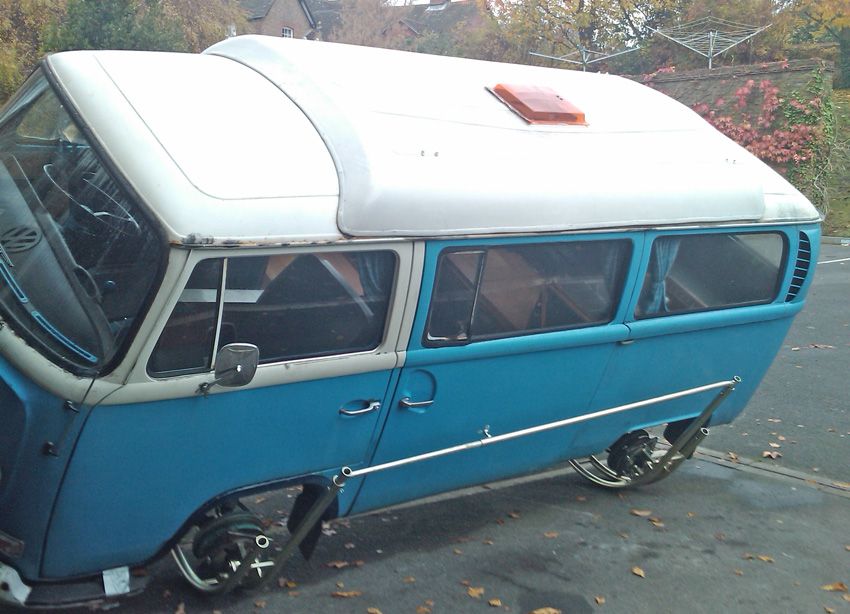
Still had no idea what was going to happen - had visions of the van crashing over on its side, with all glass shattering...
We got the van to what seemed to be a balance point:
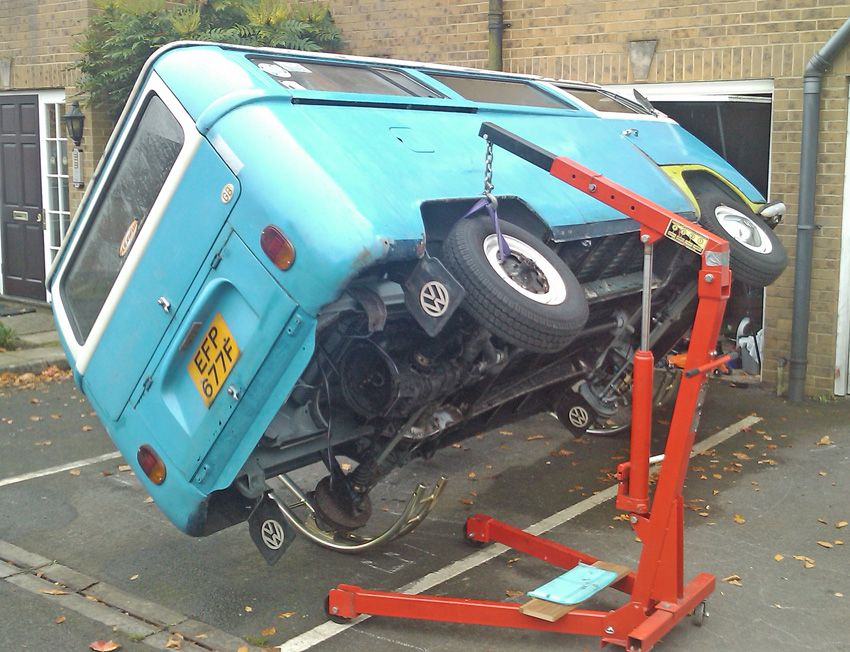
[We actually did a run-through the previous night when there happened to be 5 of us around helping - just in case, but it was too dark for pics then]
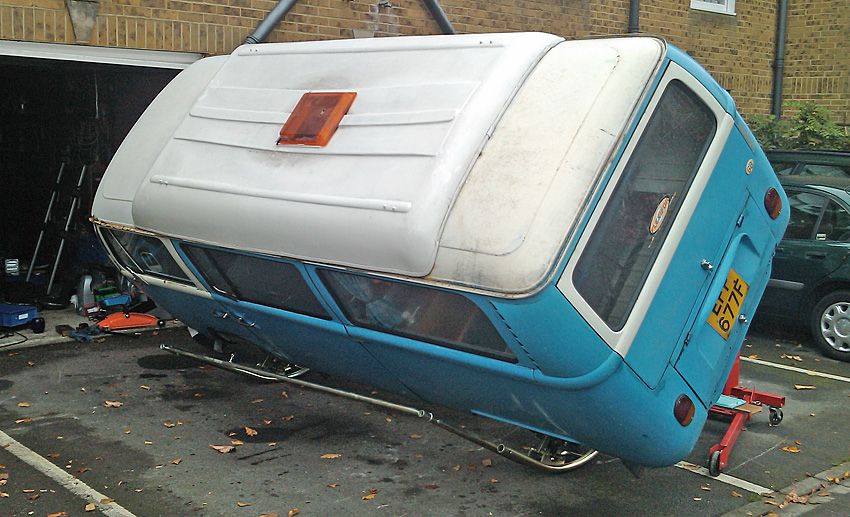
So once we had got to this point, we took a deep breath and pushed...
...with no drama at all the van slowly rolled over the last few degrees and settled with a gentle bounce as the j-tubes flexed. Easy!
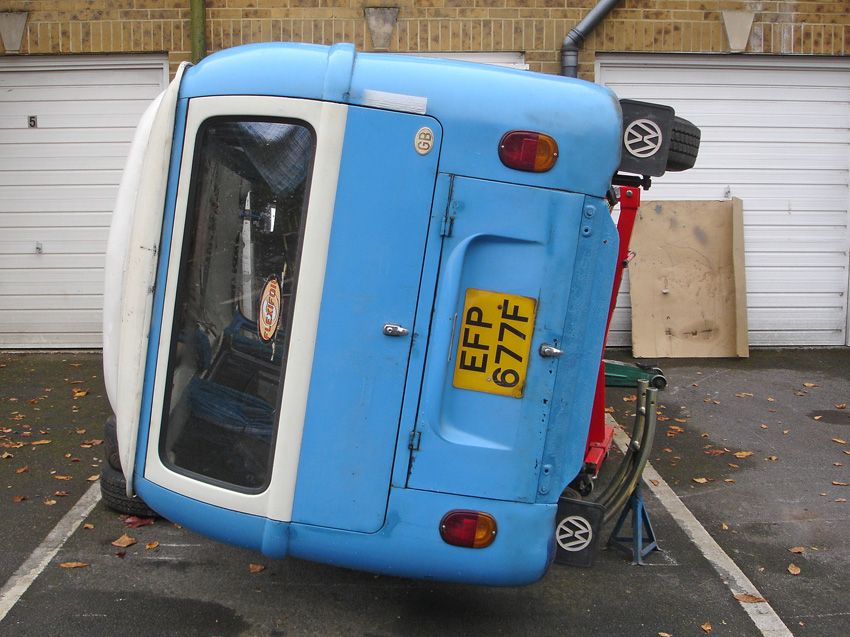
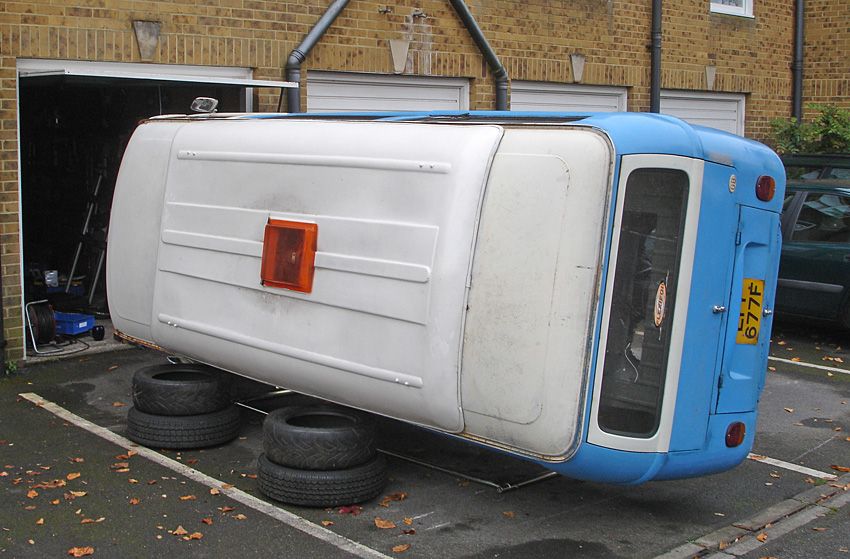
A few tyres stopped the van rocking, and an axle stand under the tubes on the other side provided safety.
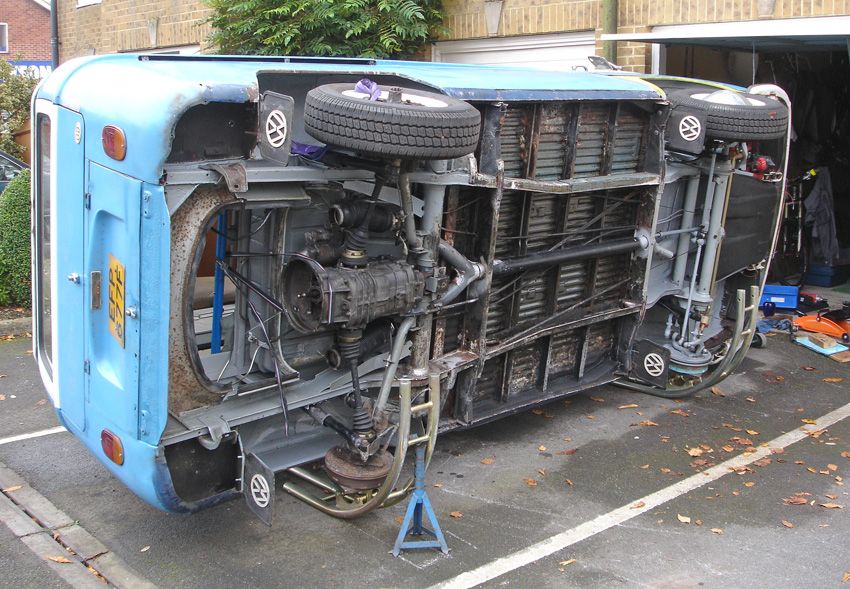
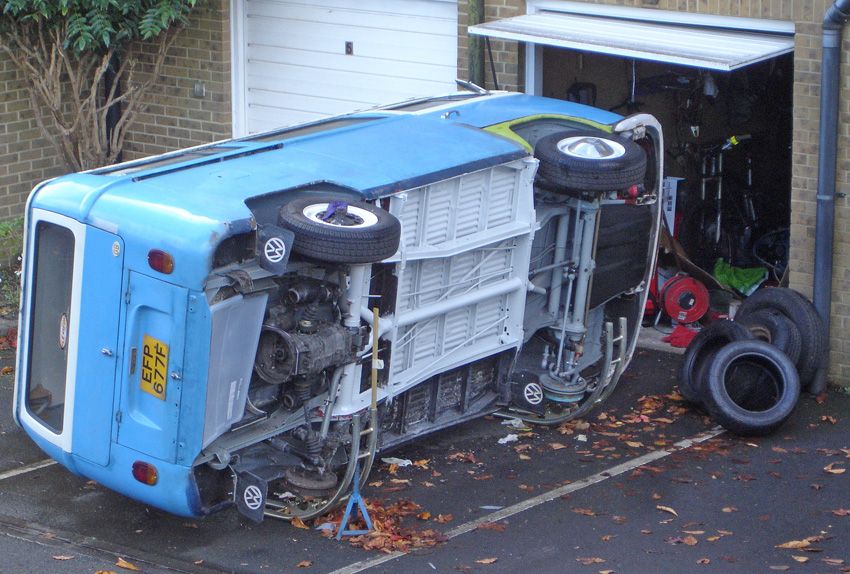
As you can see - access is now a joy! You can also see that I had whipped the engine out. Probably didn't need to in hindsight, but as I had no idea what was going to happen, it was no big deal.
So, it was this middle section I wanted to sort out.
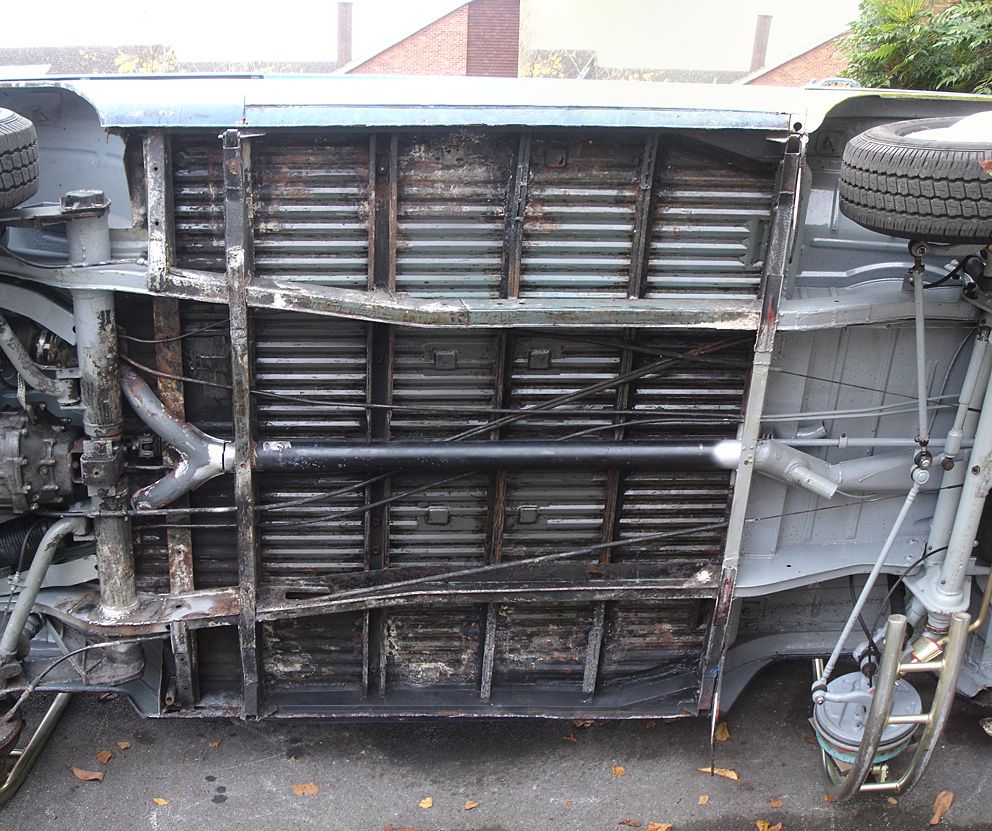
Clean off crappy underseal, weld where required and re-paint to match the work I had already done on the front. Job has a tight time factor as I have just lost the use of the garage the van lived in, so want to get it sorted asap and back on the wheels. Don't have the time for an 'over-winter' resto job. Just want to make van secure and use her...
Made a good start at the end of last week and took a few days off. Old underseal comes off ok with a bit of heat and scraping, followed by white spirit. Paint underneath is actually solid - especially in the centre section, so I'm leaving that on. As normal, sills and out-riggers are a little more 'weathered', but sound after some basic (and in some places a bit crude) repair work (done by someone else) a few years ago.
Weekend was a wash out and I was gutted to see my hitherto dry van get soaking wet. I got a JK cover to stop water getting in everywhere else whilst on her side, which works well.
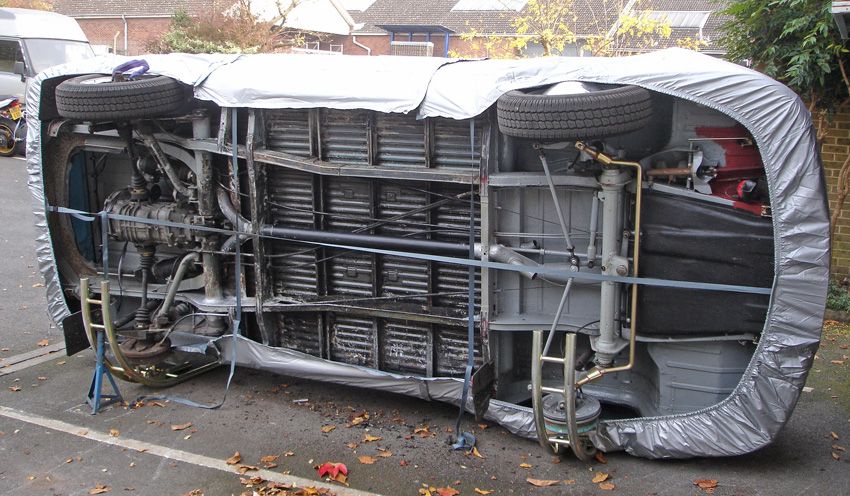
So far, cleaned off 2/3rds of underside, used MachineMart rust beater and then red-oxide to coat. This does a good job of not minding if the surface isn't spotless, and IMO works well.
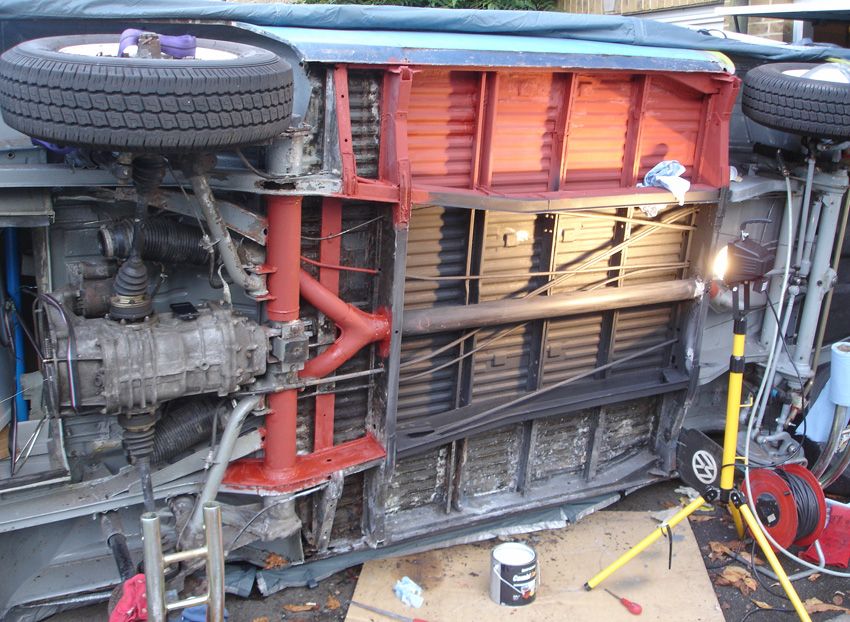
Halogen light is giving a little bit of warmth to the metal and paint.
I have decided to use spray underseal on the central section (where all the metal pipes run and access is a bit more of a bugger) I have then painted over this. I did this as I didn't have to take off every bit of what was already there - it was in pretty good nick - remember I have tight time limits....
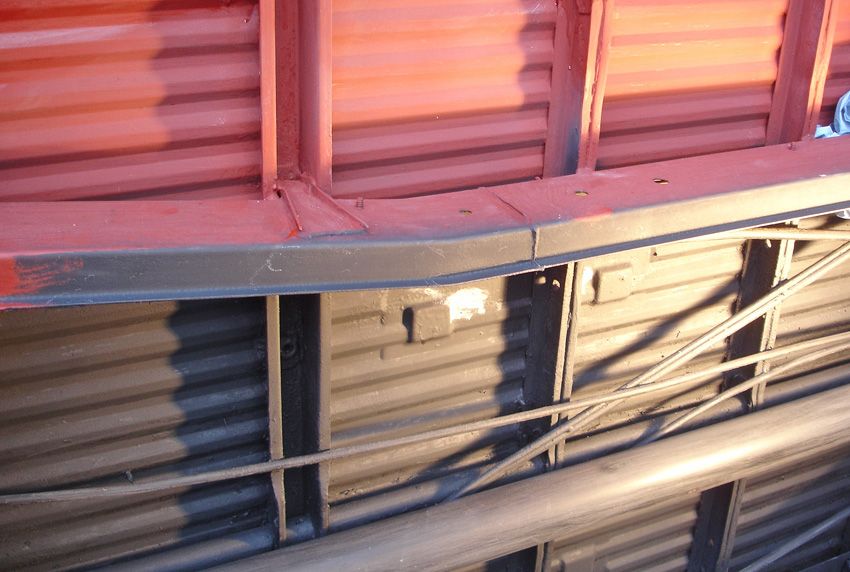
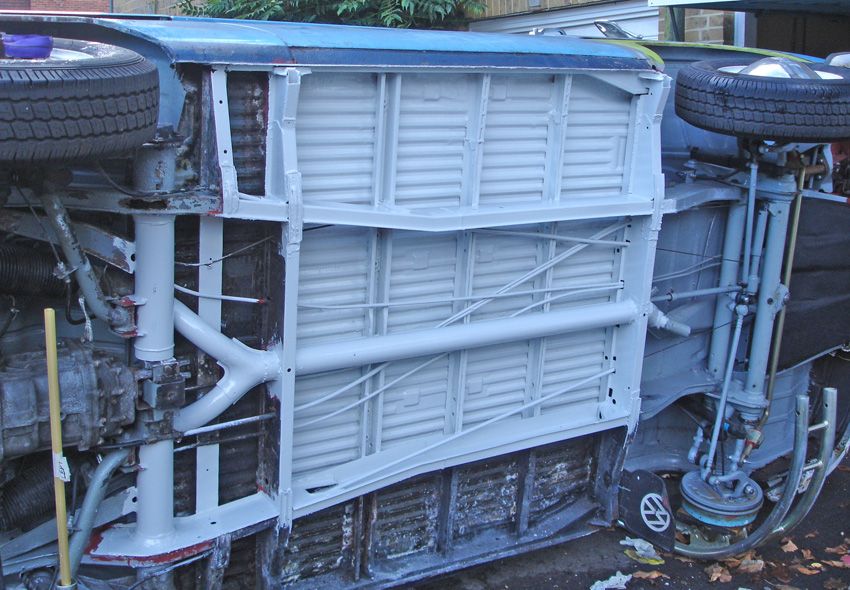
Yesterday I managed to get the paint on the 'top' and middle sections - I am using Rustoleum/Combi-Colour light grey. It was dark, so will take pics tomorrow and upload. It is looking good though.
I have decided to fit belly pans. Controversial I know, but I am not going to weld them on, but rather bolt them on. I'll make sure the chassis is painted and fully sealed first, will also paint the pans, and use them to stop crud getting thrown up in all the nooks and crannies...but won't seal them in. That way, they will drain, and I know that what is behind them is solid and protected...
Taken covers off to give van a bit of an airing:
...more to follow!
Having sorted the front and back of the van, I just had to clean up and re-paint the middle section of the underside. It is all pretty solid, but wanted to be sure. I had got fed up with trying to clean off those corrugated floors when lying underneath the van, and as for welding...
As I don't intend to spend too long on the job, I decided to do it out in the car park. Last week was sunny, so got away with it, but weekends rain has not helped.
Anyway...

Van on Rollers

Adapter needed for wide wheel spacing

...it's a start!
Now I had no idea how these things were going to work with my van. Van is fully road-worthy and MOT'ed...most pics I have seen have been rolling a shell. Little bit scared about glass cracking, twisting, and the heavy pop-top on my van, so this was going to be a bit of an adventure.
Used and engine crane to lift the van, but where to strap it....? Started up using the rear axle torsion tube bits, but crane clashed with van as we started jacking, so ended up putting the strop through the wheel and bolting back on the van - seems to work really well:

To start the lift off I used a jack at the front of the van at the same time, to help clear the crane arm


Still had no idea what was going to happen - had visions of the van crashing over on its side, with all glass shattering...
We got the van to what seemed to be a balance point:

[We actually did a run-through the previous night when there happened to be 5 of us around helping - just in case, but it was too dark for pics then]

So once we had got to this point, we took a deep breath and pushed...
...with no drama at all the van slowly rolled over the last few degrees and settled with a gentle bounce as the j-tubes flexed. Easy!


A few tyres stopped the van rocking, and an axle stand under the tubes on the other side provided safety.

As you can see - access is now a joy! You can also see that I had whipped the engine out. Probably didn't need to in hindsight, but as I had no idea what was going to happen, it was no big deal.
So, it was this middle section I wanted to sort out.

Clean off crappy underseal, weld where required and re-paint to match the work I had already done on the front. Job has a tight time factor as I have just lost the use of the garage the van lived in, so want to get it sorted asap and back on the wheels. Don't have the time for an 'over-winter' resto job. Just want to make van secure and use her...
Made a good start at the end of last week and took a few days off. Old underseal comes off ok with a bit of heat and scraping, followed by white spirit. Paint underneath is actually solid - especially in the centre section, so I'm leaving that on. As normal, sills and out-riggers are a little more 'weathered', but sound after some basic (and in some places a bit crude) repair work (done by someone else) a few years ago.
Weekend was a wash out and I was gutted to see my hitherto dry van get soaking wet. I got a JK cover to stop water getting in everywhere else whilst on her side, which works well.

So far, cleaned off 2/3rds of underside, used MachineMart rust beater and then red-oxide to coat. This does a good job of not minding if the surface isn't spotless, and IMO works well.

Halogen light is giving a little bit of warmth to the metal and paint.
I have decided to use spray underseal on the central section (where all the metal pipes run and access is a bit more of a bugger) I have then painted over this. I did this as I didn't have to take off every bit of what was already there - it was in pretty good nick - remember I have tight time limits....

Yesterday I managed to get the paint on the 'top' and middle sections - I am using Rustoleum/Combi-Colour light grey. It was dark, so will take pics tomorrow and upload. It is looking good though.
I have decided to fit belly pans. Controversial I know, but I am not going to weld them on, but rather bolt them on. I'll make sure the chassis is painted and fully sealed first, will also paint the pans, and use them to stop crud getting thrown up in all the nooks and crannies...but won't seal them in. That way, they will drain, and I know that what is behind them is solid and protected...
Taken covers off to give van a bit of an airing:


...more to follow!

