Sagging roof repair

Early Bay Forum

Help Support Early Bay Forum:

This site may earn a commission from merchant affiliate links, including eBay, Amazon, and others.

redwards

Well-known member
Joined
Aug 25, 2011
Messages
97
Reaction score
0
Location
Llanelli with a spanner in my hand!
Hi all,

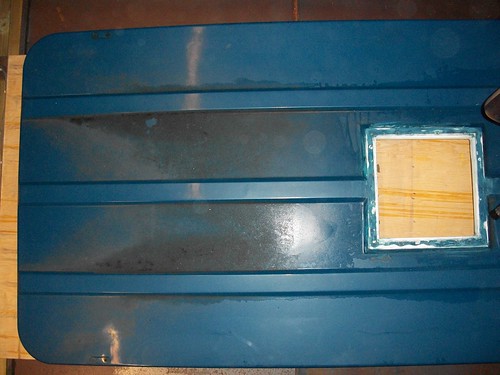
As we enter a new year, I am on a push to get the bus sorted. The weather last year literally put a dampner on things. After I stripped the interior I found the poptop was leaking, through the fibreglass. I have pull the top off and stripped everything off it, I have also picked up some 20x20mm Ali U channel.


100_2215


100_2217

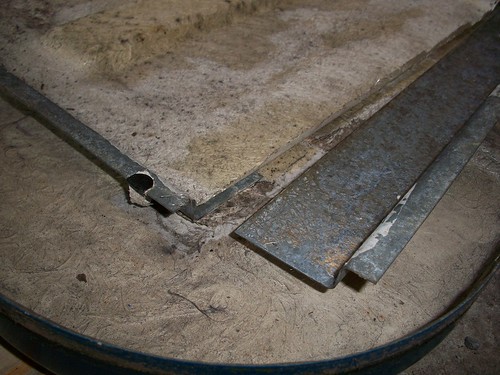
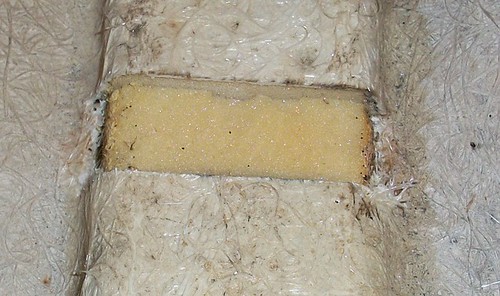
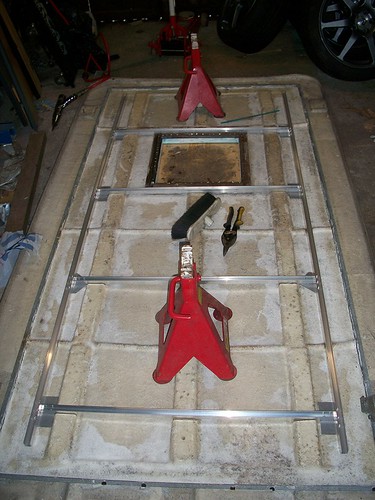
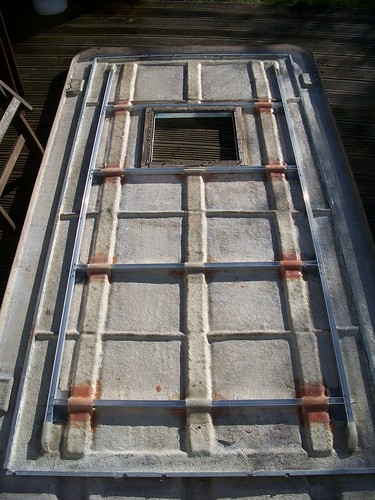
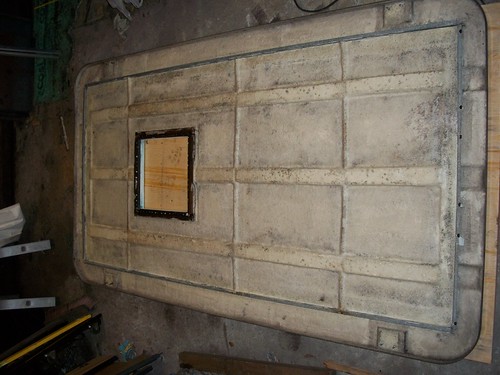
The roof is all fibreglass, the thinner cross supports are cardboard rods with a thin wire through the centre. The 3 thicker ribs are filled with expanding foam. Around the edge is what appears to z profile metal which has been fibreglassed over to bond it in place.

So, has anyone repaired this type of roof before (I've seen 2/3 online)? My plan is to run the Ali down the full length (outside the ribs), then 3 strips to replace the cardboard tube.

Any help will be greatly appreciated. Thanks, Rich.
 
Hey Rich, I think your plan sounds good, but not sure what sort of pop top that is. The flaw in the original design seems to be the break in the main / central rib because of the skylight. What you are proposing should vastly improve the whole thing so long as you reinforce round the skylight as well to try and make that central rib is as continuous as possible or even tie off the front and rear of the skylight to the side supports a bit like trimmers around a loft hatch. The other thing I`d do with a repair / rebuild like that is to make sure you have as much sag in the roof as possible while you have it upside down to make sure that it`s as high as possible when it`s up the right way to aid run off and to stop it sagging for a long time to come. And the last thing I`d make sure of, is that when it`s totally bonded, I`d drill a few holes through the metal and fill carefully with expanding foam (not too much) because of the thermal conductivity issues with ally. Then insulate the whole sheeebang. Then you`ll have a pop top to last for the rest of the century. :mrgreen:

Ozziedog,,,,,,,,,,,,Ex roofer and insulation surveyor,,, :lol: :roll: :lol:
 
Hi ozziedog, thanks for casting your eye over this. I've mocked something up below.

The U channel Ali will be put on it's side in a'C' position, open side facing the outer edge. It will also be drilled every 6" on the bottom edge to allow the adhesive bond through it. I'm going to have to rely on some foil sheet insulation though, as the z profile that the headlining clips to isn't very deep.


100_2217

I might also get some sheet Ali to reinforce the corners like this (pic borrowed from Hotrod's amazing thread)

89564036.jpg
 
Just thinking out loud,,,,,,, but the U channel will be twice as strong if you fixed straight through the centre of it so that the middle of the U was in contact with the roof with some rivetts then insulate and glass over,,, Off of your first post, I thought for some reason that you`d intended to use the U channel with the U hanging down away from the roof and just secured with glass fibre and I think either of these ways would be a lot stronger. You are doing exactly as I was suggesting around the skylight. It`s not clear from the piccy,, but are there two seperate skins to this construction ? And if so ,, is it possible to seperate them and hide the reinforcing ?? :?

Ozziedog,,,,,,,,,,,,, :mrgreen:
 
Please keep thing thinking aloud! The more it's talked about the more pitfalls/improves we can find :D

Plan A was to have the U hanging down, but I would struggle fixing the cross pieces. Thinking about it now, there won't be too much lateral movement once it is all in position. I didn't want to use rivets into the roof as I can't guarantee that I won't break through the outer skin. There are 2 skins (the 2nd is inside the z steel), they do seem to be bonded together so I doubt they will come apart without something cracking.

I am concerned that all this work is happening on the inner skin, which should be nice and rigid. The mounting points for the lift assembly are on the outer skin, which will flex. I think this area will be address in phase 2!
 
SO,,,,,,, still thinking out loud. Are you actually going to reinforce the ceiling when it`s the roof (to use house terms) that needs strengthening / straightening out ? If you could get the reinforcement into the long ribs in the outer section, either with fibreglassed U channels or repeatedly rivetted U channels into the flat ish top of the ribs, the leak potential would be somewhere between minimal and zero because it`s on the high point of the roof and not the sections where all the water flows, a bit like fixing large ribbed corrugated roofing sheets, as it`s the lower bits that have all the run of water on them. The upper bits just have to deal with the actuall few raindrops that land on them, very much like most roofs leak on the lower sections and not too much up on the ridge unless there`s a stack or something to catch extra water. Also how much has the roof and inner distorted ?

Ozziedog,,,,,,,,,,, :mrgreen:
 
The inner and outer skin are bonded together. I've tried to sketch it out below.


roof

I like the idea of putting the reinforcement in the rails, I think I should have bought box section instead now! :roll: With the roof & ceiling bonded together though they should be ok. I'm going to start chopping on the weekend, so I'll post some more pics up.
 
Bit of an update for you all.

After getting the lurgy last weekend, progress hasn't been great. I cut into the ribs to fit the frame and it was full of foam as expected. Looking at the construction, it looks like the outer skin was moulded first. Then all the foam, cardboard roll, timber and z profile was layed out, next a fibreglass layer was put over the lot.


100_2231

Once all the cuts were made, I could get the frame sitting flush with the roof. A little fettling with a flap disk was required in places


100_2232

Next up was the fibreglass. I bought a 250ml kit online, I've used all the resin and only half the fibreglass mat :lol:


100_2235

So getting there slowly, I need more resin now for the other side of the frame. Then it'll be flipped over and sanded down so I can check the top over.
 

Latest posts

Top