What did you fix on your Bus recently?

Early Bay Forum

Help Support Early Bay Forum:

This site may earn a commission from merchant affiliate links, including eBay, Amazon, and others.
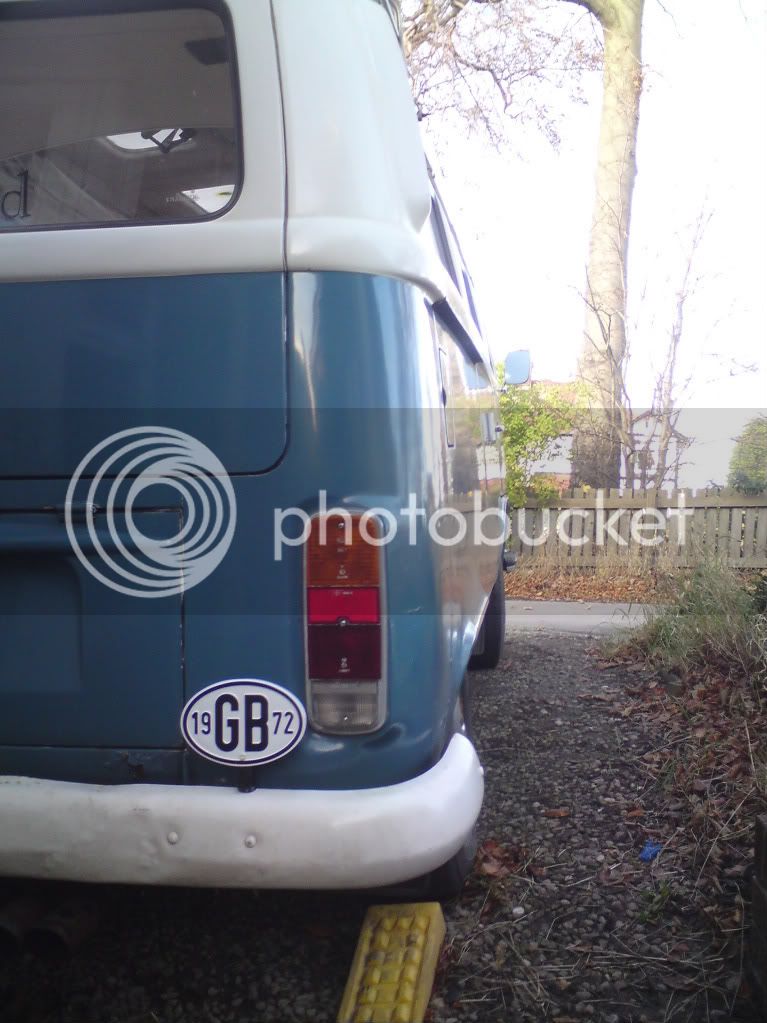
I installed my GB date plate:
DSC00876.jpg


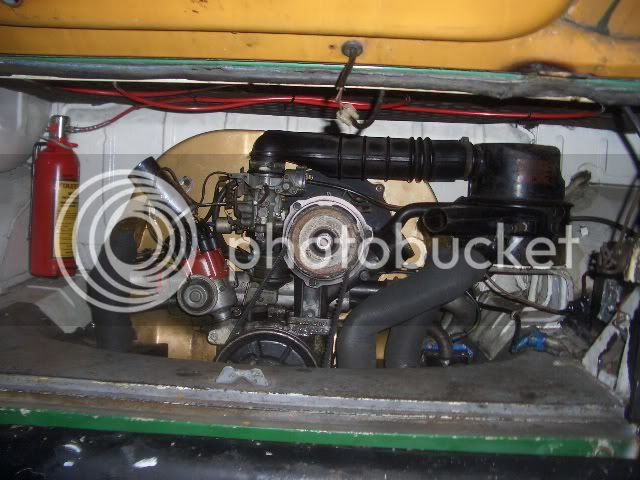
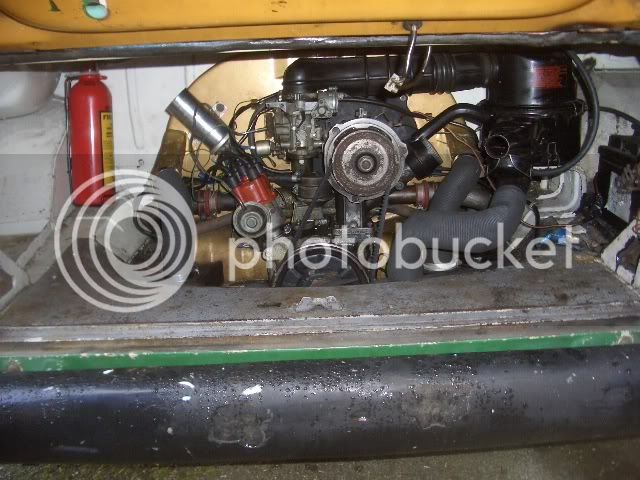
as well as a flame thrower coil, and fixed my reversing issue (when reverse bulbs illuminated a fuse blew and engine died - not any more) :D

Next job is heating: just bought exchangers, stock exhaust and fitting kit - hope I have everything, and the aptitude to do the job!?
 
I was thinking of installing a Westy seat/bed on the Bay, but looking for one is hard. Hence, I improvized one by buying a flywood, drawer railings and some bolts and nut, plus with the help of a handy drill!

Here it goes:

DSC_1233.jpg


After measuring the cargo area, I installed the removable railings under the flywood!

DSC_1240.jpg


Then, got the measurement of the railings placed at the cargo area!

DSC_1246.jpg


After drilling and installing the railings and the flywood, this is the finished job (sans the lamination and edgings)

DSC_1247.jpg


Half-pulled!

DSC_1248.jpg


Full length! The mattress kept on top to the table and net below the ceiling!

DSC_1257.jpg


Finished one! I still need to place a rod that will rest on the bumper to re-enforce it while it is being used. Plus, I have to customize a cloth with screen to cover it!

DSC_1255.jpg


Shot from the inside.

DSC_1261.jpg

The kips were excited to try it!

DSC_1267.jpg


A table. Although its a bit higher than a table with the regular height! But its worth it!

Thanks
 
I recently added the following items on our baywindow, viz:

1. Table in the middle of the rear seat and seat facing the back.

2. Removable table up front in the middle of the driver and passenger seats attached under the dashboard and is stored at the back of the driver's seat when not in use.

3. Cabinet beside the seat facing the back which is right at the back of the passenger seat and beside the sliding door. And once its door is opened, it can be used to place the portable/picnic gas burner.

4. Storage/cabinet in the middle of the driver and passenger seats. And can be use as an emergency seat for one child.

I'll post the pictures later.

Thanks.

DongKG
 
Just sorted out me rear brakes un-adjusting see here http://forum.earlybay.com/viewtopic.php?f=4&t=11553" onclick="window.open(this.href);return false;

Next is to sort out the zips on the awning as they are broke.
 
I really pushed the boat out


I charged the battery

then i


charged the leisure battery.
Dont want to over do it.
 
I've finally got round to putting a proper drivers seat in, rather than the naff boy racer bucket seats (previous owner :roll: )

Fitted a new drivers door last week, just need to find a passenger door now..... :wink:
 
Just fitted a JK type parcel shelf under the dash,bought s/hand. I need as much storage space as I can get. :)
 
couldnt face another 30 mins of corrie, so went out and fitted my new (to me) locking engine lid lock

keep the scrotes outta my engine bay :mrgreen:
 
Fitted 2 new sunvisor clips (cheers carole) and a glove box lid (cheers Scott), also stripped half the interior and currently painting the floor
 
New air filter and replaced a bit of wiring, which still needs to be tidied.

Spot the difference :roll:

CIMG8326.jpg


To...

CIMG8484.jpg


:lol:
 
I added a cabinet at the luggage compartment of our Baywindow bus.
I bought a cabinet but its back would not rest properly against the passenger window of the luggage complartment. Hence, I modified the same just to fit accordingly. These are the pictures I took in the process.

DSC_1288.jpg

I dismantled the entire cabinet for fitting.

DSC_1285.jpg


After getting the right curves and dimentions, I sew the panels.

DSC_1286.jpg

DSC_1287-1.jpg


DSC_1290.jpg

DSC_1291.jpg

Afther assembling the entire cabinet, I installed the back cover. Due to the modificatios, the cover had to be forced fitted.

Then each panel was double checked for correct distance.

DSC_1295.jpg


Now, since the base of the cabinet is flat and would interfere with the bed extender/table on the rear compartment, I had to make a customized base onto it.

DSC_1306.jpg


Once the base was finished and the wood laminations had been applied, I installed the cabinet using air/con brackets, three on the base and one on top.

DSC_1301.jpg


Double checking whether the slider interferes with the base of the cabinet. Flawless!

DSC_1304.jpg


Then, installed the door. And finished!

DSC_1308.jpg


View from the inside of the bus!
 
I also installed this cabinet in the middle of the front seats:

DSC_1311.jpg


Close

DSC_1310.jpg


Open

DSC_1312.jpg

Also this detachable table up front which is stored at the back of the front driver's seat if not in use.
 
After getting an exhaust from Rocket back in October I finally, eventually removed the 4-tip Monza and have gone back to stock!!

Wow :shock: , I know the old exhaust was blowing 'slightly' but how much quieter!! I keep thinking the engine has stalled at tick over. Now just gotta check all the joints in the heating system - just in time for the milder weather!

Also fixed the horn (corroded connections) and rear hatch lock (old grease).

Next Job (after MOT) build unit behind bulkhead incorporating seat, storage chest, sub box, fold up table & magazine/map holder!
 
Spent all day under mine today :cry: After spend 7 hours getting home from DF on sunday (thanks to mrAA) spent today removing the engine and find that the release bearing was smash to bit :cry: :cry: :cry:

Still should be on the road soon :D
 

Latest posts

Top