1970 RIVIERA

Early Bay Forum

Help Support Early Bay Forum:

This site may earn a commission from merchant affiliate links, including eBay, Amazon, and others.

AGC

Well-known member
Joined
May 15, 2007
Messages
689
Reaction score
2
Location
CAMBS/SUFFOLK
I guess the hunt for this bus started the day after selling the previous one.... Not that I had any intentions of buying another Early Bay because I had decided to step back from the scene for a while... However when the VW bug has hold of you, anyone outside the scene cant understand how lost you feel when your drive is Bay-less!! :(
So, several weeks passed and a very clean Mercedes Vito came up for sale at work and I thought it would be a good project to convert it to a camper so I purchased it, spent lots of money on it and used it for a while, but it wasnt a Bay. The final nail in the Merc coffin and what made my hunt for my next EB inevitable was last years Alive & Vdubbin Show where we used the Merc to camp and realised it was "just not right" :D :D

So the hunt began.... Ive had Late Bays, and a 1966 Splitty but Im hooked on Early Bays. My last bus was my favorite so far. It was a tin top that came to me via Austria and was very solid and with original paint and some original sign writing.

VanandDogs006.jpg


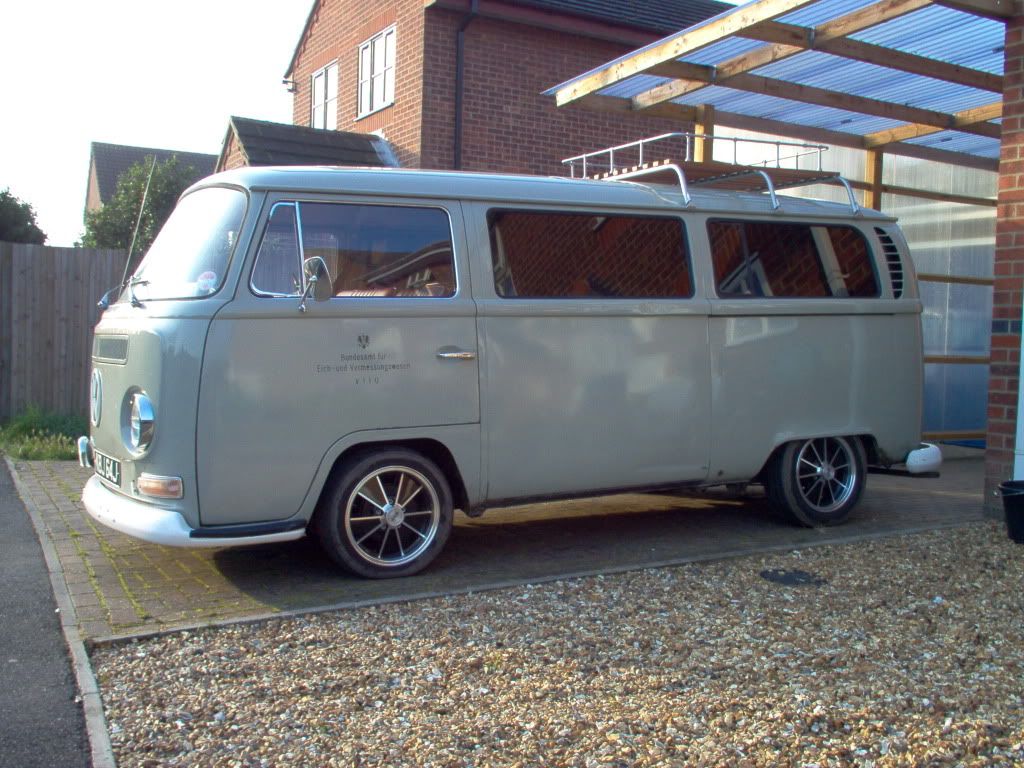
The new bus had to be original, from a dry country and this time had to have an elevating roof (getting too old to stoop or shuffle around on Knees ) :D. Altho I didnt really like the look of busses with elevating roof I decided that a good compromise would be a turret top like the splitty S042 design.

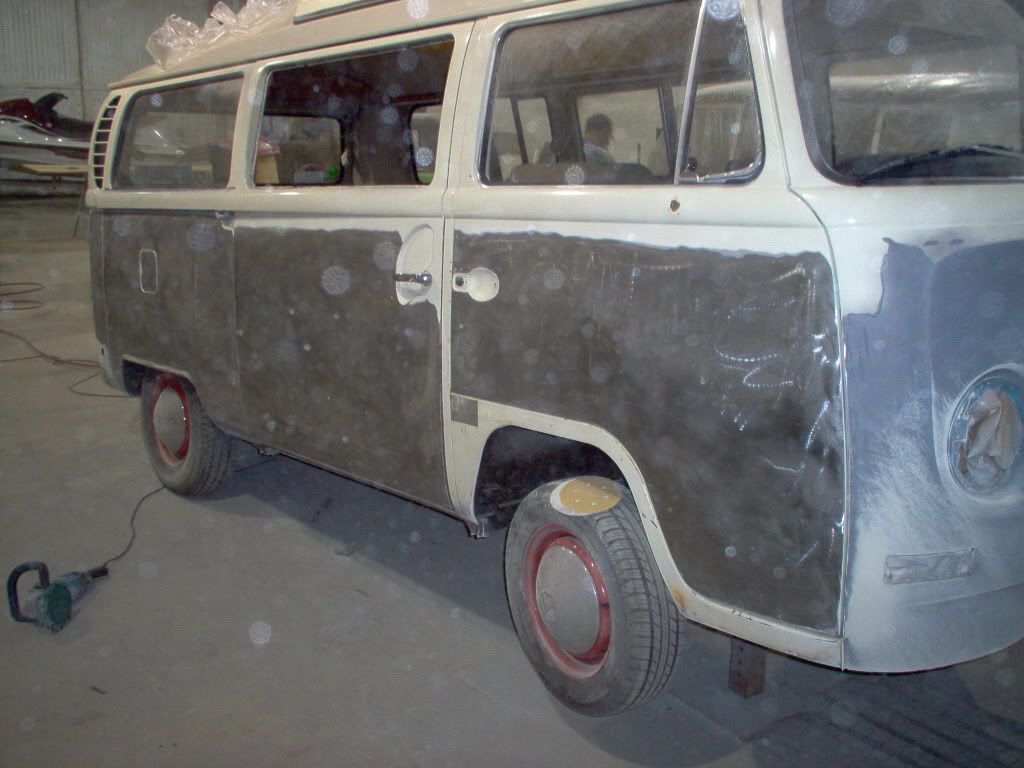
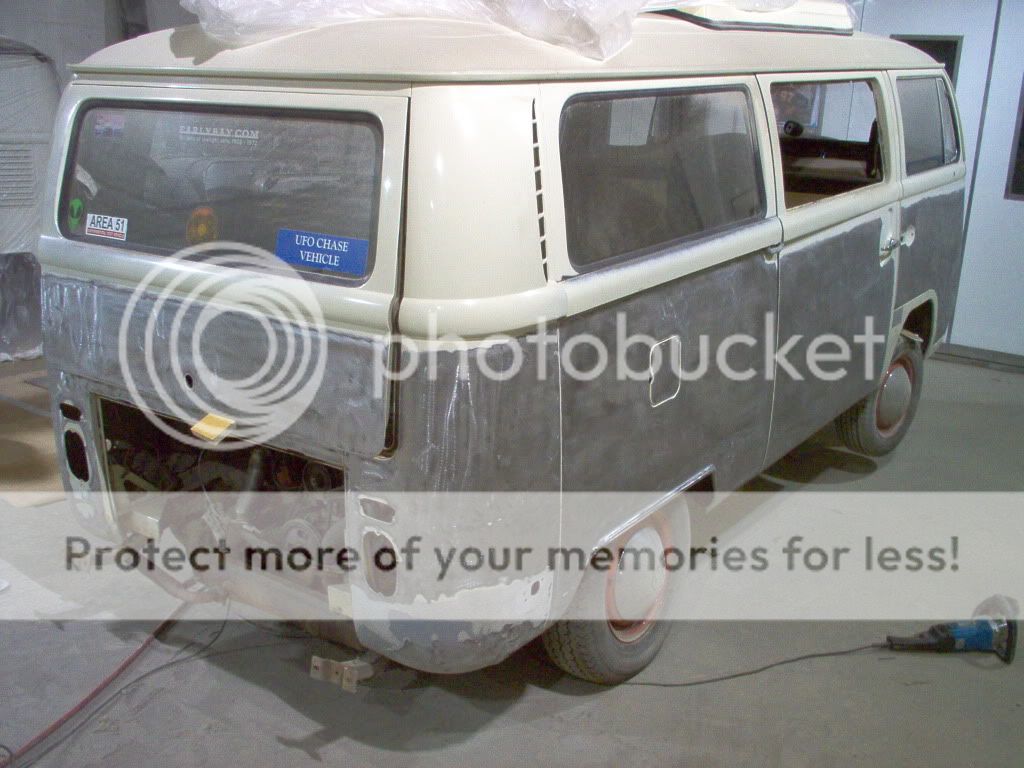
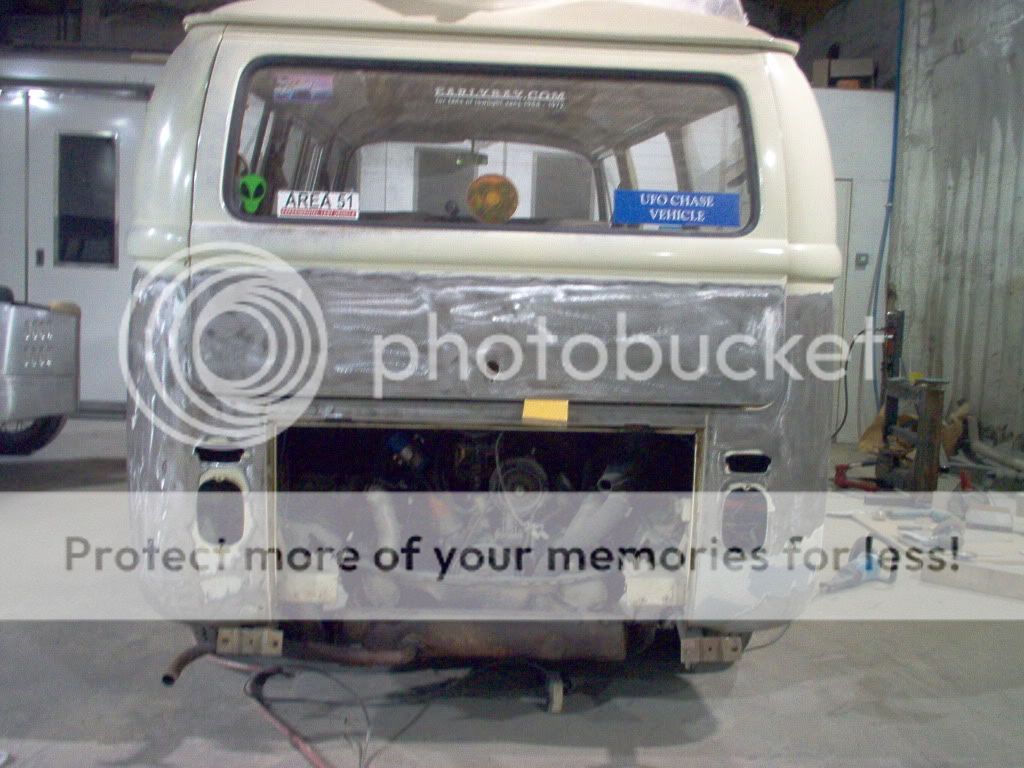
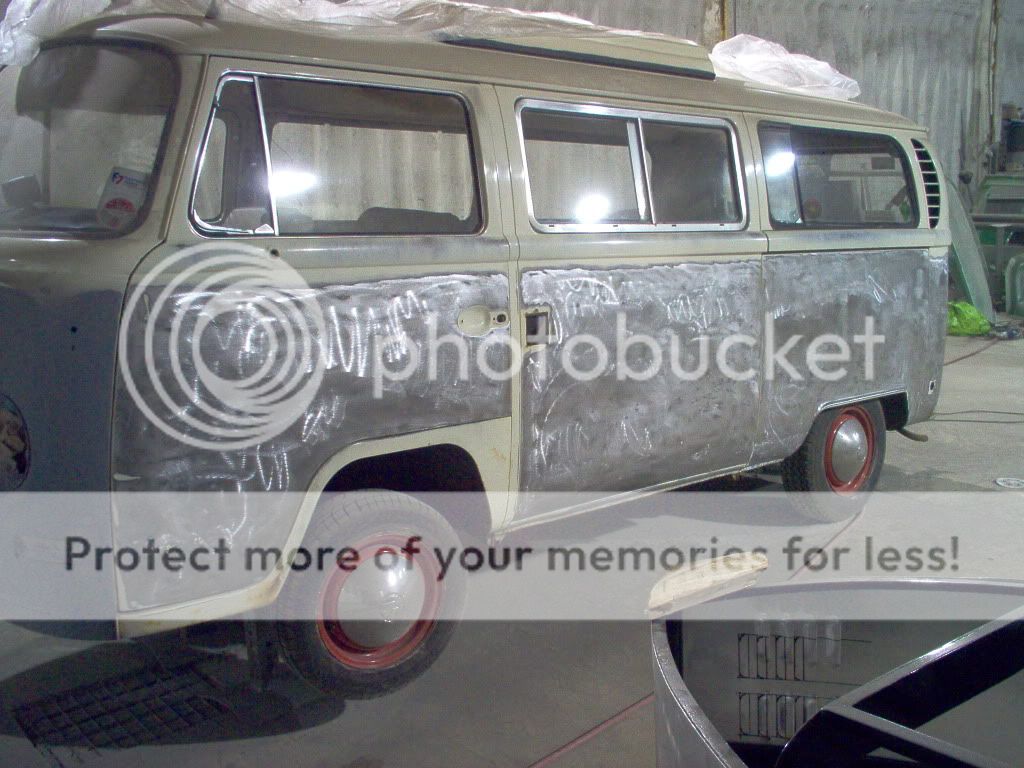
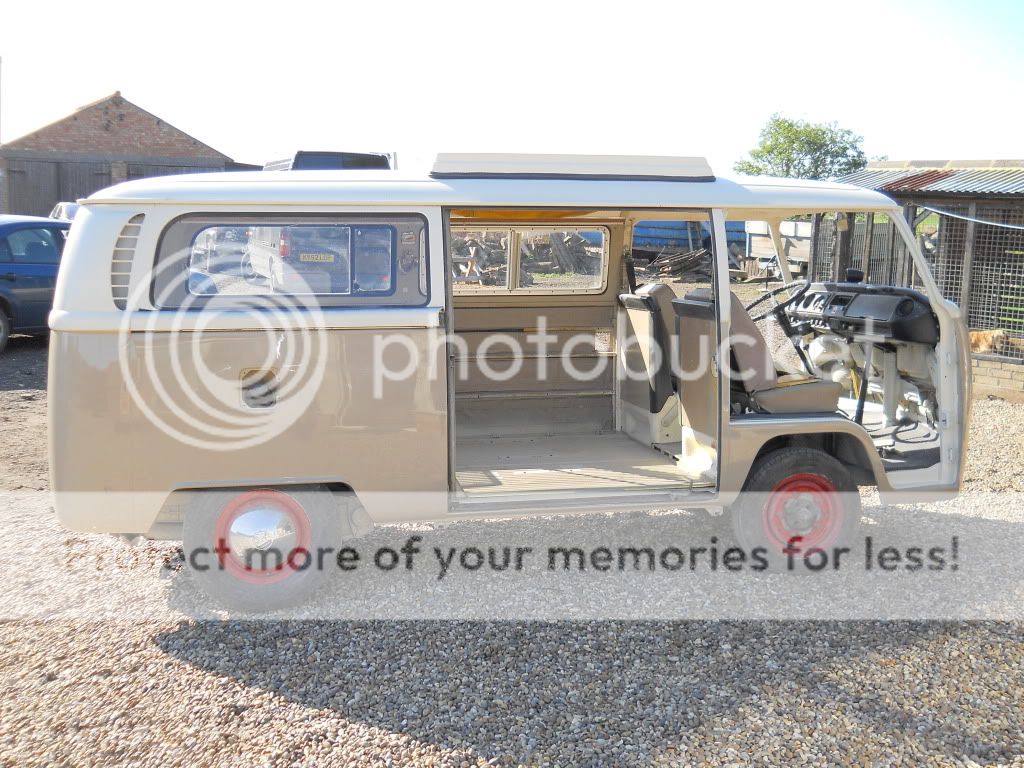
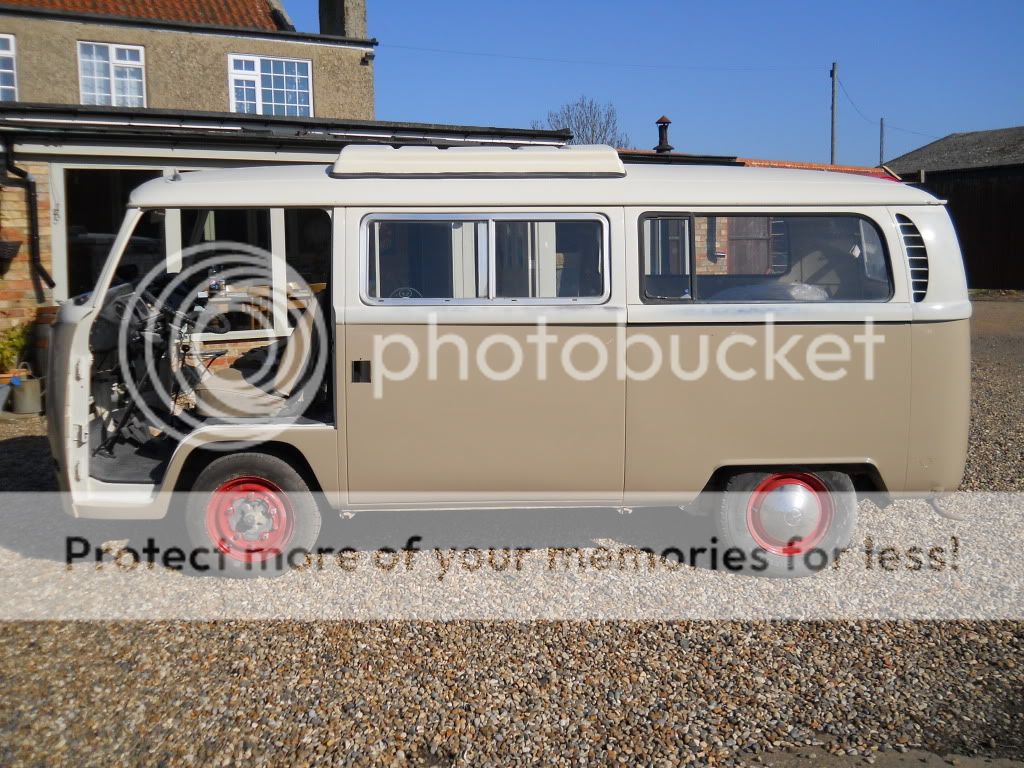
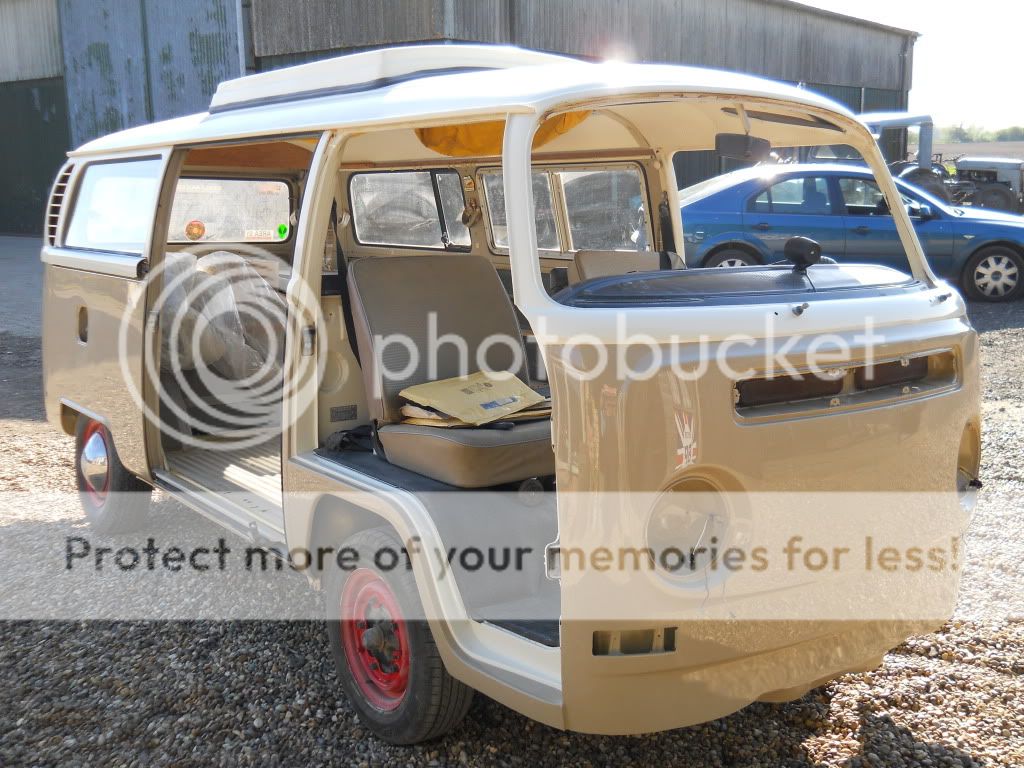
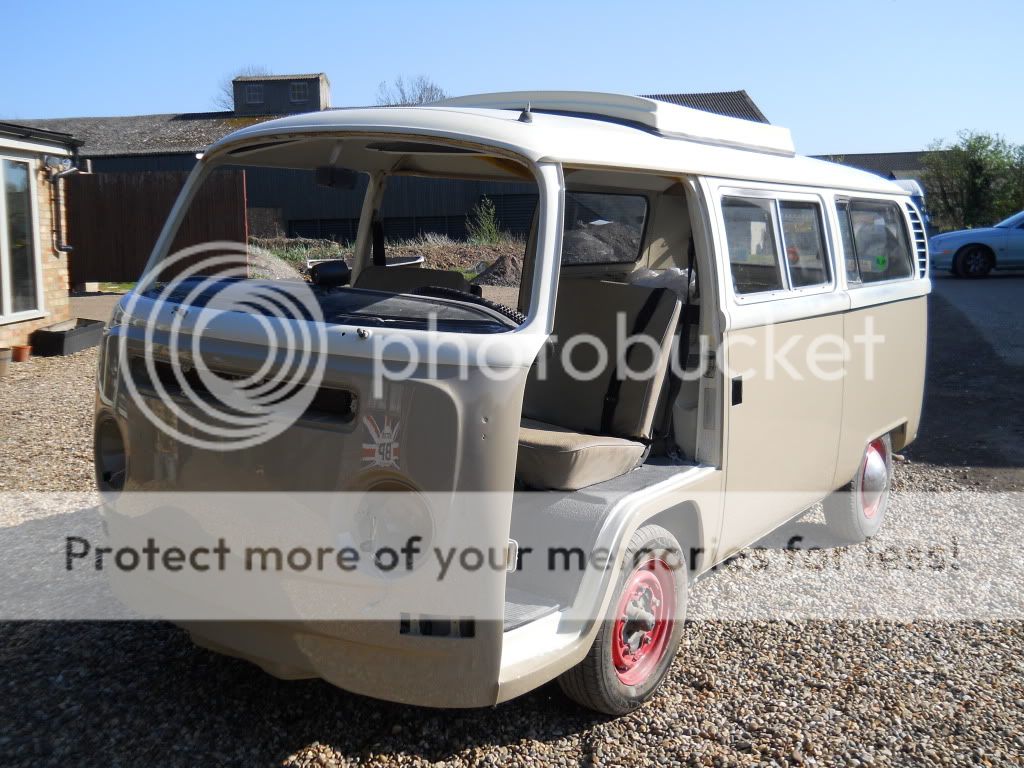
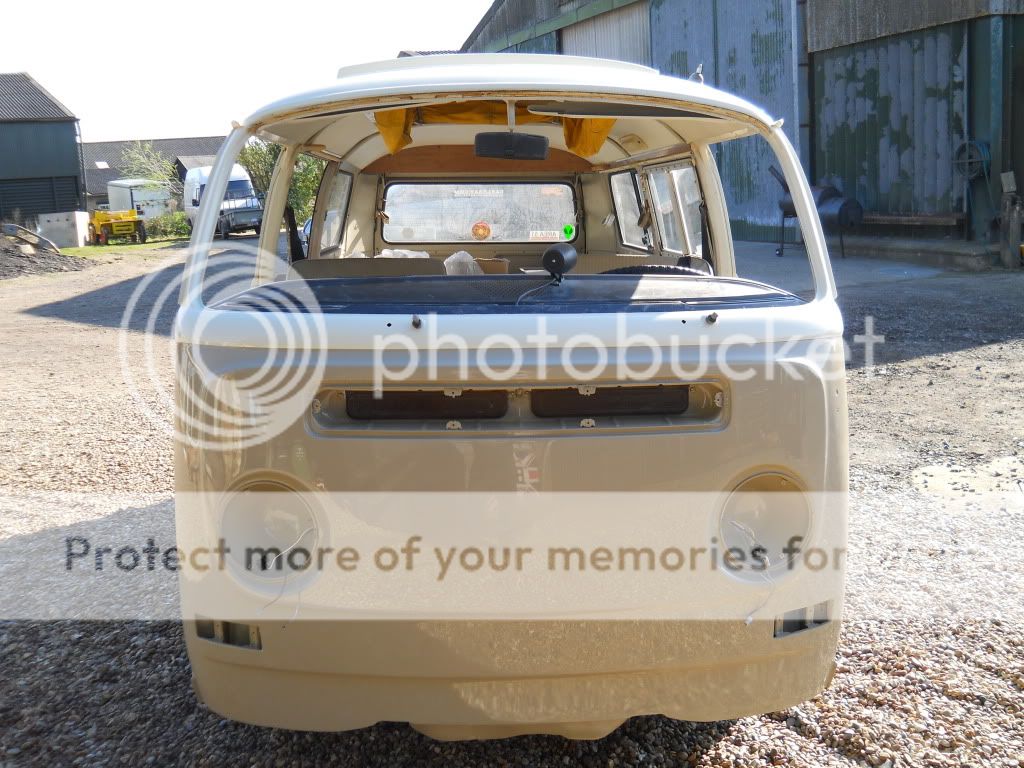
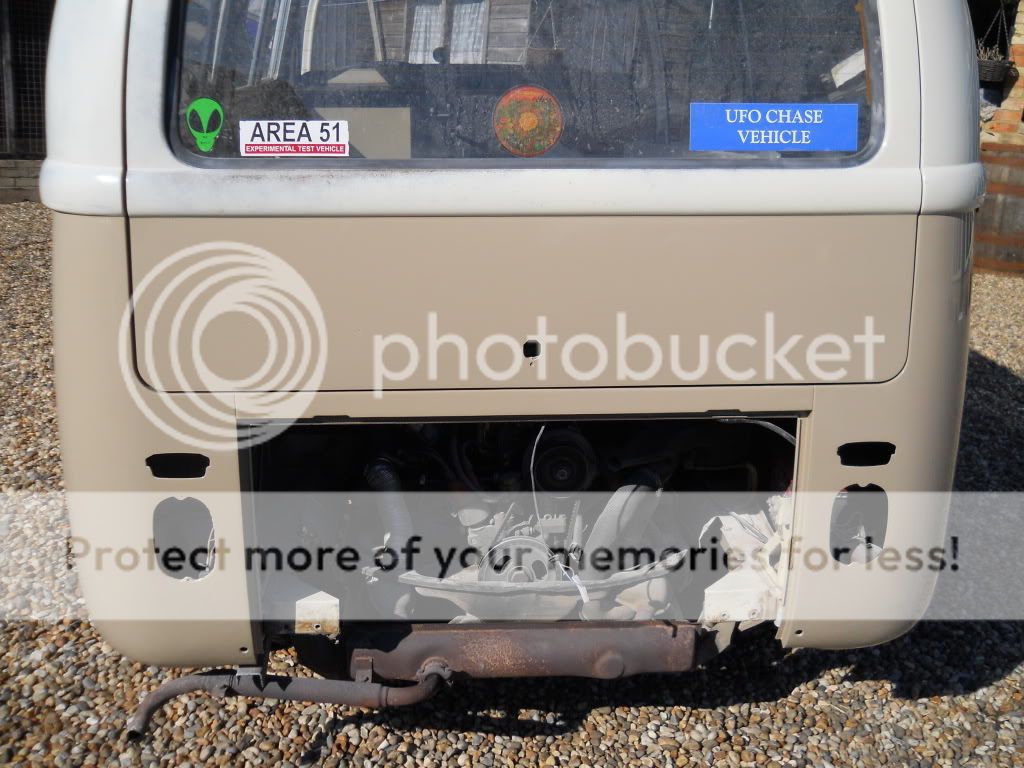
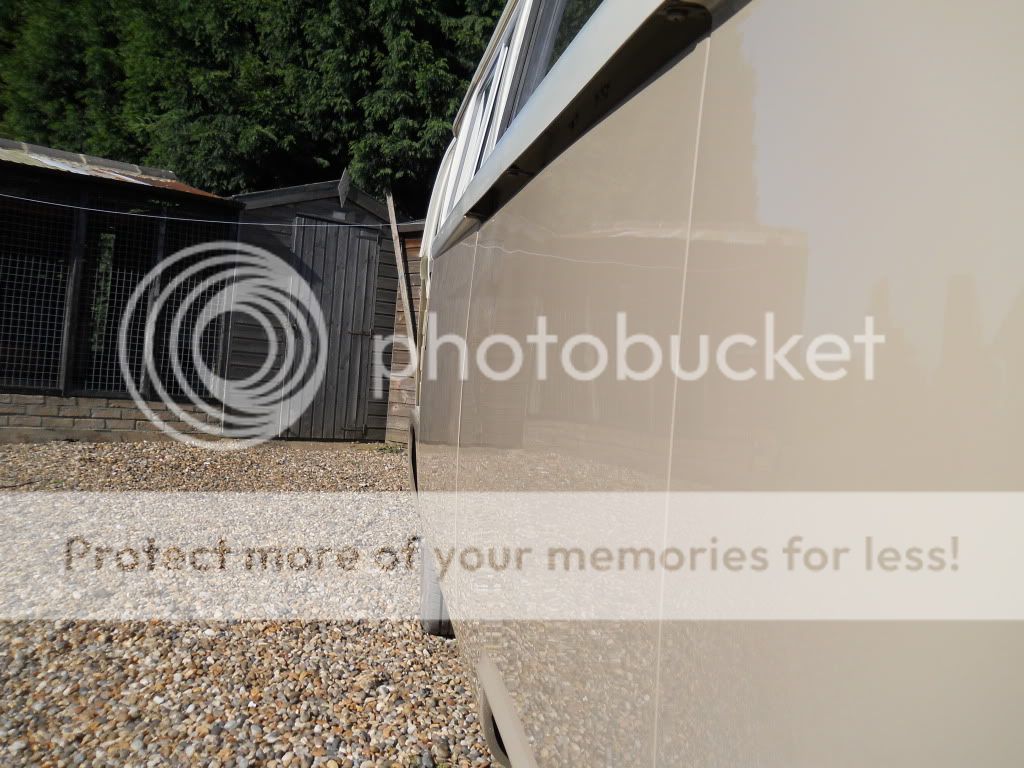
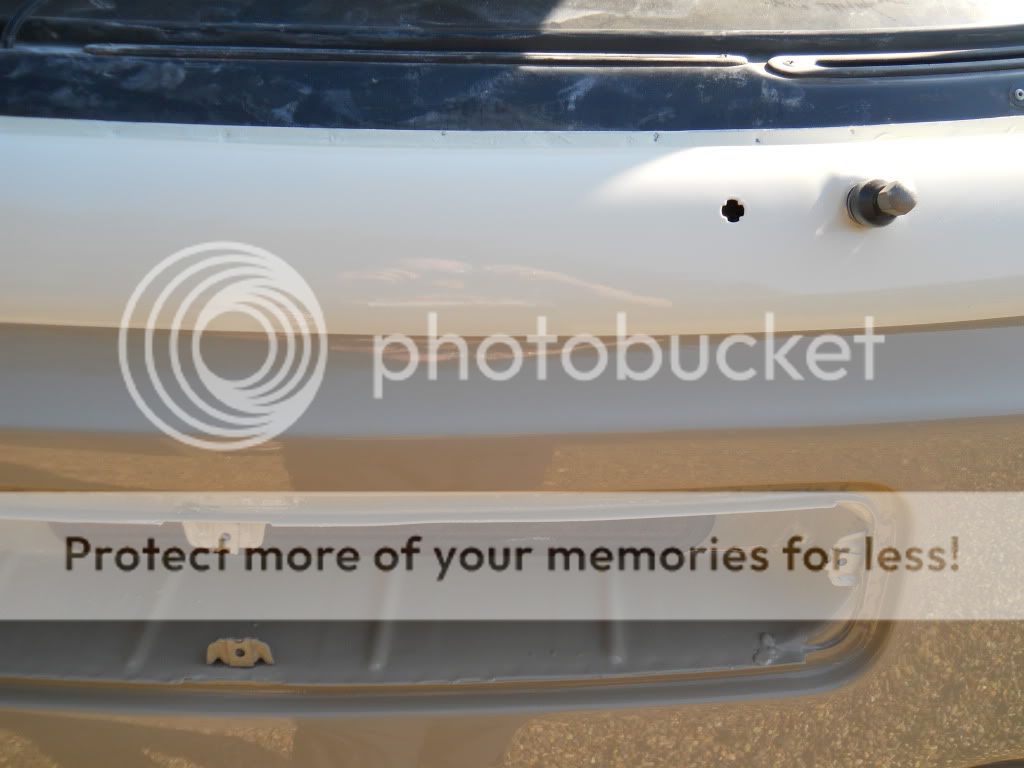
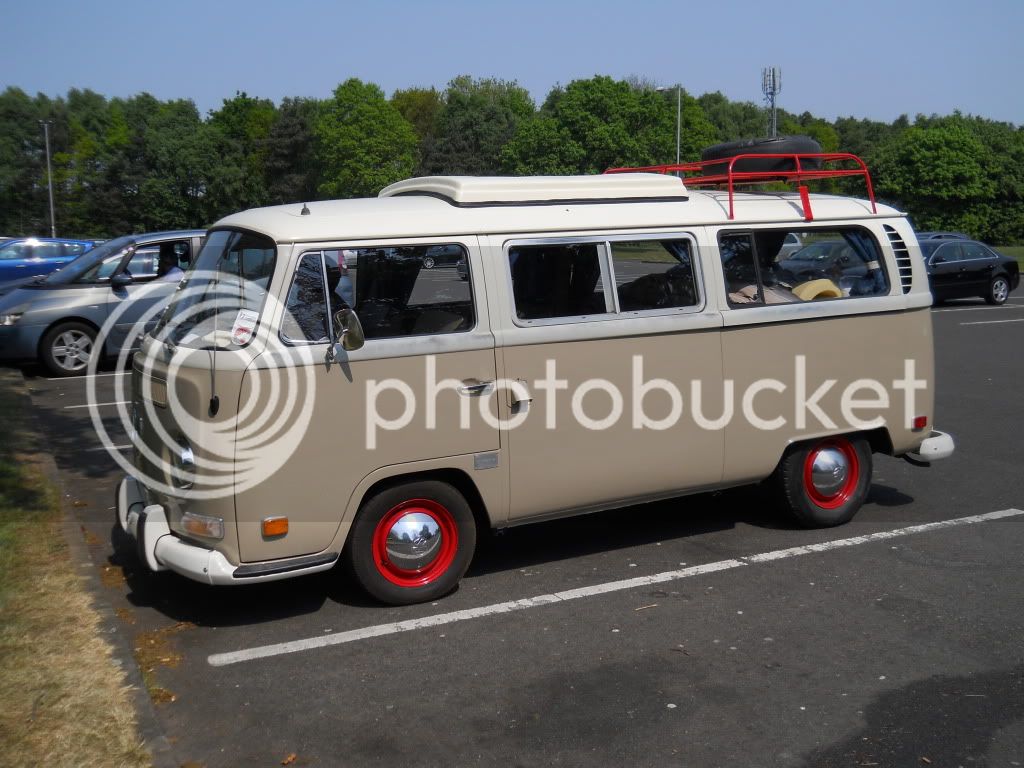
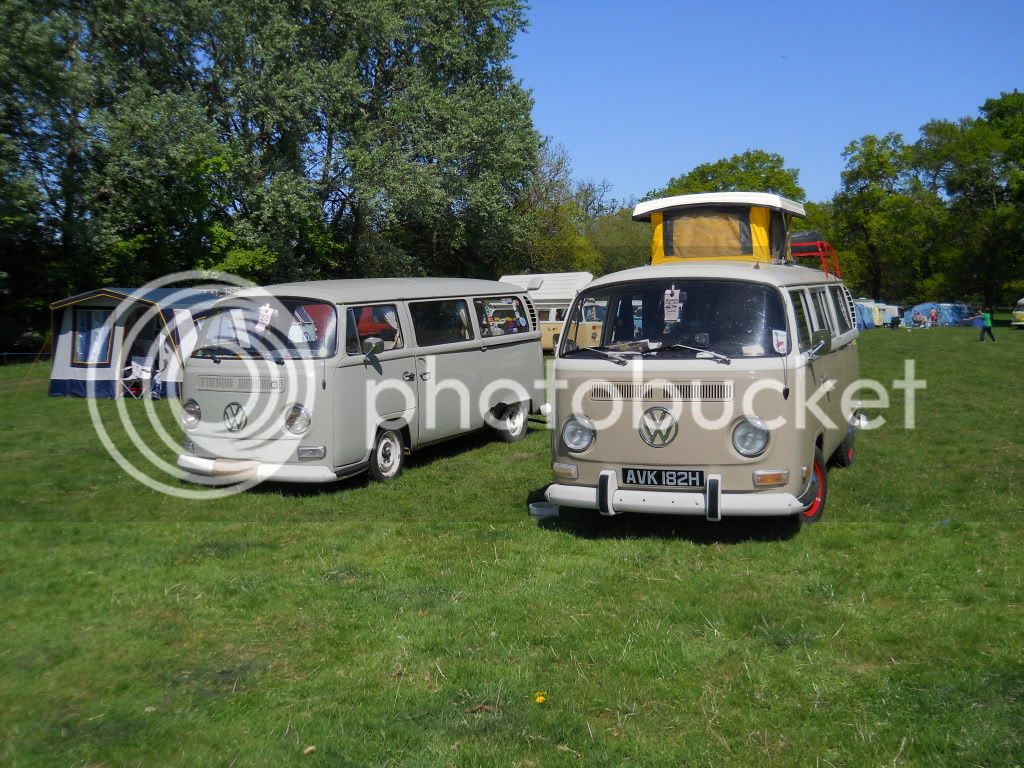
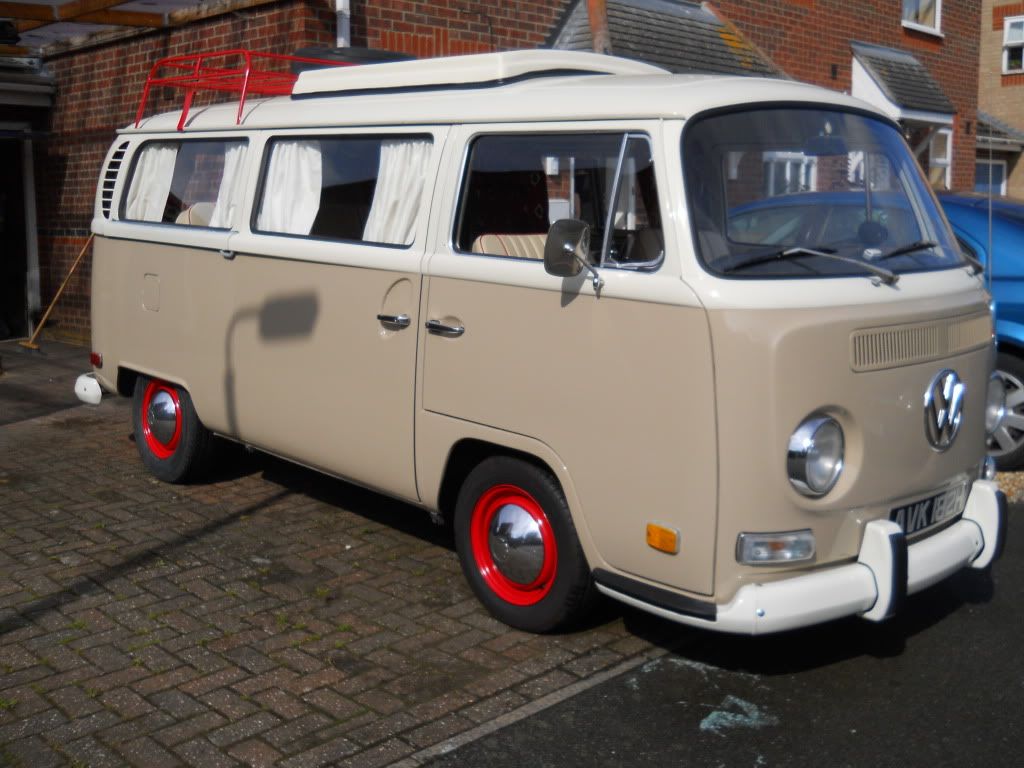
After lots of searching the following bus ticked all the boxes...

RIVIERACAMPER.jpg


rearofriviera.jpg


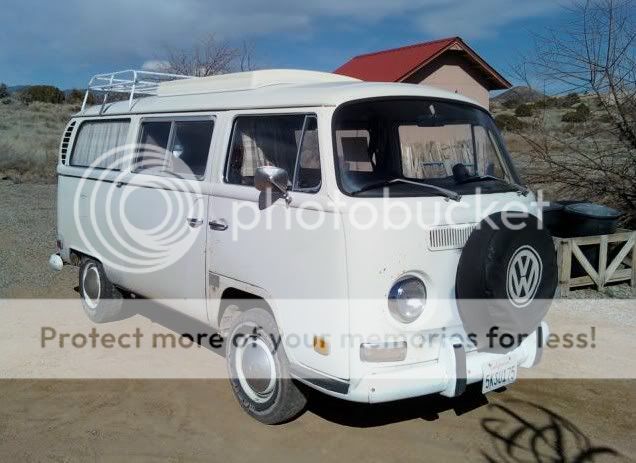
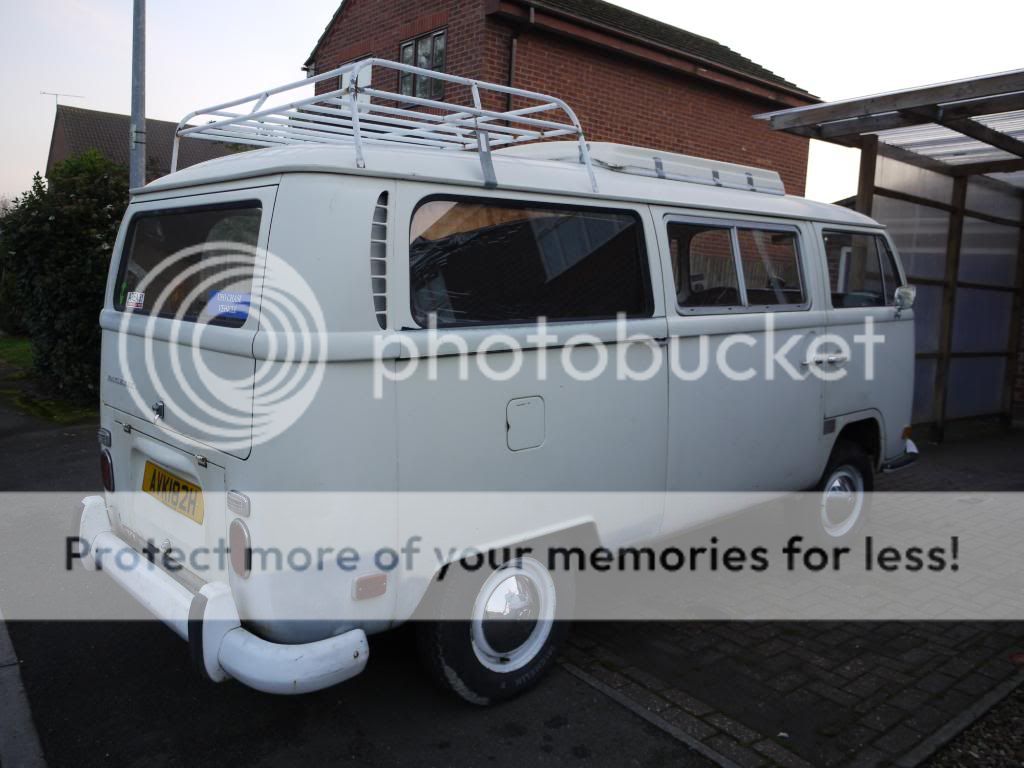
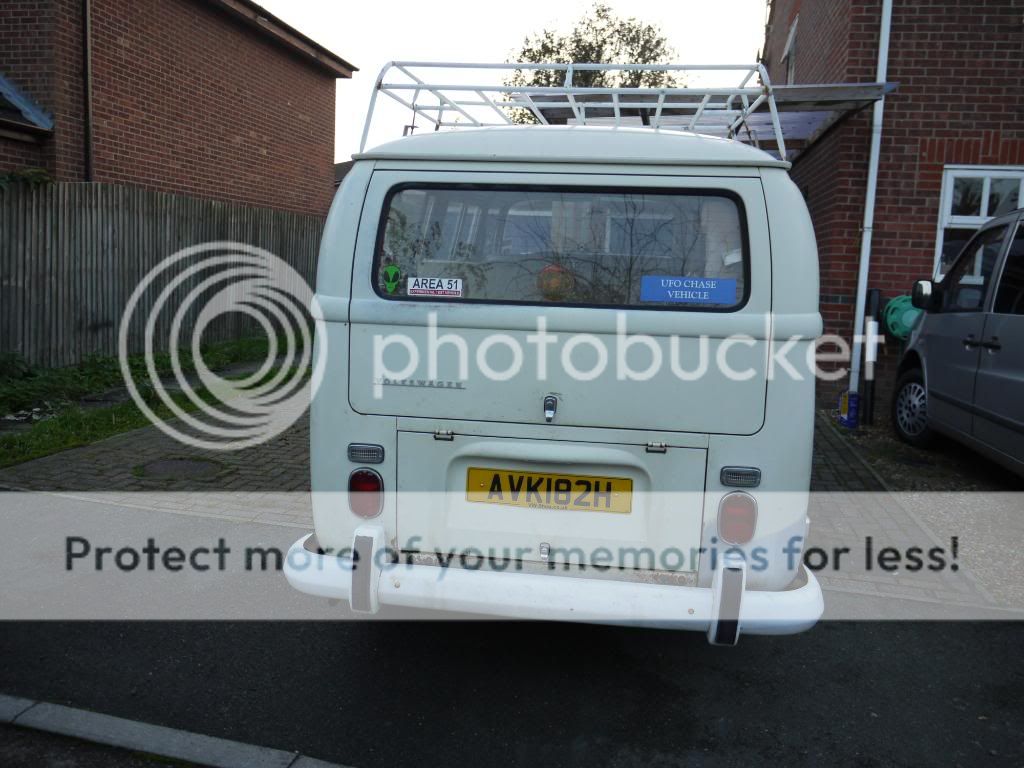
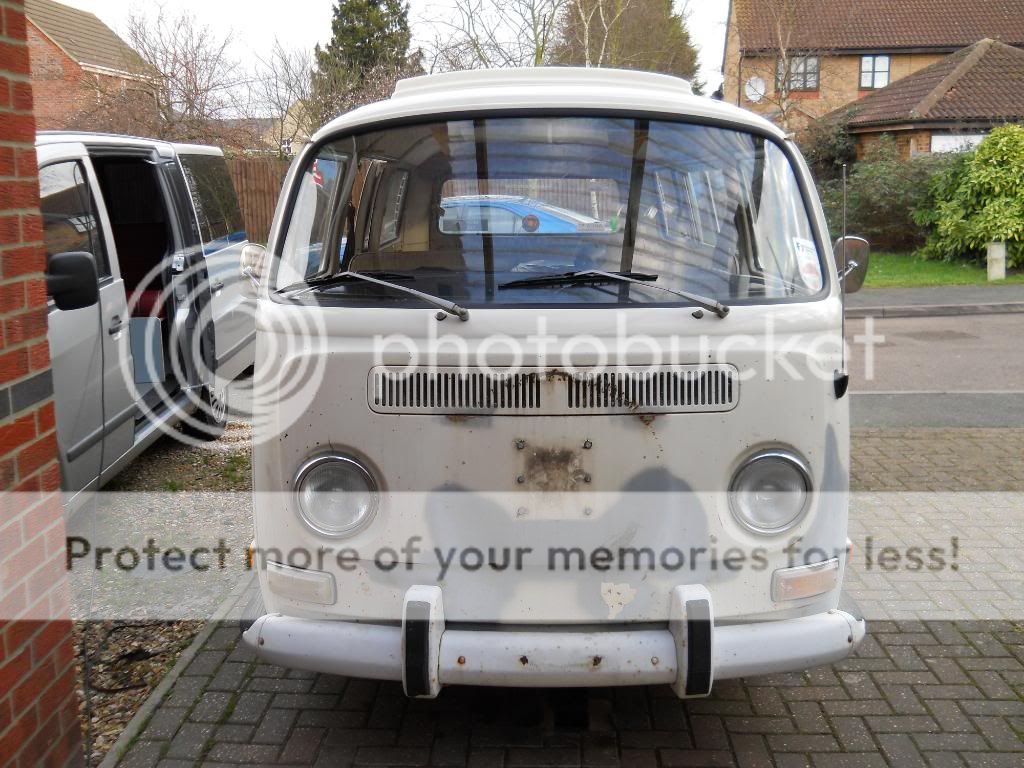
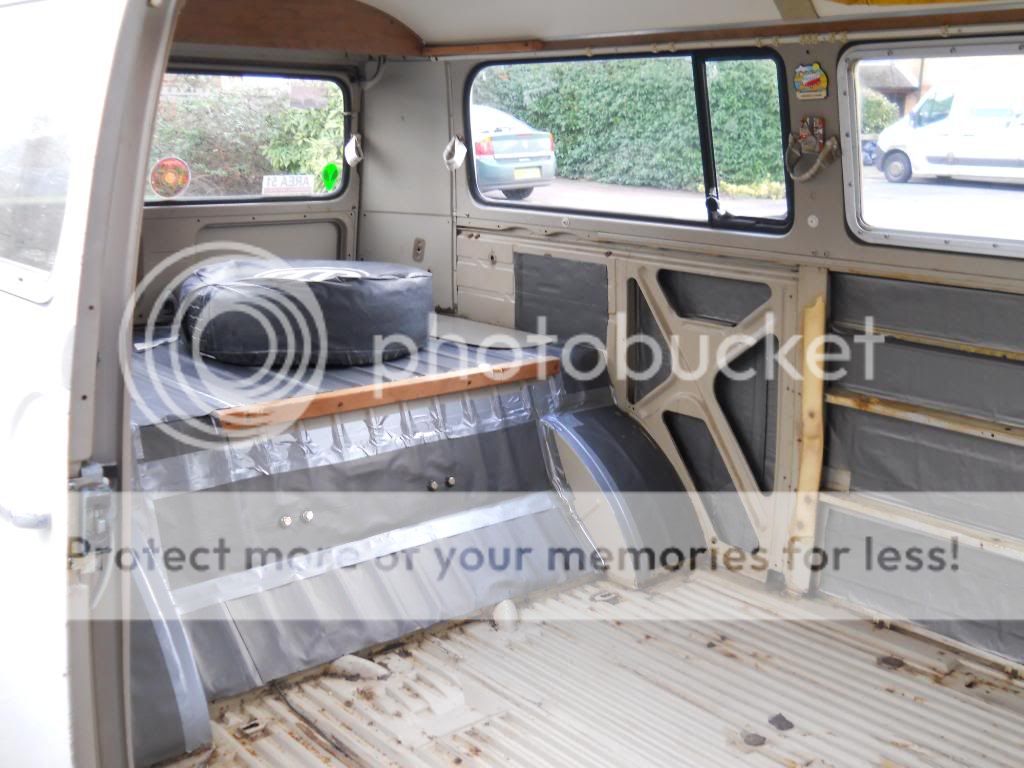
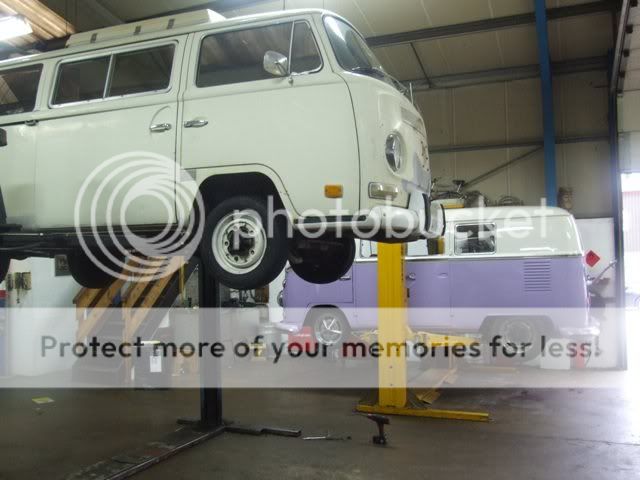
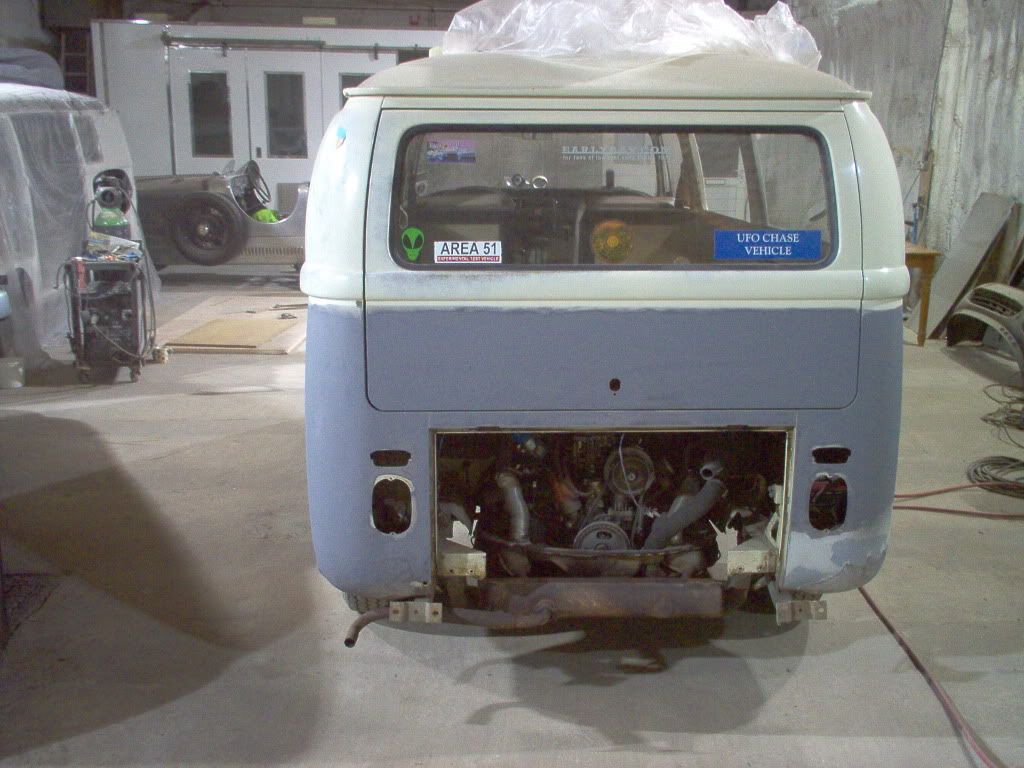
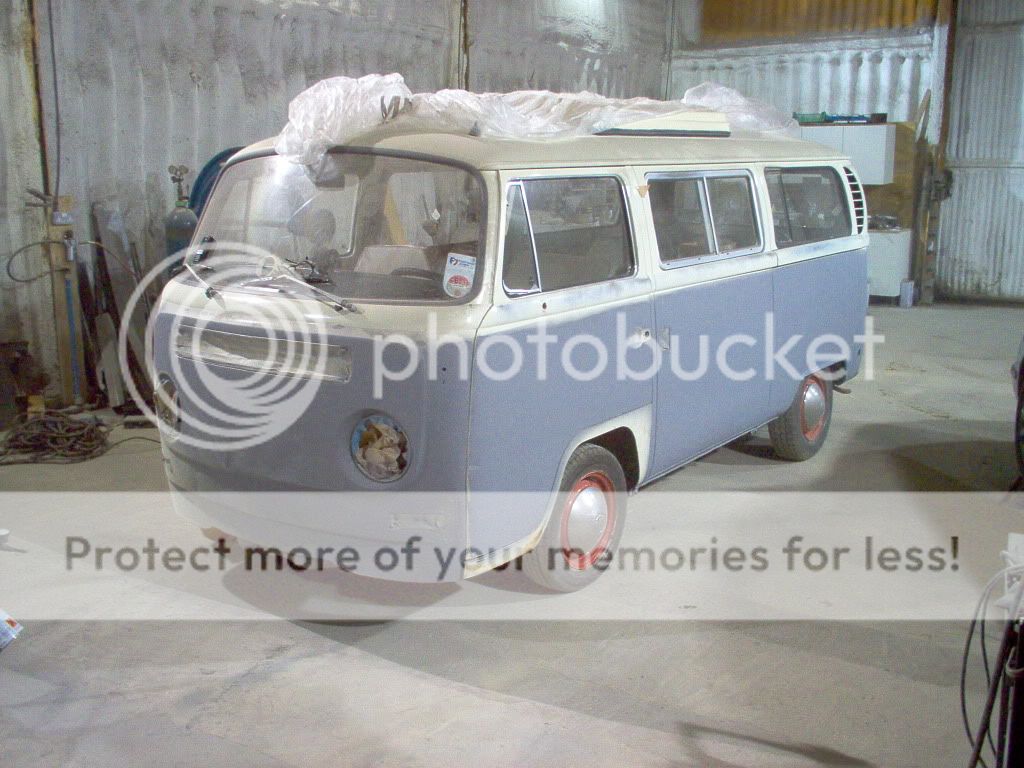
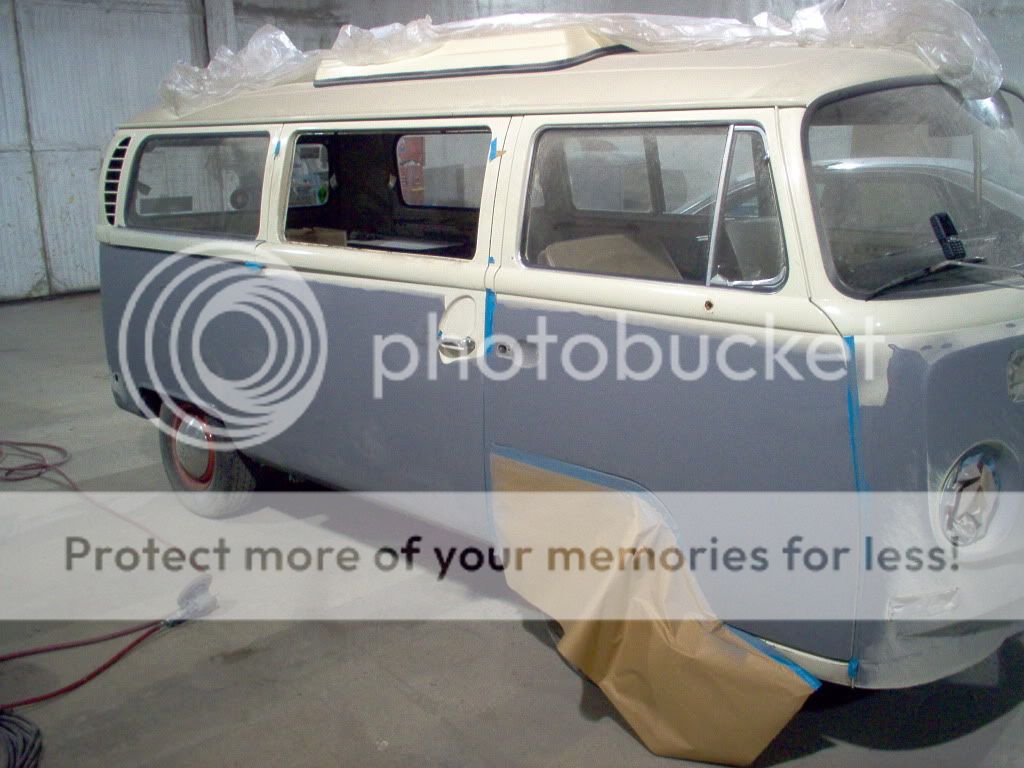
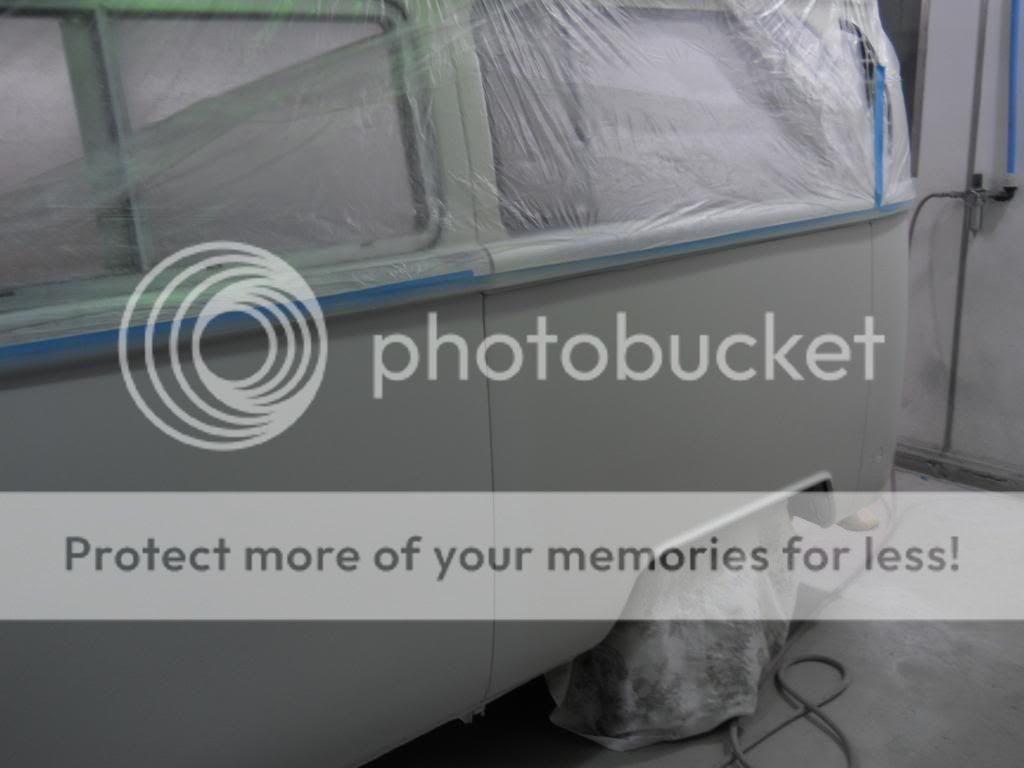
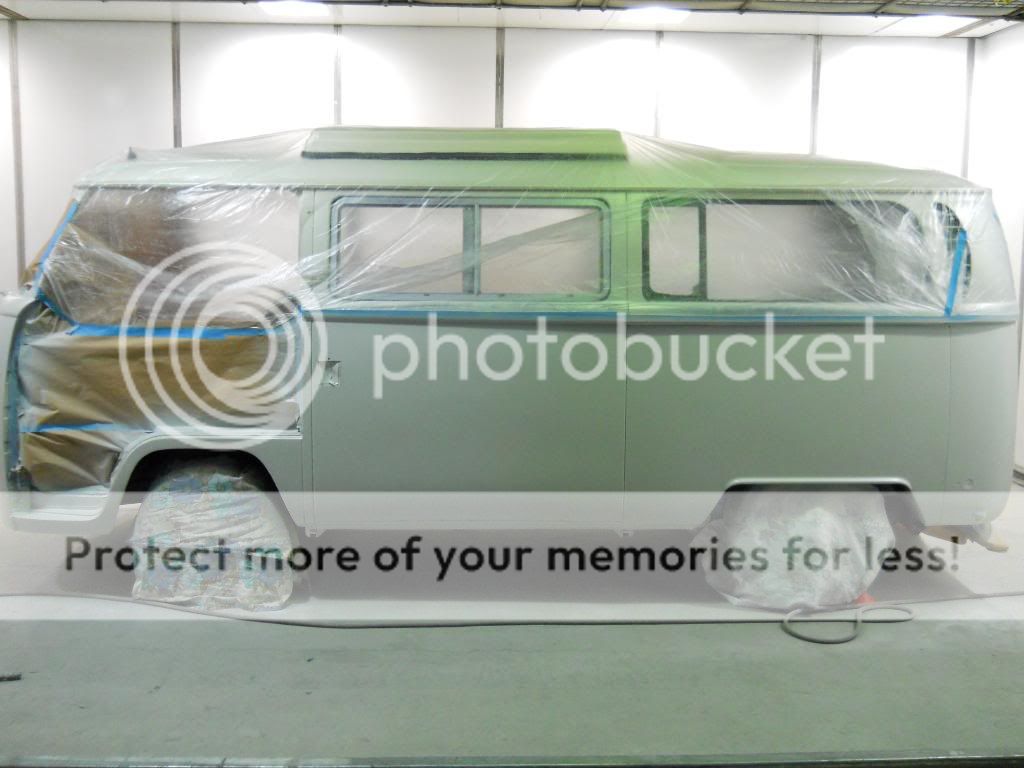
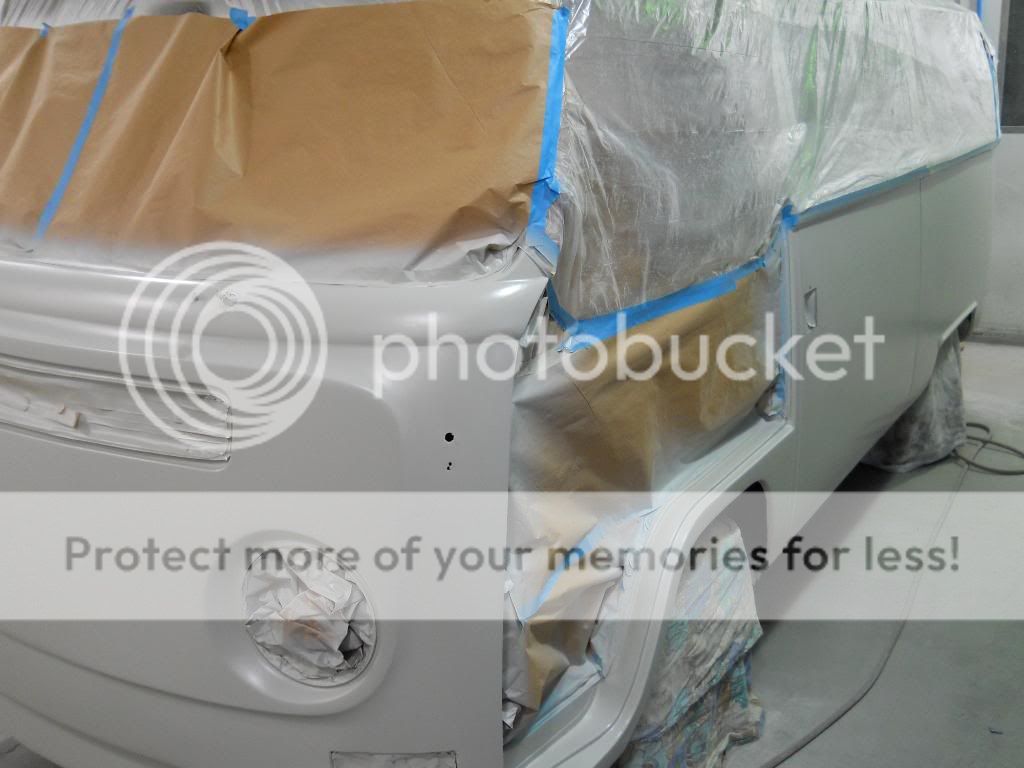
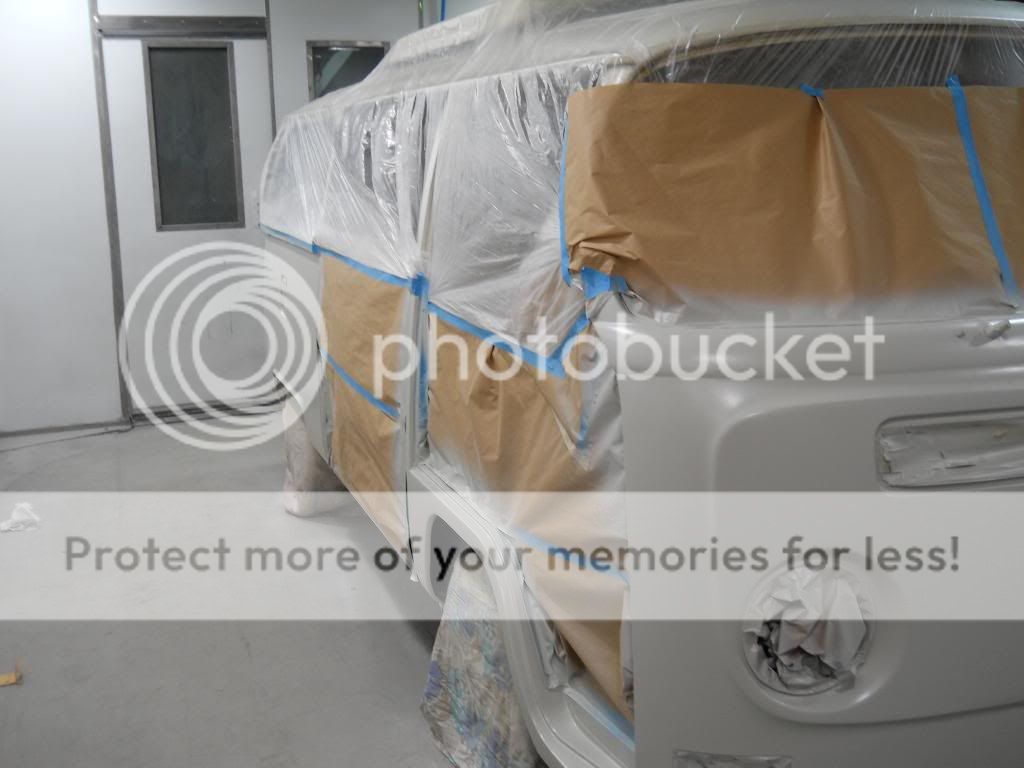
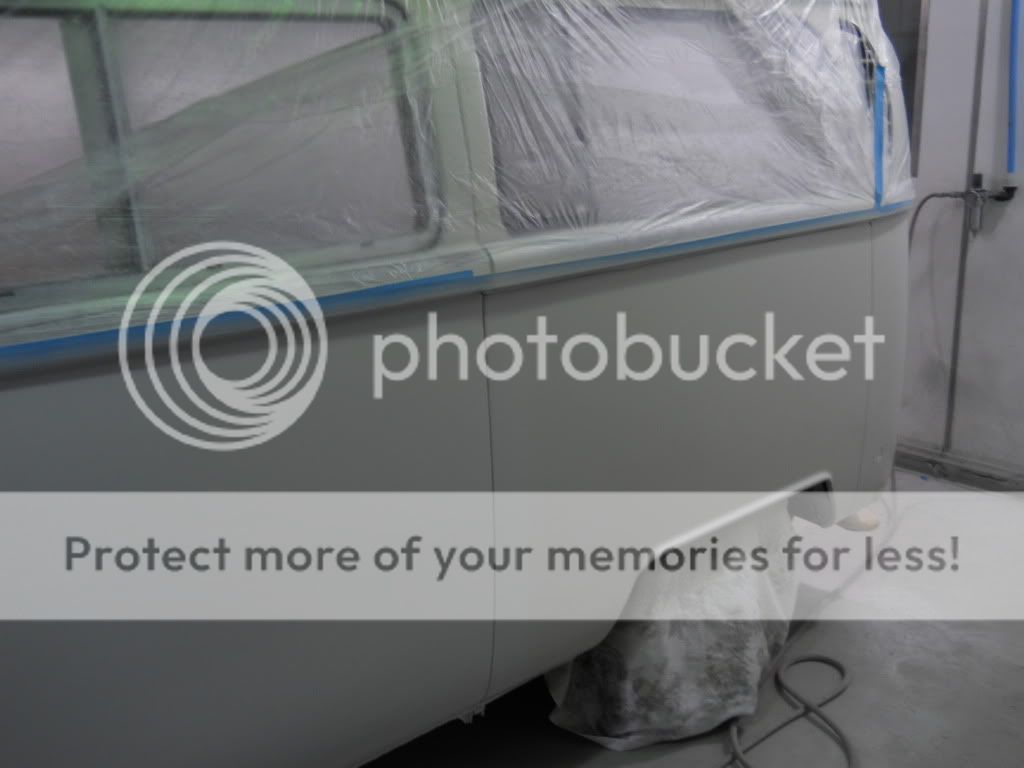
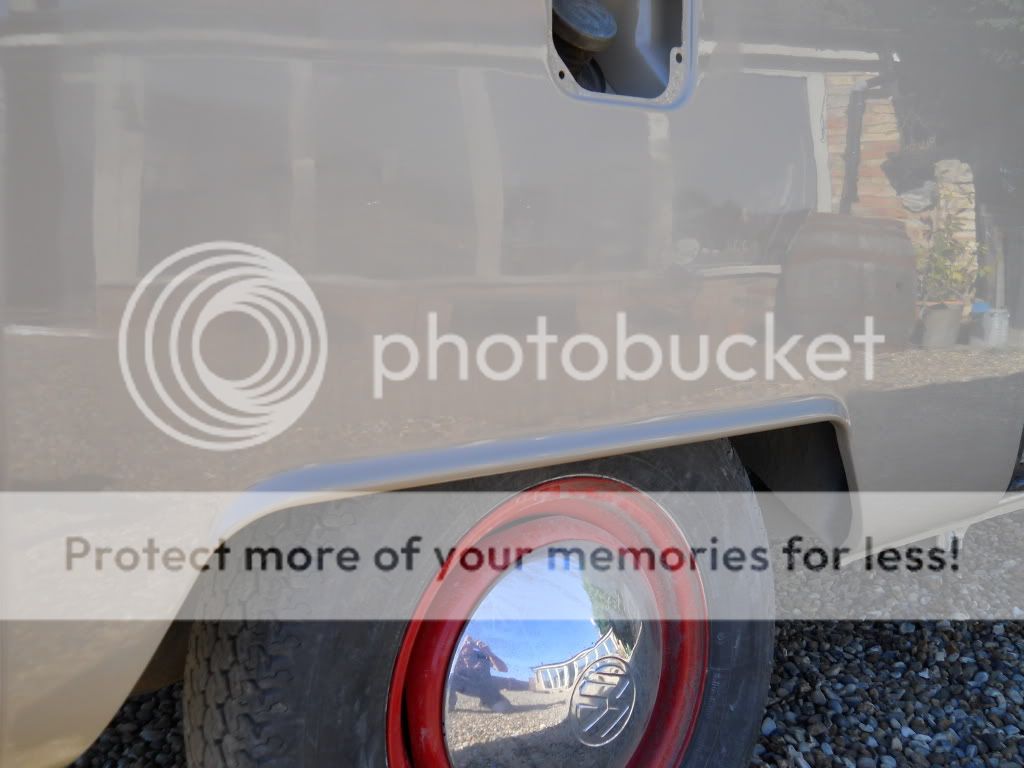
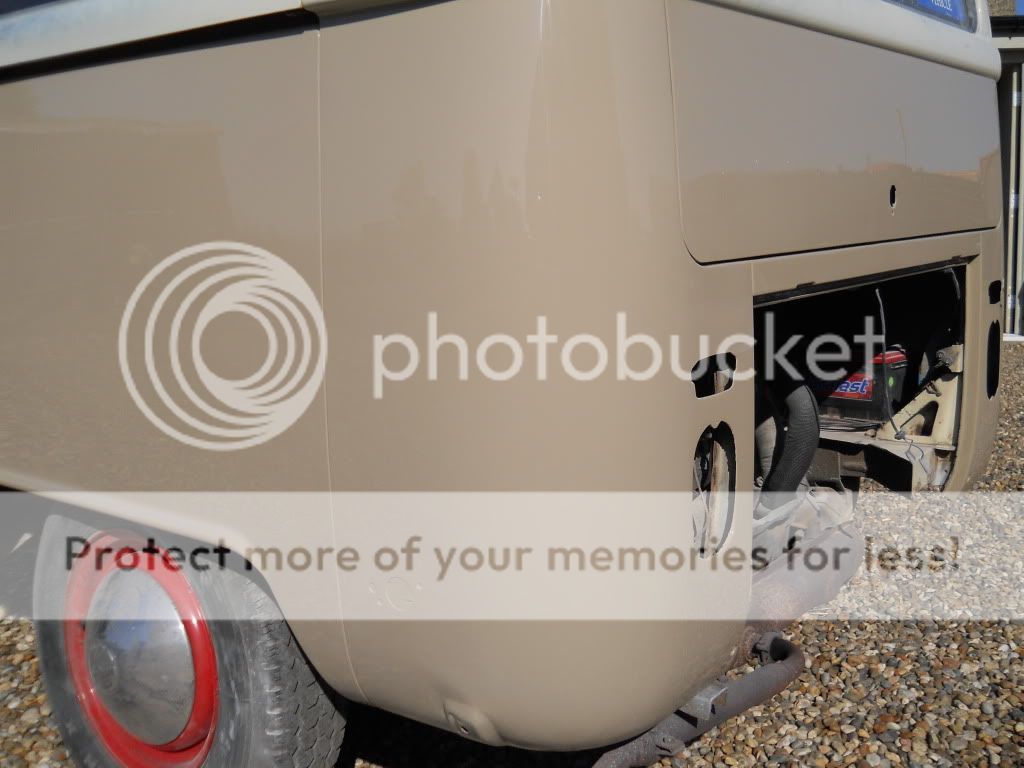
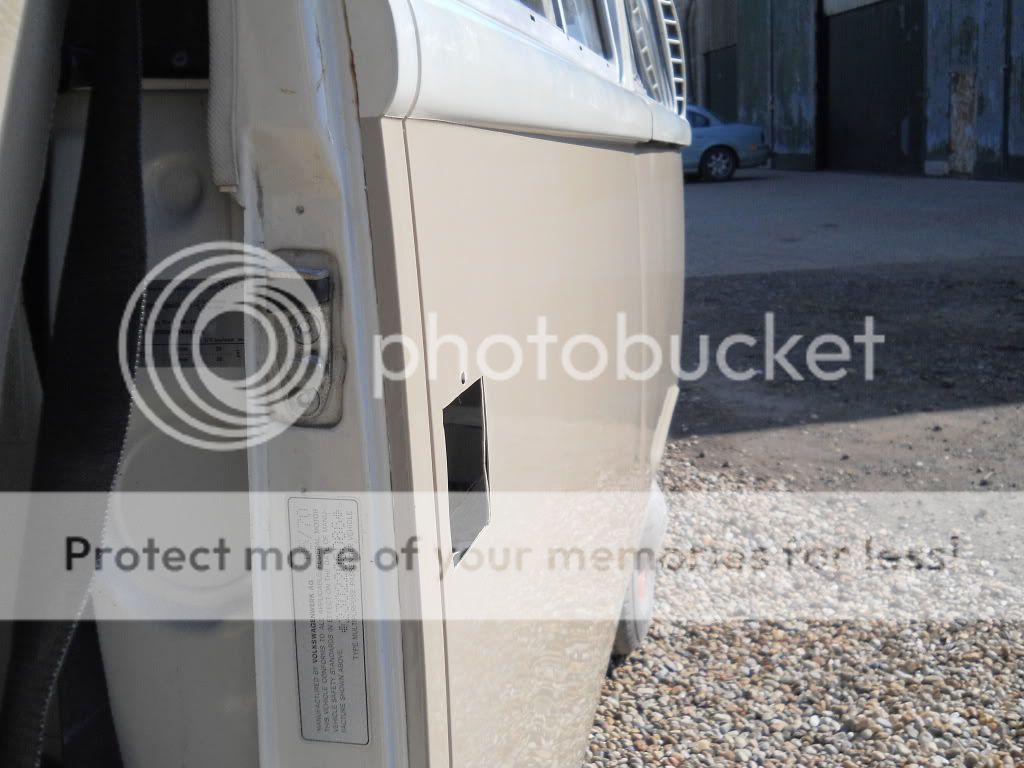
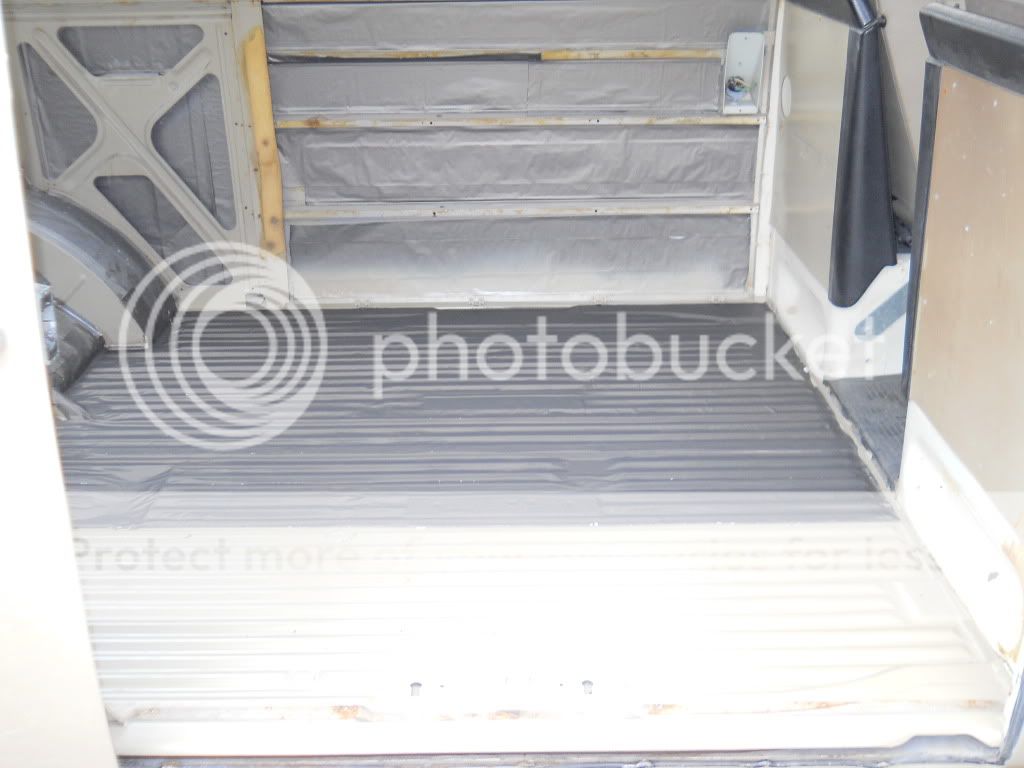
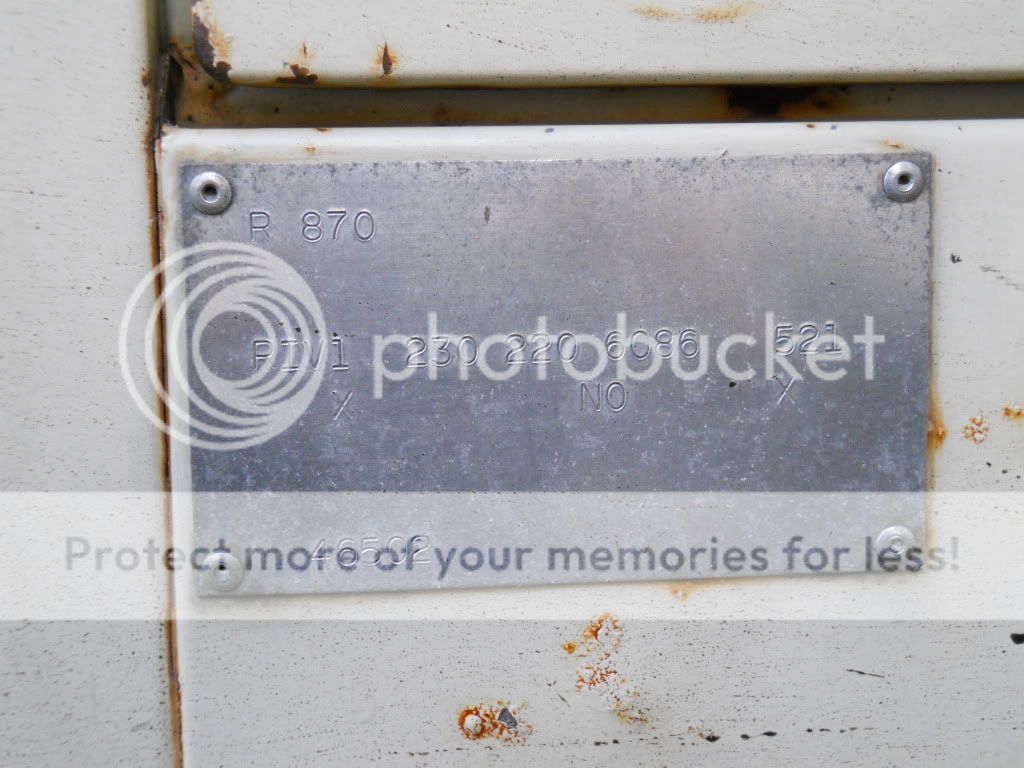
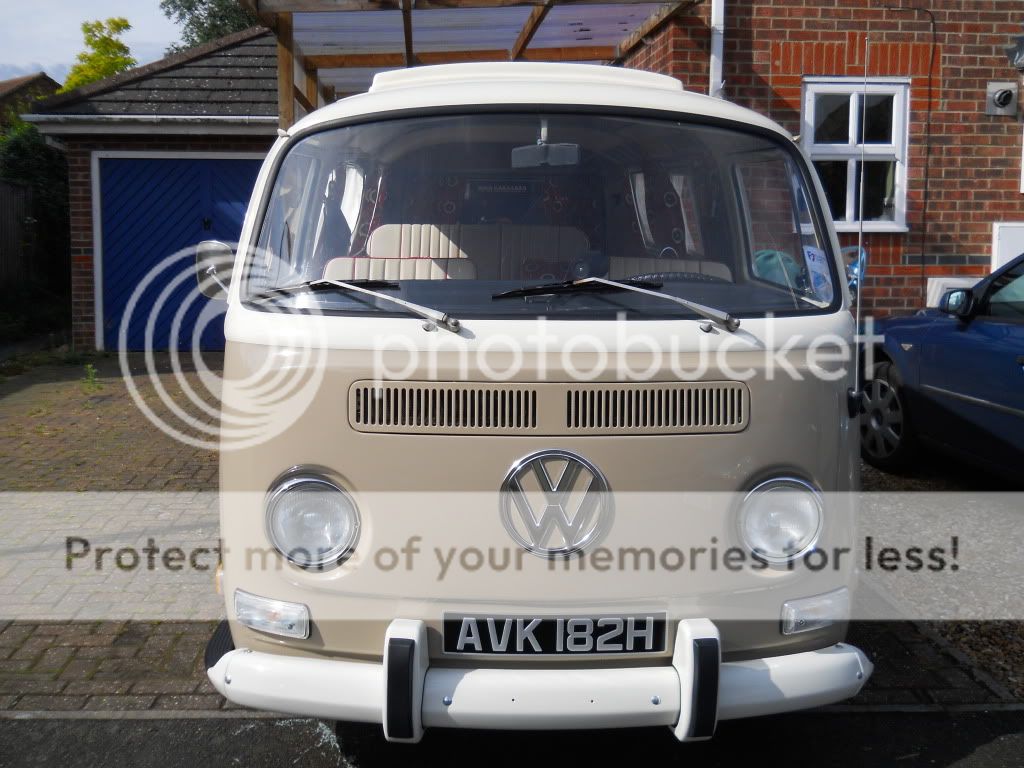
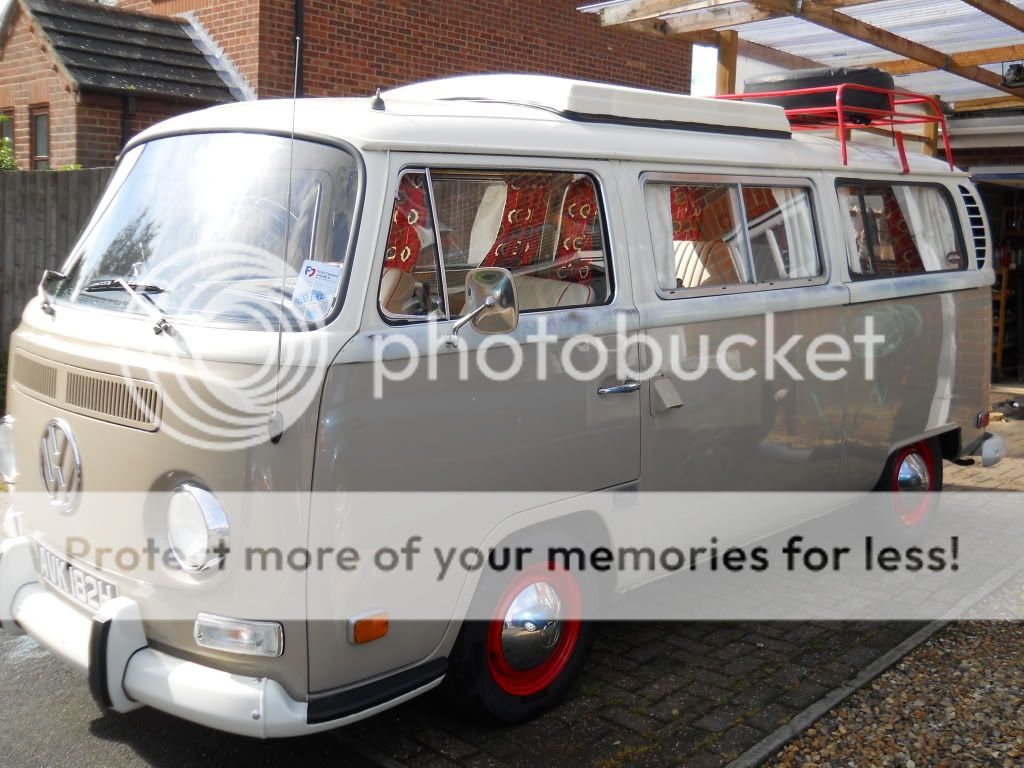
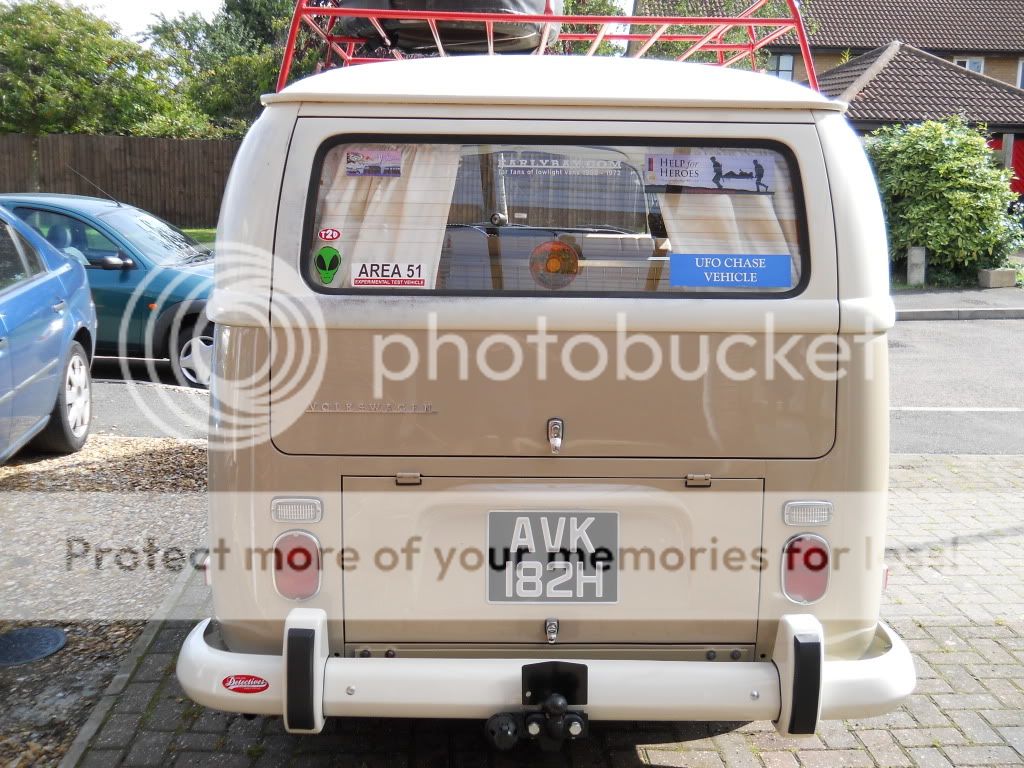
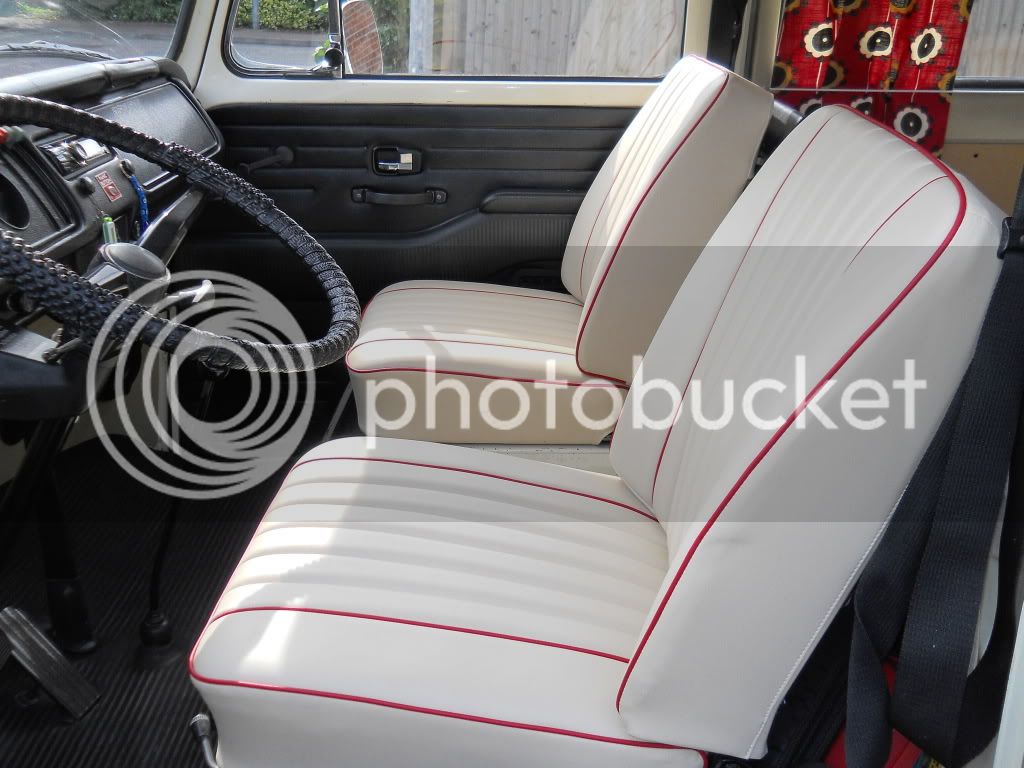
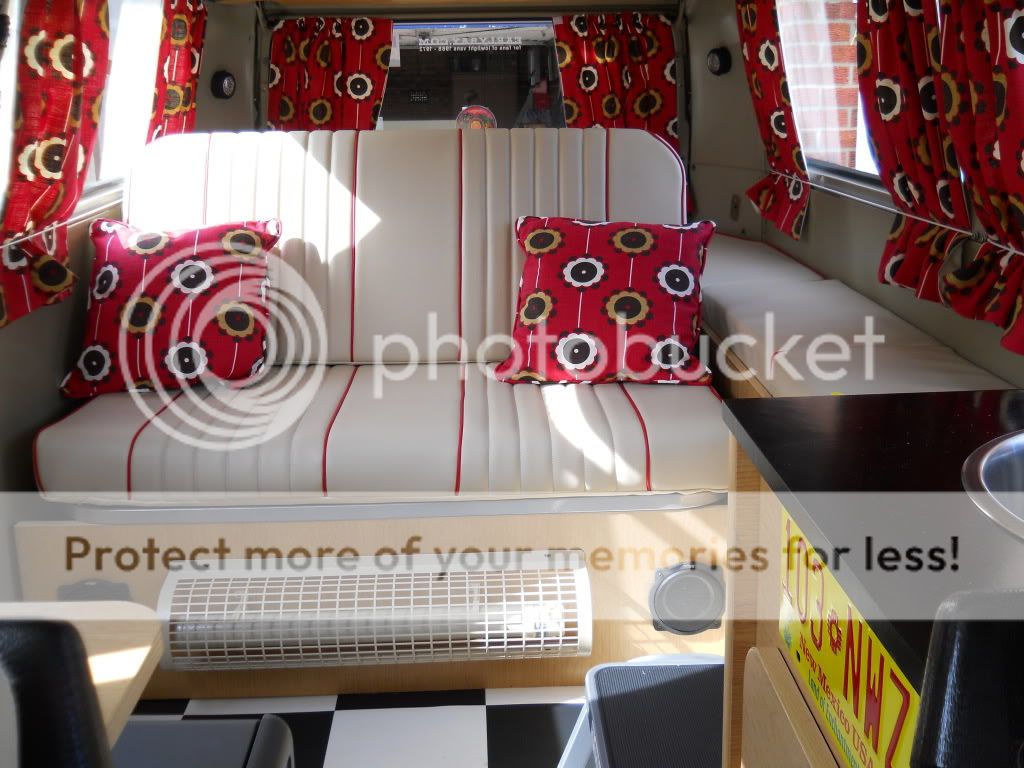
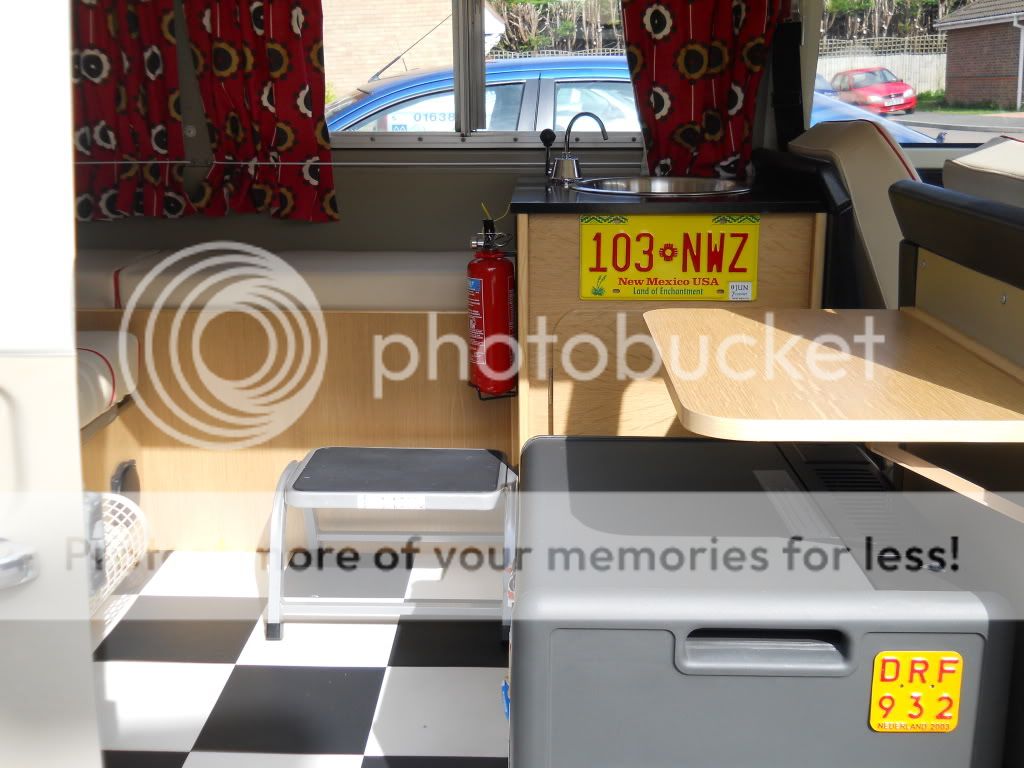
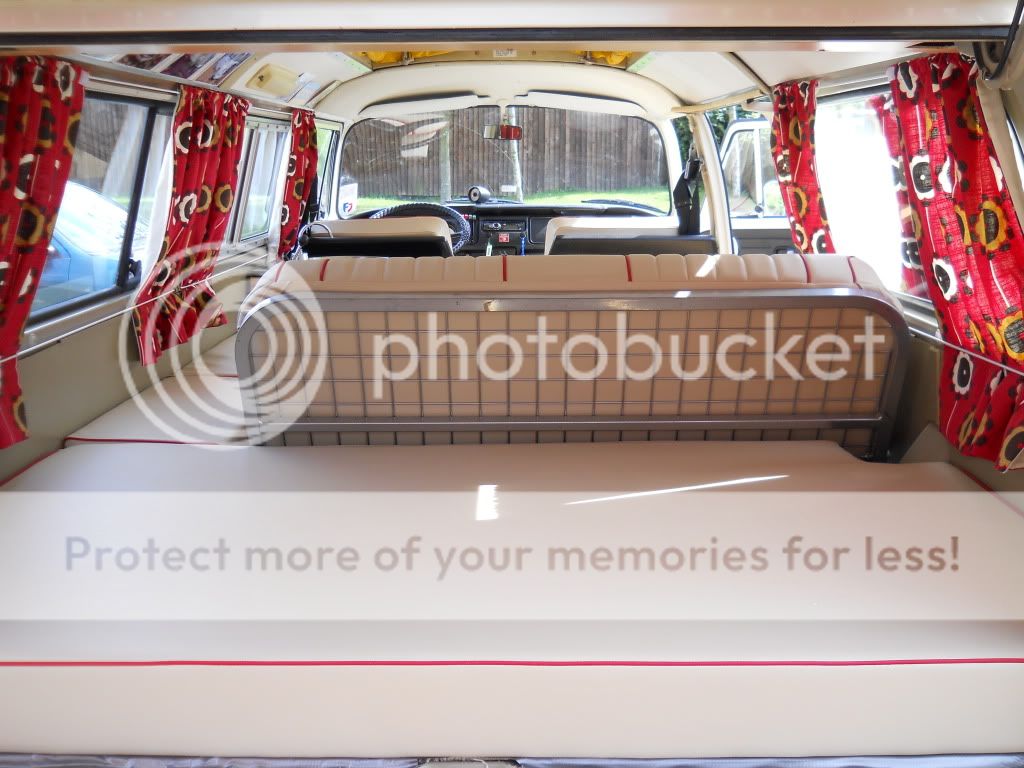
These were the first images that I saw of it. To me it seemed ideal so the deal was done and Im now the proud owner of this 1970 Riviera camper from New Mexico USA :D :D :D
 
Good to have you back Andy , do you have any more pictures of it now in the UK ??
 
Good to be back mate :D :D

The bus has now been MOT'd with only brakes and lights needed to be sorted. Underneath its very good with no welding. The body is also very dry. Its had a new battery tray, a small patch welded near rear wheel and a covering of "bondo" on front clip. Cant see why this has been done... I would guess it is covering some accident damage. The bus was always going to be resprayed so will find out whats happened to the front then. These pictures are after MOT and DVLA registered. Its had a good service and fuel lines replaced and is at the sprayers as I write.
While I was waiting for my slot at the sprayers I removed the interior and have started to sound proof and insulate. Will finish that off when the bus is back with me.

P1010677-1.jpg


P1010679.jpg


P1010678.jpg


Andrewspics021-1.jpg


Andrewspics020-1.jpg


Its also already been to Type2 for mild lowering (1 spline at the back and leveled out at the front)


LoweringatTypeTwoDetectives-2.jpg
 
Im changing the interior for something more practical for us and have already sold it.

Im pleased that its gone to another Riviera owner who wanted an original interior.

It was in good nick with wardrobe, buddy seat and bed.

P1010698.jpg


P1010697.jpg
 
Looks like a nice easy project for you ;)

Welcome back and looking forward to see what you do next :D
 
Got black and white plates to go on when painted. Also getting rid of wheel on front and replacing with a nice new chrome badge :D :D
 
The bus has been with the sprayer for what seems forever... What with a family bereavement and a 2 weeks holiday, the prep, welding and general fetteling has taken much longer than I thought it would however I dont think it does any harm for the primer to have chance to dry completly before the top coat goes on. Im only having the bottom half painted now with the top painted later (probably in the winter)... Went to have a look at progress yesterday and got some progress pictures from the sprayer
002-1.jpg

003-1.jpg

007-1.jpg

010.jpg

005-1.jpg

020.jpg

019.jpg

018.jpg
 
Latest pics taken by me yesterday in the sun!!

071.jpg

070.jpg

069.jpg

068.jpg

067.jpg

066.jpg

065.jpg

064.jpg

061.jpg

058.jpg

057.jpg

056.jpg


Should be home with me by next weekend..... CANT WAIT :D :D :D
 
Nice van Andy very 8) I remember when ours came back from the shop! Best feeling in the world. You can see where your moneys going! I spent an hour just admiring the finnish! Great job BTW. :D
 
That is going to look really nice when completed 8)

Nice colour choice too :D
 
Time for an update.... Collected the van from the sprayer on 15th April.... Although it has been away for a long time Im very happy indeed with the quality of his work. The van is as straight as Ive seen and the colour is just what I wanted so Im a happy bunny :D :D :D

Ive been working hard to get it ready for us to use for the first time when we go to Stanford Hall. So Ive completed sound proofing and insulating and have fitted the Rock and Roll bed.

004-3.jpg


0082.jpg


010-1.jpg


002-2.jpg


001-4.jpg


The following picture is in a service station carpark taken this weekend on our way to Midland Early Bay open day followed by a cruise to Stanford Hall show and a fantastic first weekend away :D

012-1.jpg


On the campsite at Stanford Hall

039.jpg


023-2.jpg
 
Well done and looking very good 8)

Did you sleep in the van then??
 
Nice to see it all done an on the road matey I really need to get a move on with mine


Cheers rob
 
Its good to see another one on the road in UK dont see too many of them .Must say your is nice and straight and i like the colour shame you could not keep the interior are your sliding window a good seal because i had to change mine because the were a nightmare and leaked like a sieve .Is the canvas on your pop original? looks good!
 
We were able to sleep in it with some temporary curtains and taking care not to fall off the three quarter bed :D :D The sliding window doesnt leak but doesnt slide either.. Will have to look in to that.

Do you remember asking to see the Riviera plate monkeyboy, well here it is... this has been replaced on the bus following the respray

Andrewspics028-2.jpg


Not sure what it all means. This next picture show when the bus went to Riviera

056.jpg
 
Been working hard over the last few weeks on the interior. The bus is just about finished.... Heres some pictures.


Riviera2pics001.jpg


Riviera2pics002.jpg


Riviera2pics003.jpg


Riviera2pics004.jpg


Riviera2pics014.jpg


Riviera2pics012.jpg


Riviera2pics010.jpg


Riviera2pics011.jpg


Interior woodwork, electrics, flooring etc done by me, seats covered by Ian Hawkes at Burwell, and curtains by Jigsaw.
Oak veneered board, floor covering, seat vinyl and curtain material chosen by my partner Angie :D :D
 

Latest posts

Top