1972 Bus with a 2007cc motor

Early Bay Forum

Help Support Early Bay Forum:

This site may earn a commission from merchant affiliate links, including eBay, Amazon, and others.
john the horse said:
we just came back form there today too , looks like you sayed at breck farm from the weybourne station pic 8)
We stayed just down the road in Weybourne in a cottage - family weekend away with the bus loaded up with five adults and two kids! I've been wanting to get a shot of the bus outside Weybourne station for ages.

Tijssie said:
I have to admit I preferred the EMPI's but that's a matter of opinion...Awesome bus dude!
It was time for a change and the burners (which I've wanted for a long time) came up at a bargain price after being used on a vehicle for a genuine 1 mile! I've still got the Empi wheels, but can't decide whether to refresh them and fit them up with some new treads and keep them as an option for occasional 'shoe' changes or sell them :?:
 
Back from another good weekend at Big Bang and with a new personal best on the quarter mile for me of 18.4 seconds. Now looking at what I can do to get my time down.

Anyway, here's a little video of my 18.4 run...


With Big Bang done my bus is now off the road for its chassis overhaul. Yesterday I stripped all the interior out and today with two of us on the job the engine, gearbox and oil cooler circuit are all coming off together with the fuel tank ready for the bus to be rolled on its side, hopefully by the end of today.

I'll keep you posted with progress.
 
I am pleased, but I won't be stopping with an 18.4. Got a couple of plans up my sleeve for the motor and gearbox side of things, but it all depends on money! As you'll see in my next post I'm now eye deep in chassis repairs!!
 
I've now started on the project to fully overhaul and rebuild the chassis for my 1972 bus. It has had various bits of welding to wildly differing standards during my ownership and before, but having assessed it we decided the only way forward was to go for a full rebuild including sand blasting the whole chassis to bare metal.

Yesterday it looked like this...

IMG00578-20110509-0809.jpg


Then the interior came out...

IMG00582-20110509-1005.jpg


The result being a very bare bus.

IMG_1518_lr.jpg


Engine and gearbox out.

IMG_1517_lr.jpg


The start of preparations for rolling.

IMG_1532_lr.jpg


Bolting up the hub adaptors.

IMG_1523_lr.jpg


Ready to roll...

IMG_1524_lr.jpg


On the move...

IMG_1526_lr.jpg


Rolled!

IMG_1528_lr.jpg


This is what we had to work with - a tatty looking chassis.

IMG_1530_lr.jpg


Straight off we cut out the belly pans to assess for repairs

IMG_1533_lr.jpg


The new view through my garage doors.

IMG_1532_lr.jpg


Forgetting to close the driver's side window was a mistake as it needed to be closed for sand blasting - so in I went!

IMG_1536_lr.jpg


At the end of the day I started sand blasting the chassis which we'll be continuing with tomorrow. We've also assessed a number of panels which need to be replaced and drawn up a shopping list.

IMG_1540_lr.jpg


More to come tomorrow!
 
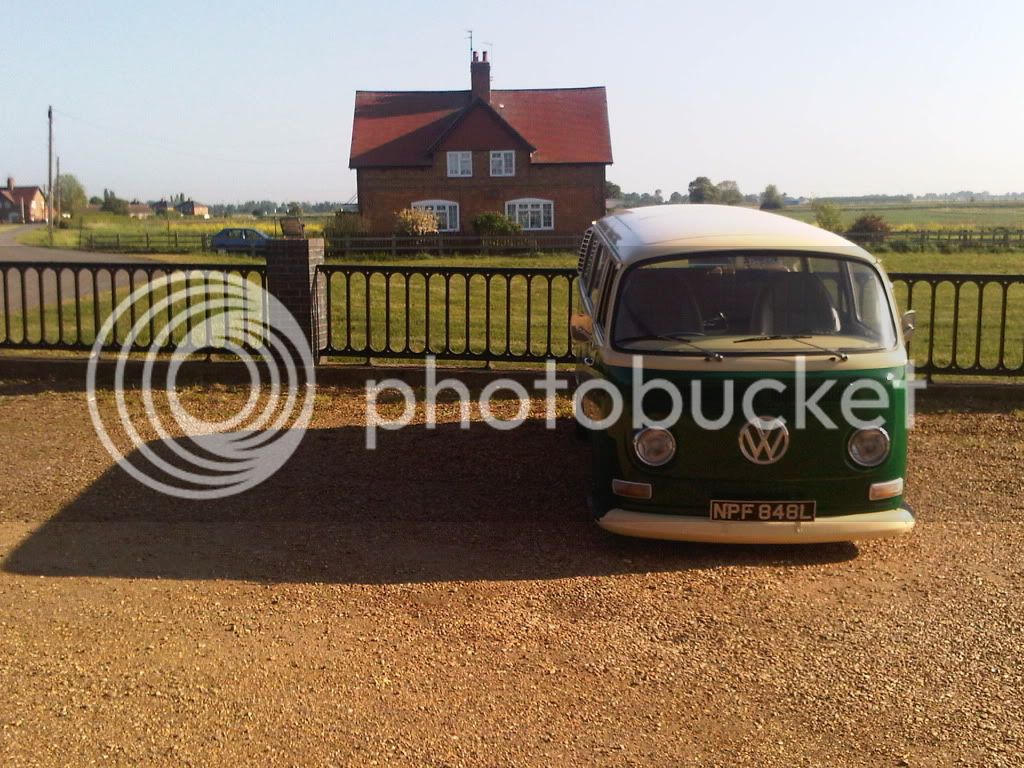
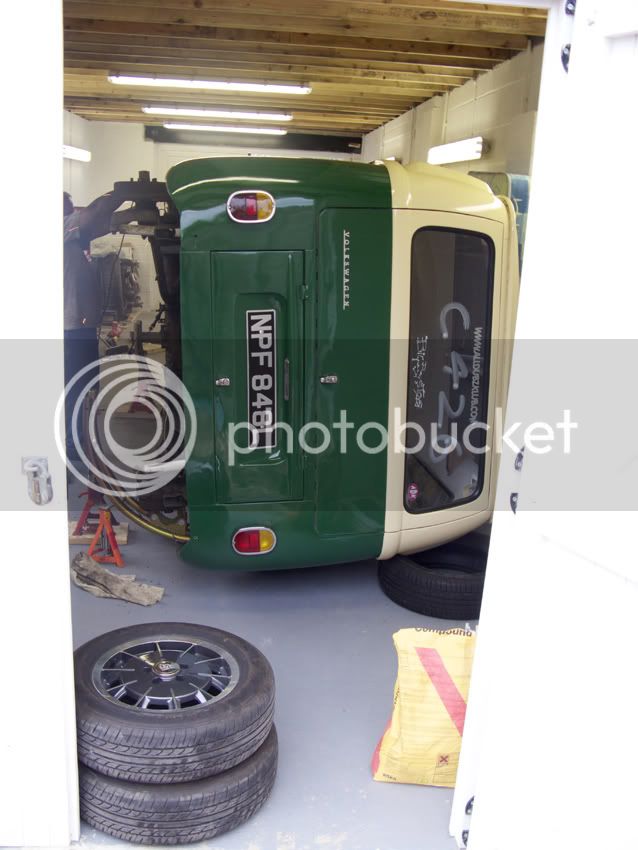
Before I post up any more on this project, I think I should explain the back story to this bus. I bought it back in 2005 when I knew nothing about cars (I'd never even serviced my own car before) with the ideal of weekends away and learning how to keep the bus running as time went along.

However, the van wasn't in good condition on closer inspection so I found a local car mechanic to carry out welding repairs, restore the lighting circuits and prepare it for an MOT. 10 months on he'd done practically nothing, so I arranged for a trailer and gave him two weeks notice. Magically 90 hours work then took place in those two weeks and the bus was made solid underneath.

At this point I found another mechanic closer to home, who prepared the van for its MOT, completed outstanding welding repairs and arranged for it to be painted.

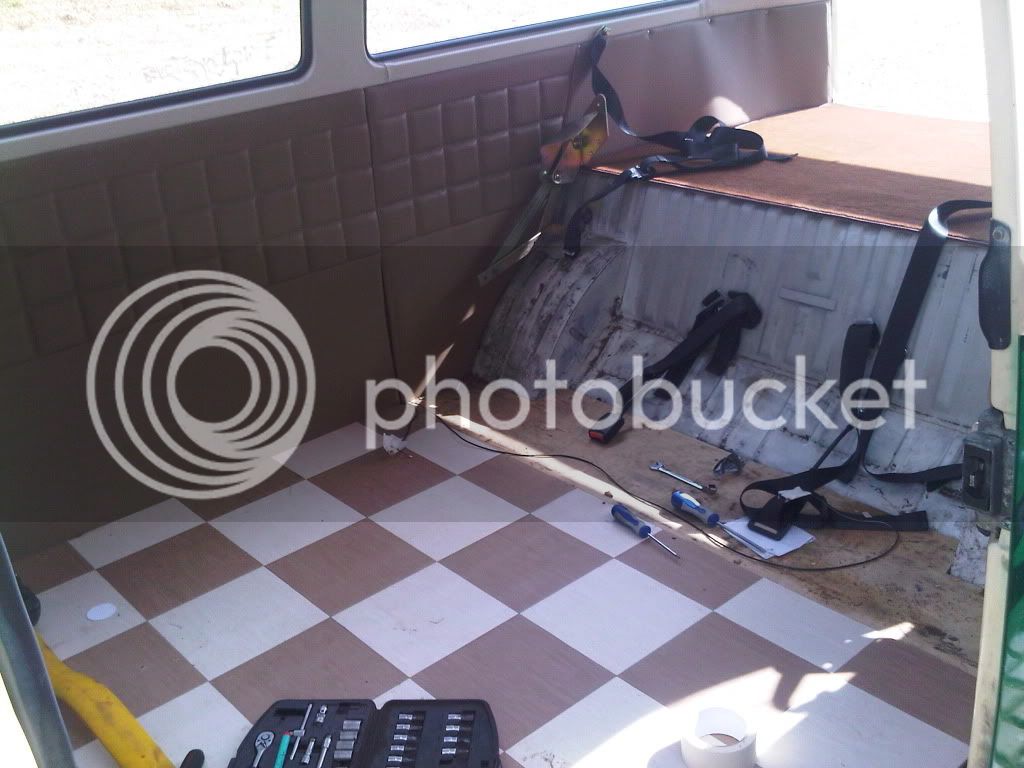
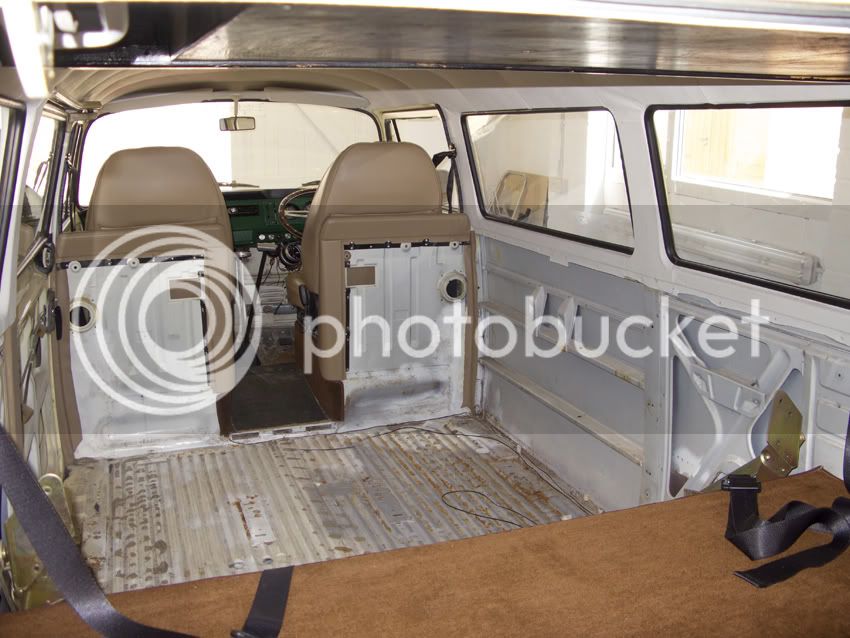
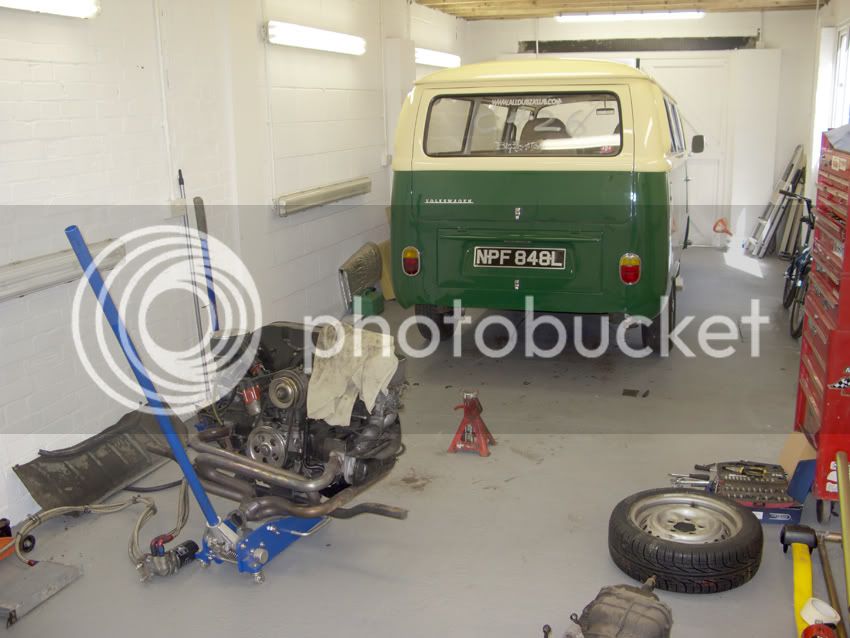
Four years since it returned to the road in May 2007 I've had a great deal of work done on the van in terms of suspension, engine, drivetrain, interior etc etc while also learning skills myself to the point where I run all my cars and other family members too having also rebuilt by wife's 1970 Beetle in 25 working days with a friend.

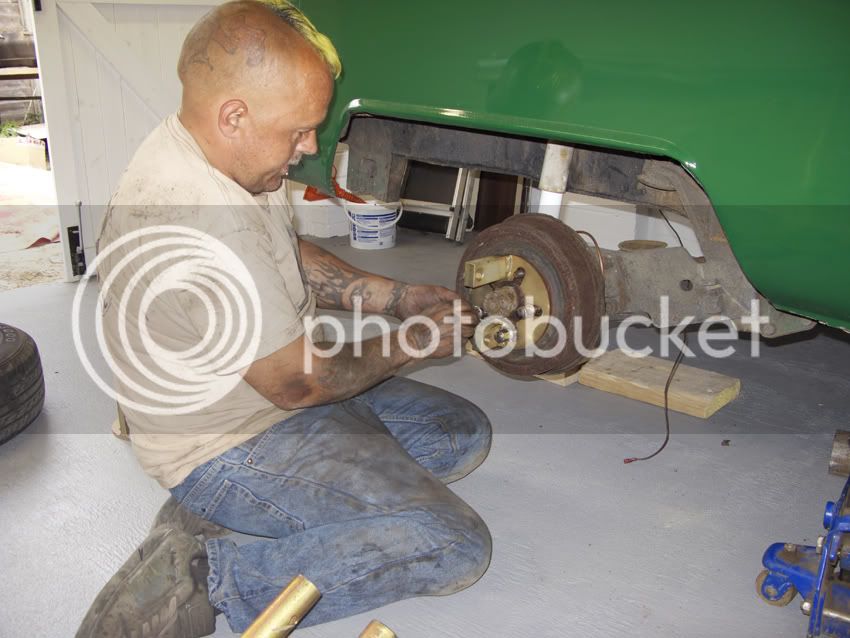
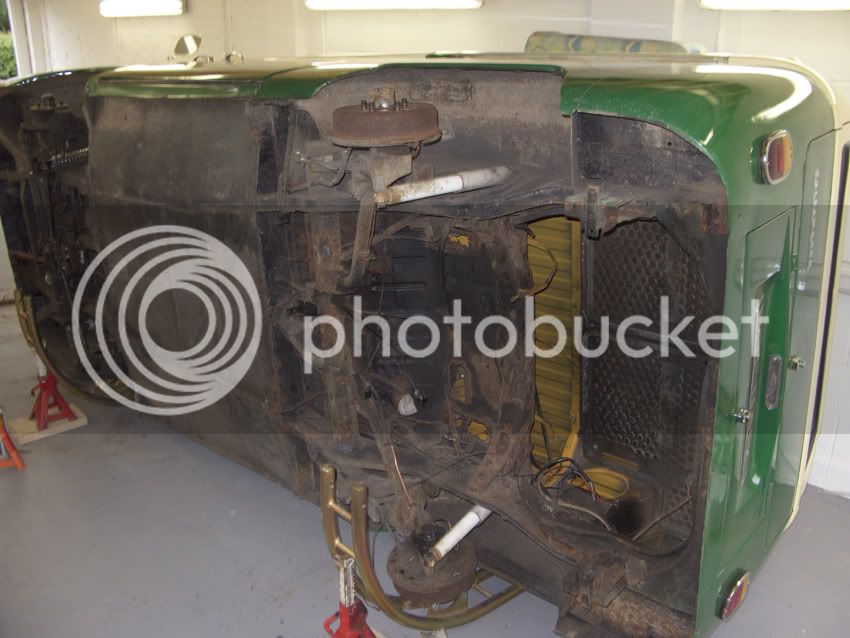
Back to the bus and after today I'm now in a position where every piece of welding work which has been carried out on the chassis has to be redone. Nothing is as it should be.

I'd always planned to carry out welding repairs to the rear half of the chassis this year prior to its next MOT, but this has now extended to starting at one end and working my way to the other. Previous repairs included the front A-frame, jacking points and outriggers and a host of other panels, but the A-frame is in a poor state with thin panel plate instead of chassis plate, jacking points barely held onto the chassis (mainly with filler!) and fibre glass and filler everywhere in the front of the chassis but hidden beneath underseal and paint.

So, this is today's work:

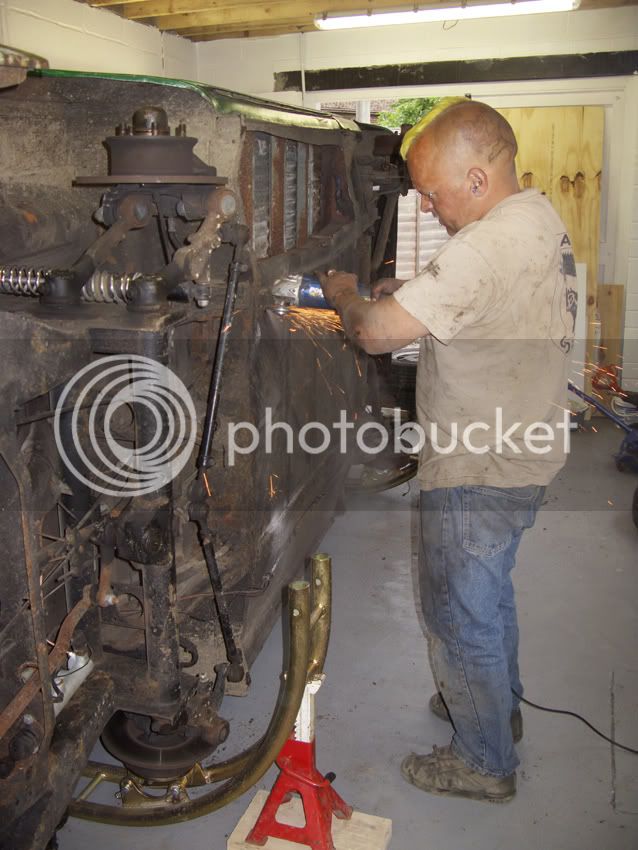
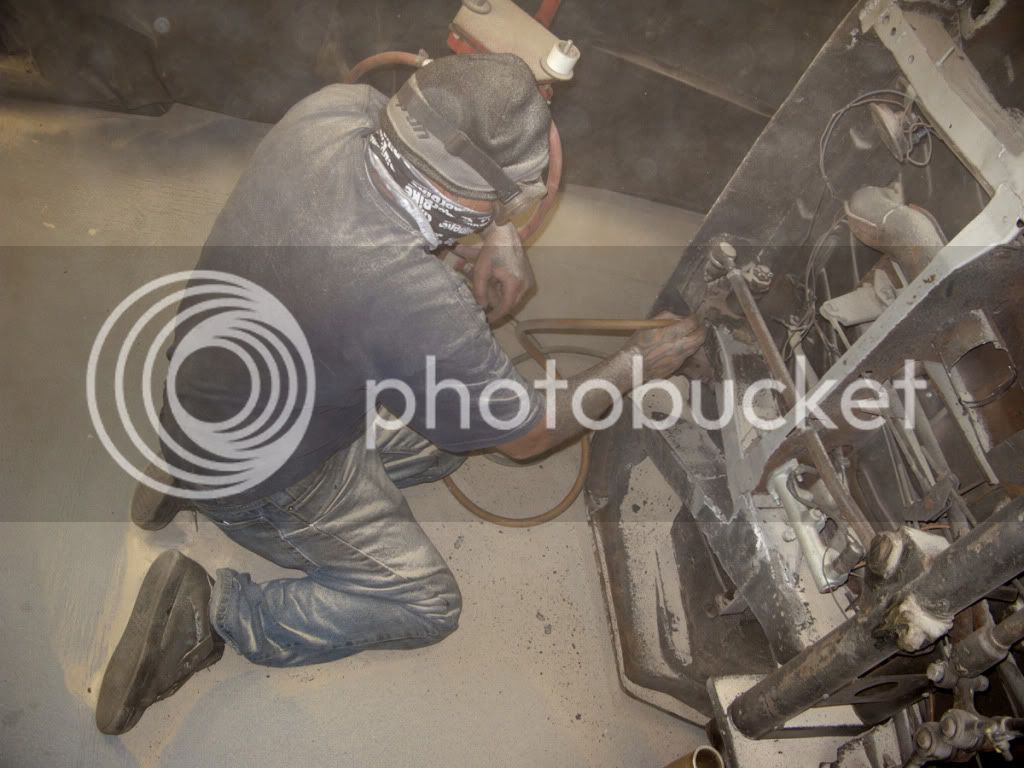
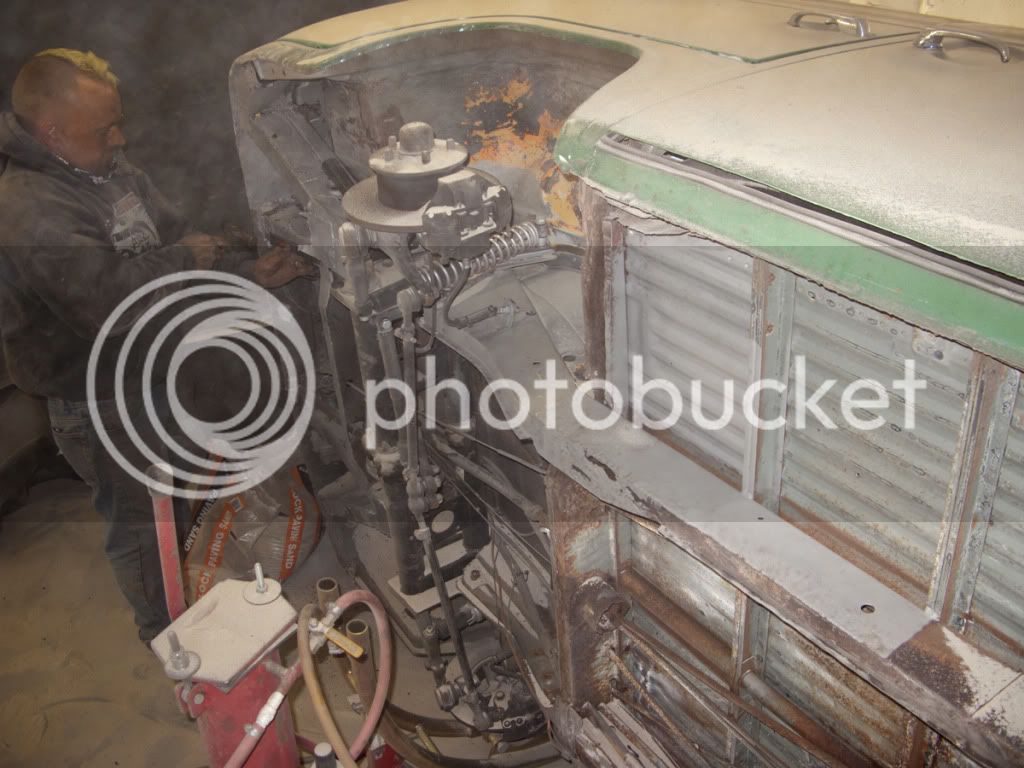
We started by picking up where we left off yesterday by sand blasting at the front of the chassis, a long job, but worth while.

IMG_1543_lr.jpg


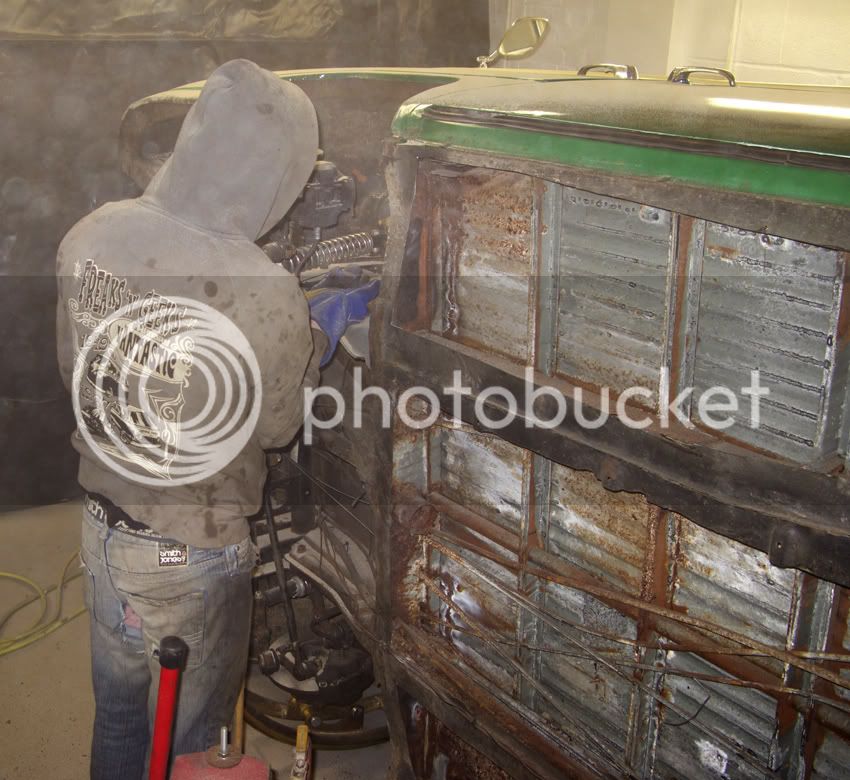
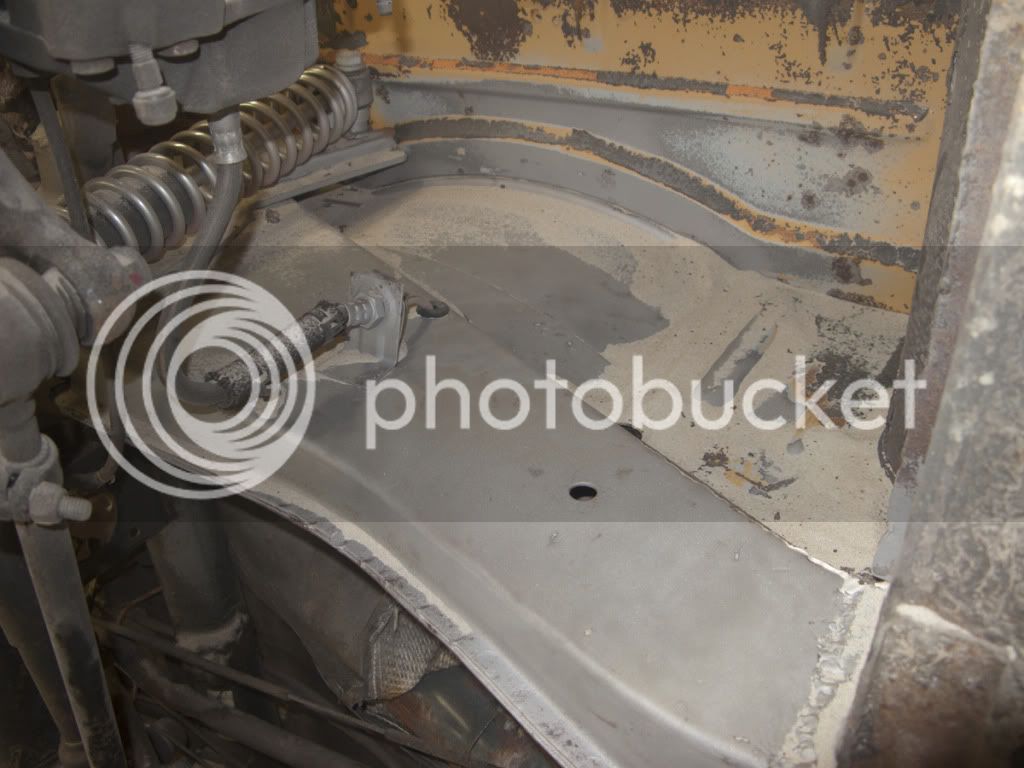
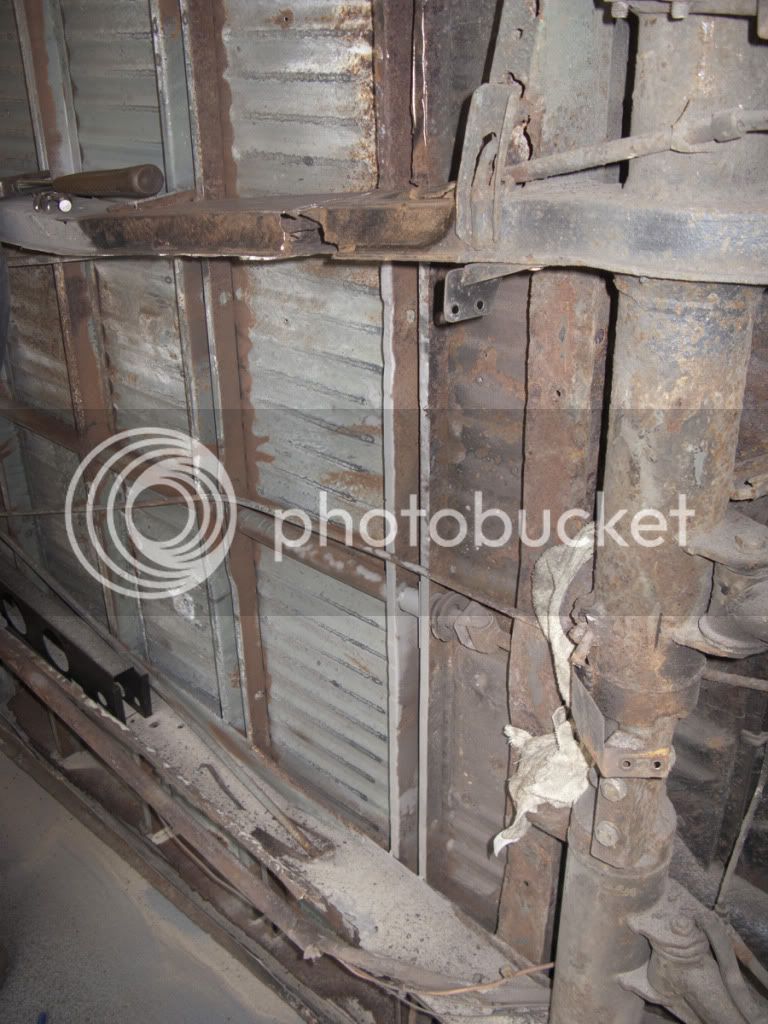
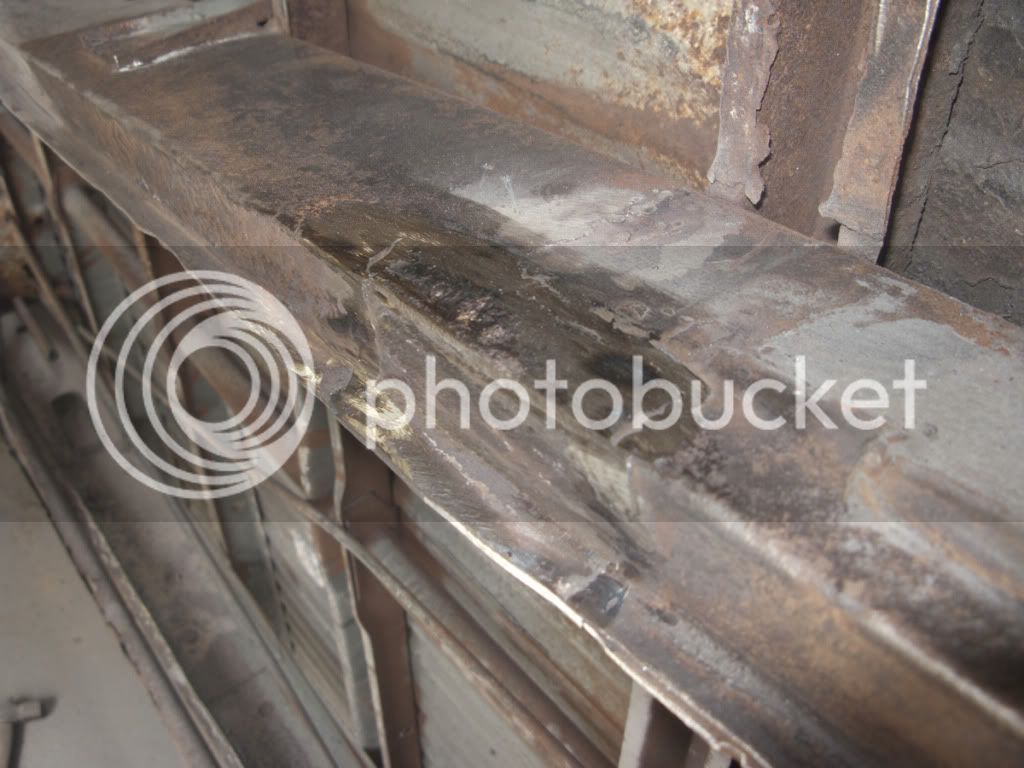
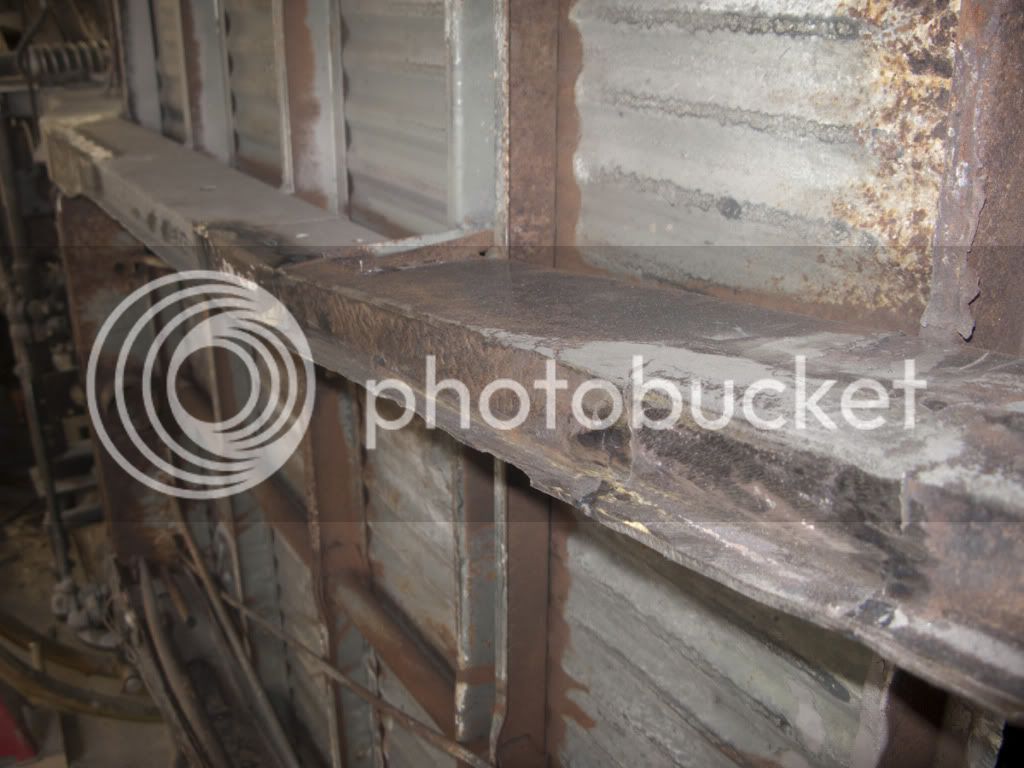
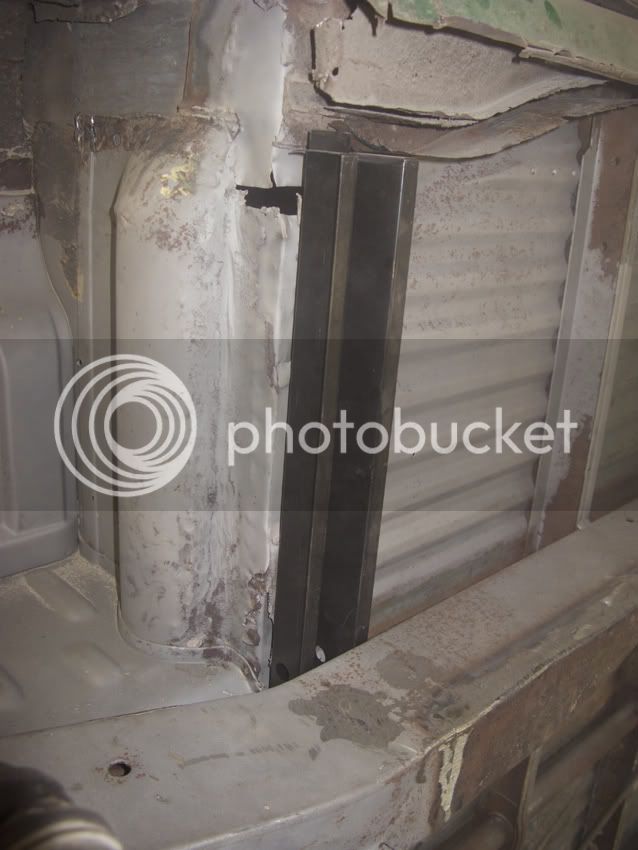
Some parts of the chassis are in excellent condition, including the chassis rail inside the arch.

IMG_1542_lr.jpg


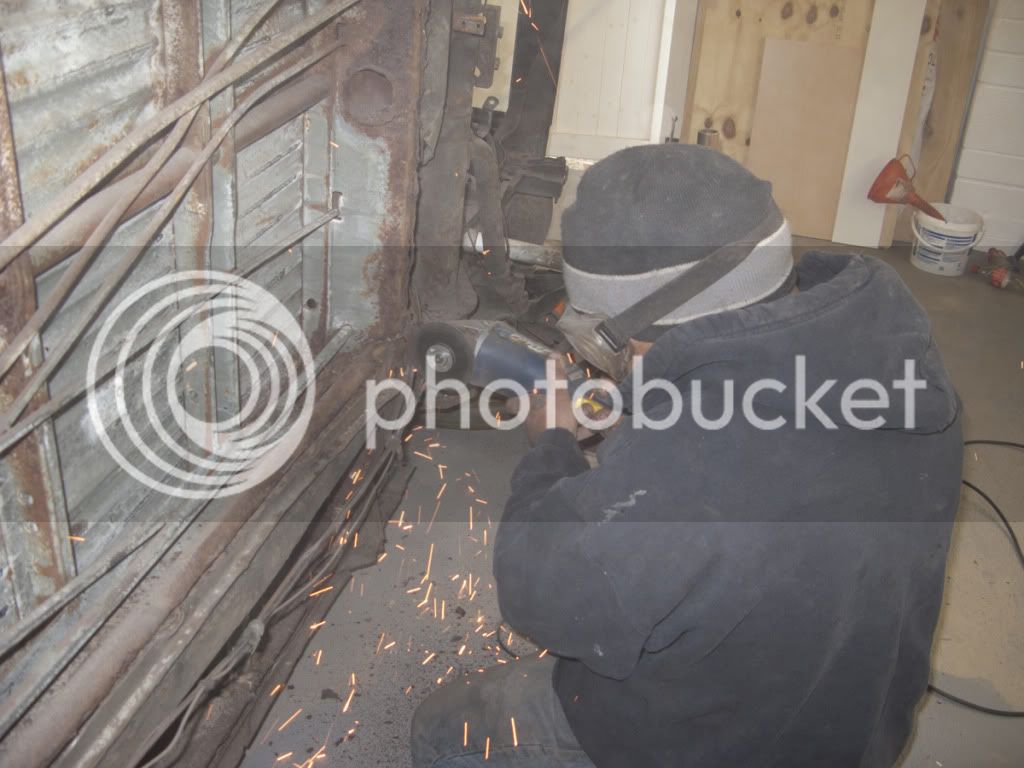
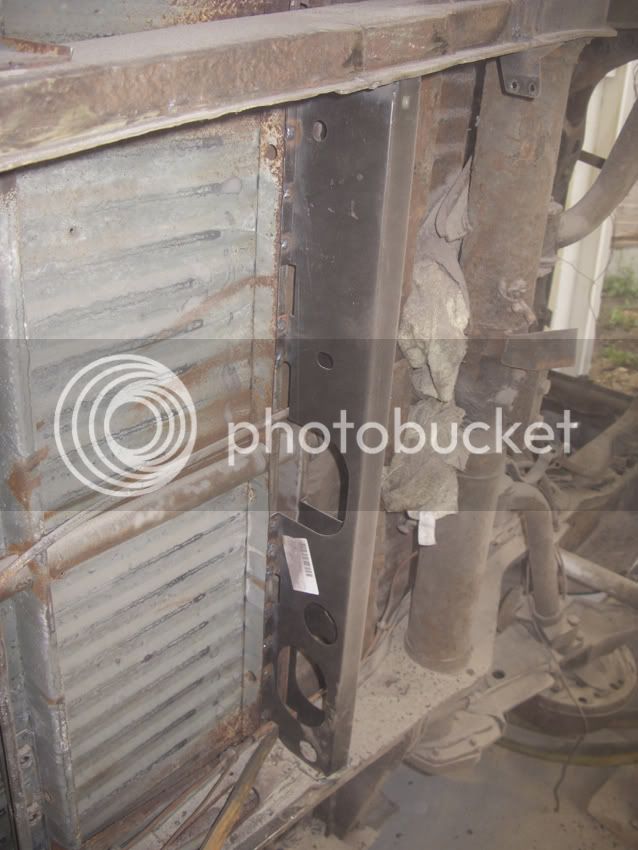
Cutting back metal around the chassis after removing the belly pans yesterday - this revealed a few horrors!

IMG_1545_lr.jpg


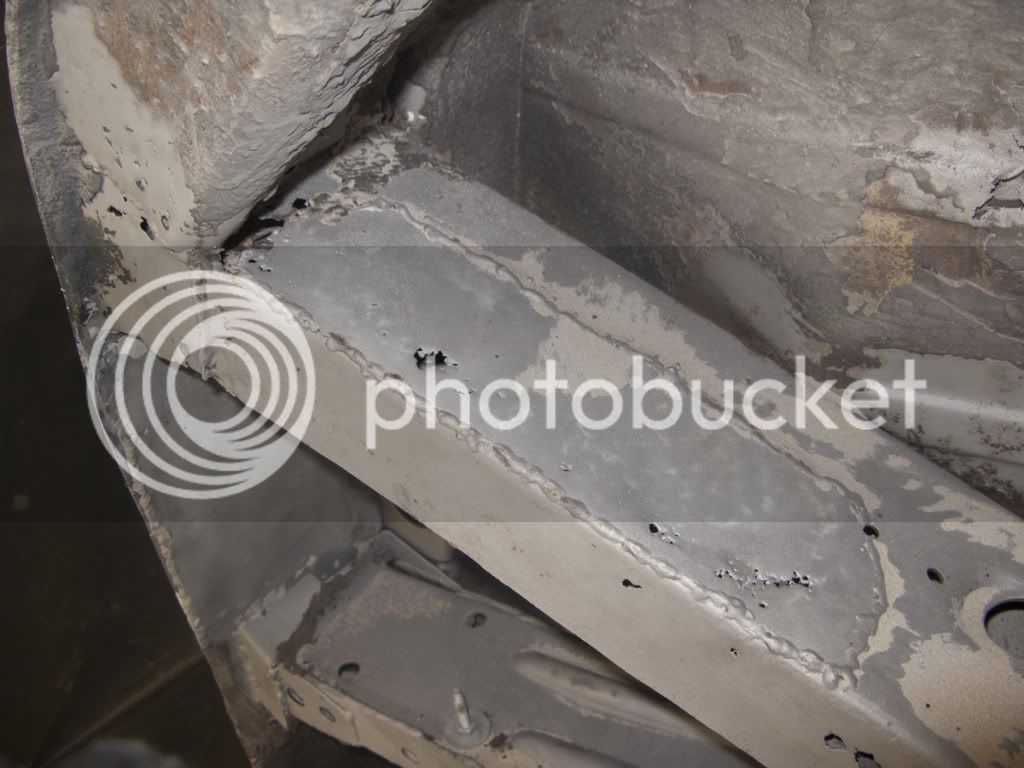
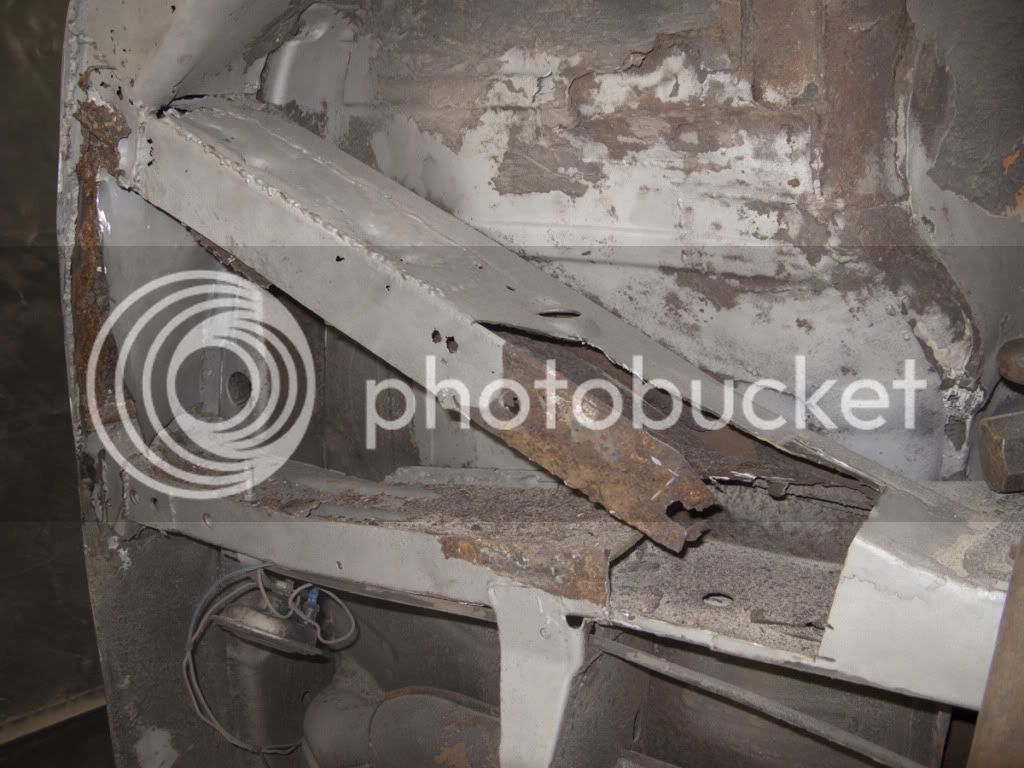
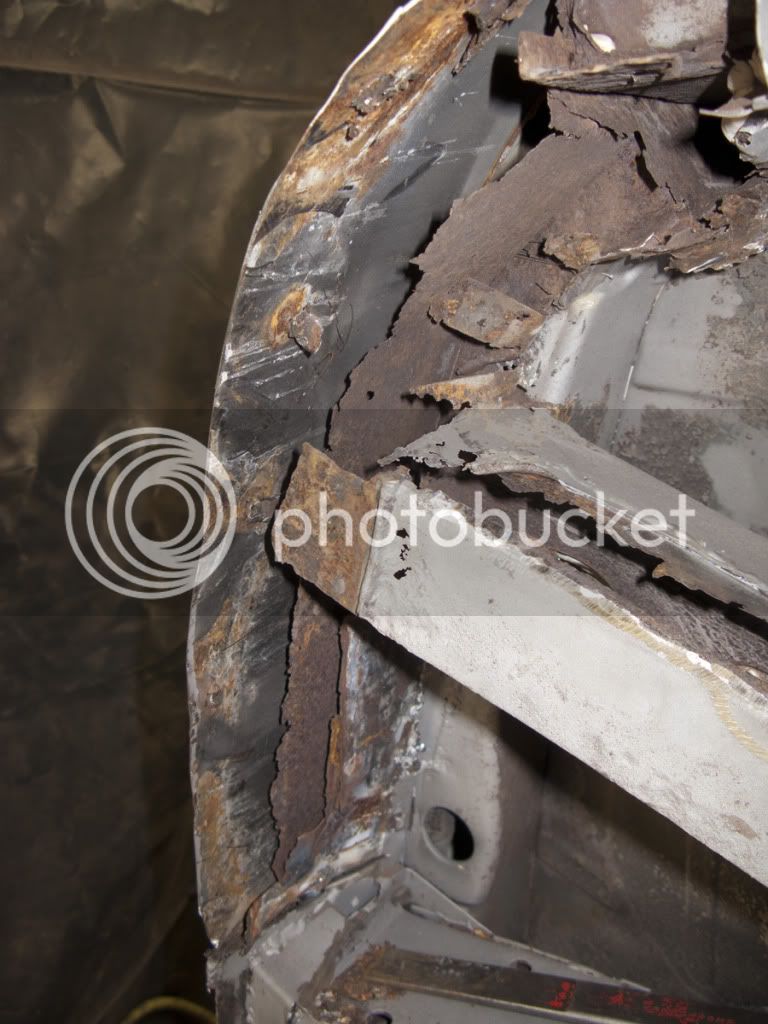
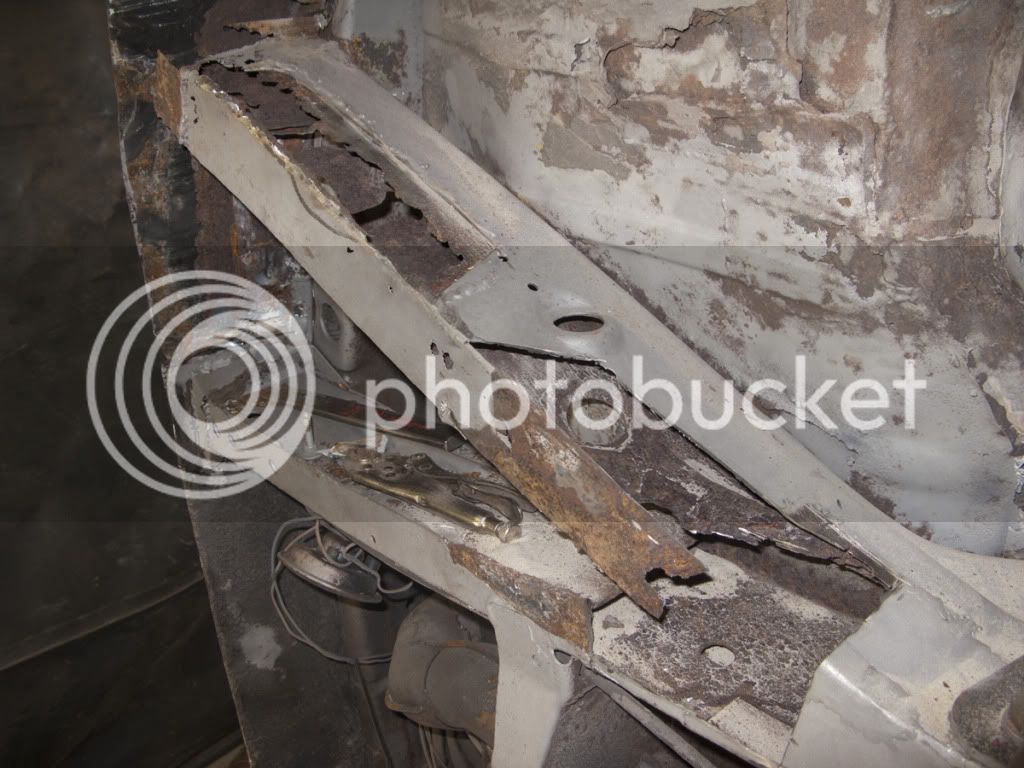
Pitted and rotted previous repair to the A-frame which has been done with body rather than chassis plate and retained no strength.

IMG_1547_lr.jpg


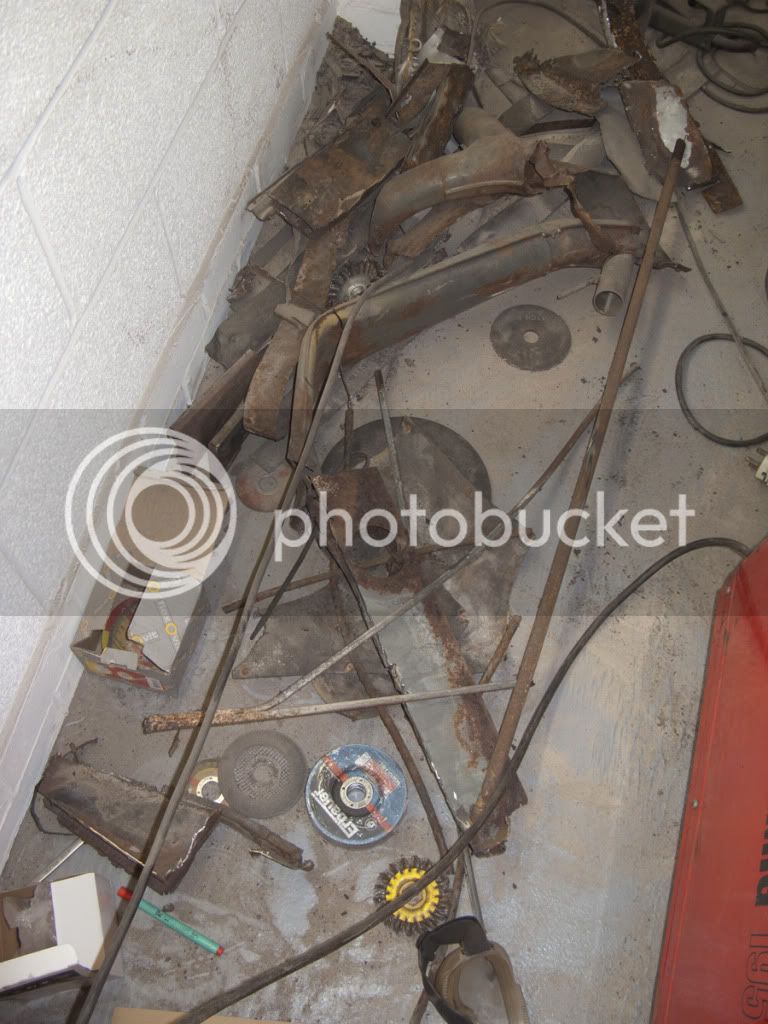
Just some of the rot which fell out of the chassis after the belly pans had been removed.

IMG_1549_lr.jpg


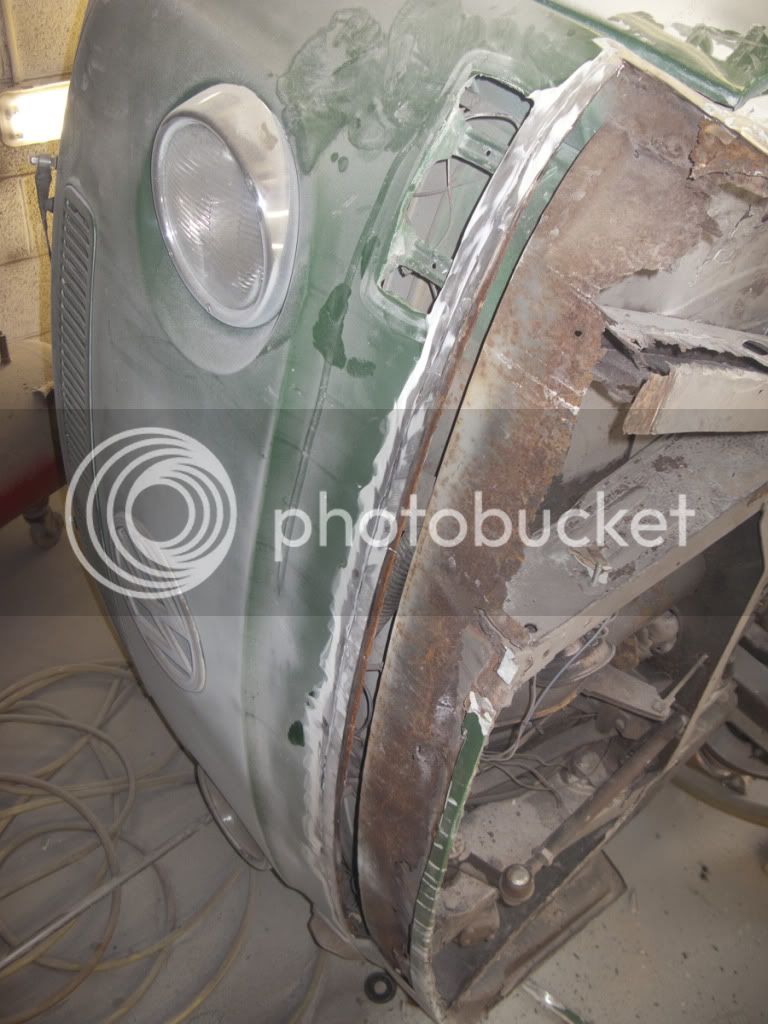
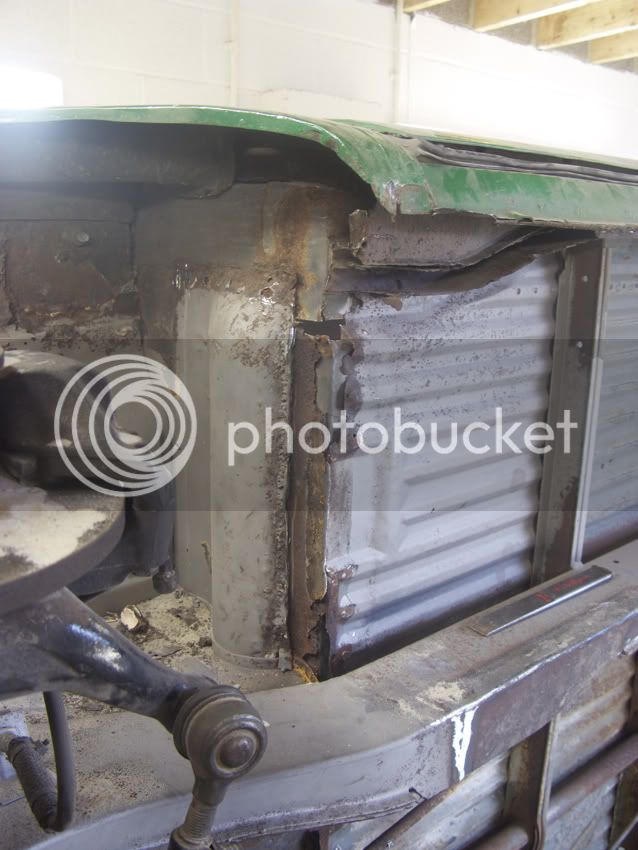
The disconnected and incomplete front end.
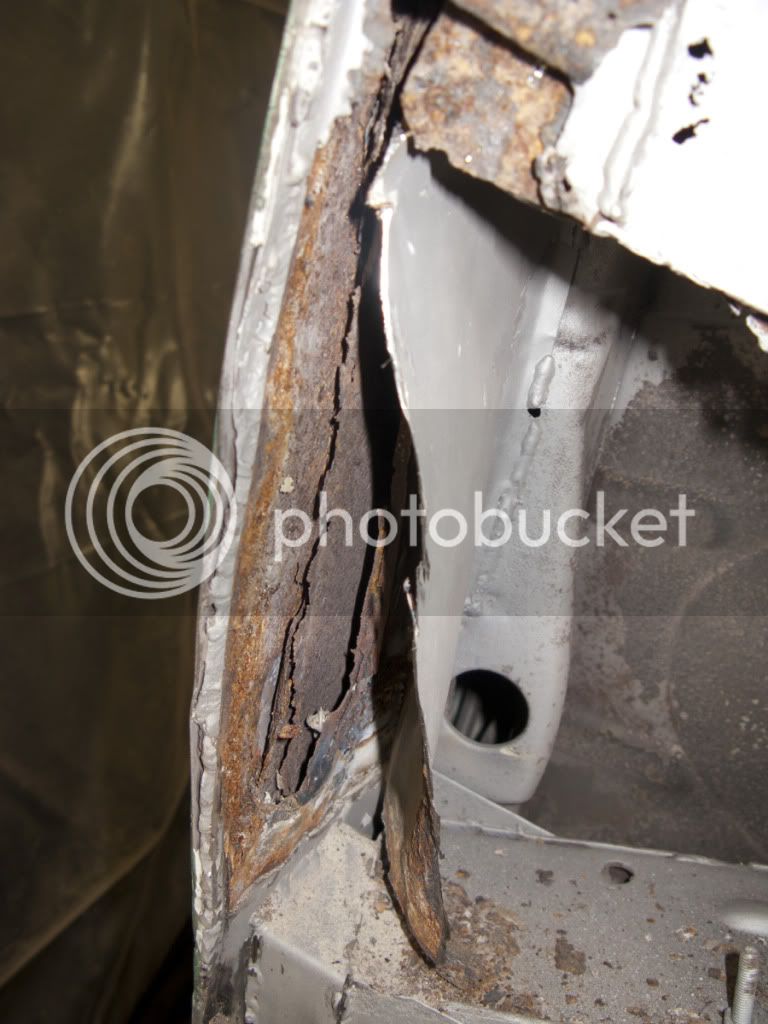
IMG_1550_lr.jpg


Rot in the chassis.

IMG_1551_lr.jpg


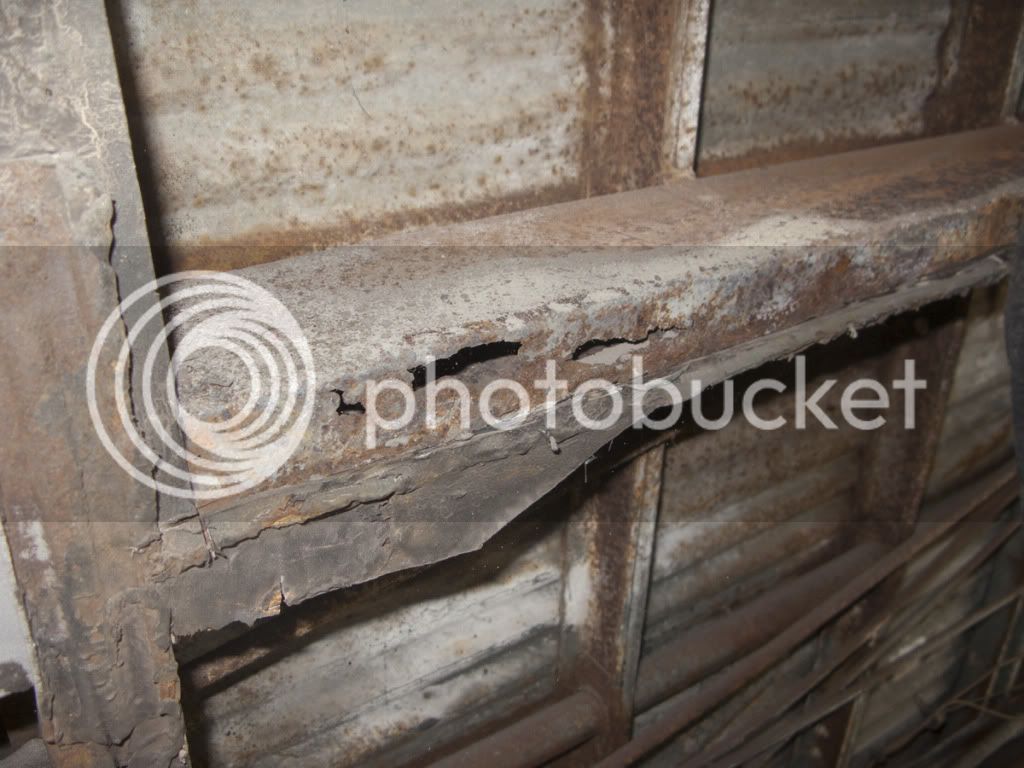
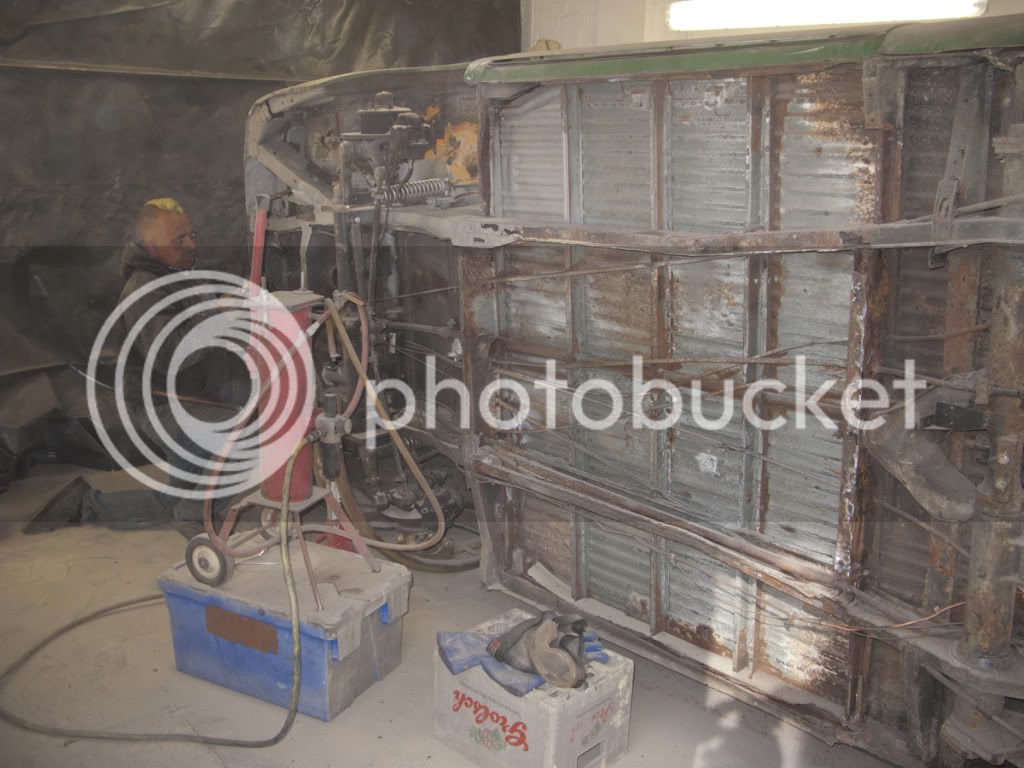
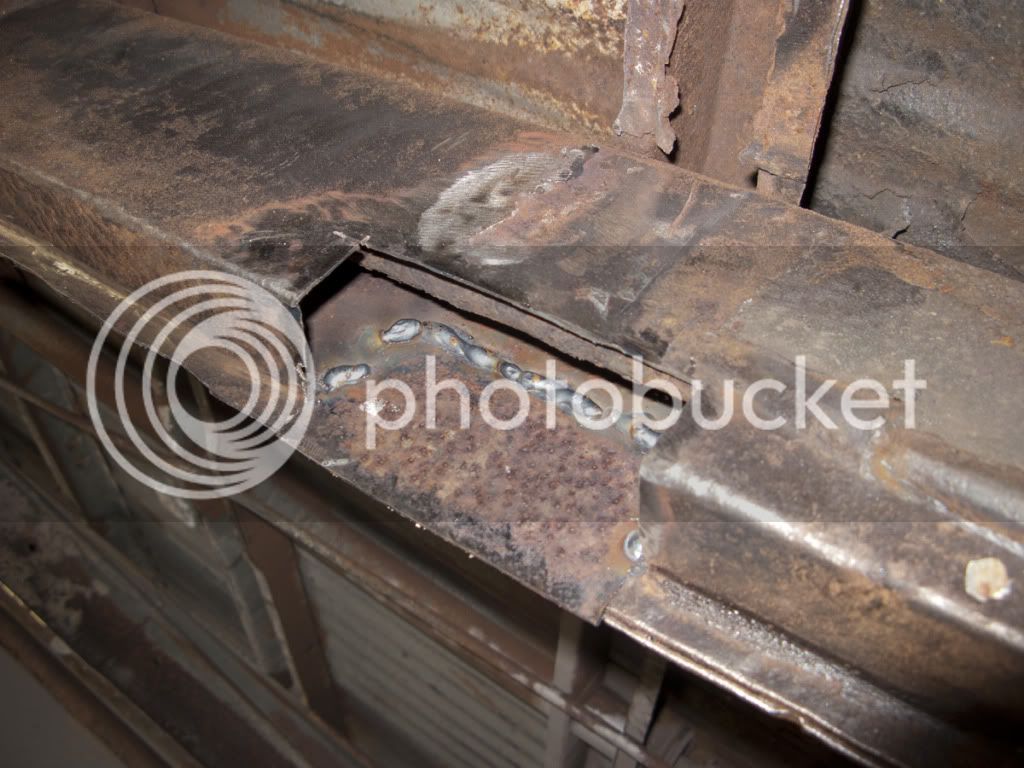
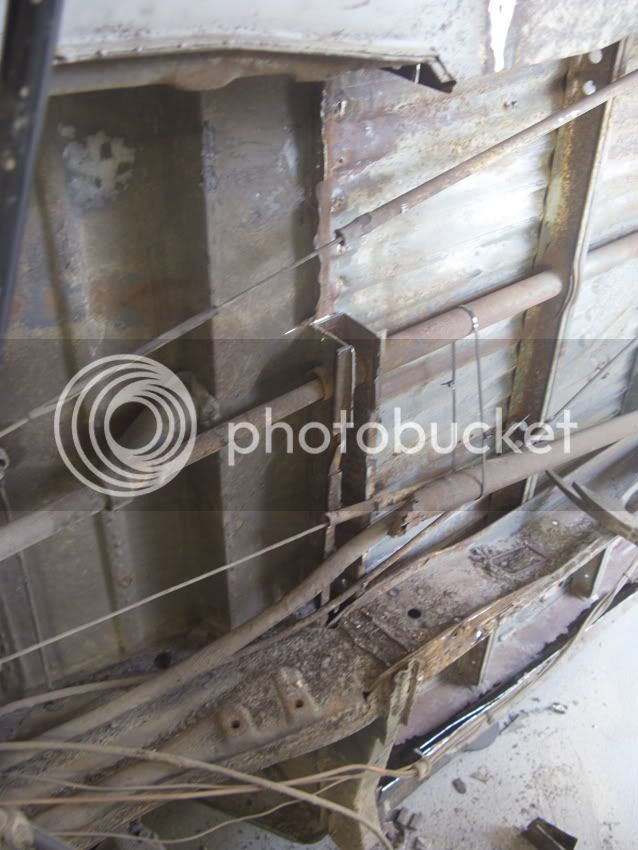
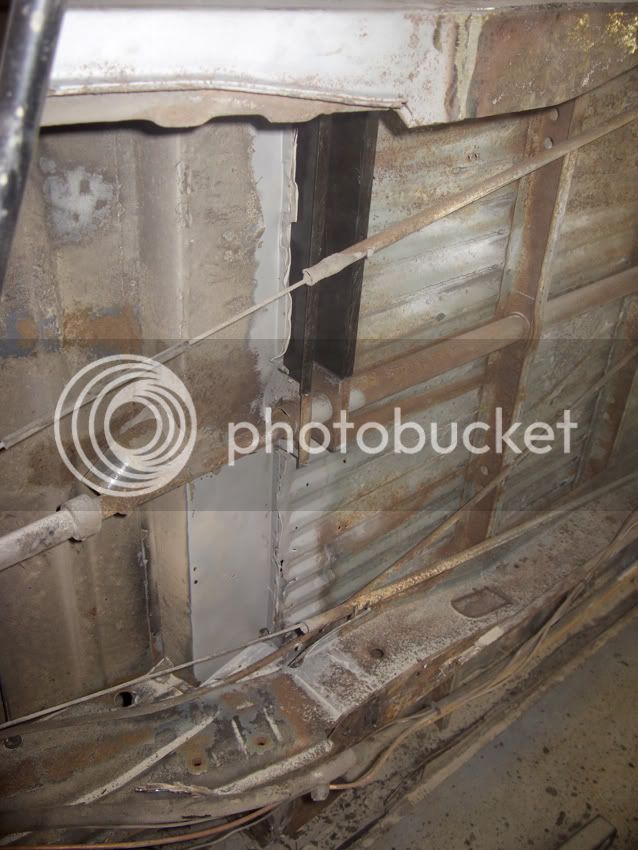
Around the rear jacking point/outrigger the main chassis has suffered badly under the belly pans.

IMG_1553_lr.jpg


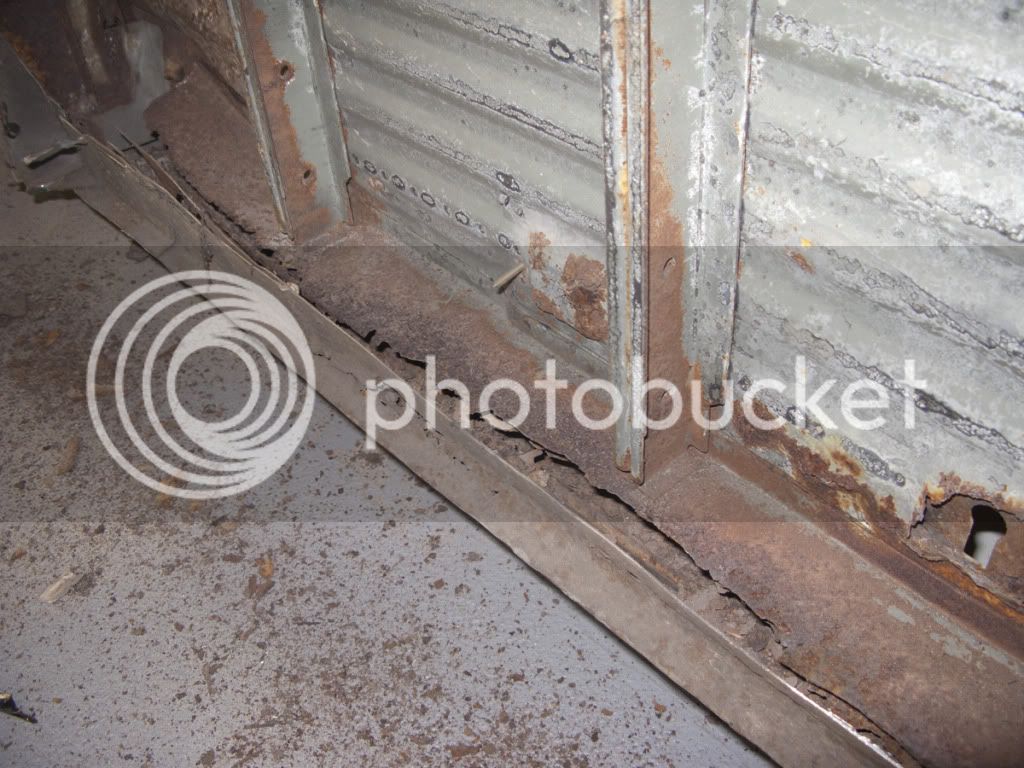
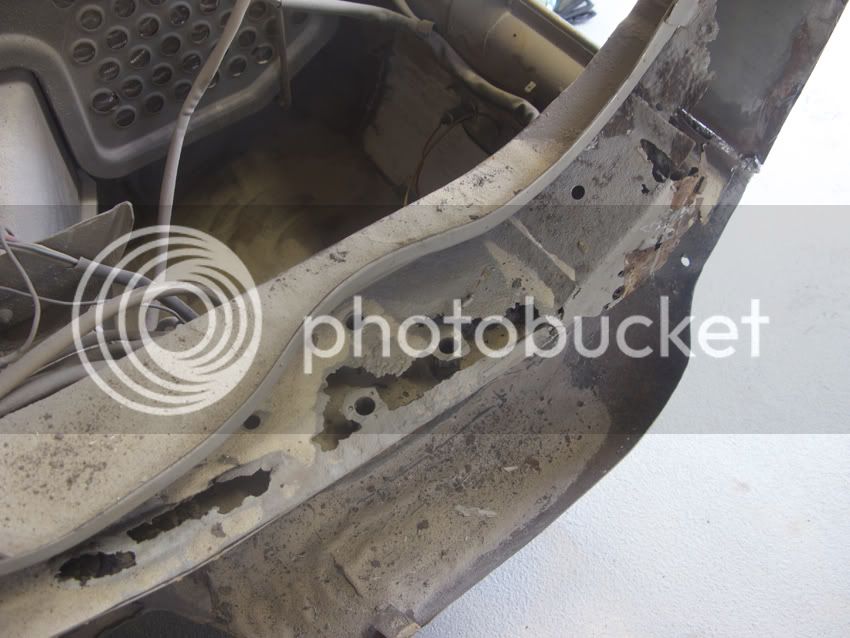
Rotten inner sill on the driver's side - something we knew about!

IMG_1555_lr.jpg


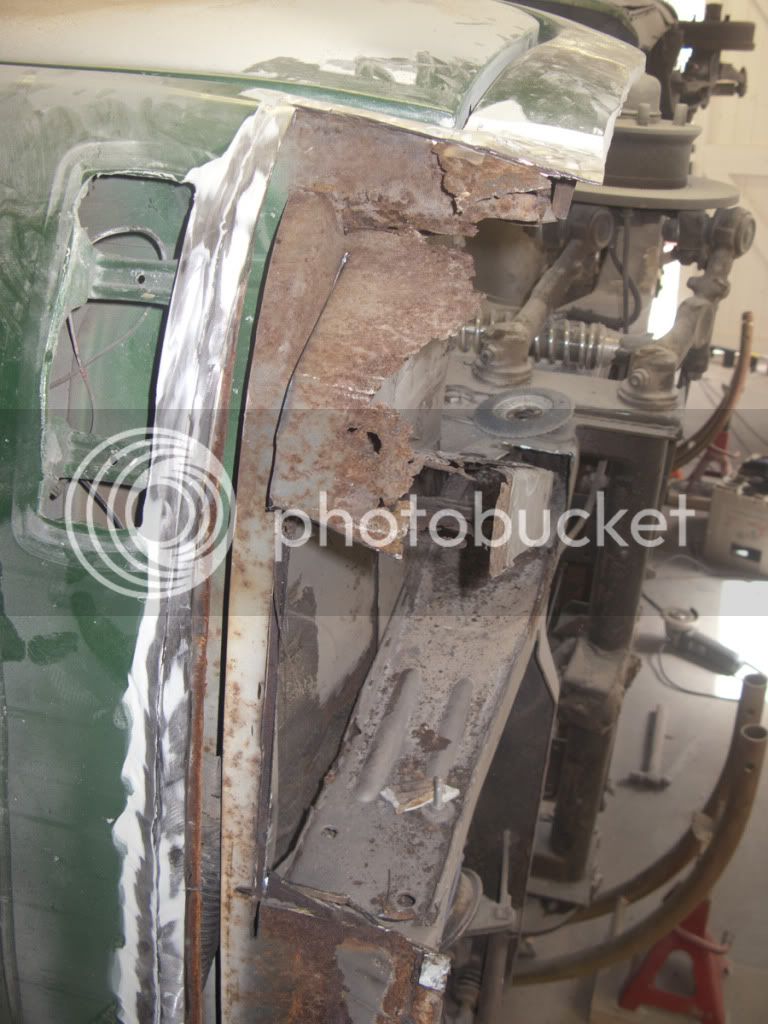
The front jacking point was barely attached to the van!

IMG_1558_lr.jpg


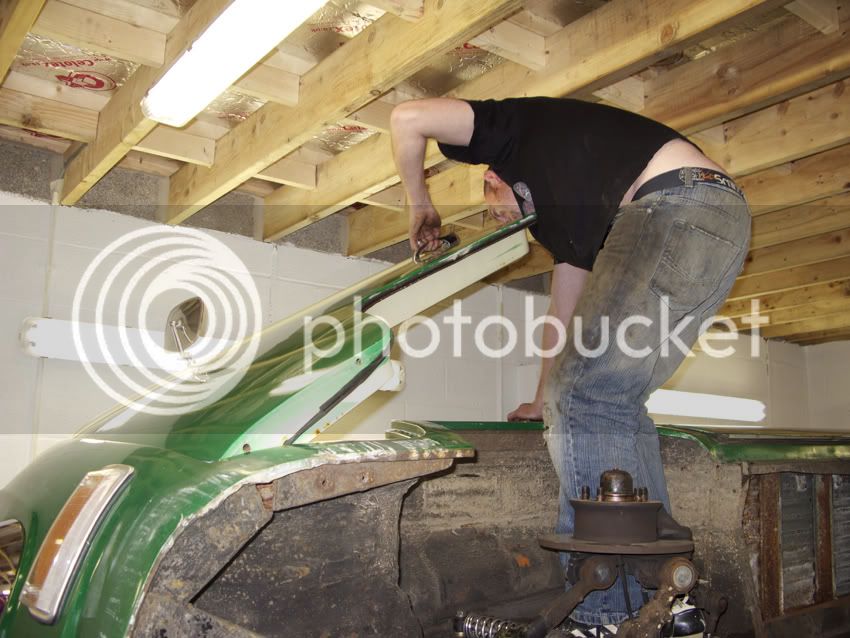
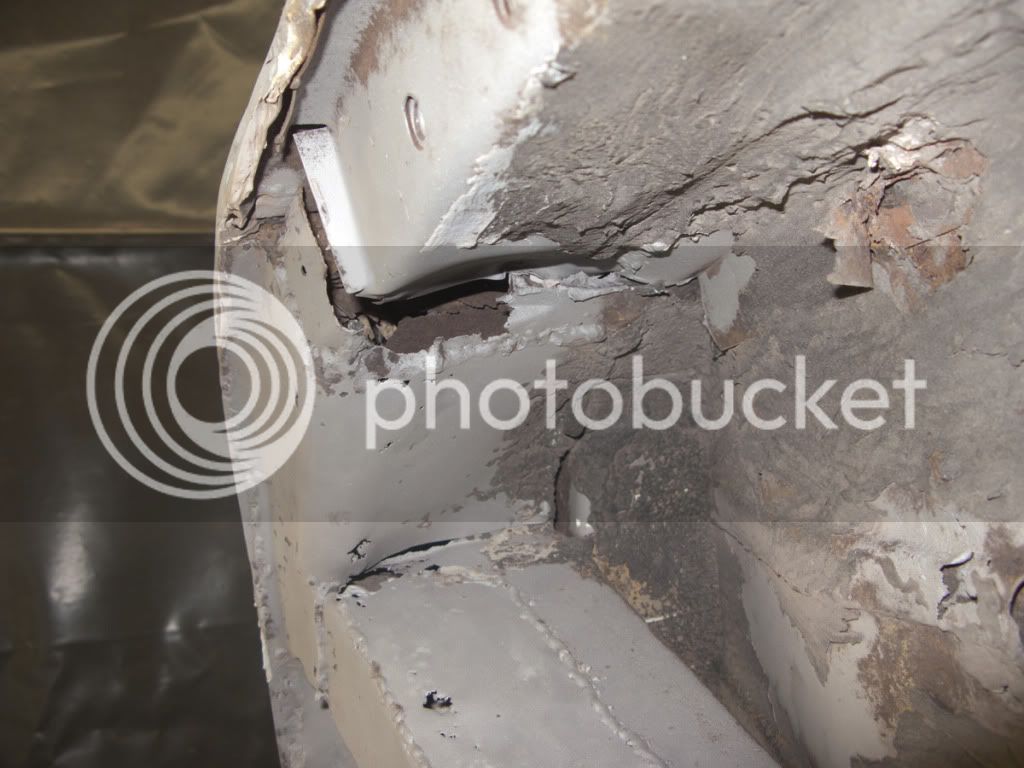
Peeling plates away from the front A-frame...

IMG_1561_lr.jpg


Looking better, but also worse as more rot is removed!

IMG_1562_lr.jpg


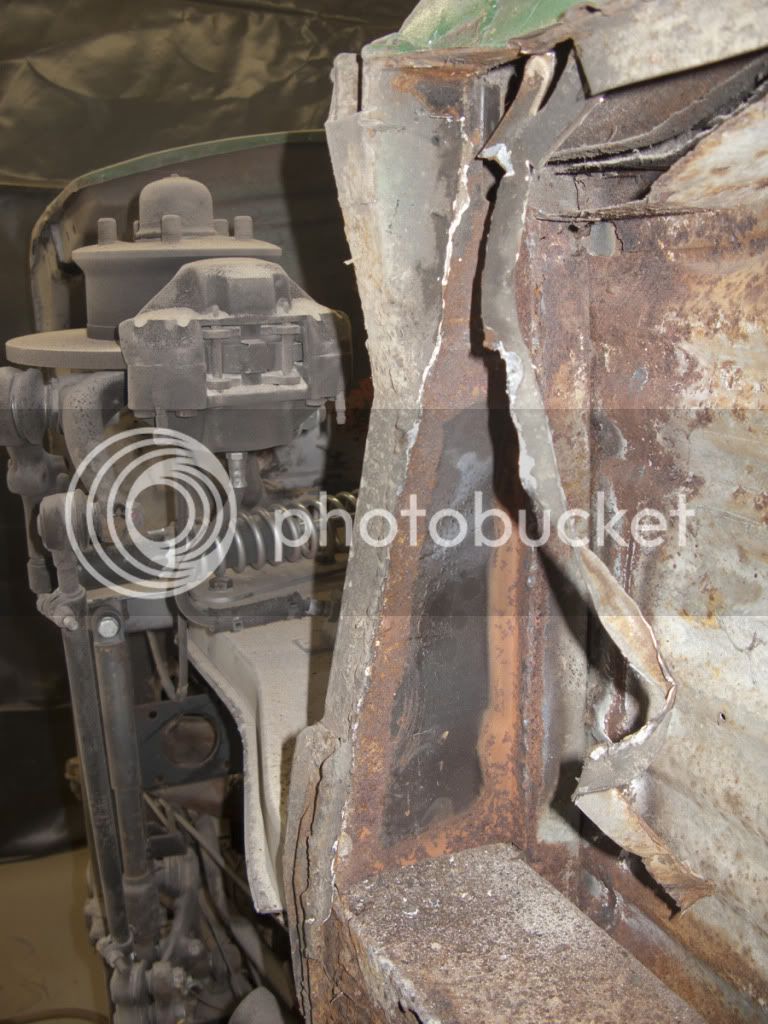
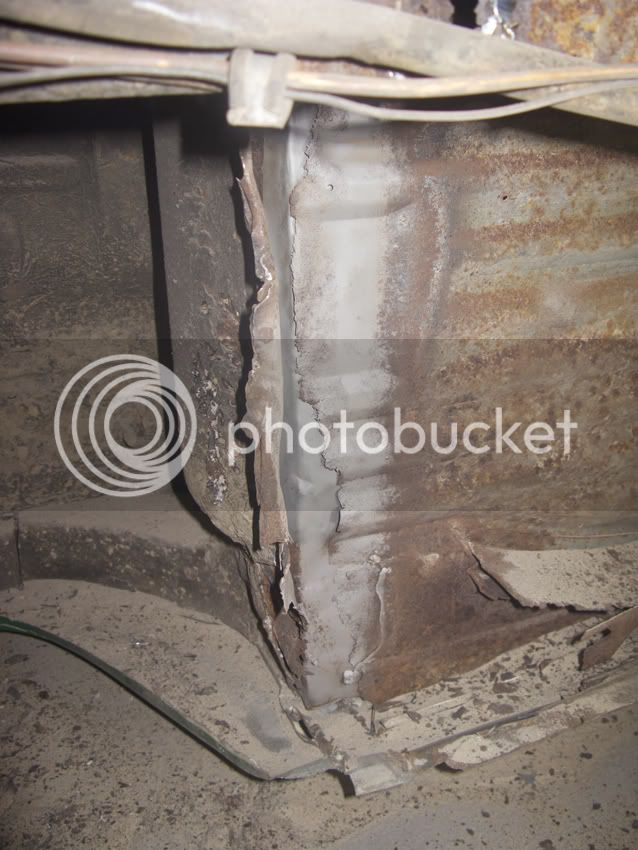
Rotten chassis legs around the engine bay.

IMG_1565_lr.jpg


Our view this afternoon.

IMG_1569_lr.jpg


The front A-frame again, which actually got worse after this photograph!

IMG_1571_lr.jpg


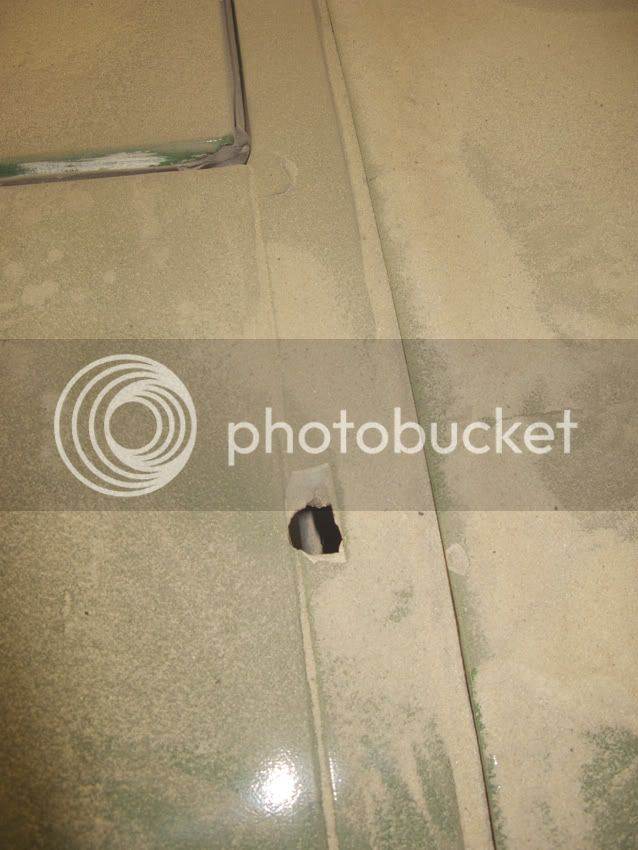
At the end of the day we started peeling back the layers behind the lower front panel.

IMG_1572_lr.jpg


To say the least it has been a bad day today! I knew the chassis needed work, but I never thought I'd be starting again from scratch and redoing work that I'd paid for in the past. Fortunately I have a great friend and skilled welder and working together I'm sure it will be back on the road in the near future.
 
Just think you have been driving your van down the strip with the chassis like this :shock:

Looks very familiar though :(

Looking forward to seeing the work being carried out :D
 
gninnam said:
Just think you have been driving your van down the strip with the chassis like this :shock:

Looks very familiar though :(

Looking forward to seeing the work being carried out :D

That was what I was thinking today when we were discovering all the nasties - it doesn't bare thinking about!

It has been a shocking day in all respects, but at the end of it I know it will be mint and solid underneath which is the most important thing.
 
Ok, so we've made good progress over the past couple of days, but most of that has been removing rot from behind the front valance. Here the painter handily left all the rotten layers of metal behind the new outer skin then plastered it in filler to make the front of the van 'match' the profile of the rest of it. This was all then neatly disguised behind layers of paint and filler! Considering all this I'm not a happy bunny, but this time round I know it will be right.

Better still one of the first repairs I paid to have done on the bus was the front A-frame. As it turns out this hasn't really been repaired - its been plated over with panel thickness metal with all the rut and rust left behind. Again the 'repair' sections have barely been attached to the chassis and all I can say is that I'm very lucky to have had a safe track record on the road with the bus.

Onwards and upwards as they say - this is what we've found and been working on...

Rather than try and make good the cross members they are being replaced, the rear has been cut out ready for the new metal to go in and to allow repairs to the chassis rails before it is fitted.

IMG_1575_lr.jpg


This is the first of three areas of the passenger side chassis rail to be repaired. The aim is to keep it looking factory.

IMG_1576_lr.jpg


At the end of Thursday this was the pile of scrap - and some of it was outside too!

IMG_1578_lr.jpg


At the rear of the passenger side chassis rail both sides needed repairs between the crossmember and jacking point. This is with the rear section tacked in.

IMG_1579_lr.jpg


The front of the chassis is a really nasty area. Basically the outer legs of the A-frame are completely rotten. The layers of metal which we found hidden behind the front lower panel can be seen here too.

IMG_1581_lr.jpg


The remains of the front A-frame!

IMG_1582_lr.jpg


Second repair to the chassis rail complete.

IMG_1602_lr.jpg


As it turns out we found it better to cut the outer front panel off completely only to find that it hadn't been let in properly and because the metal hadn't been treated it was about to pop anyway - joy of joys!

IMG_1604_lr.jpg


It has taken most of today to cut this area back, and this is only part of it!

IMG_1607_lr.jpg


However, the passenger side chassis rail is now fully solid again after three repairs.

IMG_1610_lr.jpg


We've got another day on it tomorrow so hopefully now that the front is cleaned up we'll be able to start rebuilding that area while I also continue repairing the driver's side chassis rail ready for arrival of the new rear crossmember on Monday.
 
We've definitely got our work cut out, but I think we're over the worst of it now. All the nasties have been uncovered and we know what needs doing, so it is a case of putting in the hours to get the vehicle built up again and ready for the chassis to be painted.

I probably shouldn't tempt fate, but our target is to complete the chassis rebuild in time for BVF at the beginning of July! :shock:
 
Holy sh!t balls Mike :shock: you've got your work cut out there mate. You got the right man for the job in Drew tho :D

We saw you go down the strip on the Saturday, looks awesome fun! 8)
I'll be following this closely mate. If you need any help, extra pair of hands, give me a shout.
Cheers,
Chris.
 
Cheers Chris - much appreciated, although you might regret offering the help! I'd do more on it myself, but the day job means I can't be in my garage all the time lol

It is a sorry state of affairs and I feel like a bit of a sap for trusting in the repairs that were done for me by a couple of local garages. Hindsight though is a wonderful thing and all I can do now is keep moving forward with the knowledge that the work Drew and I are doing uses the right materials and a welder resulting in a structurally sound chassis. 8)
 
Don't beat yourself up about the repairs mate, it happens to the best of us! Some professionals just aren't that professional :roll:
You can't be expected to look over their shoulders to make sure they're doin a proper job!

By the way, if you do decide to sell the Empi's, I'd be very interested? 8)
 
Ok, so the last two weeks haven't been particularly productive. I've been back at work more than full time and Drew - my partner in crime - has been on holiday and dealing with a couple of his own projects.

Anyway, excuses out of the way we were back on it on Monday having cleared our respective decks for the day.

At the front end we got the front crossmember cut out together with the rotten top hat which revealed more had repairs - this time to the cargo floor where it joins the inner wheel arch.

IMG_1638_lr.jpg


IMG_1637_lr.jpg


At the back I made some more progress with sand blasting cleaning up the rear chassis legs which has revealed even more work that needs doing thanks to other poor repairs around the area and a rather unusually rotten chassis leg around the engine mount, but on one side only.

IMG_1639_lr.jpg


New top hat in position temporarily at the front.

IMG_1642_lr.jpg


To avoid having to pull the gear linkage apart we kept the only good bit of the original top hat in place - all three inches of it!

IMG_1643_lr.jpg


This is a close of up the driver's side where the top hat once sat. More had repairs have been found in the bodywork which need doing before its date with the MOT station.

IMG_1644_lr.jpg


Oh, and the B-post repair on the passenger side involved a lot of filler apparently!

IMG_1645_lr.jpg


The good news is that the rear cross member is all in fitted and done. Just some cleaning up to do.

IMG_1646_lr.jpg


Onwards and upwards as they say.
 

Latest posts

Top