1972 Crossover Dormobile - Full Restoration Work In Progress

Early Bay Forum

Help Support Early Bay Forum:

This site may earn a commission from merchant affiliate links, including eBay, Amazon, and others.
Getting there Nafe, ;)
You may think it's taken a long time but if you'd of been doing this yourself at w/ends it would still be no where near
this stage.
Think you should buy those carbs though, they'd be rude :evil:
 
i know i would be no where near where they are at the moment. i did weigh up how long it would have taken me to carry out everything and it was well over a year.

it is just a little frustrating when the guy told me 4-6wks. but i am constantly referring back to how long ti would have taken me to do it - and to what standard

NaFe
 
it SHOULD have been finished again by this evening, but not quite - almost there now.

i have told the bodyshop guy that it is being collected on thursday evening so has to be done by then.

ok so the progress they have made:

floor is welded in, the wheel arhes and the webbing of the rear quarter panels have been made up and tacked in place. the two rear corners are now welded fully. the outer wheel arches are welded fully.

15052009576.jpg


15052009577.jpg


15052009578.jpg


15052009575.jpg


15052009582.jpg


15052009584.jpg


15052009583.jpg


15052009585.jpg


replaced old gusset at top of b pillar
15052009581.jpg


battery tray lowered down to make room for two batteries:
15052009586g.jpg


new gussets at edge of engine bay and patch made up for fuel tank shelf:
15052009587.jpg


15052009588.jpg


attention has started around the sliding track area area. i'm not too sure how good this will look in all honesty, but i have been told it will look good:
15052009579.jpg


the engine is being taken down on wednesday and collection is planned for thursday. i bloody hope he sticks to it - getting peeved off now

NaFe
 
looks all good mate. i know its frustrating but never rush a welder :shock: he'll warp the sh#t out of it. it will be all good in the end. :D
 
ye its 95% there now and i am hoping that he will be able to stick to the thursday slot we have planned. going to be popping up there on tuesday to check that they are going to be doing everything i want them to by the time i collect. i have left a list with the guy, but i am sure i will think of something else along the way :)

on a slightly differnt not i have now pretty much made the wiring harness for the Porsche engine. i'm designing in a way that the fump pump, realy, ignition etc are all mounted to a bulkplate, when when/if i want to drop the engine its a matter of undoing the dropign the engine and g/box. i may even post some pics of my wiring :)
 
so the van is back!!!!!!!!!!

overall really pleased with all the gaps on initial inspection. however, there do seem to be one or two gash bits that i will have to redo how i want it and the sprayshop may have some extra work to do.

i'm now really considering having the thing acid dipped and then e-coated in paint but surfaceprocessing up in dudly. trouble is its £945+VAT for acid dip, and then £945+VAT for paint dip. so about £2200 for the both - then there is the cost of the work that is discovered after dip :(

anyway a couple of pics - more to follow over the weekend:

22052009589.jpg


22052009590e.jpg


22052009591.jpg
 
dont dip it mate :shock:

i realise that it would eradicate any rust inside the pilers you cant see but it costs a sh#t load.

put a line under it and get on with bare metalling what you have by hand and getting it prepped. it will end up a good bus.

2.2k is a lot of money you could spend on other bits.
 
Get ***** loads of nitromors and get to it with that, takes a long time but will save you ££££ 's which you can spend on otehr bits you want...
Buy bulk 5 litre tubs of the stuff probbly I used 2 - 3, don't get it on your skin or in your eye's :shock:
 
i'm just worried about any residual rust that i dont get rid off showing throuhg the paint in 5years time!!! i want it to be a keeper that will be in real good condition.

at the moment i may have a bigger problem. i was down the barn today and had a big big surprise. i had been up the bodyshop alot and shut the slider numerous times. however, when i put the door on today and tried to shut it, as the lower rollers went in before fully closing and the bloody thing fell off. after closer inspection the gap that the middle sill is supposed to be, which is 33mm, is more like 40mm. so therefore, the roller just pops out. trouble is its all fully welded in "finished" the bodyshop guy is coming over tomorro on his way to somewhere else to have a look.

absolutely gutted - but it means i can get him to look at some more ropey bits that havent been welded to the standard i thought i had outlined.

NaFe
 
Not quite sure te gap your meaning however sounds like you've spotted it at the right stage, I' m sure that it will be fixable and then you'll get back track.....
 
ok, just to give you all a little taster of the mild customisations/modifications i have done on the bus...

because the Porsche engine is a dry sump, you have to mount an oil tank where the battery is usually located. therefore, the car battery is positioned where the leisure battery is put - however, this would mean that i dont have a place for the leisure battery. i didnt want to put it in the bus because of chance of any fumes etc. therefore, i utilised the spare wheel well.

img1114g.jpg


img1112t.jpg


img1113efd.jpg


with the battery tray lowered down, means that i can still have the leisure battery in situ:
img1116elb.jpg


a lid to keep fumes in the engine bay. it looks gash - just look how UNcentered the holes are. this is going to be fixed and te lid is going to be a nice fit around the edge.
img1115bsr.jpg


i'm going to use the rest of the spare wheel well for a security box i think.

NaFe
 
i love custom touches like these as they are what sepate every single bus and make it slightly different :D

looking cool dude, about 3mm out on the bolt holes :p
 
while your at it mate i would have another go at making the battery lid. there is still a hole into the engine bay :shock:
it was a brave move to get another guy to do the bespoke bits that you wanted to make the bus work. only you will have the attention to detail to get the bits how you want it.

i would love your engine though after hearing it roar of at brighton in nellys bus i had a sex wee moment :oops:
 
andewilson said:
while your at it mate i would have another go at making the battery lid. there is still a hole into the engine bay :shock:
it was a brave move to get another guy to do the bespoke bits that you wanted to make the bus work. only you will have the attention to detail to get the bits how you want it.

i would love your engine though after hearing it roar of at brighton in nellys bus i had a sex wee moment :oops:

ye that battery tray is one of those things that is good in principle by executed by someone -not the van owner. it looks pretty ropey in the flesh so i'm going to redo the lid and have a rubber lining to ensure nothing comes through. going to put countersink bolts too rather than the nuts to it sits flush.

i cant wait to get the wiring harness done and fire her up. will just have to make sure there is nothing anywhere near me when i do it hehe
 
Looking realy good dude, you could make a little safe out of the remaining section of wheel well :)
 
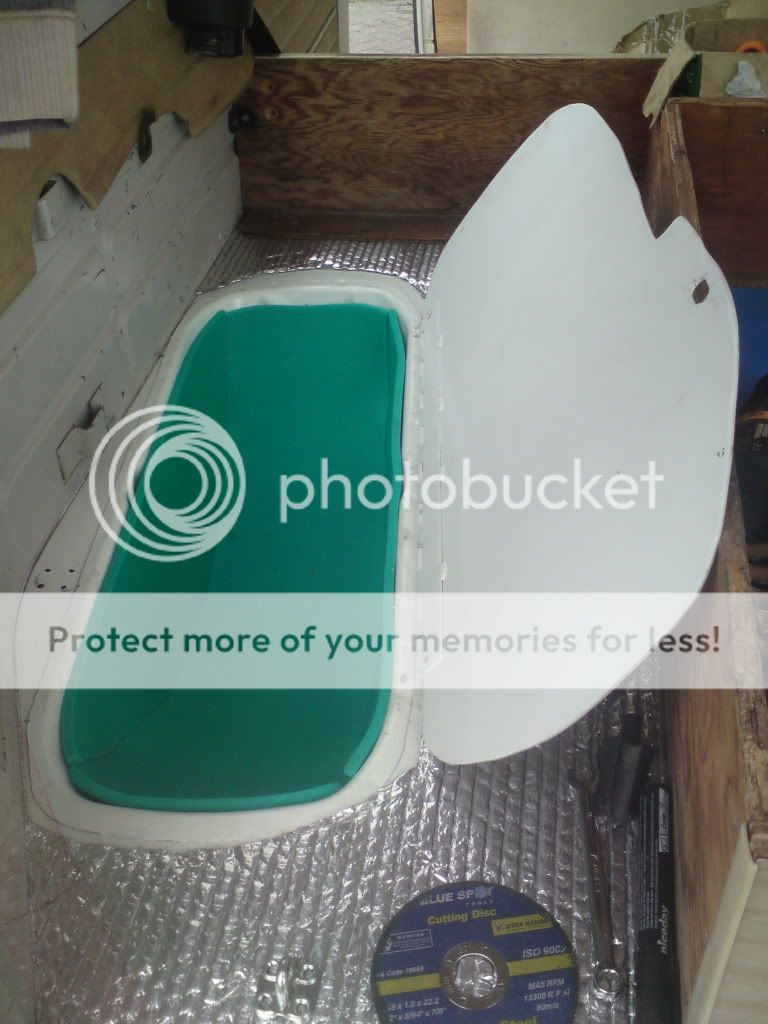
I've just made a safe of mine, tho full width as I haven't made the leisure battery housing:

DSC01123.jpg


Works well and with a full width bed over the top is well hidden :D
 

Latest posts

Top