'68 Bay Resto Challenge...

Early Bay Forum

Help Support Early Bay Forum:

This site may earn a commission from merchant affiliate links, including eBay, Amazon, and others.

Bay_Buster

Well-known member
Joined
Mar 9, 2013
Messages
84
Reaction score
3
Hi everyone, I've not been too active on here over the years, but the time has finally come for me to get my hands properly dirty and attempt to get my bay sorted. There's a lot of work that needs doing and I'm definitely throwing myself well in at the deep end with lead boots on as this is my first resto.

So I thought I should probably start a build thread now that I'm actually at the rebuilding stage, rather than just slowly dismantling everything over a few years. Those of you with keen eyes will be able to see what I'm ambitiously planning from this picture...

GOPR9033.jpg
 
You indeed spy correctly! It still amazes me what terrible repairs can be hidden by a liberal coating of waxoil. Chassis seemed fine with a good screwdriver inspection years ago. Chopping the offside out first, then I can take the old beam to a decent garage and get them to use a proper puller on my steering box as every attempt I've had won't budge it. Then the fun starts as the 'new' beams are for a LHD so need altering.

Sent from my GT-I9100 using Forum Fiend v1.3.1.
 
So I took a fair few measurements and also built this jig out of some scrap to help me relocate the new beam...
20150202_114119.jpg


Then started chopping. Front lower of the van is pretty solid I think :lol:
20150202_122241.jpg


Finally after running out and buying a reciprocating saw to get in where my angle grinder couldn't, the old beam is out.
20150202_204658.jpg
 
Slow progress recently, but progress non the less. Having the beam on the floor I had another go at removing my steering box with the only puller I had to hand - a three legged gear puller. Wrestled with it for hours, had plenty of heat on the arm but wouldn't budge.
20150212_133650.jpg


So I got one of these 27mm pullers off ebay for 6 quid...
_12.jpg


Had to grind out the large gap slightly by about 2mm either side so it would fit over the arm which took a while, but in the end it did the job with a bit more heat and plenty of hammering! :D
20150214_141622.jpg


After a few hours chipping and scraping the thick gunk off with an old screwdriver and then scrubbing with an old toothbrush and white spirit the steering box has cleaned up ok. It will need a rebuild before it goes back into service but that can wait for now.
20150214_154300.jpg
 
A bit more progress; the RHD steering box mount has been successfully fitted to the LHD O/S chassis rail I have now...

20150220_184759.jpg


The heavily pitted areas are getting replaced with some fresh metal, but overall it's in good enough condition for reuse.
20150220_184730.jpg


Old mount plate and freshly fabbed new mount plate plug welded onto the 'new' chassis.
20150224_143606.jpg


Finished mount with the steering box attached. Took quite some time but I'm very happy with the result.
20150224_174931.jpg
 
Been a while since I updated this, but I've been slowly plodding away doing bits...

Made myself a new brake cylinder housing from sheet metal taking dimensions from the very badly rusted old one.
20150306_174426.jpg


Excuse the welding, not all the prettiest but I'm getting better as I go.
20150306_174509.jpg


Checking the new partially finished throttle linkage fits.
20150307_155037.jpg


Successfully rescued the old clutch linkage mount jobby (no idea what you call this).
You can see the bits for the new throttle linkage in the background
20150323_162012.jpg


'New' Chassis rail prepped for the clutch mount jobby.
20150324_161528.jpg


Adjusted for fit :D
20150324_161625.jpg


I decided to make a new throttle linkage arm stop as the old one had seen better days, and wouldn't be easy to remove.
20150327_182720.jpg


Rescued horn mount and newly made throttle linkage arm stop.
20150327_194030.jpg


Pretty happy with my copying ability. 2mm steel isn't the easiest to bend accurately with a vice and a hammer!
20150327_194146.jpg


Clutch mount jobby welded in along with the new throttle arm stop.
20150327_200059.jpg
 
Not sure why you are apologising for the welding that brake cylinder mounting is a work of art. Great work !!
 
Busy busy few months have seen van work on hold, but now I'm getting back at it!
Thanks for the kind words on the welding too guys :D

So after a lot of buggering about trying to align the 'new' beam in place reliably I decided I had no choice but to refit the front axle to ensure it actually did go back in the right place. Not the easiest of tasks when only one beam is secured to the van!

20150412_163310.jpg


20150413_123339.jpg

I'm not sure how you're supposed to line these up, so I simply used what I had lying around to help! Did the job nicely.

20150413_123014.jpg

The crude jig I built before chopping the old beam out was put to good use, turns out the 'new' beam was bent fractionally different so this jig was vital in slightly manipulating it to fit near enough like the original did.

20150413_123036.jpg

I had to do a little bit of adjustment around the clutch mount jobby, but I expected this having welded the end into the beam previously so it was never going to be perfect.

20150413_122811.jpg

View from the top showing the clutch pedal and steering box fitted to ensure good alignment.

20150413_123107.jpg

First bit of welding...

20150413_171852.jpg

And more...

20150414_125317.jpg

Now pretty much fully secured with a nice new bit of center chassis rail section.

20150619_213213.jpg

Next it was time to fit the freshly made master brake cylinder housing and throttle linkage. There's more detail on this in another thread if you're bored and want more info!

20150623_151832.jpg

All welded up :)

20150623_185046.jpg

Cable side of the new throttle linkage.

20150623_190446.jpg

Another view with the master brake cylinder hooked up in place.

20150623_190659.jpg

And one last view from the top.

It's a great relief to have got all this done now with everything aligned up nicely and working smoothly! Time to crack on replacing the other beam now.
 
Top work. Most people would grind those welds flat but personally I like them as they are, great welding !
 
nice work. Good to see a self build thread. 8)
 
So the nearside chassis rail needed a little bit of rebuilding on the end before it was ready. I decided to leave the LHD steering box mounting as is, as if anything it will just add strength to the end of the beam and I'm not too bothered about removing it just for originalities sake.

20150714_143020.jpg


Not perfect but good and strong.
20150715_143514.jpg


20150715_162439.jpg

End of the old rail was nice and solid :lol:

20150716_111812.jpg

More rust nests under the front floor support.

20150716_114442.jpg

Supporting whilst the final cuts were made.

20150716_114504.jpg

Ready with a hi-tec catching device at the other end :D

20150716_114815.jpg

Free!

20150716_114829.jpg


20150716_115028.jpg


20150716_115645.jpg

Old and 'new'

20150718_180647.jpg

This side was much easier to line up now I've had some practice!

20150718_180835.jpg

Axle refitted again to make sure everything was where it should be before tacking and welding.

20150725_120727.jpg

Both front rails successfully replaced!

20150725_133933.jpg

Time for the front crossmember now.

20150725_140625.jpg

More layers = more strength :roll:

20150725_145155.jpg

Some heater tube sections will need a little rebuilding too I think.
 
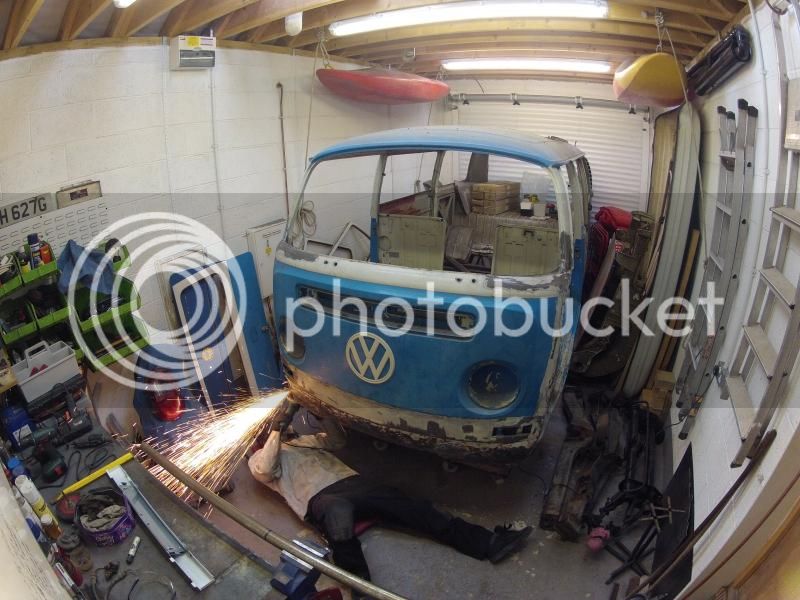
Slow but steady progress again...

20150728_152524.jpg


20150728_152820.jpg

The bulkhead needed some patching up and I decided it would be easier done by removing most of it.

20150730_122629.jpg

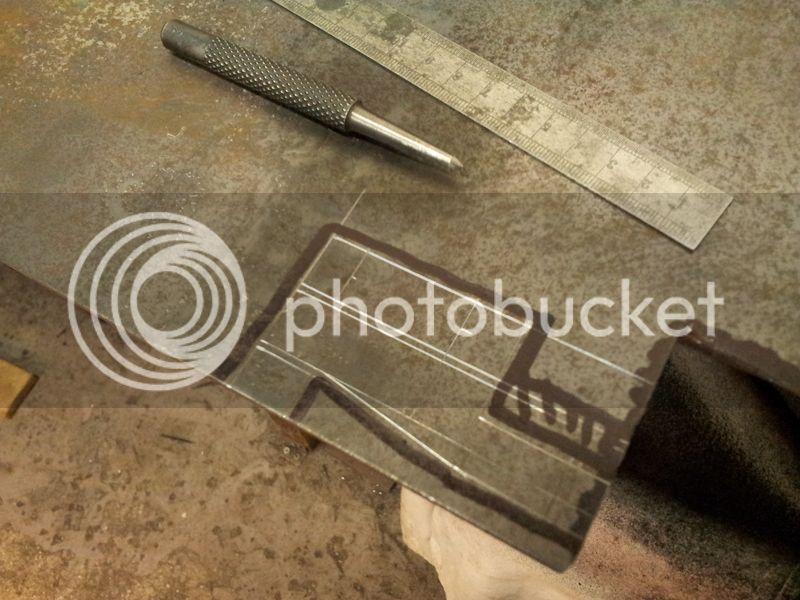
Patience was required to make sure the patches welded up true.

20150803_152903.jpg

More clean new metal :)

20150805_100340.jpg

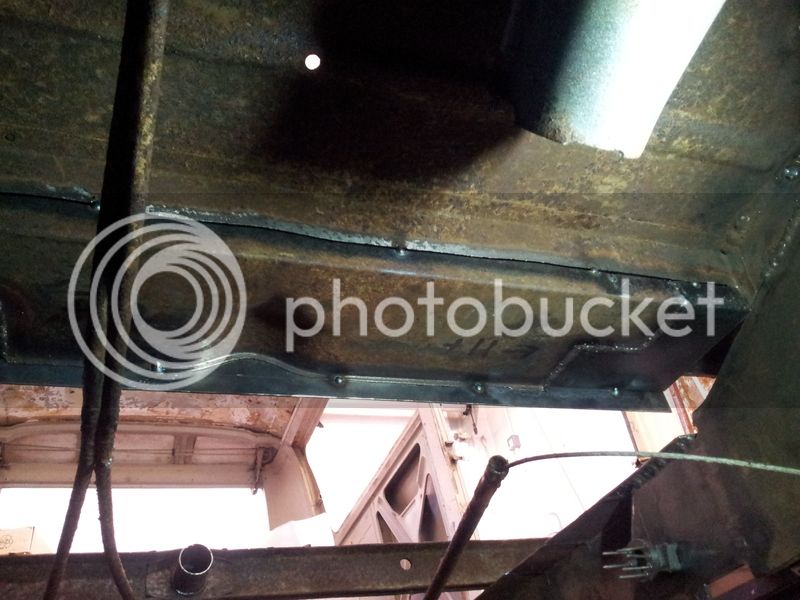
The repaired bulkhead section being refitted. Note the nails for spacing ;)

20150805_102544.jpg

Tacked in.

20150806_135551.jpg

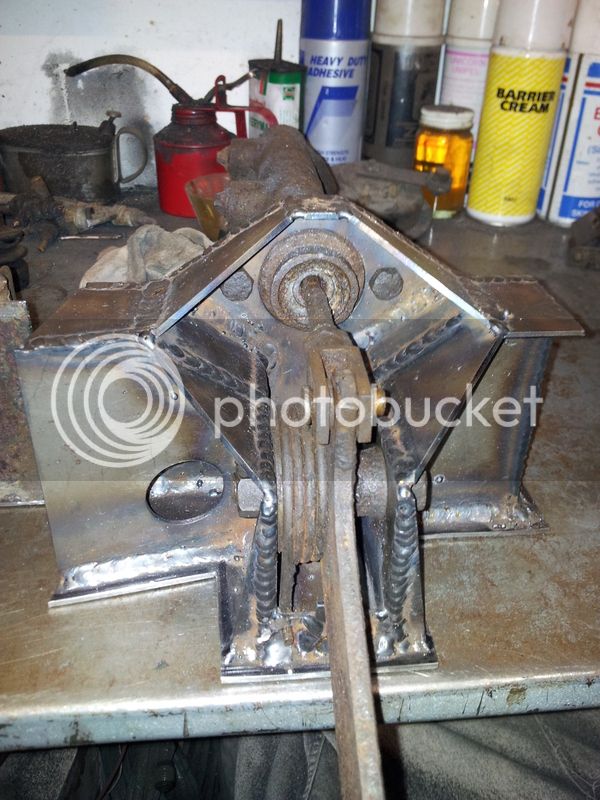
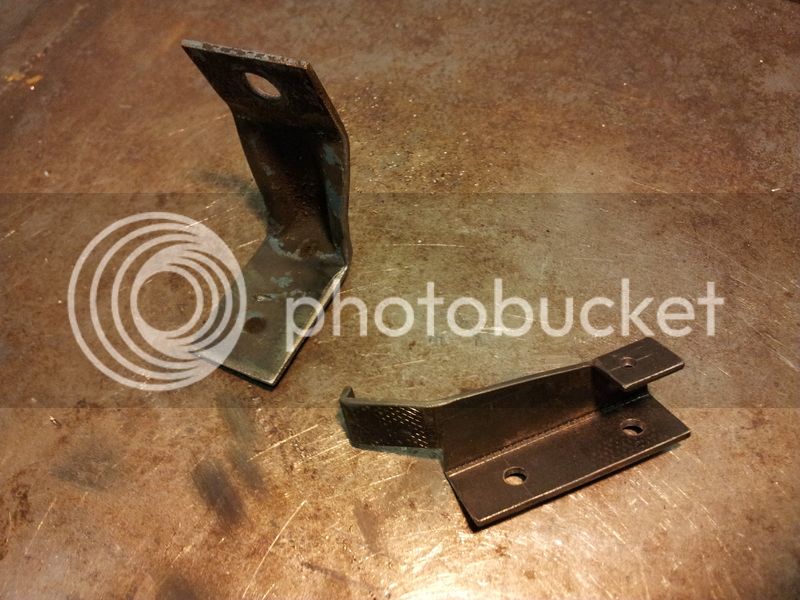
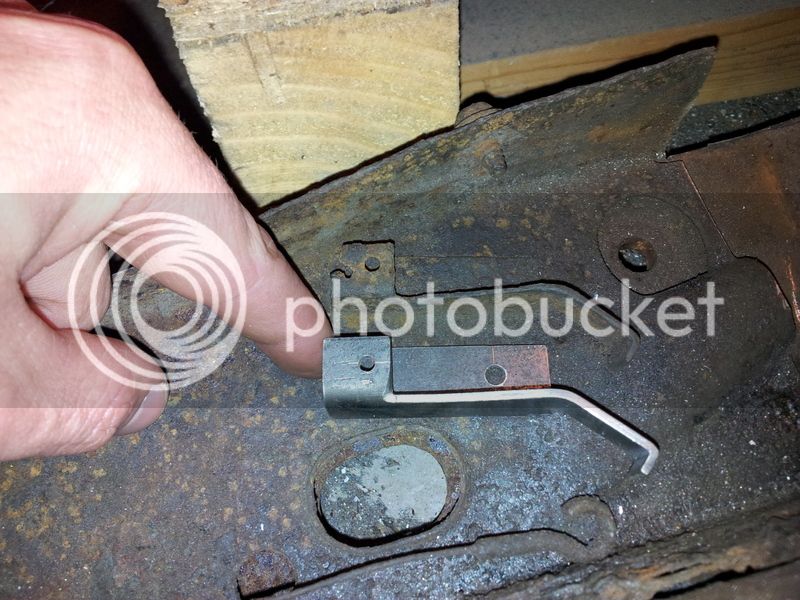
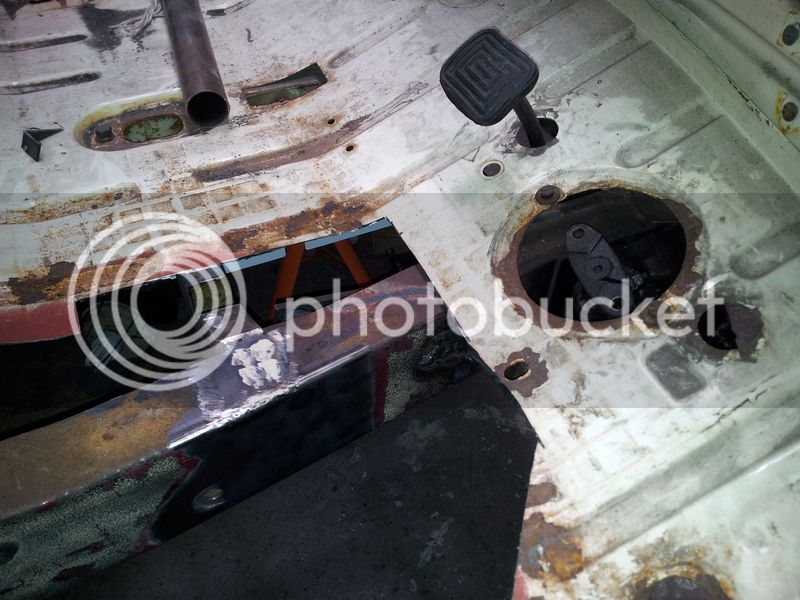
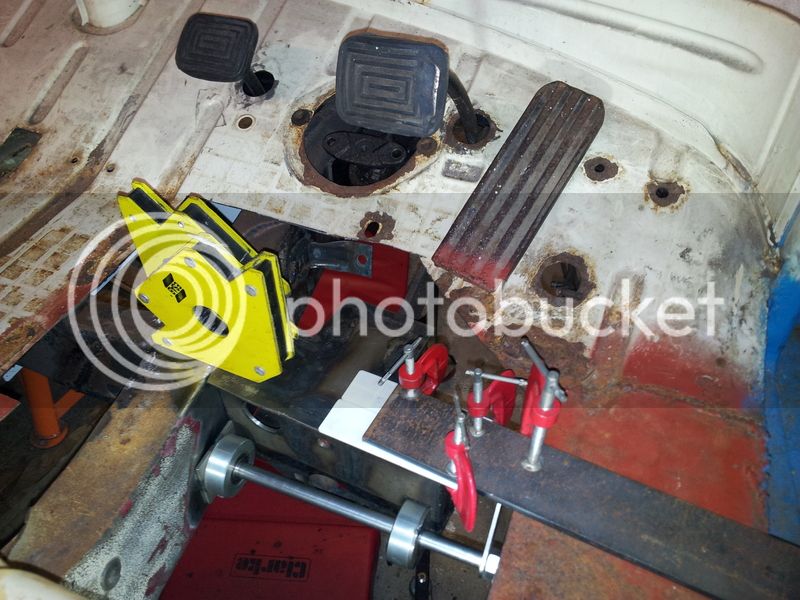
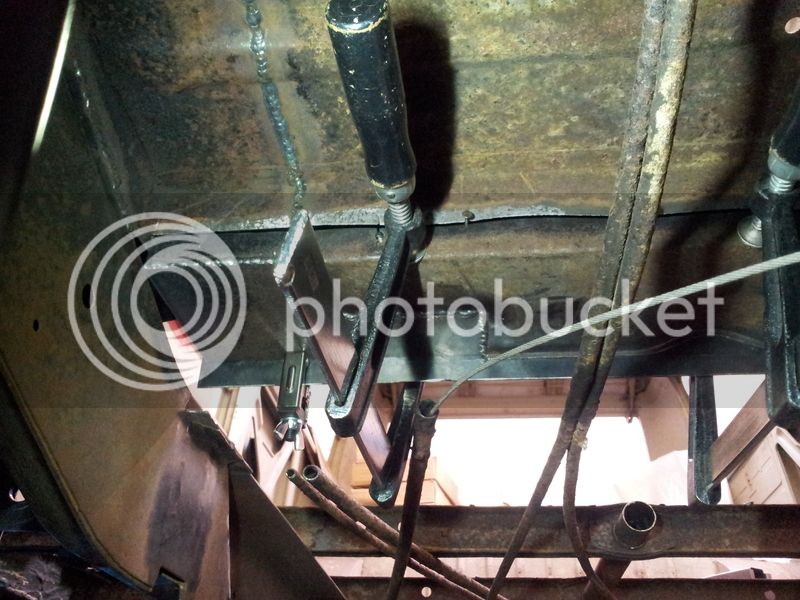
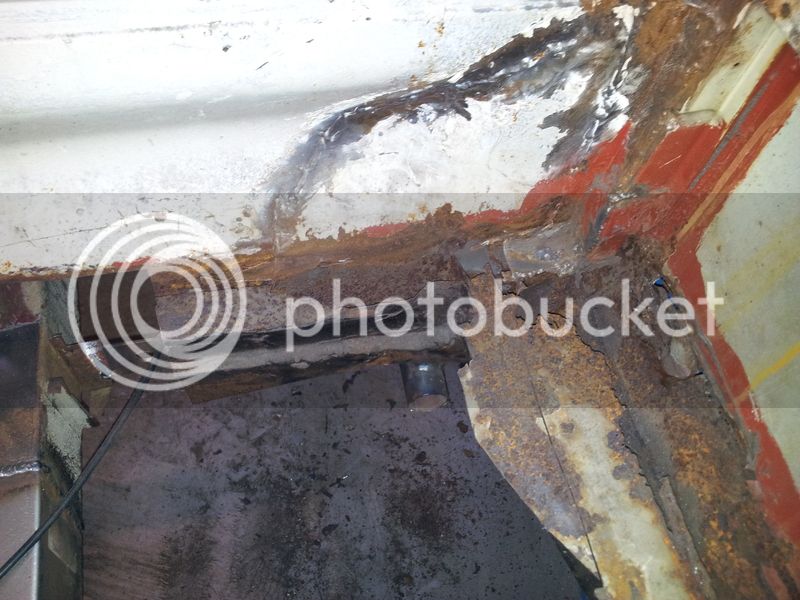
With the bulkhead tacked in place it was time to get the old shift rod guide tube out. I'd wrestled with this for a good few hours before to no avail after grinding off all the tacks that I could see, so this time I decided to chop it up into bitesize chunks.

20150806_163311.jpg

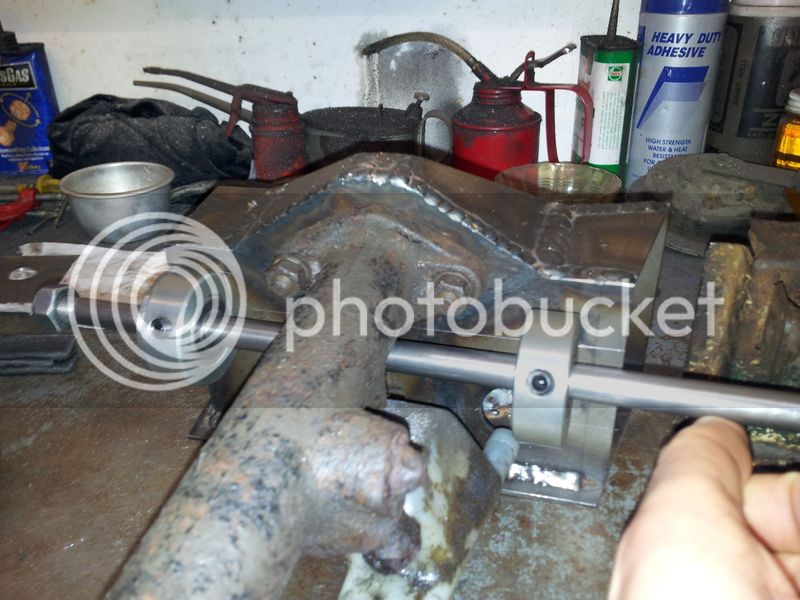
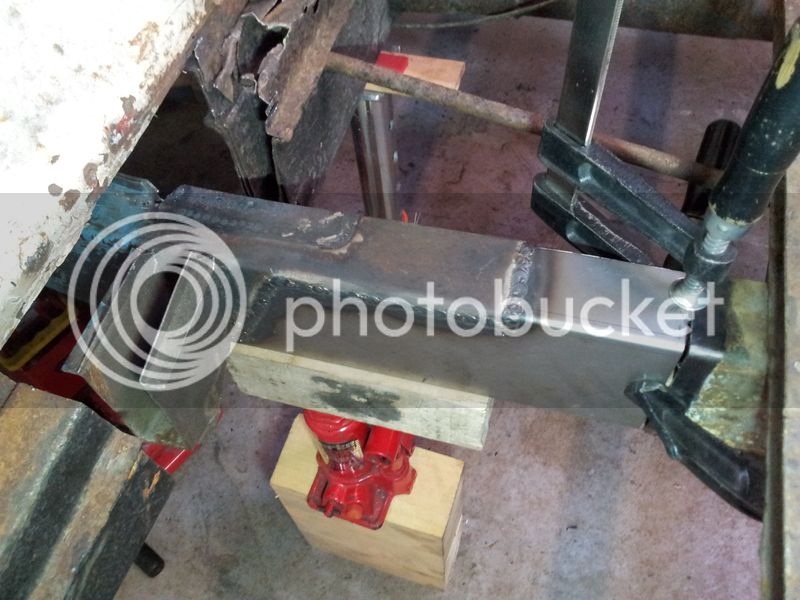
After lots of wrangling about and some cunning chopping/grinding to get around enclosed tacks the old tube was out whilst preserving the housing holes in the floor supports. The new section is seamless stainless tube with near enough the same dimensions as the original, 30mm O.D. but 1.2mm wall opposed to 1mm wall. This made the shift rod a slightly tighter fit inside, but with a bit of grease it doesn't seem to be a problem. I was concerned about potential galvanic corrosion between the dissimilar metals, but researching the topic suggests there will be no problem as there is only a very small amount of the more noble metal.

20150811_142706.jpg

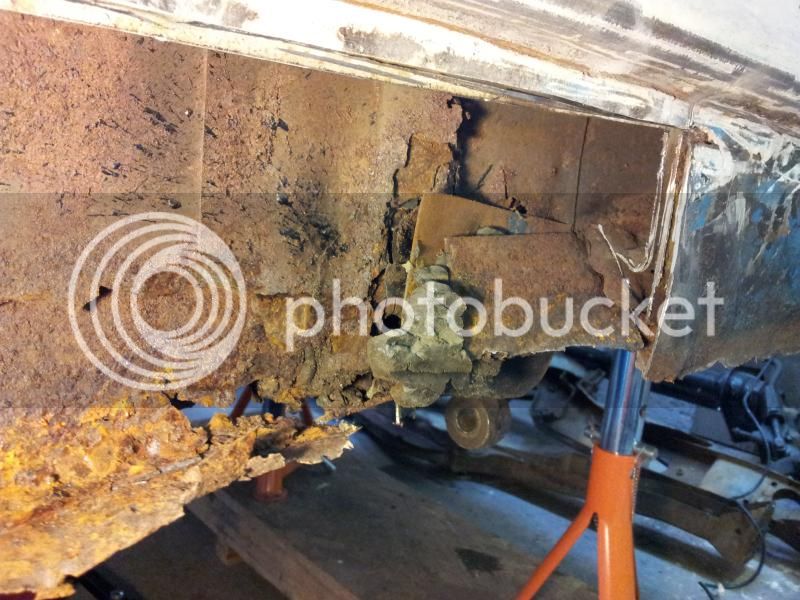
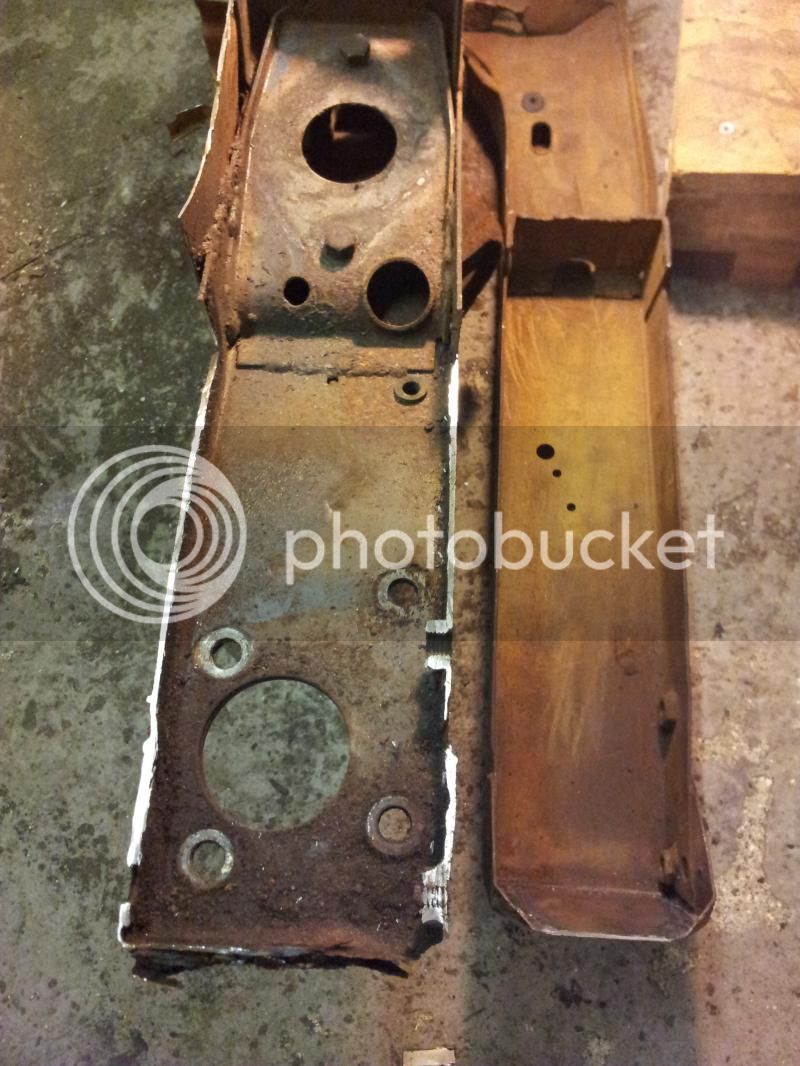
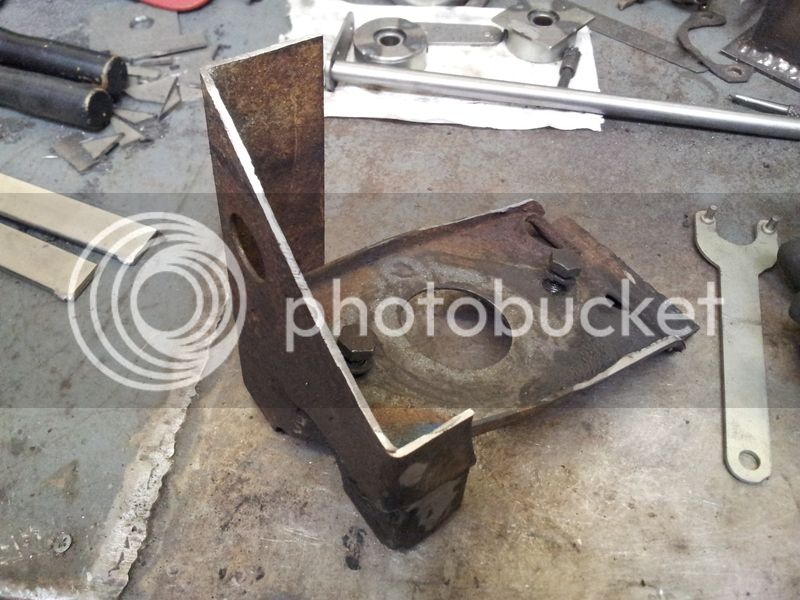
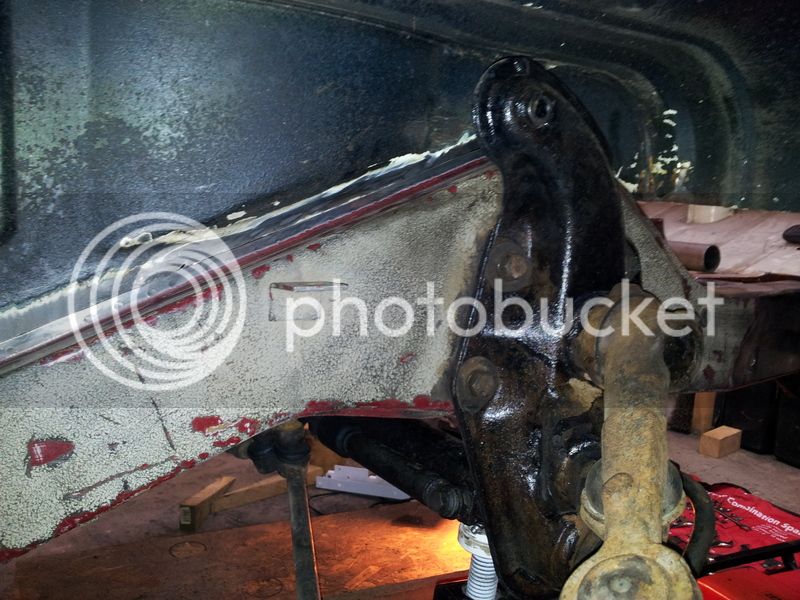
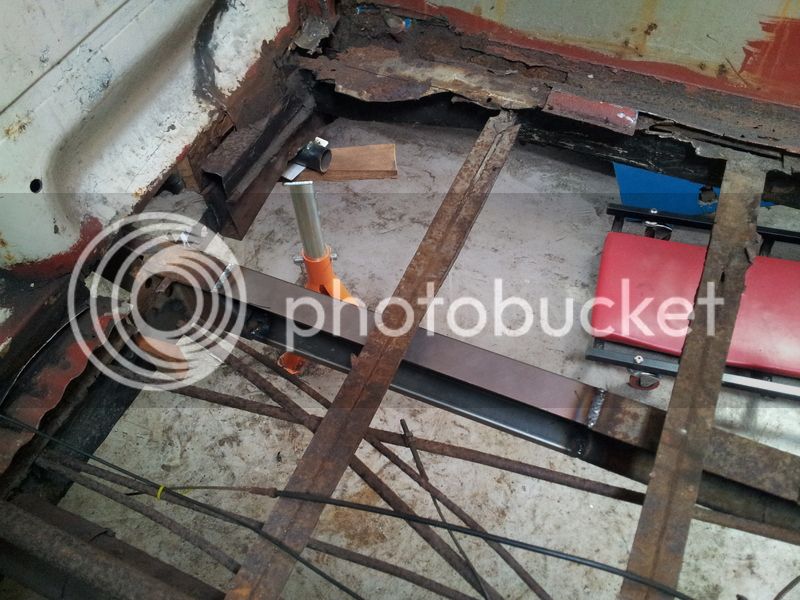
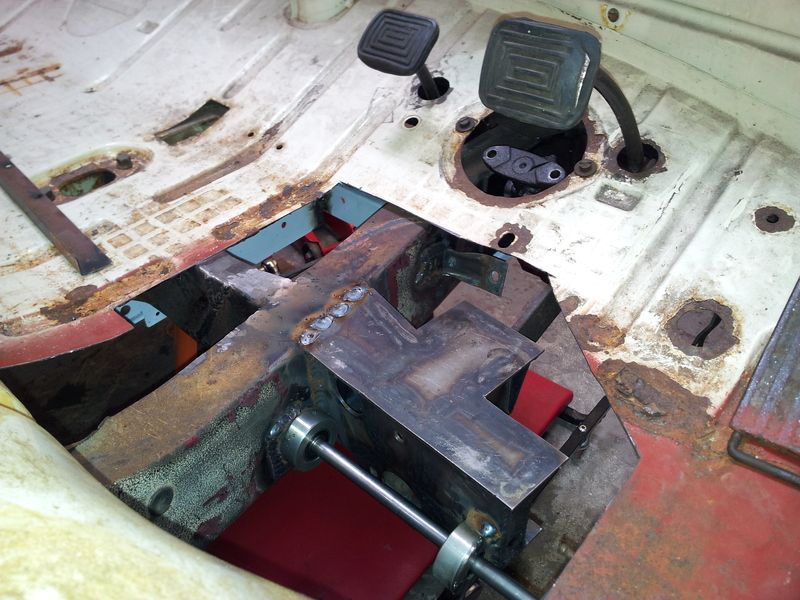
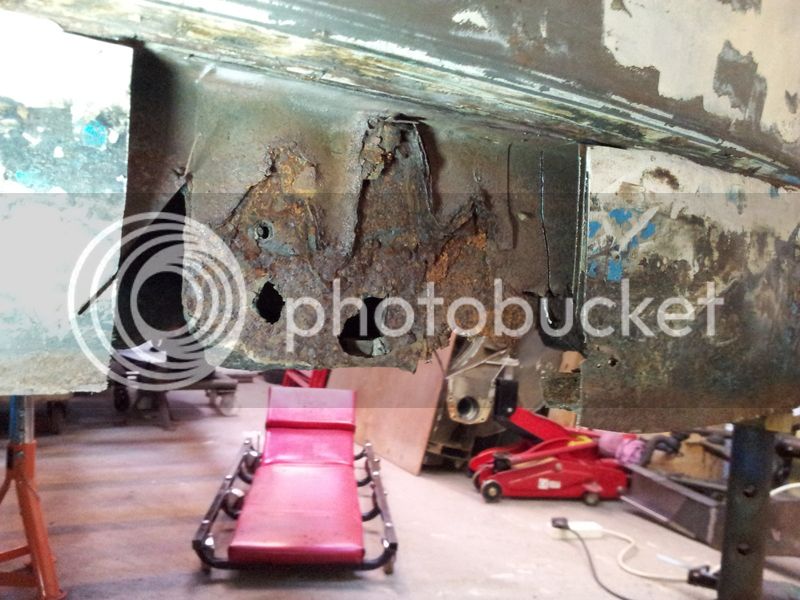
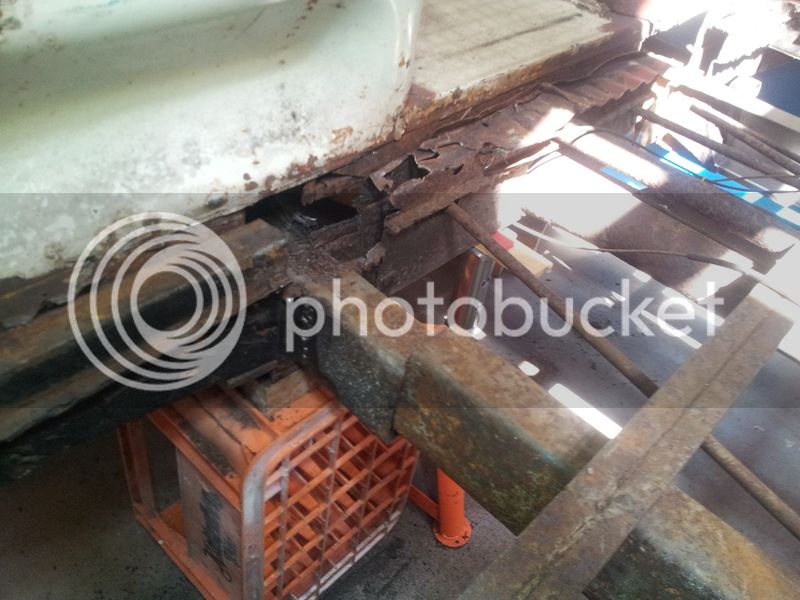
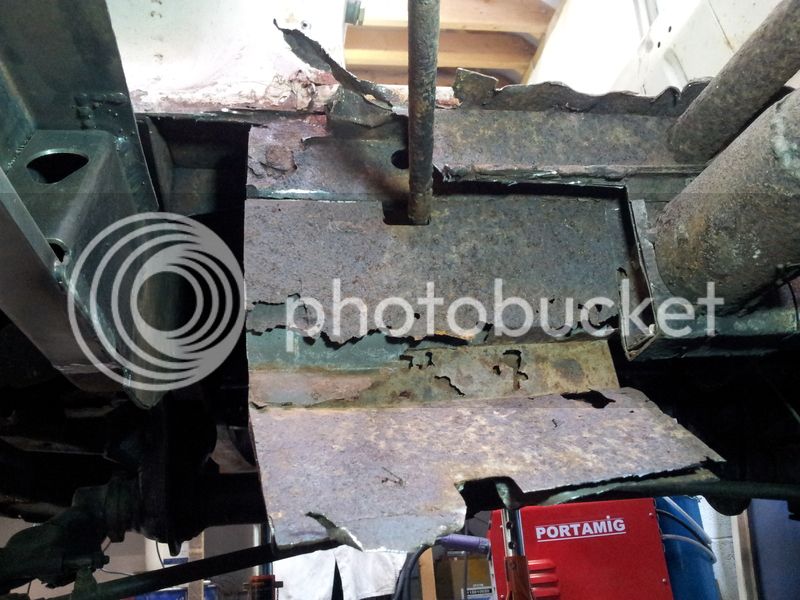
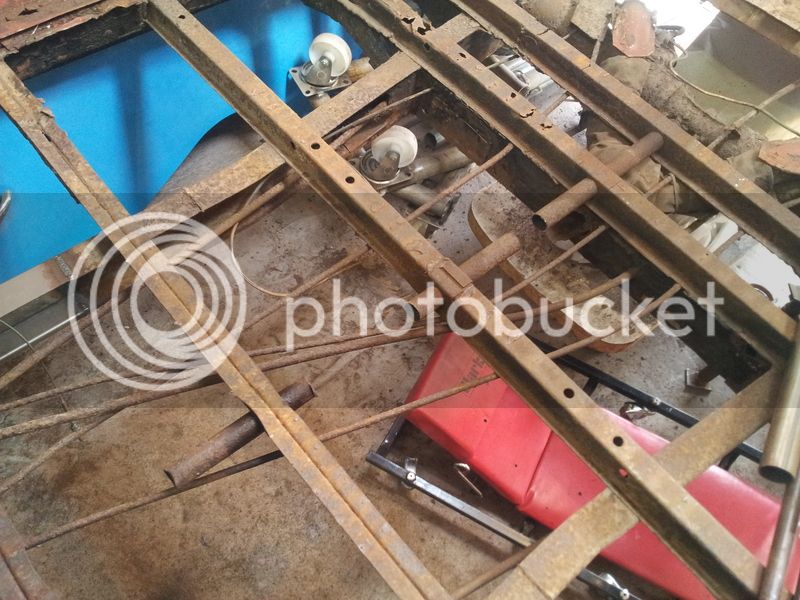
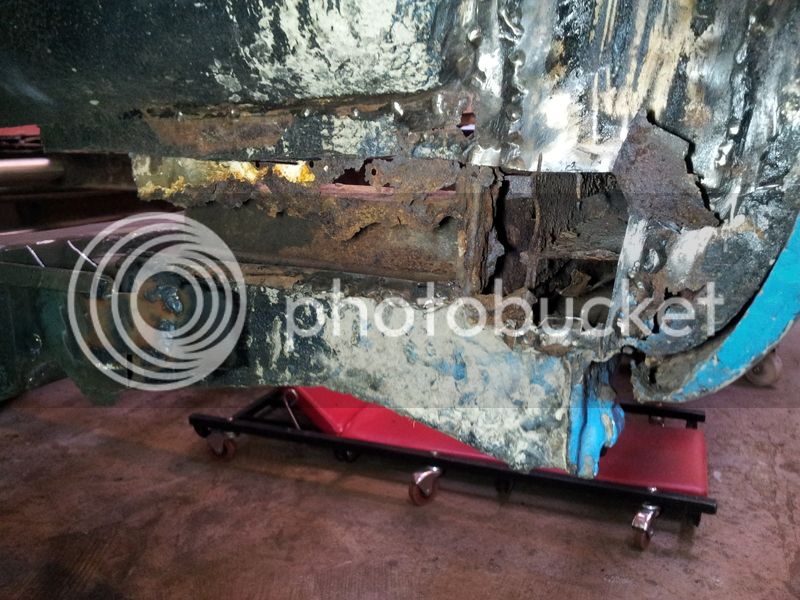
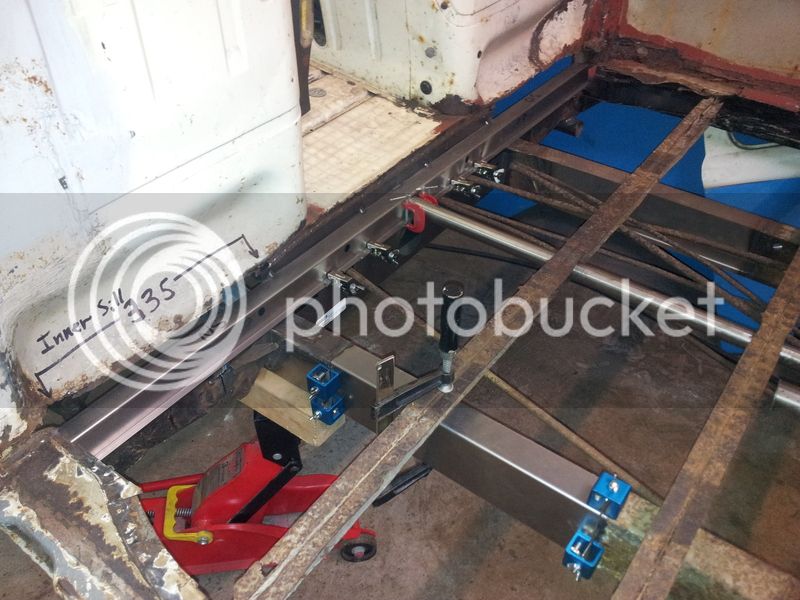
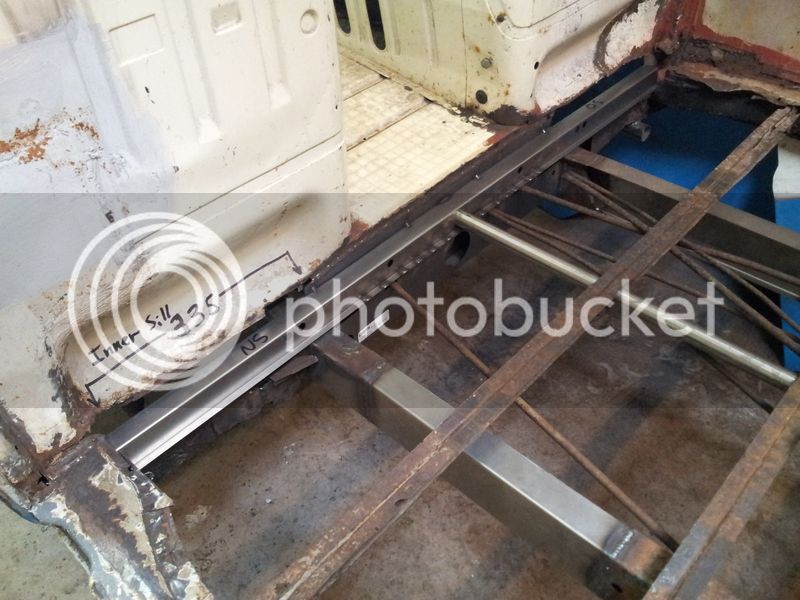
Remainder of the front floor support needed to come out next. This posed a problem - the inner sills had been badly patched over and are on my list to replace later on, so getting an accurate reference was difficult.

20150811_152222.jpg

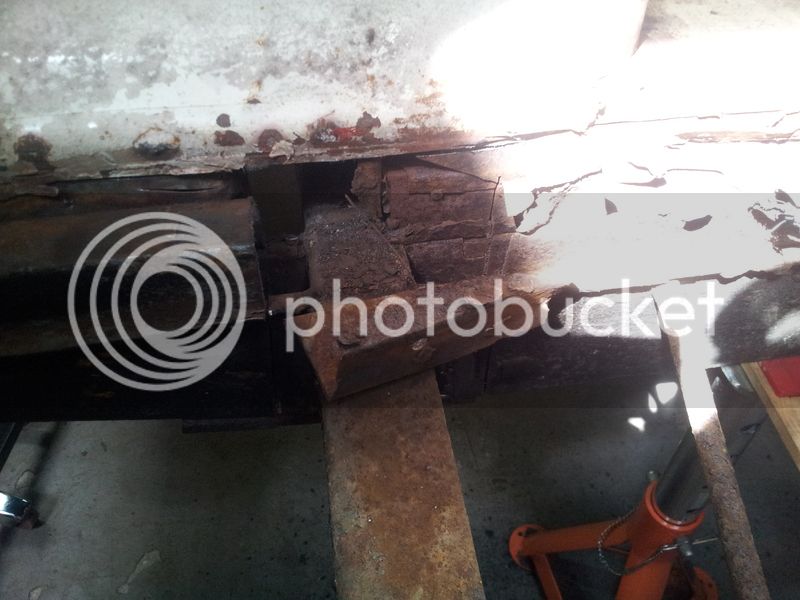
A bit of chopping revealed remnants of the original inner sill. You can also see the middle with the sliding door guide attached.

20150811_182151.jpg

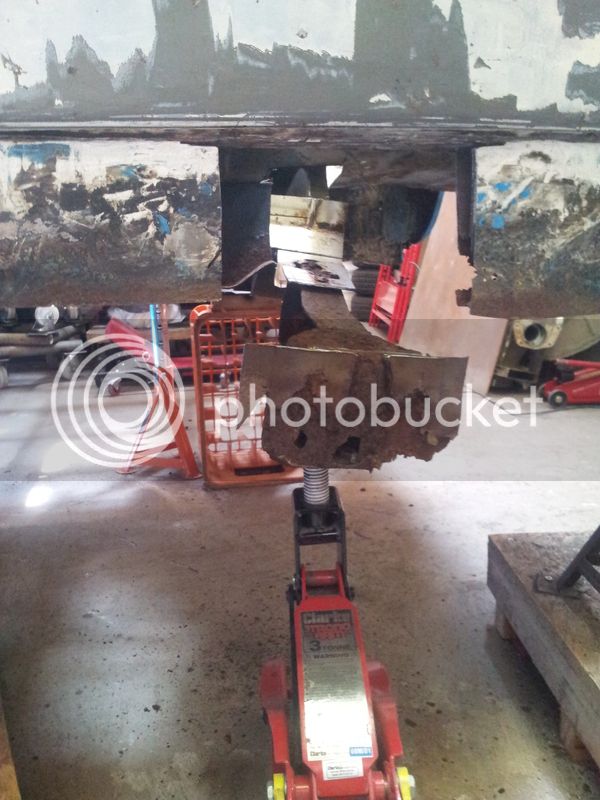
The offside was in even worse condition.

20150813_111424.jpg

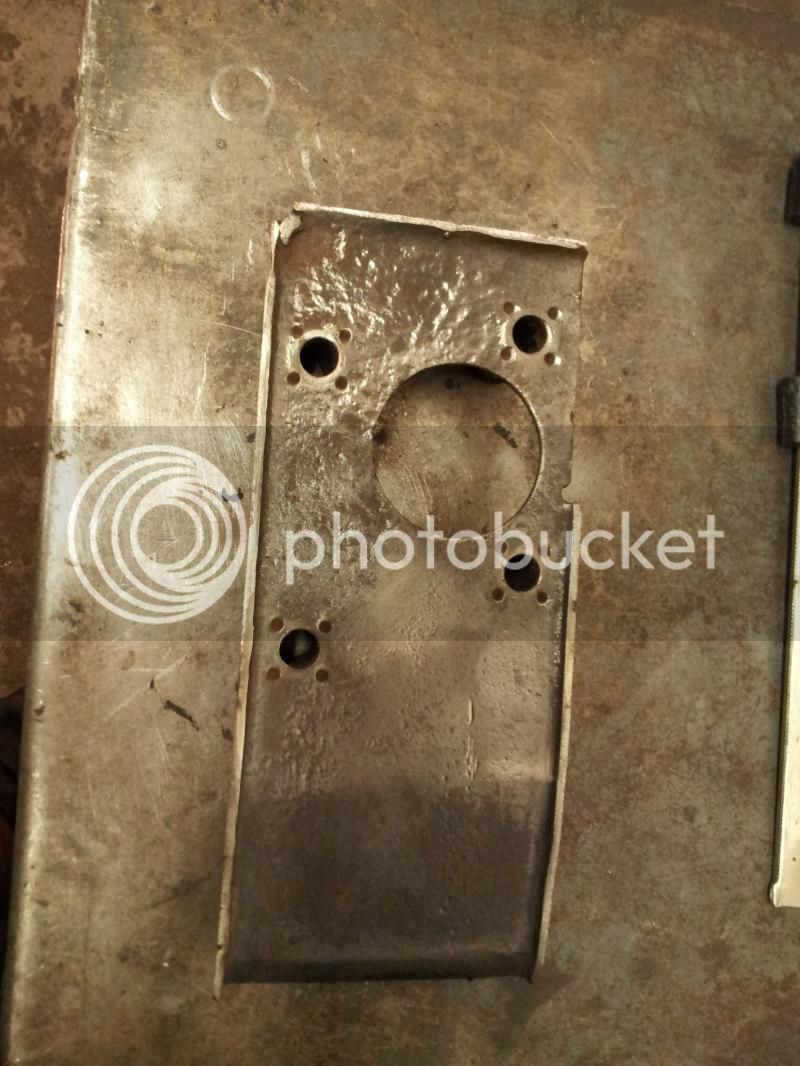
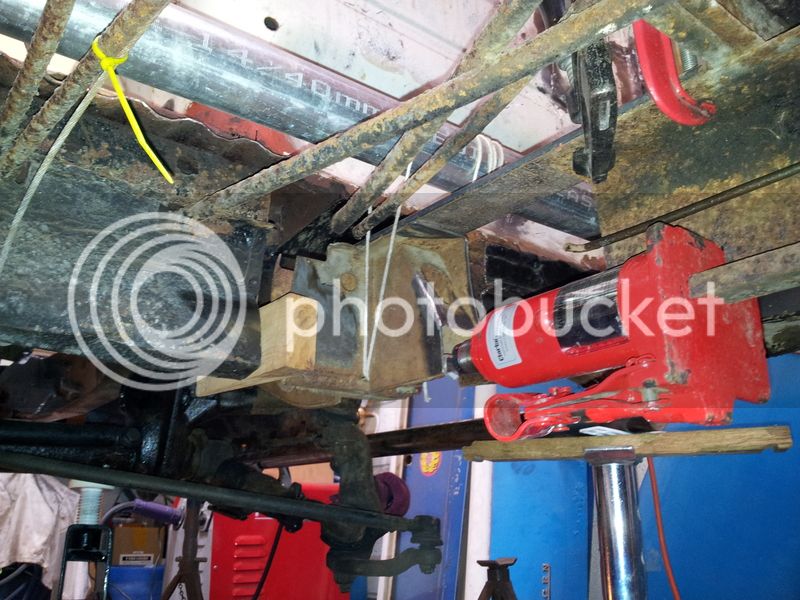
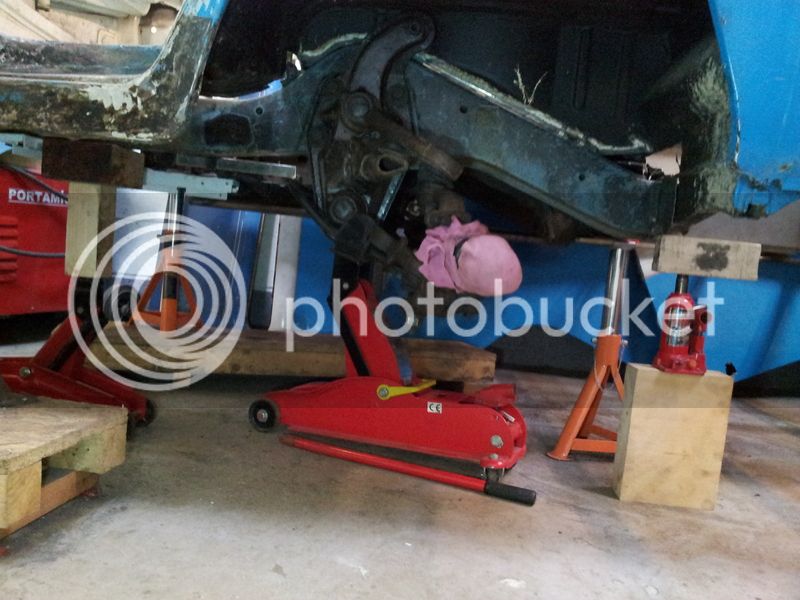
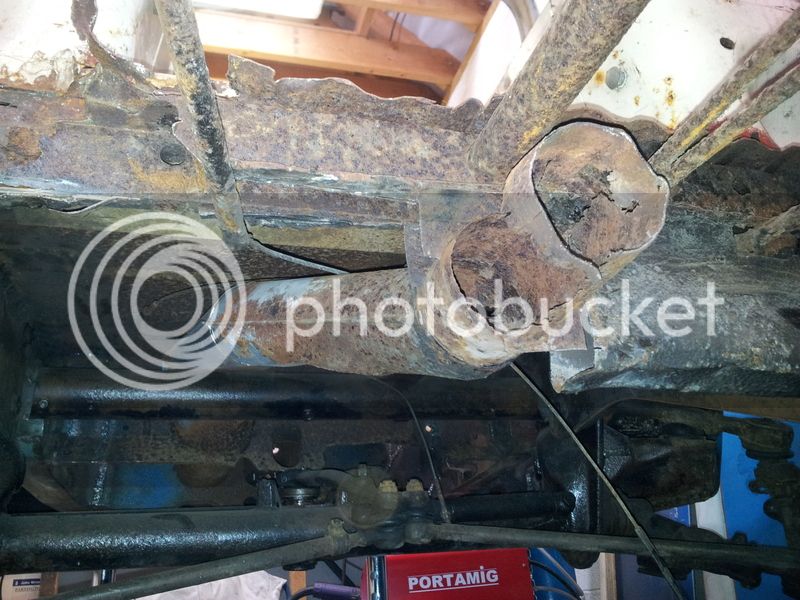
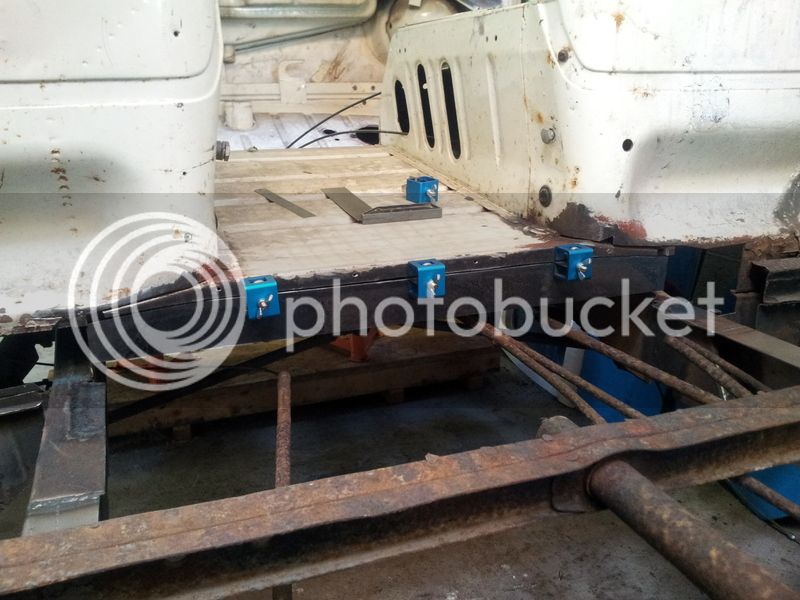
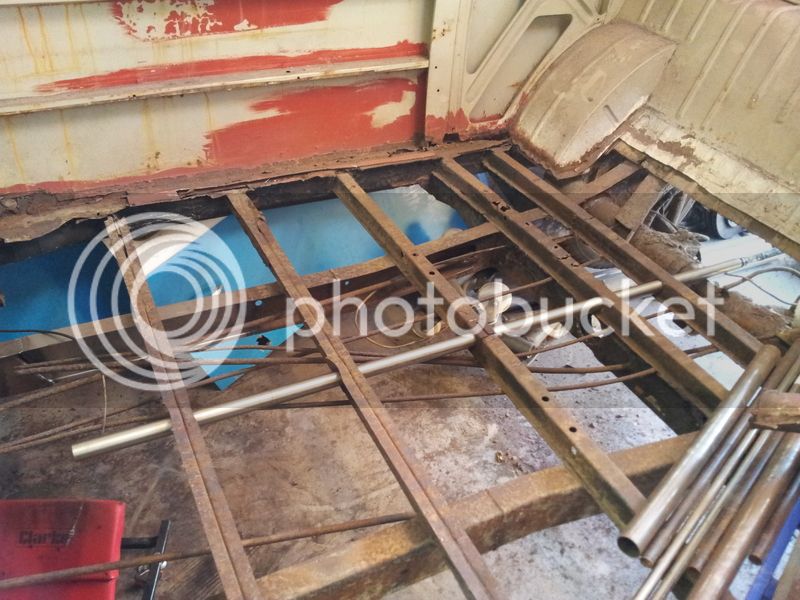
I decided to take a reference from the NS inner sill as best I could, then the inners were chopped out to allow for the floor support to be slotted in to place, with extra length left on for trimming down later when the sills will be replaced. The new shift rod guide tube was used to align it centrally and I took references from the top of the seatposts (seat bulkheads?) to level it as the rest of the floor supports were pretty wonky!

20150813_145439.jpg

Leveled and clamped up.
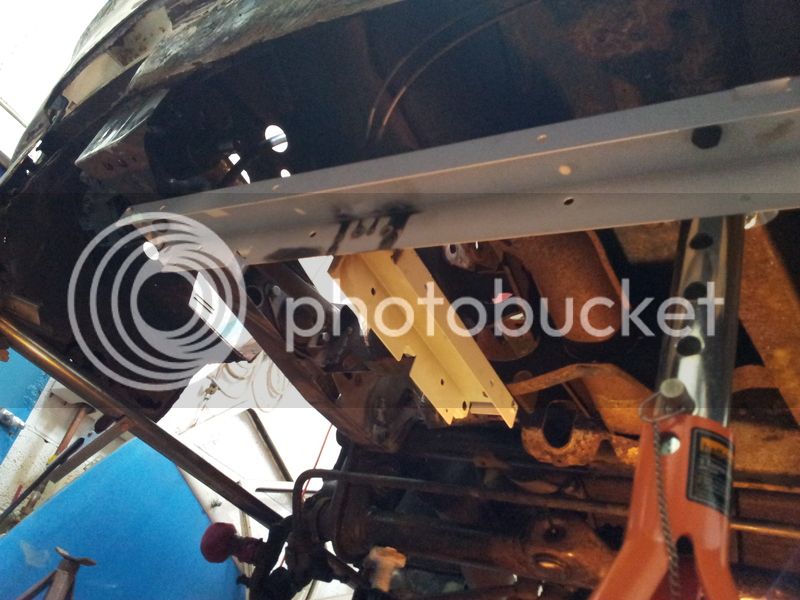
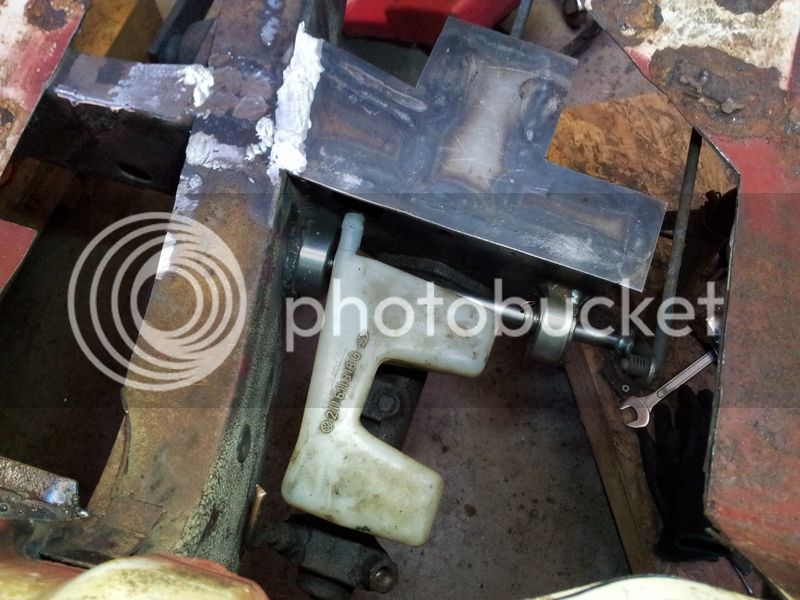
20150813_152759.jpg

Welded in.

20150814_101247.jpg

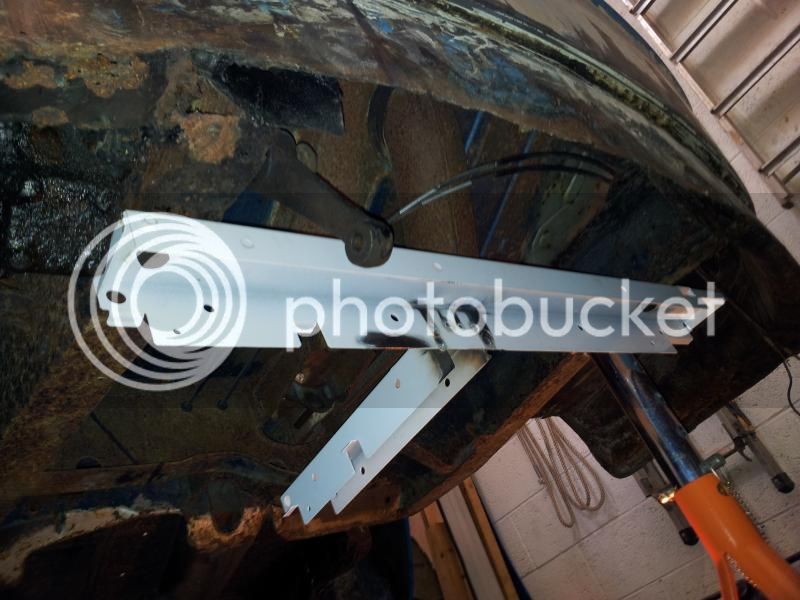
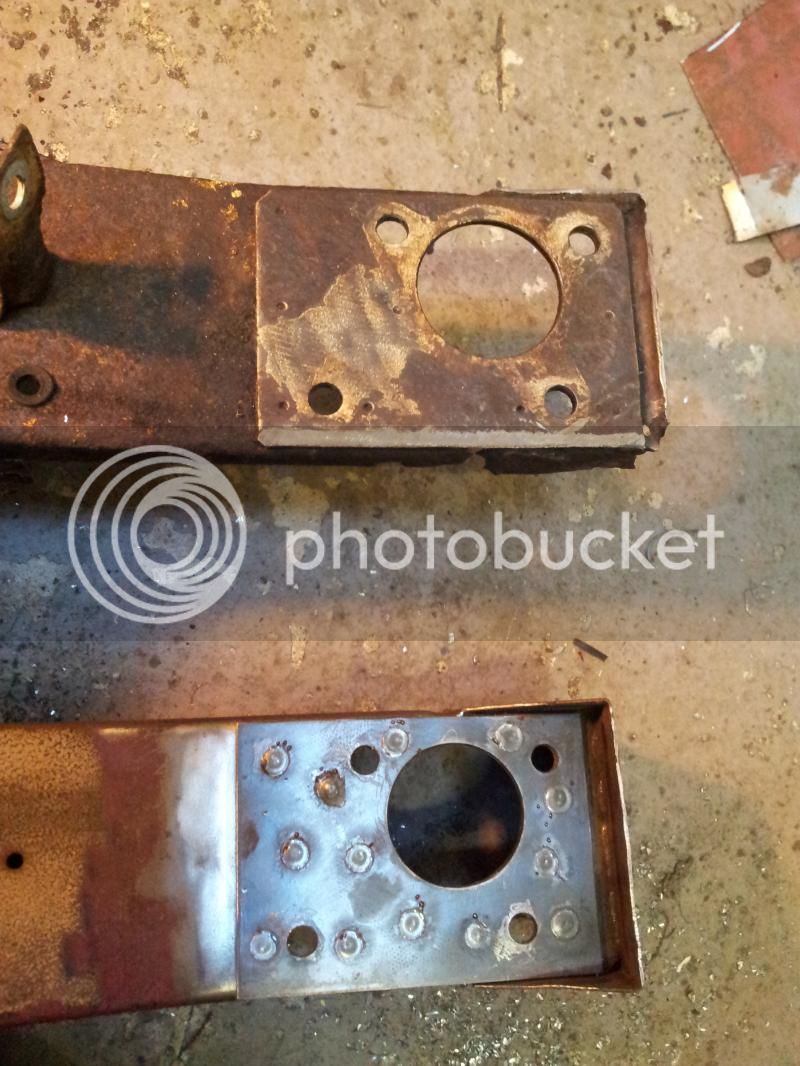
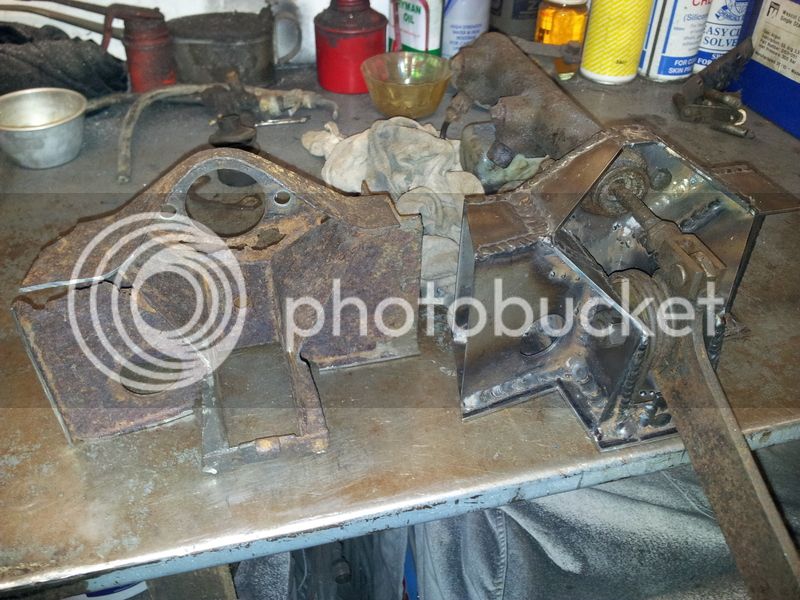
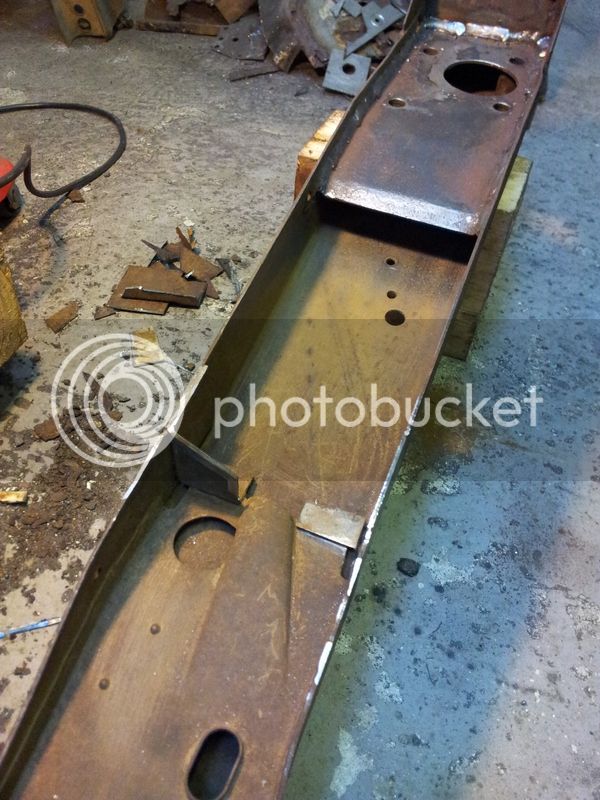
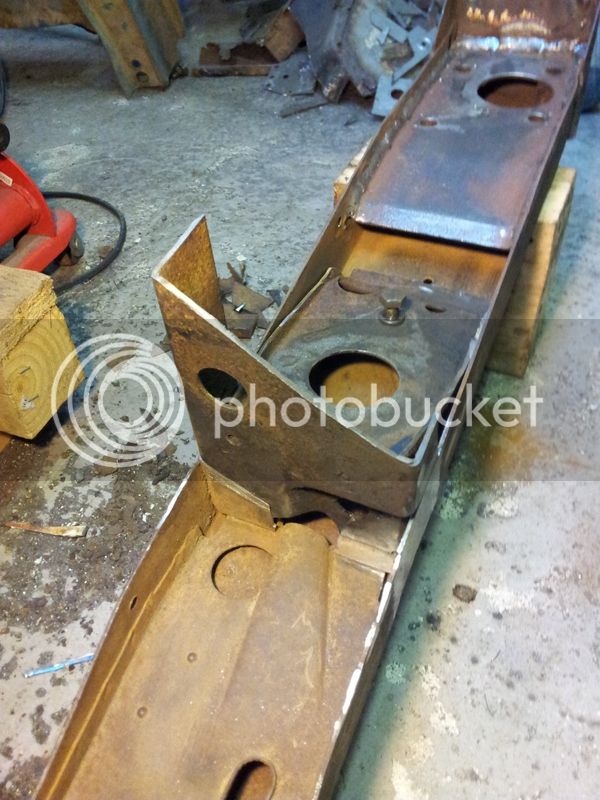
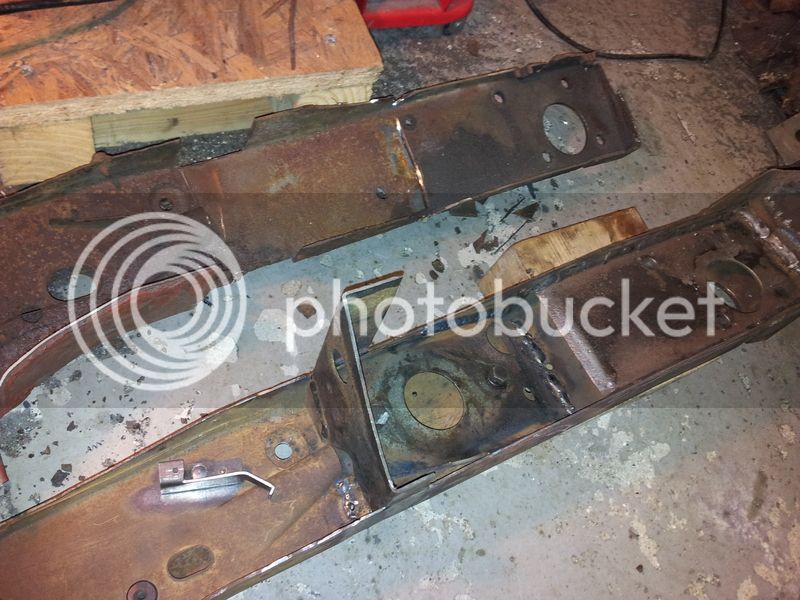
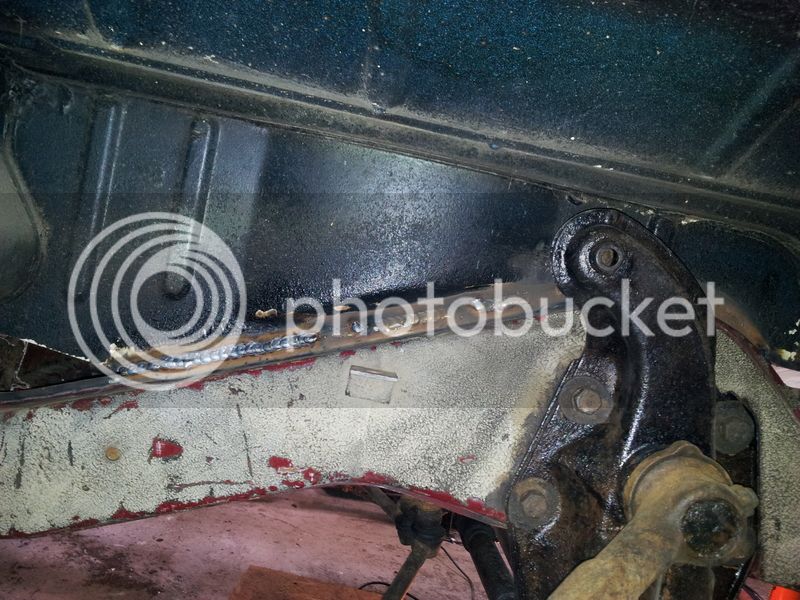
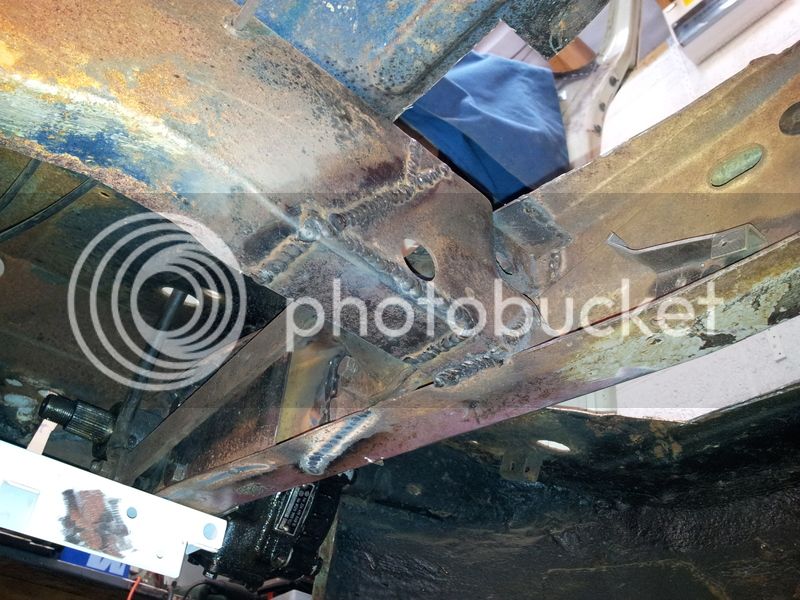
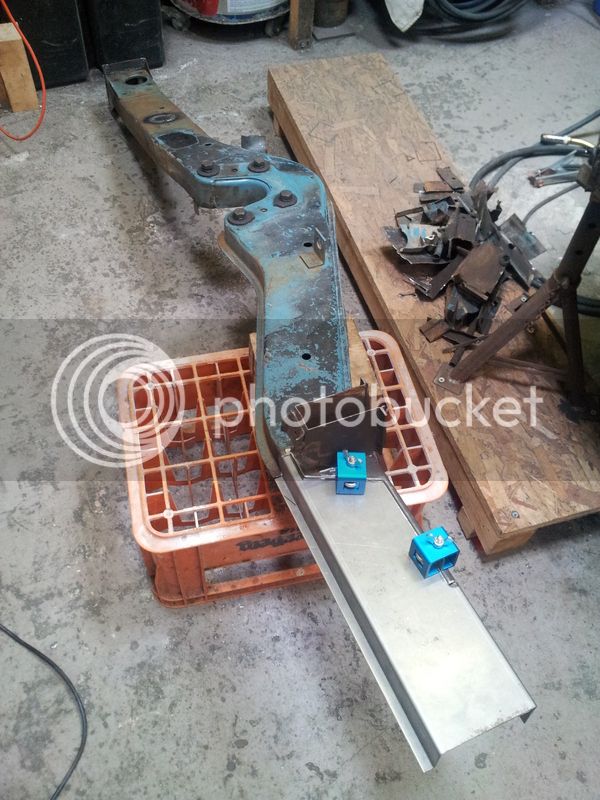
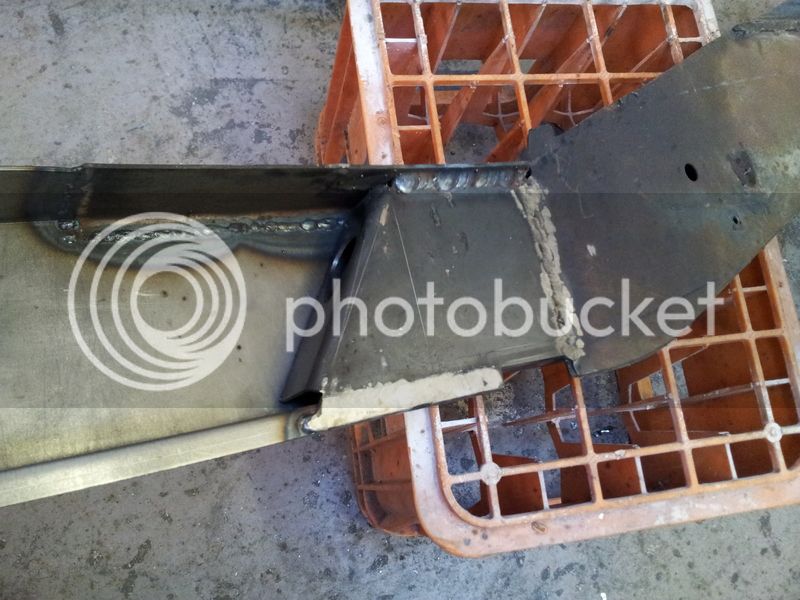
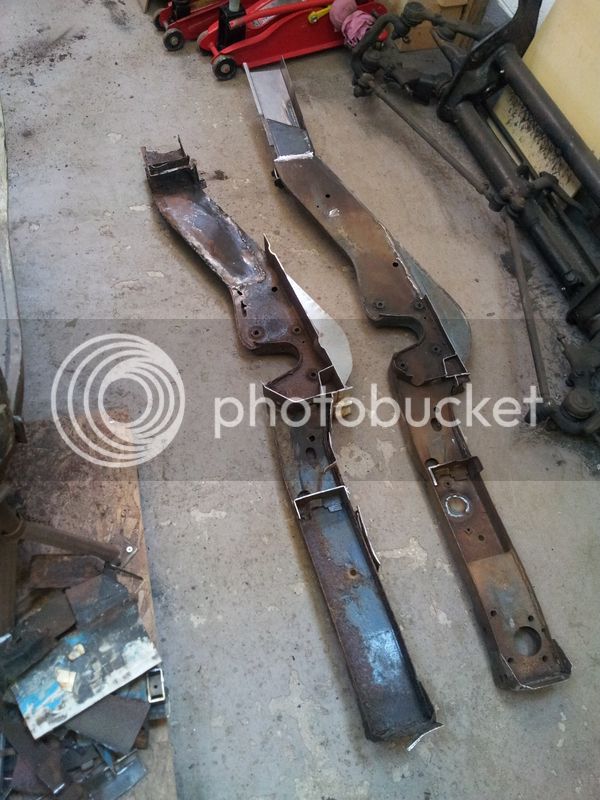
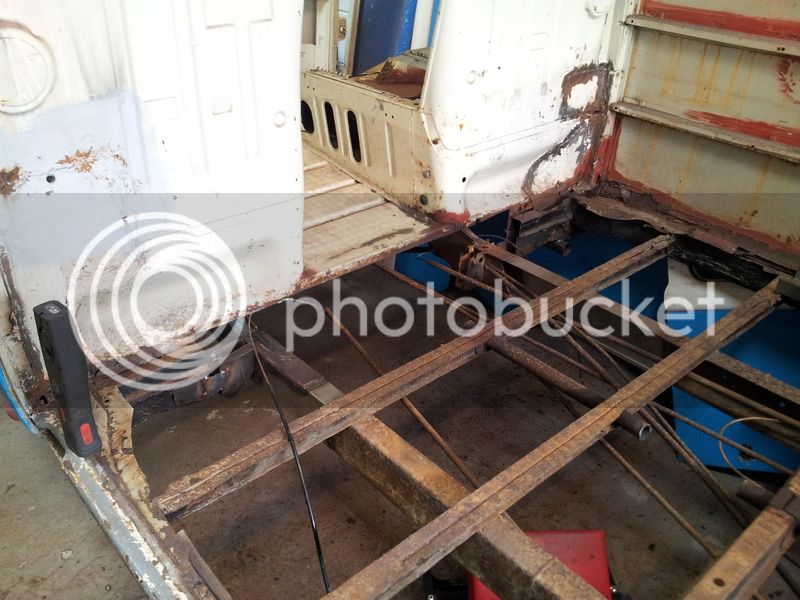
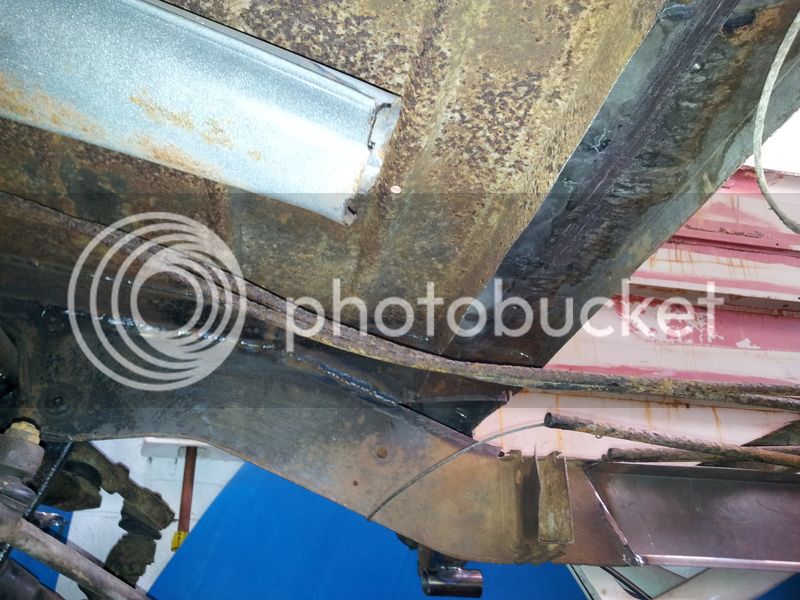
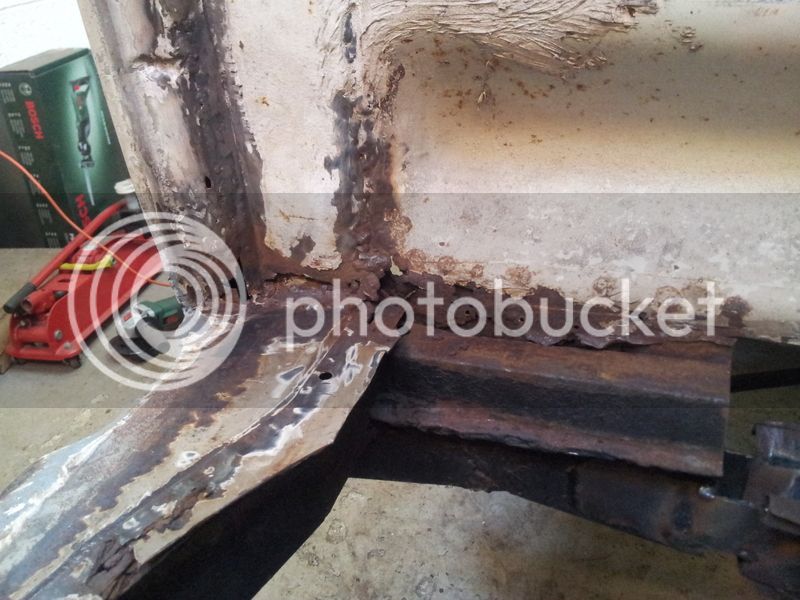
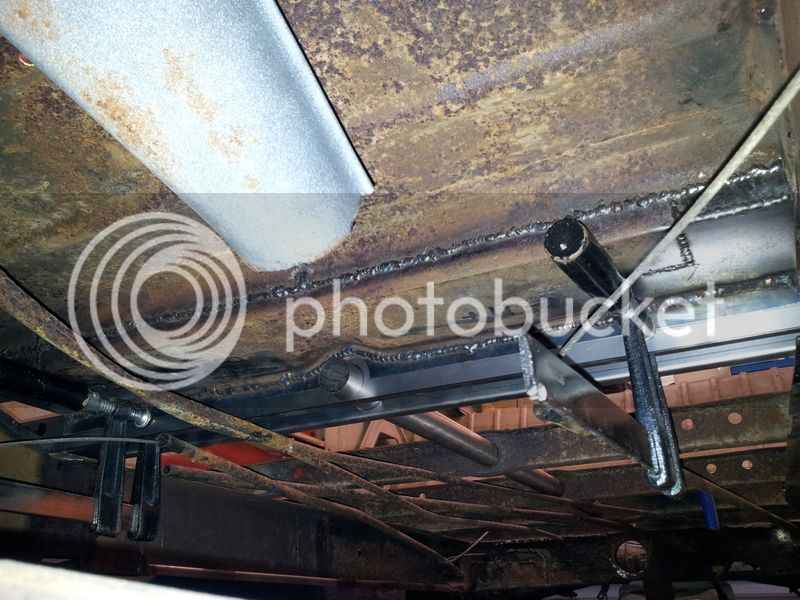
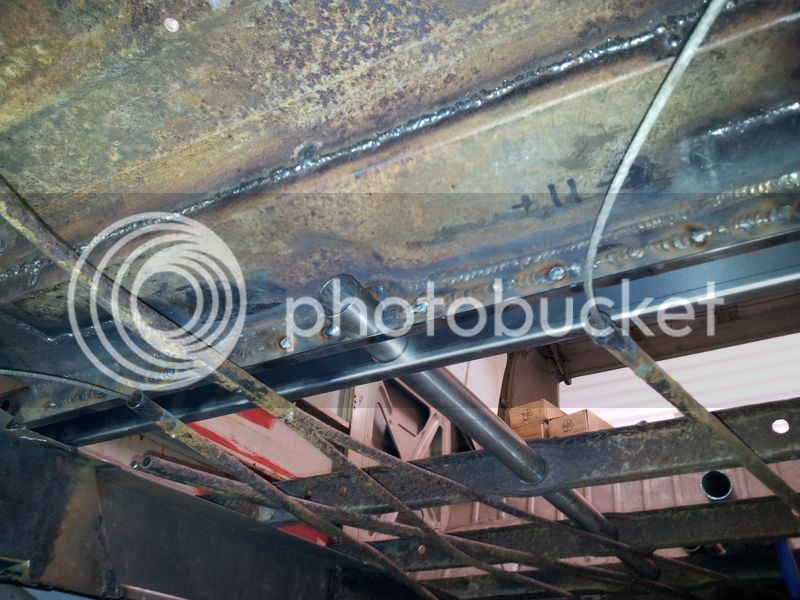
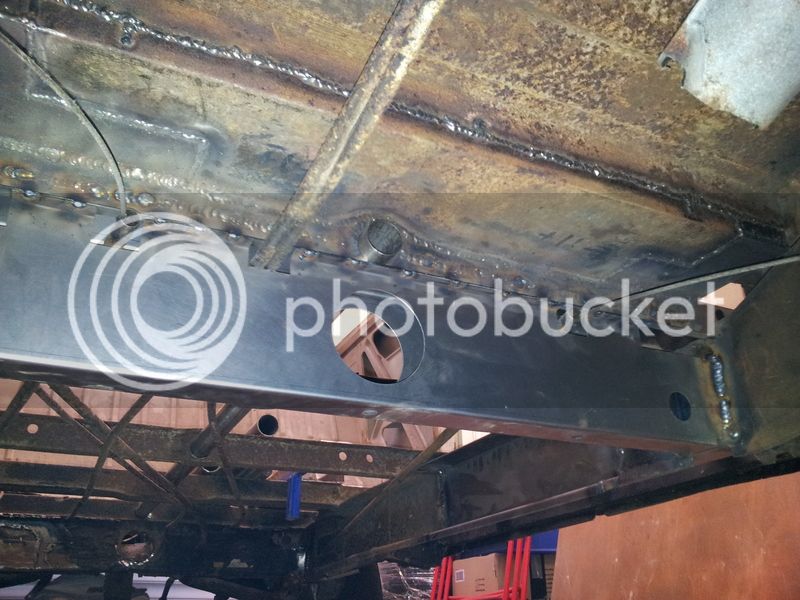
Finally, everything was in place to fit the new front crossmember and a new section of main chassis rail.
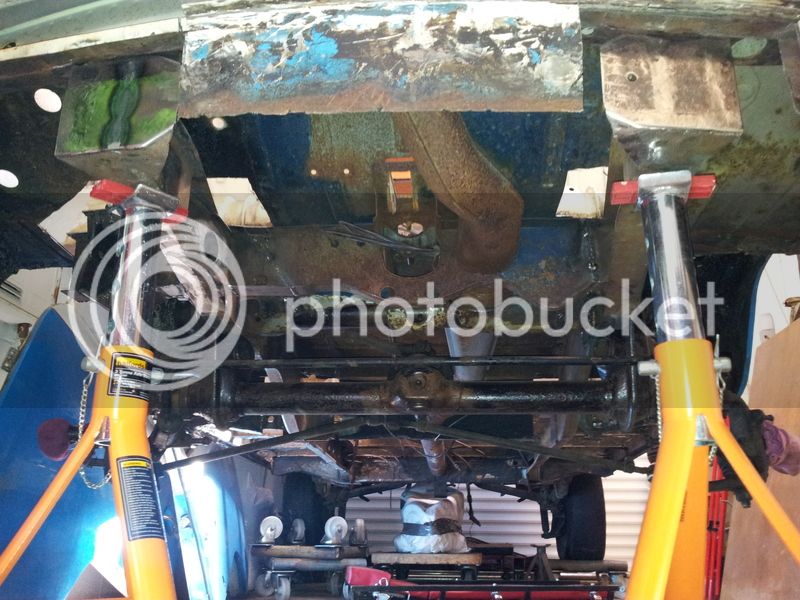
20150814_120442.jpg

All welded up :D

20150814_120608.jpg

I know the original crossmember was spot welded onto the floor support. I decided to clamp it in place, then cut V slits in the crossmember/floor support to allow decent welds rather than drilling and trying to plug weld upside down. Worked very well.
 

Latest posts

Top