'68 Riviera panel

Early Bay Forum

Help Support Early Bay Forum:

This site may earn a commission from merchant affiliate links, including eBay, Amazon, and others.

AIR_CHILLED

Well-known member
Joined
Mar 13, 2010
Messages
142
Reaction score
0
Location
Cheltenham & Aldeburgh
Hello all just joined this site and thought I'd share my van with you, great site and some real inspirational.
I am also over on vzi and recognise some of you and will be looking forward meeting you all at the coming shows.

Live in suffolk area and also just joined Suffolk Bugrs :D

I bought the van in August '09 from Simon Hall off vzi who imported it from Oregon USA june '09, top bloke and after a few phone calls and looking at lots of photo's I bought it and had it delivered hassle free.


100_0614.jpg


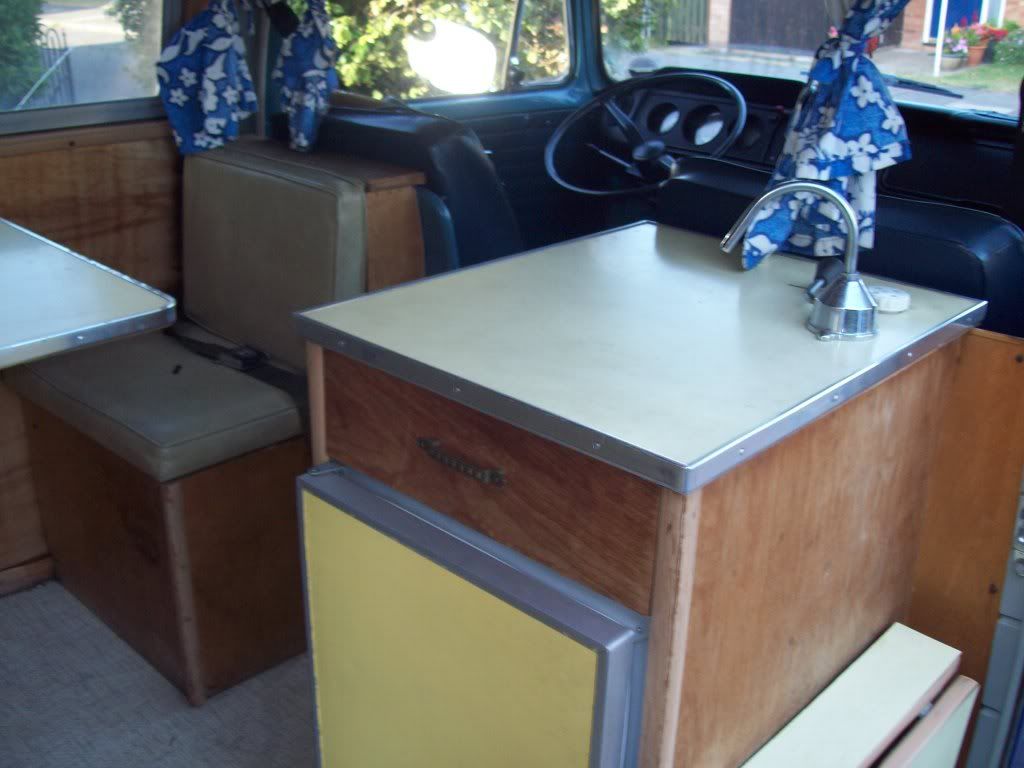
The van is a very early 1968 (built in '67) walkthrough panel van which was converted when new by Riviera who were based in Oregon. I think it's quite a rare conversion especially with the alloy windows which gives the van a unique look.

Before it was imported the old guy who had it was a bit of a hippy and decided to spruce it up abit with some flashy paint and flowers. Fortunatley the paint was a cheap job and sprayed on top of the og paint without being prepped so peels off easily.
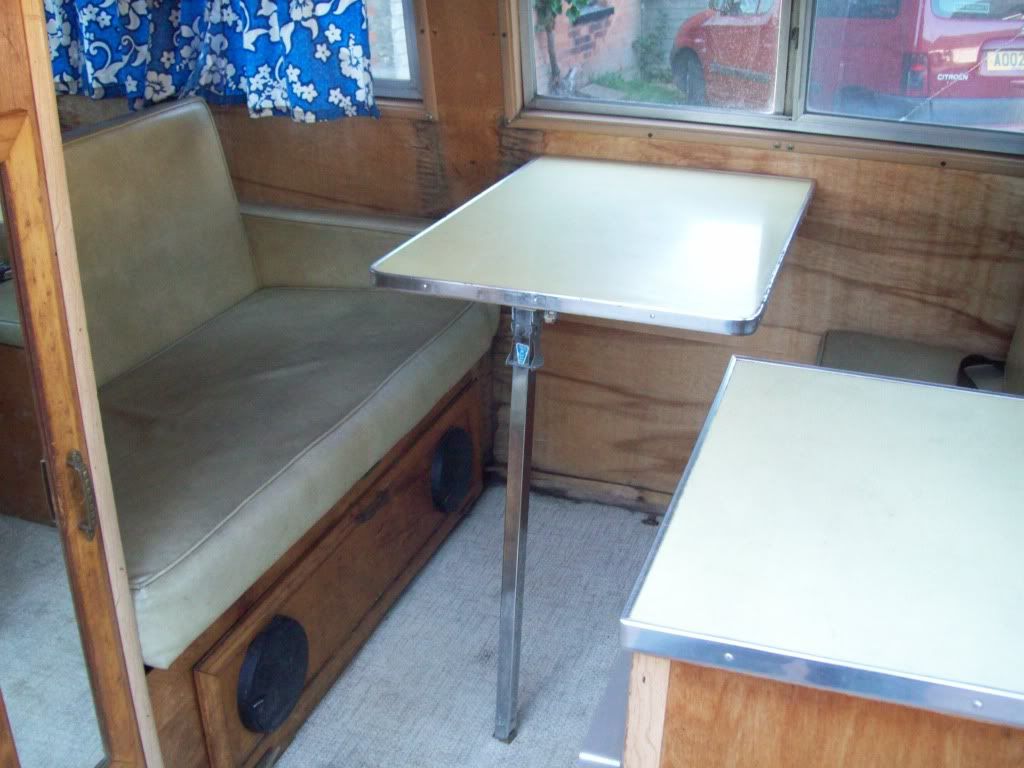
The interior is very original and unspoilt but some beach ply will need to be replaced due to the windows leaking.
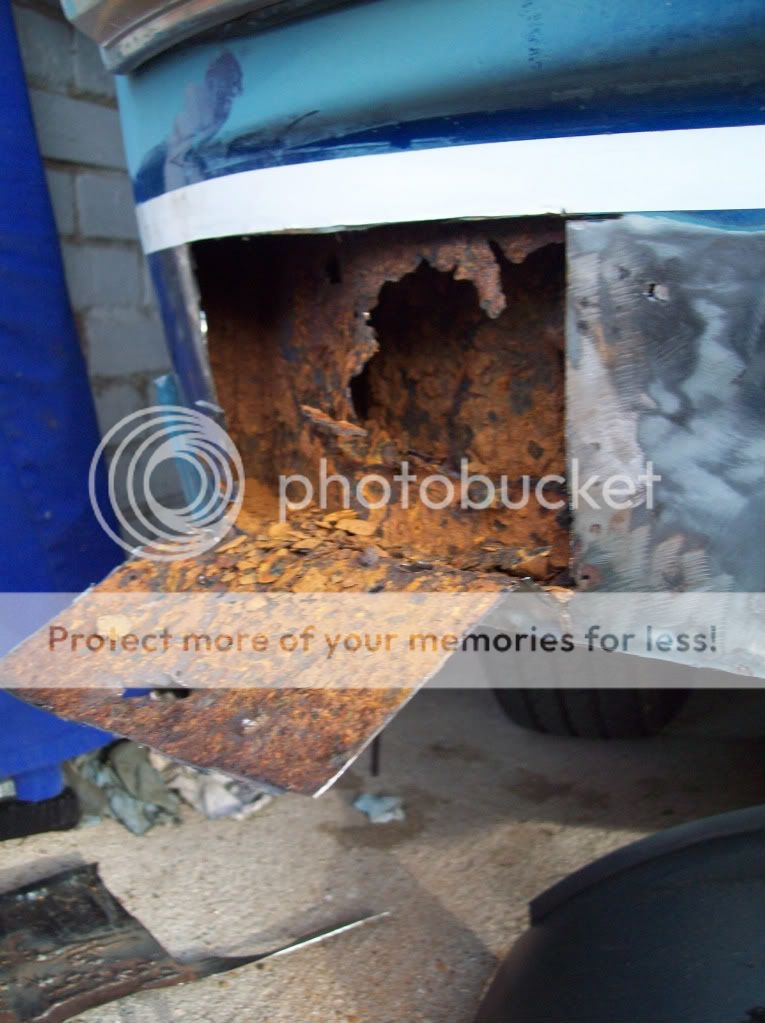
Althought it is a US import it has suffered from some tin worm although very localised.

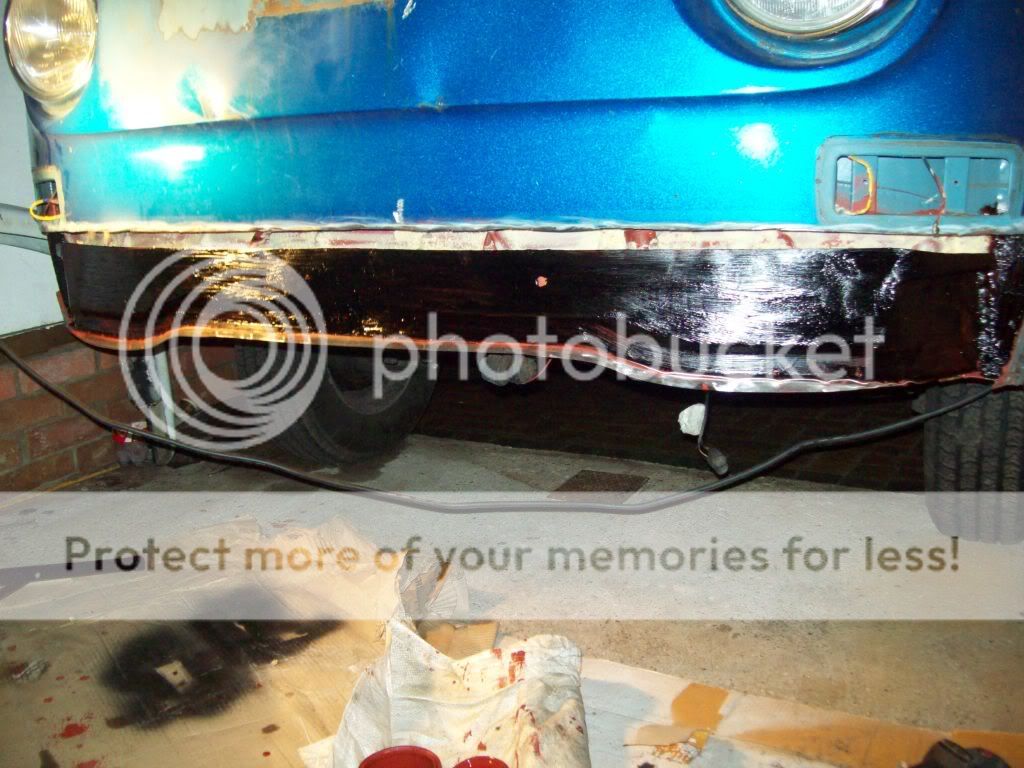
My plans are to repair the rust first then strip back the metallic paint to reveal the original neptune blue, think i'll keep some of the dents as i'm into the ratty look. I want to slam it and fit some sprint star wheels. The interior will kept fairly original but I want to fully insulate and sound proof it. Enginewise i'm not sure, it's a 1600 single port so need some suggestions, relieablity is what I'm after really.

Here's some more photos and some of the progress from the repairs:
100_0613.jpg


100_0615.jpg


100_0612.jpg


100_0617.jpg


100_0618.jpg


100_0619.jpg


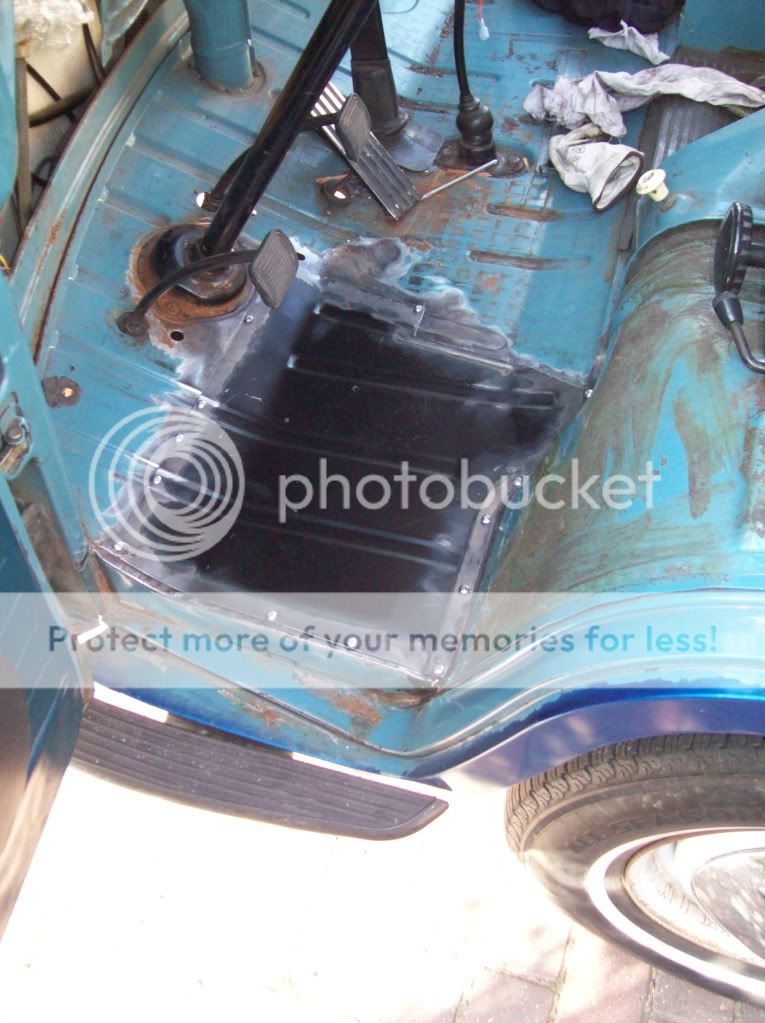
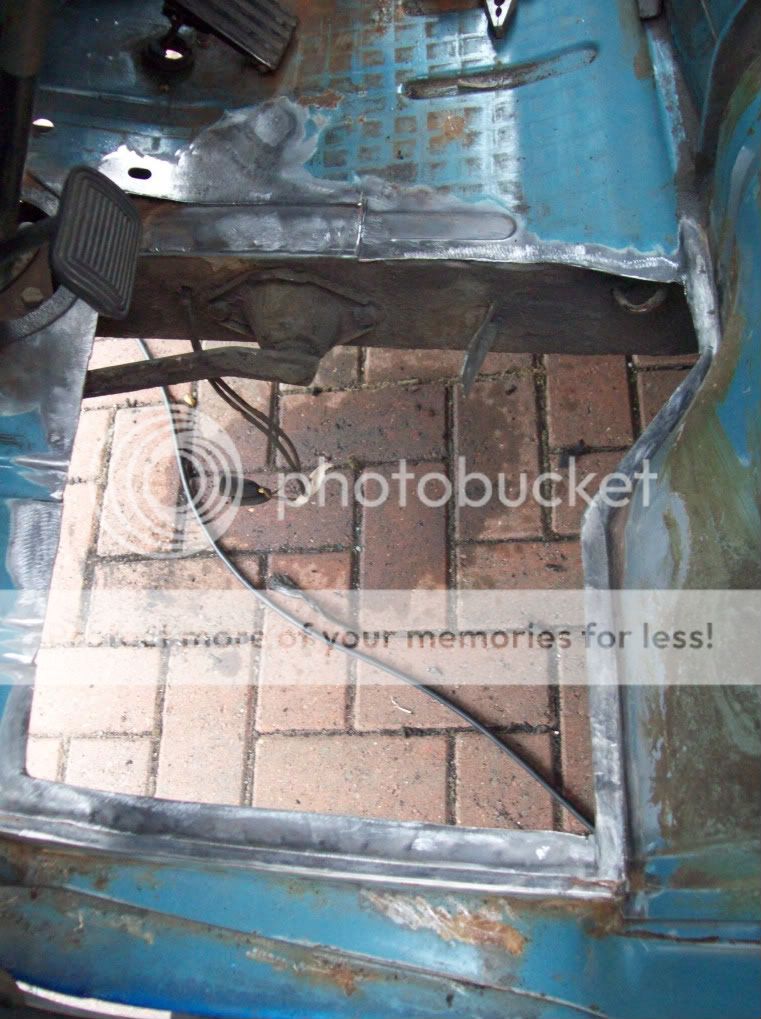
The first repair was to the driver's side cab floor, here's the rust I cut out (just cut the minimum out first):
100_0622.jpg


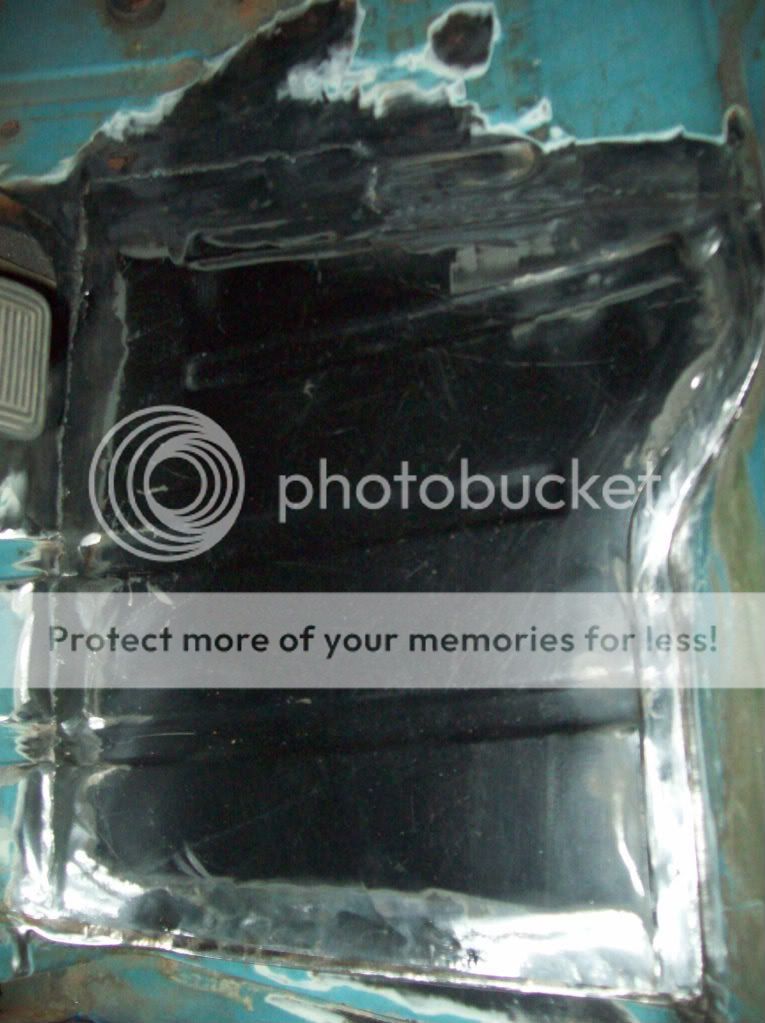
I then cut out a neater hole and was able to grind back to the original surfaces the floor was spot welded to:
100_0625-1.jpg
 
I then made a cardboard template of the whole and used it to cut the Alan Schofield panel to size:
100_0624.jpg

I then drilled and screwed the panel in so I could drive it to a friend's to get the welding done:
100_0629-1.jpg

Now welded in and ground down smooth:
100_0632-1.jpg

I have since seam sealed, kurusted and painted the area with red oxide, the underside will be waxoiled.
As I was going to underseal the cab floor area I thought I would do the front section of the van, I used a wire wheel to remove surface rust which is when I noticed these small holes:
100_0636.jpg


100_0637.jpg

And at the bottom of the front panel there was some small bubble rust which when ground down the holes got alot bigger:
100_0634.jpg

I removed more metal to reveal the extent of the damage, it is clear that the front is one big water trap! and drain wholes will have to be made in the repair panels:
100_0640.jpg


100_0641-1.jpg


100_0642.jpg


100_0643.jpg
 
Small update, I have started the battery tray area and rear corner. Thought it was best to cut the whole thing out as there isn't much left and replace it with Schofield panel, the closing panel (mudguard) will also be replaced as there is corrosion of the lip.
100_0626.jpg

I drilled the original spot welds out to remove battery tray and discovered more rust behind where the U.S reflector is, so ordered that small section from VWheritage.
100_0627.jpg


It's really frustrating at the moment not being able to work on it, it's in my garage but there isn't enough room to work on it and keep dry!!
Hello all just a small bit of progress, received my registration document today through the post and it was first registered on 01/01/68 one of the earliest!

I had a go at sanding the topcoat off and it took alot longer than I expected. I used a DA sander then a mouse sander but still managed to go down to bare metal in places. Think I might sand it by hand or use some nitromore paint remover. Does anyone have experience with revealing OG paint?? really hoping to find some patina:cool:
100_0689.jpg


Drilled drain holes in the bottom of the inner front valance and welded it on (my first ever bit of welding) and painted it in red oxide primer including the cavity.
100_0687.jpg


I then used waxoyl spray for the cavity and painted the rest in waxoyl underseal.
100_0691-1.jpg
 
Looks like a nice project there mate welcome to Earlybay , it rocks here fella 8)
 
Hello Graeme thanks for comments, I like your panel van! I'm still up for collecting the windscreen sunday so see ya there.

Drilled holes in bottom of outer repair panel for the plug welds and painted the inside with primer.
100_0692.jpg


Panel ready for welding, going to butt join the top as I heard it is better in the long run to prevent rust coming through. Any advice on welding this especially where the gap is a little bit larger?
100_0690.jpg
 
Did some work on the van again this weekend, first tacked the repair panel into place starting from the middle and then stitch welded it doing small sections at a time. I managed to get the two panels butted up tight which I'm quite pleased about:)
100_0694.jpg

100_0697.jpg

100_0696.jpg

What do you think of the weld, do I need more or will this be ok to grind down? I'll weld up any holes etc.
 
After carefully sanding the topcoat off to reveal og paint I started to notice the paint underneath had already been sanded:mad:
So I've decided to carry on but with my DA and mouse and rat the van:D
100_0698.jpg

What do ya all think?
Anyone have some rat / hoodride bay's you can show me???

Cheers,

Mike.
 
Cheers Airtime, it's a really good forum you have here!

Bit more work done, repair with first coat of paint.
100_0699.jpg

100_0701.jpg

100_0700.jpg


Made the sections up for the inner panel, welds were painted with zinc 182, seal sealed, red oxide was painted on the rest of the repairs then all was painted in black hammerite and waxoyl.
100_0705.jpg

100_0704.jpg

100_0702.jpg

:)
 
Once the paint had dryed on the lower panel I could see the imperfection in the filler and have since sanded and painted it again, now looks better.
Took the windscreen out during the week so that I could repair the metal underneath the seal this is what I found:
100_0707.jpg

100_0709.jpg

100_0714.jpg


The metal is pitted all the way along the recess and gone through in some places. Advice needed on this one peeps what would you do? should I replace the lot with repair panel or plug weld the holes, grind down the rust, treat, fill and and paint?
The metal does seem quite solid were it hasn't gone through although it pitted.

Any help would be much appreciated.

Cheers,

Mike.
 
welcome to earlybay :)

ill definitely be watching your resto, good job on the front so far 8)
 
Nice work 8)

Regarding your windscreen surround - try and save as much of the original metal as possible, but remember that it might look ok on top, but underneath might be a different story so check from as many different angles as you can ;)
 
gninnam said:
Nice work 8)

Regarding your windscreen surround - try and save as much of the original metal as possible, but remember that it might look ok on top, but underneath might be a different story so check from as many different angles as you can ;)

Great advice, i have just replaced the bottom lip of mine and although not to bad, needed replacement 8)
 
good looking bus fella....liking the work too,
saw this for sale ages ago and thought it real nice then.....glad its in sufook 8)
see ya at a meet or three soon dood :D


ste :mrgreen:
 
Thanks for all the comments and advice, was a nice day yesterday so have ground down the rust and welded up the bigger holes although it was a pain because the holes got bigger to start off with :evil: I then rust treated and filled with metalized filler. I will check the underside and treat but if the damage is extensive i'll just replace the lot.

Whats the best way to paint this area should I use etch primer then normal paint etc or use some of my Zinc 182 primer to add more protection? Does this stuff etch well to bare metal?

Bus will be lower soon with some t2d goodies 8)

Some pics of how the van curently look:
100_0720.jpg


100_0719.jpg


100_0715.jpg


100_0717.jpg


100_0723.jpg


100_0722.jpg


100_0721.jpg


I have continued with the rear corner battery tray area, alot more solid then first thought so all good better pics to follow:
100_0716.jpg


100_0718.jpg


Mike.
 
Fantastic work, especially as its your first time welding. The welds look good and strong. Nice filling work too, think you'll turn out a great solid van.

Gareth
 
Thanks chap, have two weeks off now to get some repairs done and lower the van. I've got t2d front beam adjusters, slam shocks and rear adjustable spring plates.

Went to Suffolk Bugrs local meet today, saw some really nice buses and the weather was perfect too.

Thanks Graeme (grazy) for the windscreen was a pleasure to meet you.

mike.
 

Latest posts

Top