


uglybugger
Well-known member
- Joined
- Nov 3, 2011
- Messages
- 51
- Reaction score
- 0
Inspired by other members of this forum I wanted to change the sink cabinet of my Westy Campmobile interior. The aim was to upgrade to contemporary comfort standards while maintaining the original outlook of this unit. This challenge was good fun and I would like to share with you the outcome of my ideas.
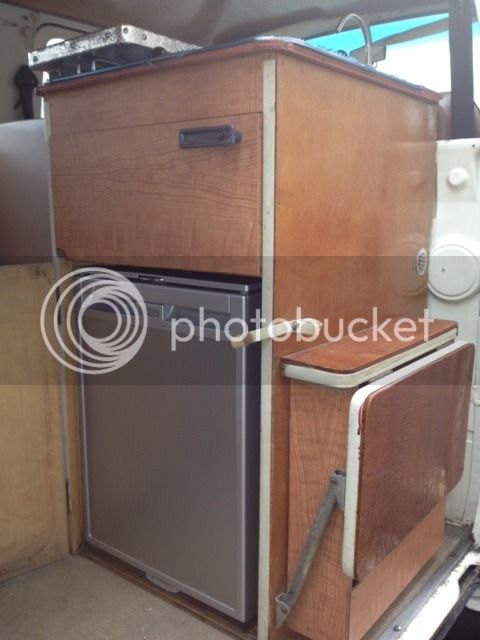
The icebox and the water reservoir needed to be removed to make space for a 12V compressor refrigerator. These are less dependent on outside temperature then the more often used absorber-types are. The refrigerator has almost the same depth and height as the cabinet. While in place, the original door can still be closed (though you have to remove the metal frame). With this refrigerator, a converter to 220-230 V can be supplied. When connected, it automatically jumps to 220-230V and it shuts off the refrigerator when the battery goes low.
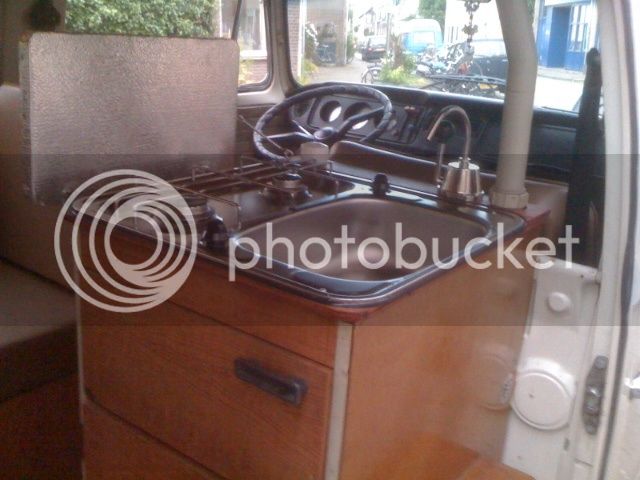
The top sink is replaced with a cooker/sink combination. It is shown before by others, but this time the cooker/sink was turned 90 degrees to gave space and maintain the original arrangement of water filler, rocker pump and ventilation pipe as much as possible. This required some adjustment of the inside of the cabinet (with a chisel) to make it fit, though. Luckily, the wood on the sides of the unit is (just) thick enough. The cooker/sink combination sticks out just a bit on both sides, but you’ll hardly notice because of the rubber edge. At the end of the top of the cabinet, a new wooden plate was screwed on to house the rearranged the original water filler, a new rocker pump and the ventilation pipe.
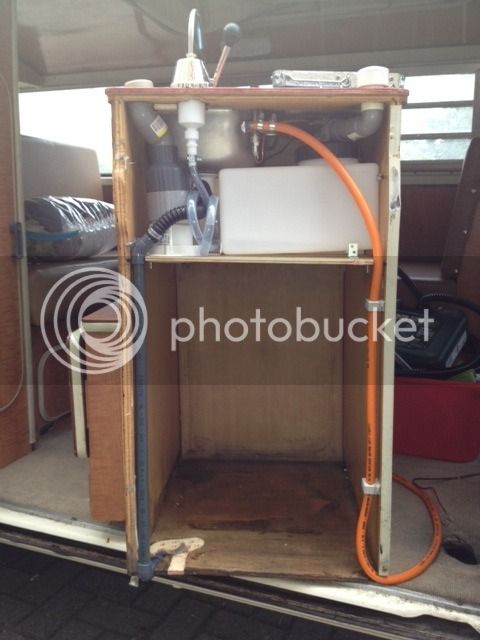
The shelf in the storage compartment was made to the full depth of the cabinet and the backing plate was moved an inch back inside the cabinet for more room. This way, a tray for cutlery could be placed.
Behind this backing plate a 5-litre water reservoir was fitted and connected to the water filler. It isn’t holding much water, but enough for washing hands, brushing teeth and wetting a cloth to wipe the table throughout the day…
Heat exhaust from the fridge is made possible trough little ventilation holes on the side and trough the ventilation pipe to the roof. Wastewater is removed from the sink by a flexible hose and pipe, which runs through the hole in the floor and collected in a jerry-can on the ground. While driving, the hose is tuck back into the hole in the floor.
Gas bottle and the described converter are placed under the buddy seat.
Finally, some adjustment were carried out to the sink cover/folding table in the walkthrough were made. First, the hinges moved to the edge of the cooker/sink, therefore this edge had to be reinforced with an aluminium profile underneath. The cover is shortened to fit on top of the cooker part and an aluminium plate was fitted. The hinges needed to be connected to the top of this plate to be able to close nicely onto the cooker.
I’m very pleased with the results.
The icebox and the water reservoir needed to be removed to make space for a 12V compressor refrigerator. These are less dependent on outside temperature then the more often used absorber-types are. The refrigerator has almost the same depth and height as the cabinet. While in place, the original door can still be closed (though you have to remove the metal frame). With this refrigerator, a converter to 220-230 V can be supplied. When connected, it automatically jumps to 220-230V and it shuts off the refrigerator when the battery goes low.
The top sink is replaced with a cooker/sink combination. It is shown before by others, but this time the cooker/sink was turned 90 degrees to gave space and maintain the original arrangement of water filler, rocker pump and ventilation pipe as much as possible. This required some adjustment of the inside of the cabinet (with a chisel) to make it fit, though. Luckily, the wood on the sides of the unit is (just) thick enough. The cooker/sink combination sticks out just a bit on both sides, but you’ll hardly notice because of the rubber edge. At the end of the top of the cabinet, a new wooden plate was screwed on to house the rearranged the original water filler, a new rocker pump and the ventilation pipe.
The shelf in the storage compartment was made to the full depth of the cabinet and the backing plate was moved an inch back inside the cabinet for more room. This way, a tray for cutlery could be placed.
Behind this backing plate a 5-litre water reservoir was fitted and connected to the water filler. It isn’t holding much water, but enough for washing hands, brushing teeth and wetting a cloth to wipe the table throughout the day…
Heat exhaust from the fridge is made possible trough little ventilation holes on the side and trough the ventilation pipe to the roof. Wastewater is removed from the sink by a flexible hose and pipe, which runs through the hole in the floor and collected in a jerry-can on the ground. While driving, the hose is tuck back into the hole in the floor.
Gas bottle and the described converter are placed under the buddy seat.
Finally, some adjustment were carried out to the sink cover/folding table in the walkthrough were made. First, the hinges moved to the edge of the cooker/sink, therefore this edge had to be reinforced with an aluminium profile underneath. The cover is shortened to fit on top of the cooker part and an aluminium plate was fitted. The hinges needed to be connected to the top of this plate to be able to close nicely onto the cooker.
I’m very pleased with the results.
")