"Bluey" the Green 1971 Westy - eh?

Early Bay Forum

Help Support Early Bay Forum:

This site may earn a commission from merchant affiliate links, including eBay, Amazon, and others.
Hi Andy, great build , did you use the horse shoe plates ? The Continental Ecocontact Premium 2 on the front 185/55/15 86h xl are a great find , I will be fitting these to my own bus as I have never felt safe with the 165/50/15 although I have never had a problem , apart from the harsh ride.
Stuart
 
midlandpaintwerks said:
Hi Andy, great build , did you use the horse shoe plates ? The Continental Ecocontact Premium 2 on the front 185/55/15 86h xl are a great find , I will be fitting these to my own bus as I have never felt safe with the 165/50/15 although I have never had a problem , apart from the harsh ride.
Stuart

I drive 165/55/15 and they are stiffer then the 175/65 (correct loadindex) i had before, but with the combinatoin of airshocks it's still fine. The 165/55 are 1cm lower then the 185/55, i think tubbing is needed with the 185/55?

Keep up the good build, it's going to be a cool family Westy
Greetz
 
midlandpaintwerks said:
Hi Andy, great build , did you use the horse shoe plates ? The Continental Ecocontact Premium 2 on the front 185/55/15 86h xl are a great find , I will be fitting these to my own bus as I have never felt safe with the 165/50/15 although I have never had a problem , apart from the harsh ride.
Stuart

Hey Stuart, I decided not to use the horse shoes. The adjustables will get me plenty low enough for this ride. I did toy with the idea of using them with the adjustables, but only so I didn't have to add notches for my A arms, but in the end the ride height I've settled on needs notches for the driveshafts anyway, so there would be no gain in using the horse shoes but plenty of losses in getting the rear wheel off :lol:

As for the tyres, I have been running 185/45/15 Nankangs on my split crewcab for years without any problems at all and will continue to do so, but as you say, the ride can be a bit harsh and bouncy on ****** roads. It doesn't bother me when I'm flying solo, but 4 up with the wife and kids on board I notice it.........and so does the wife ;) As seen as Bluey is going to be the family ride, I decided to see what else was available that would give a more comfortable ride and also look good on a lowered/narrowed bus. These 185/55/15 XL's are just the job, and although it wasn't a major factor in my decision , its a bonus they meet the factory front axle load specs too ;) (Front axle load weight is 1010kg, so 505kg per tyre equates to a 85 load rating and these are 86. I did my maths just for the hell of it ;) )

Mycha is right though. I do need to tub the front end to get these to work at my chosen ride height. I have a pair of slamwerks tubs ready to go in. In the pics above, there is 1mm clearance to the factory tub :lol:
 
Fantastic work yachty and cool Westy. Mycha directed me to your post in response to my question in the technical section about swapping the diagonal arms left-right for less camber on a lowered bus. I'm glad to see that you tried it -and it worked. Did it make a significant difference in camber? -More than the minor adjustment rotating the arms (per Bentley manual) provides? Can't wait to see your progress, I'll be watching your thread.

Bob
 
Cheers Squarebob. Yup, flipping the A arms deffo makes a difference. I was hoping for more but when I was stripping the backend down afterwards, I realised I hadn't fully tightened the A arms in their brackets so its possible they were twisting in their mounts a bit! Hopefully it will be even better the next time I put it all back together.

One other thing, flipping the A arms means they bottom out on the top of their mounting brackets before they hit the chassis rails so a bit of radius-ing is required which then means the brake pipe mounts have to be moved a little. Have a look at Gadgets Citrus Valley build thread for pics ;)
 
yachty said:
One other thing, flipping the A arms means they bottom out on the top of their mounting brackets before they hit the chassis rails so a bit of radius-ing is required which then means the brake pipe mounts have to be moved a little. Have a look at Gadgets Citrus Valley build thread for pics ;)

I did not flip my arms at the moment (going to do it next month when putting the air-shocks on the rear) but i already did need to modify the mounting brackets because they fooled.

On the samba there are also speaking to shim the two upper mounting points (between springplate and a arm to reduce camber???

http://www.thesamba.com/vw/forum/viewtopic.php?t=156211&postdays=0&postorder=asc&start=3300

"Actually, when lowering the rear, you can maintain good camber if you shim on the top bolts between where the spring plate and trailing arm meet."

Greetings mycha
 
Hi Mycha

Yup, I saw that bit about the washers but it seems a bit too easy if you know what I mean ;) I think I'll be giving that idea a miss :D

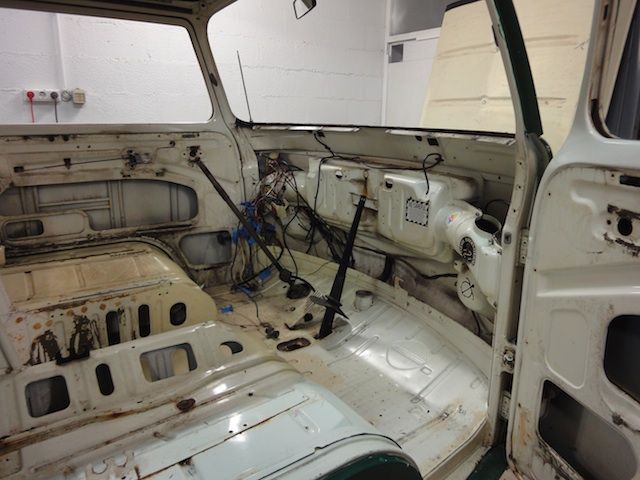
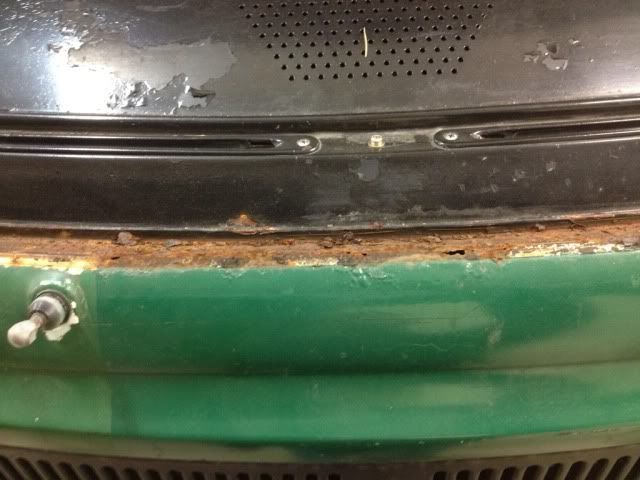
Spent yesterday removing all the glass. Only bit of rust I found was under the front screen. Will require some welding but not to bad 8)

8D1086B6-CA11-4334-9C73-CB0EC2C50D48-1775-0000027115109539.jpg


BTW, the guy who wrote the "How to remove cab door window glass" section in the Bentley manual MUST have been on acid :lol:
 
yachty said:
Hi Mycha

Yup, I saw that bit about the washers but it seems a bit too easy if you know what I mean ;) I think I'll be giving that idea a miss :D
I'm with you 8) ;) i'm thinking of a special plate between the four bolts, thick on the upperside thin on they underside? Greetings
 
Yeah, I'm going to wait until mine is back on its wheels and see how it looks before thinking about it any more :lol:

So, Not much progress in the last couple of weeks but I managed to get all the interior and glass out end of last week. Found a bit more rust than I was expecting around the front windscreen but its not to bad. Just a few pinholes really and the lip where the rubber sits is perfect. Should clean up well. The rest of the window frames are more or less perfect 8)

25550AB6-CFA2-497B-94CE-0E96FD211BC7-172-000000157D40389A.jpg


The dash came out yesterday.......

DashOut.jpg


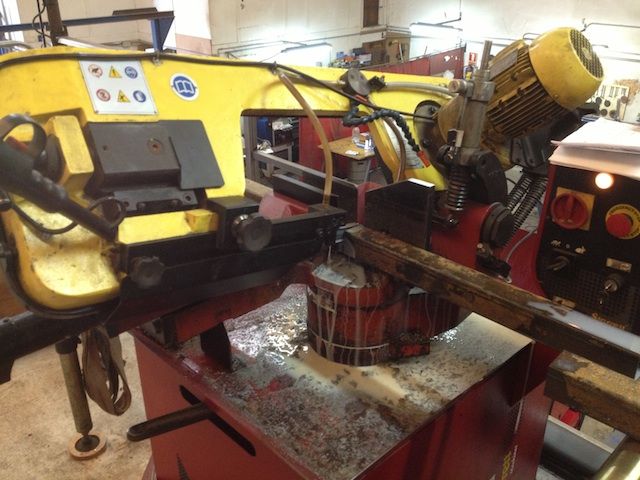
This morning was spent down at my mates workshop fabbing up some dollies for the front and rear. I took the measurements yesterday and made some templates. A few minutes cutting on the cool cutting machine.......

CoolCuttingMachine.jpg


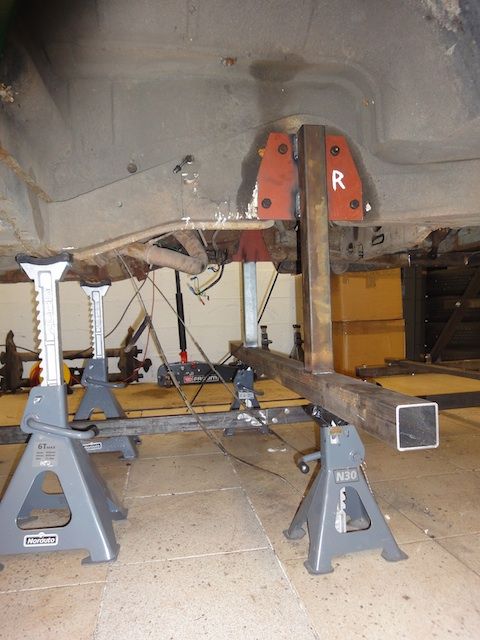
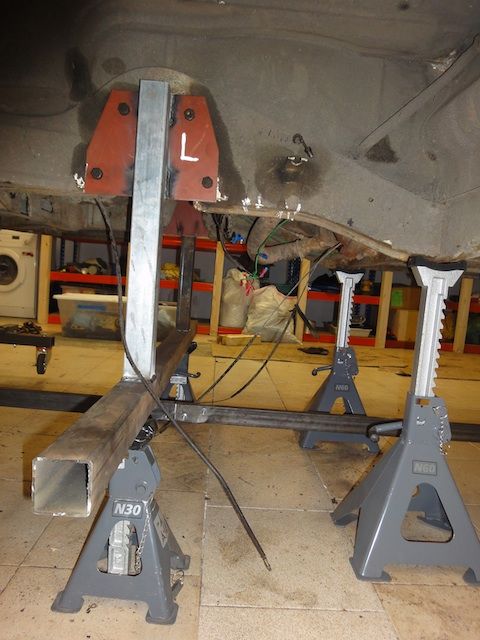
.....followed by a bit of tack welding and alignment by yours truly and some proper welding by my welding guru, Guillermo, (no way I was trusting my dodgy beginners welding on something like this!) and we had these.....

Dolly2.jpg


Dolly3.jpg


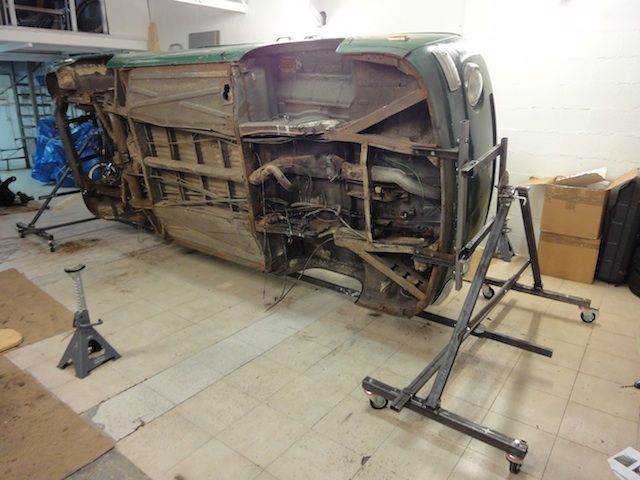
I actually only made these so I had something to get the jack under to get the bus up high enough to get it on this............

BottomsUp3.jpg


And that's as far as I've got. Time to pack for Volksworld. Cant wait. Hope to say hello to some of you at the weekend :)
 
Hi yachty nice resto and well documented 8) I'm doing the beam swap at the moment and found that the hand brake cable is catching,thanks for posting that . Ive also put steering stops on the beam and its catching them as well :(
I'm going to cut/bend the hanger rod as well think it should cure it :) nice to read someone else has the same problems ,in a good way 8) ...Dave
 
I really like your bus. It has the look I am going for on my crossover POBA camper.

PS. Convince your kids to keep it green.

G.
 

Latest posts

Top