Despite the fact that is has rained for the last 3 months, I have been trying to get on with re-conditioning my van.
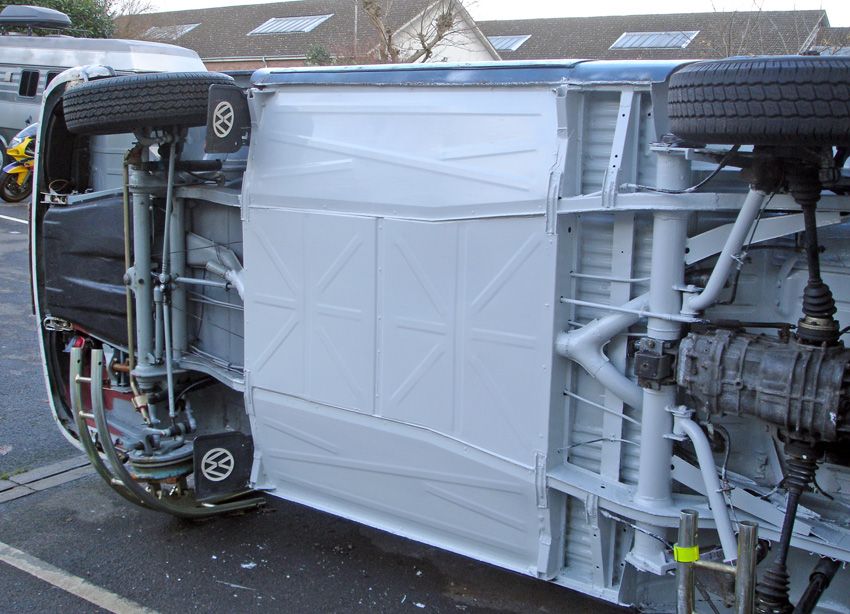
Last time we saw it, I had just finished work on the underside, having cleaned and re-painted the chassis and added belly pans for weather protection:
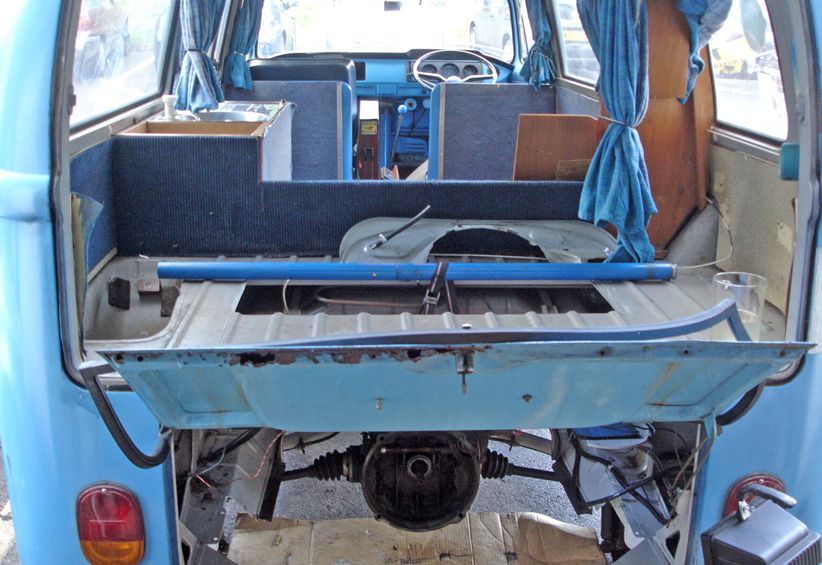
Now the van is back on her wheels, I have carried on updating bits and bobs.
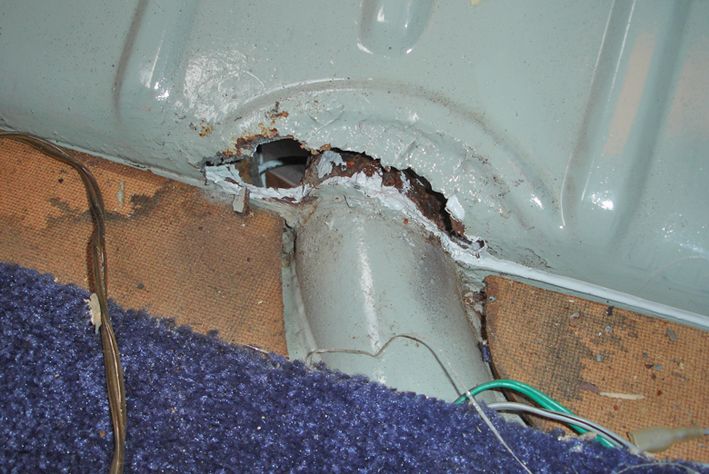
Having insulated the new heater tube under the pans, I moved to the engine end of the heating system.
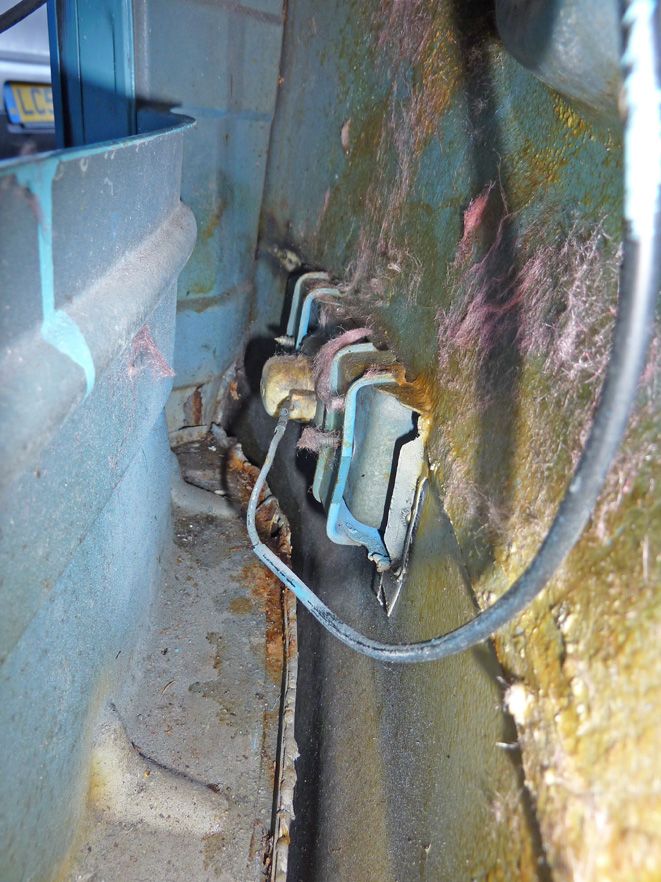
First I had to repair a small rust patch inside the van, where the heater tubes just break into the interior:
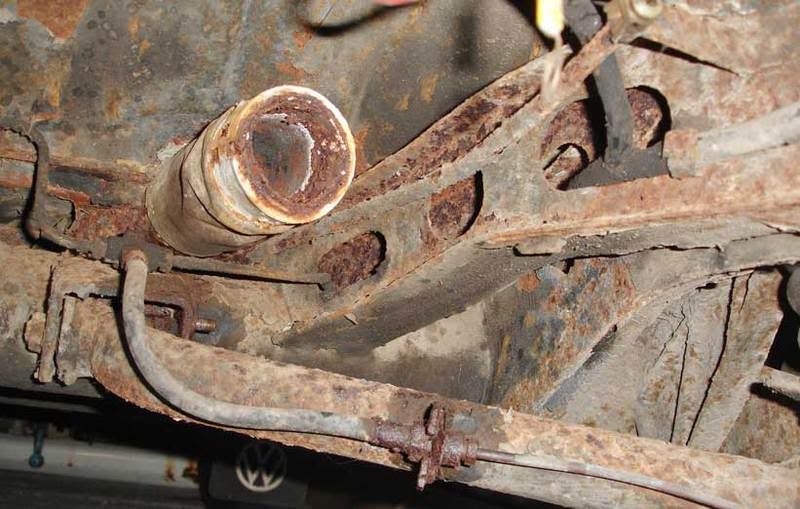
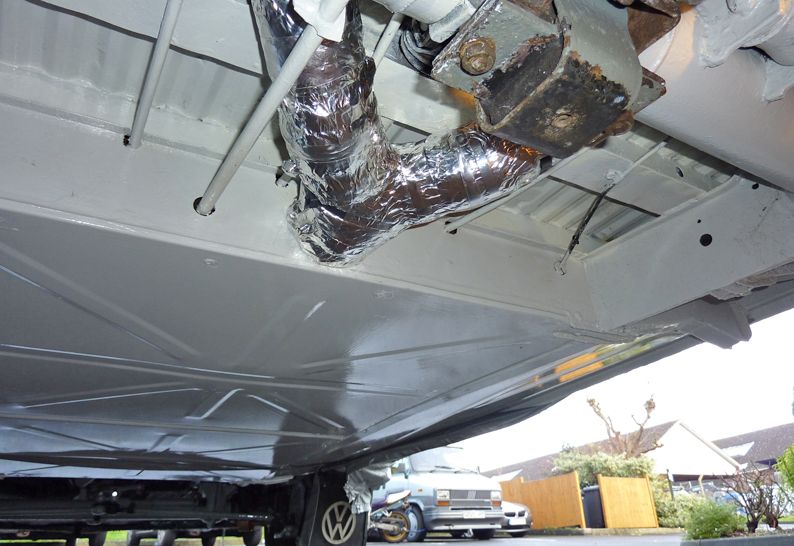
...and then I used some of non-rusty bits of the old heater tube to repair the stubs that extend into the engine bay - the ends of these had turned to rust where they joined the plastic joining bellows - as seen here a few months ago!
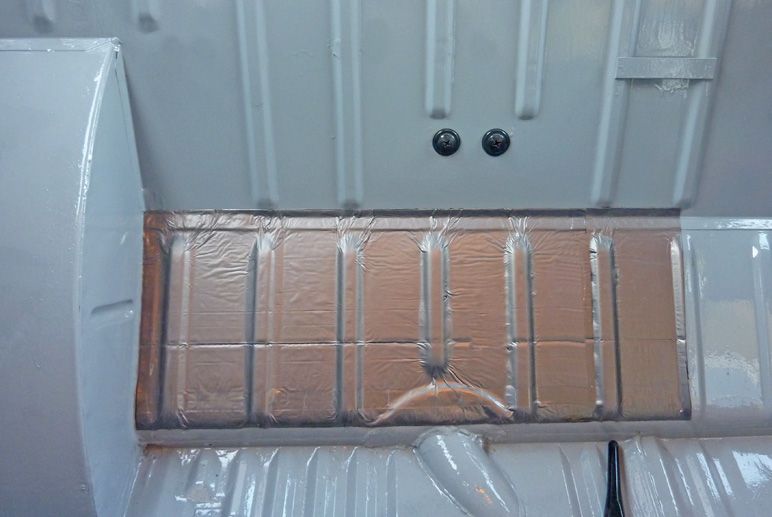
Once painted, I added more of the thermawrap bubblewrap. I'll keep and eye on this, but I think it is far enough away from anything really hot to be ok.
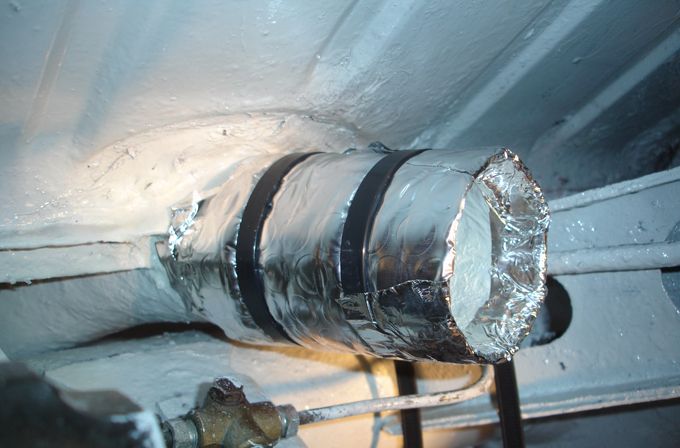
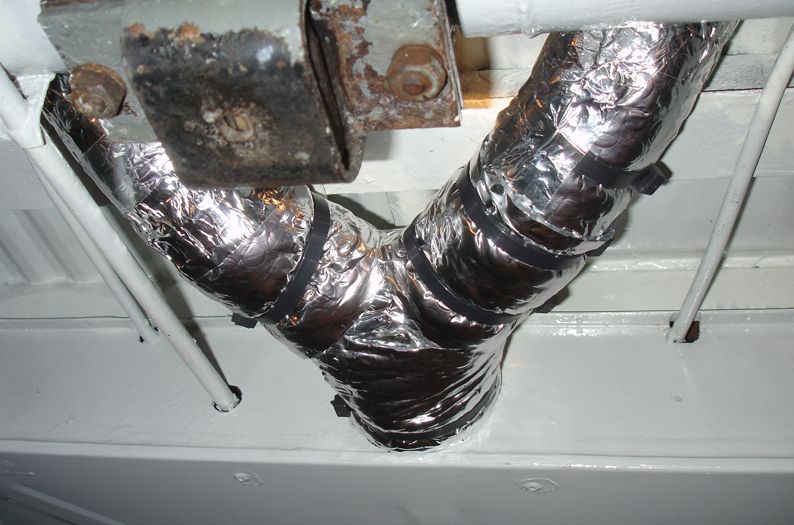
I also wrapped the tubes as they came back together after passing over the torsion tube:
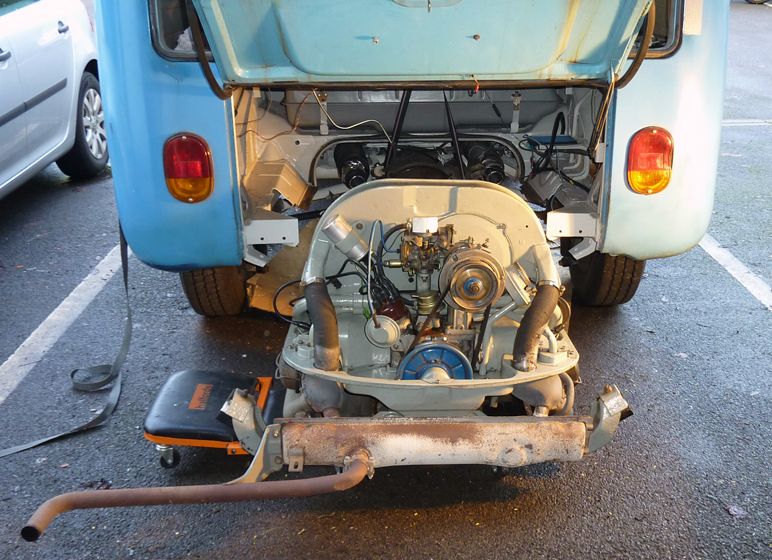
Then it was engine back in:
TOP TIP: As you can see, I keep a digi camera near me when doing these things! But can be really handy to either take pics to refer back to (especially where wiring is concerned!) or to see what things are looking like from a different perspective. Here are two examples. The first shows what the engine/gearbox join looks like behind the fan housing:
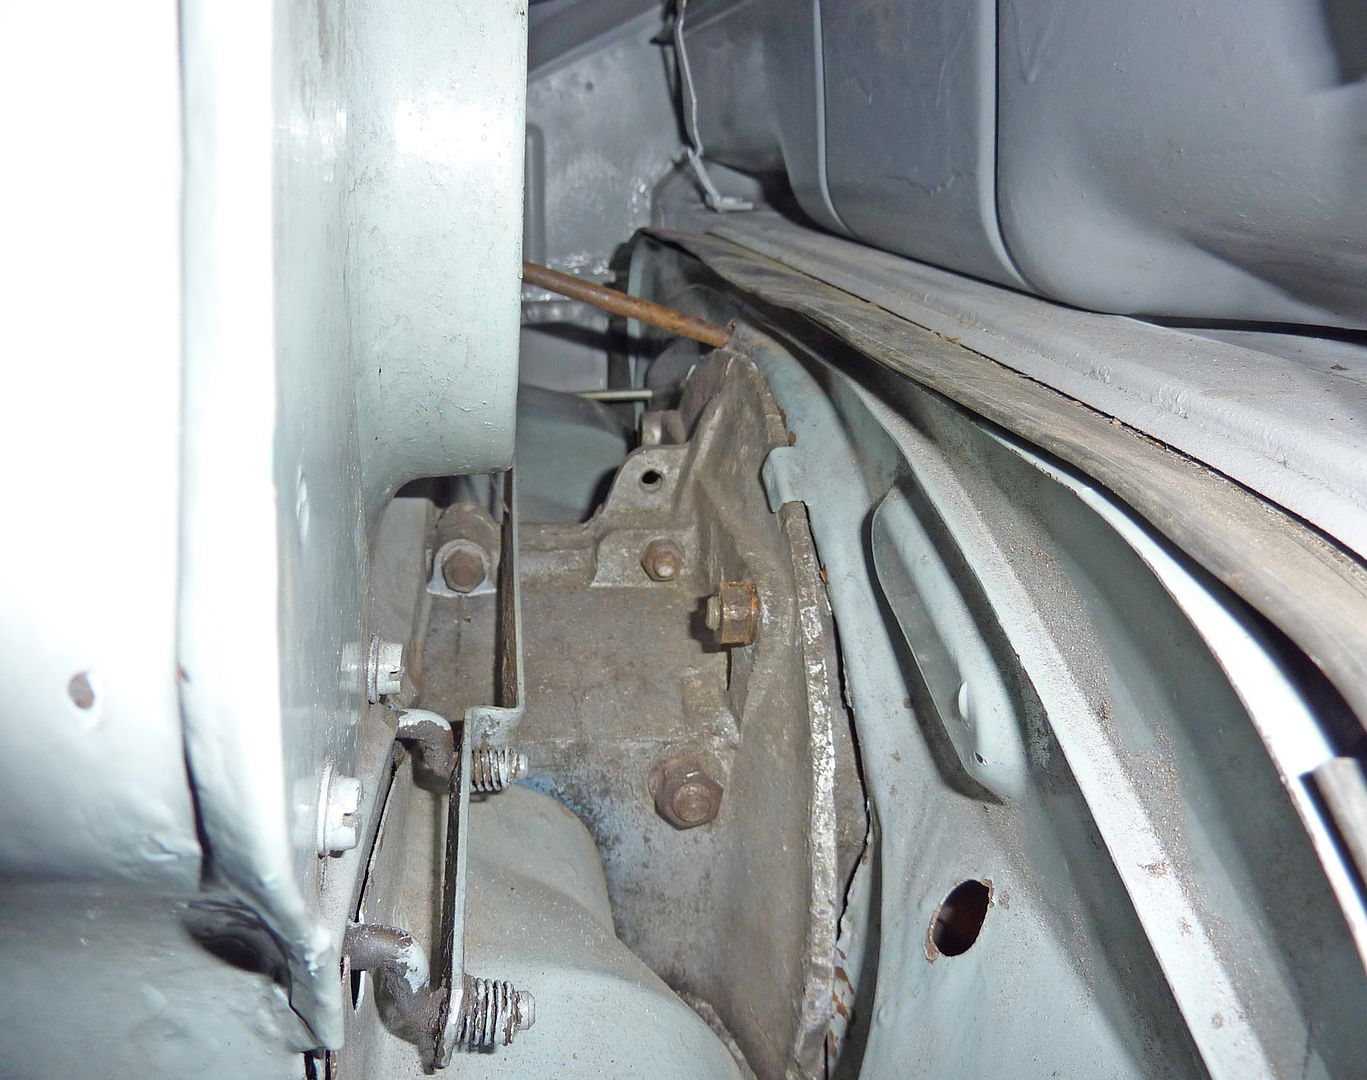
It shows the control arms for the air-flow flaps within the fan housing, details of how the tinware locates, accelerator cable tube etc etc
This second (unrelated) one is taken at the front of the van, reaching down in front of the handbrake and looking into the gap between the front panel and the floor. You can see the 'back' of the left indicator (low, obviously!)
The yellow crud is old waxoyl - the pink fluff is the remains of some loft insulation I had stuffed down there - removed now to replace with something better! It all looks ok there - a little bit of surface rust as a result of a small leak through the windscreen rubber - on the list!
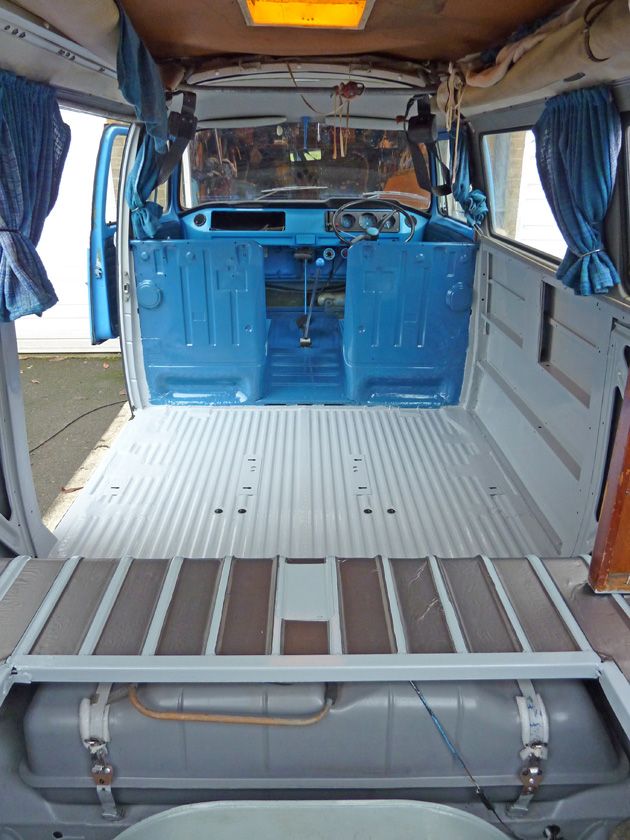
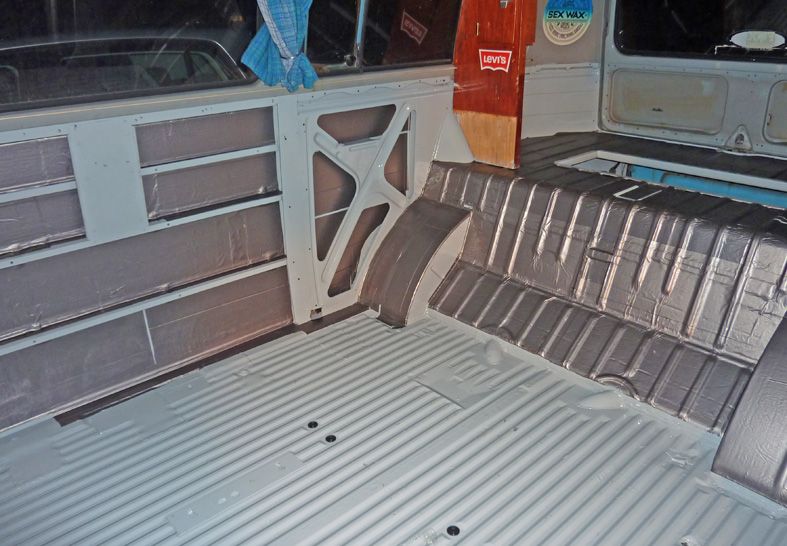
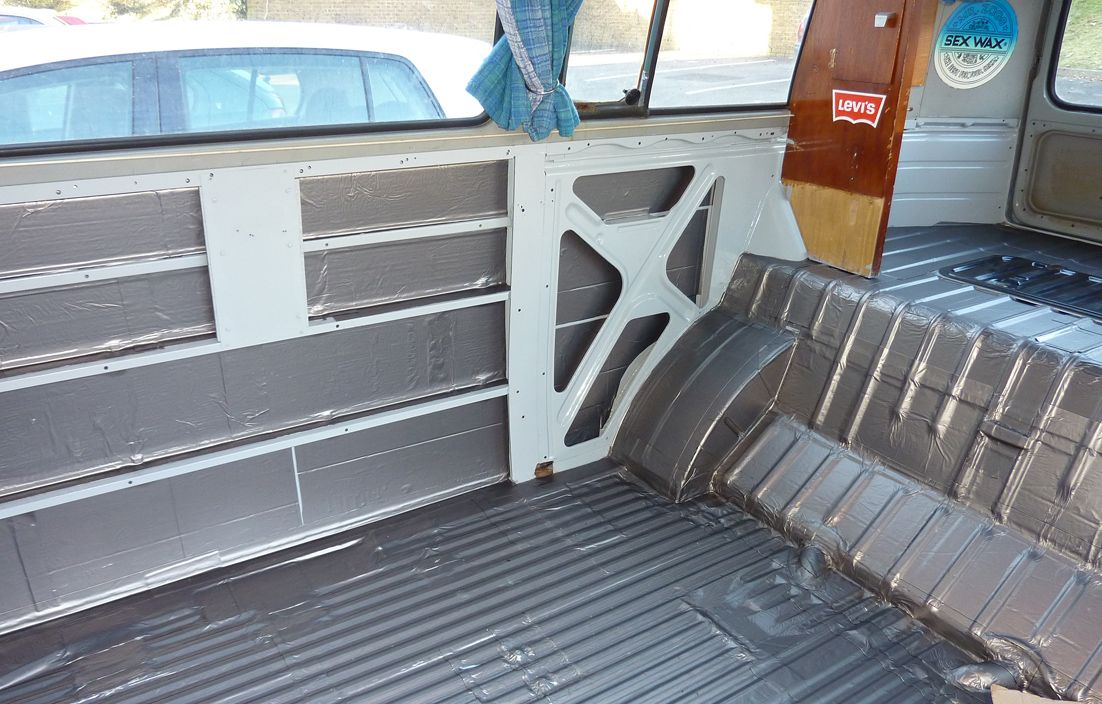
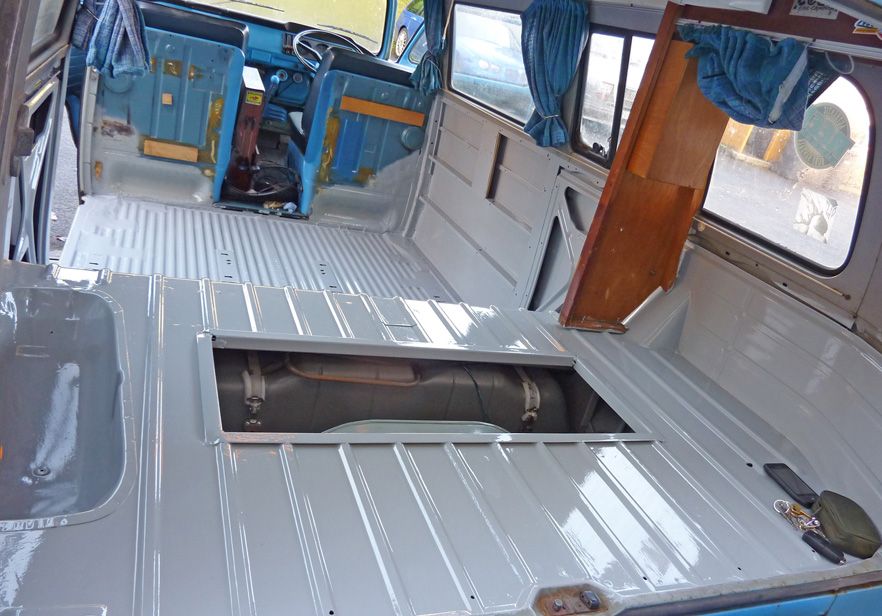
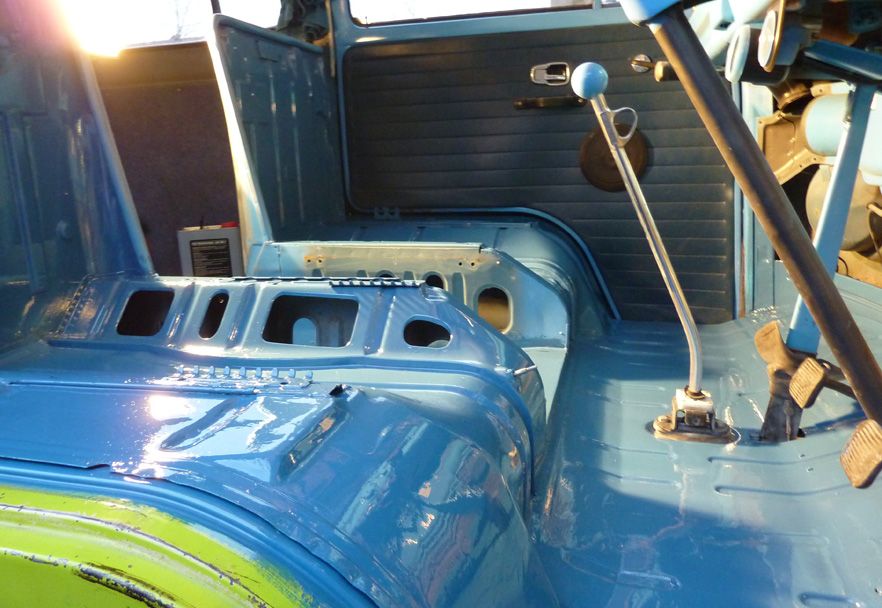
Back to the rear of the van...and I am now moving onto the interior. I have decided to take all the interior out and re-paint the inside with the Combi-colour (Rustoleum) paint, after repairing any holes. I will be keeping the basic layout of the interior the same, with maybe a few tweaks and better materials.
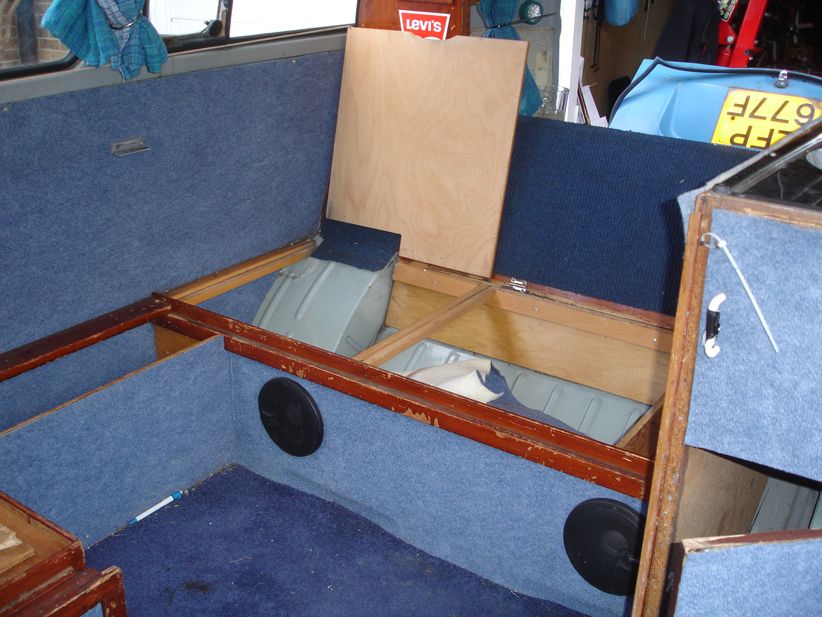
...more of that loft insulation - all to be replaced.
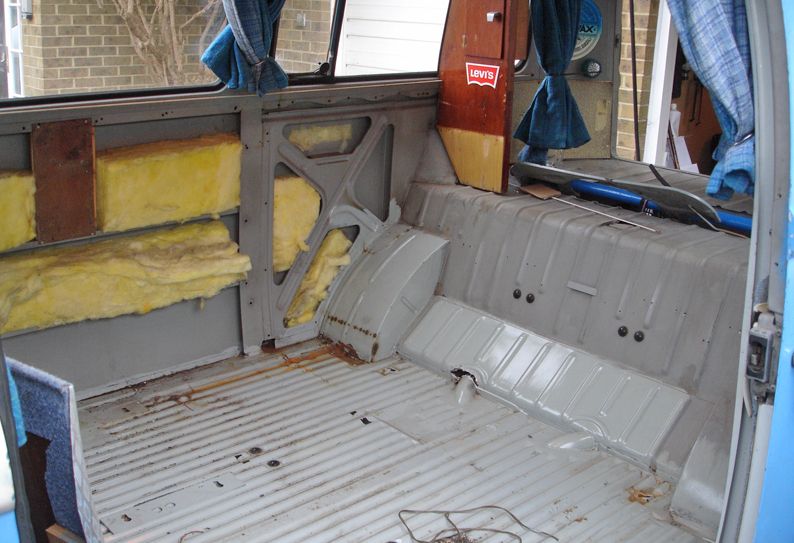
I intend to insulate the interior for both warmth and quiet, hence the emptying of the interior - I need to insulate/isolate the engine cover. I tidied the floor, filled any old screw holes, and then gave a nice thick coat of light grey combi-colour. The colour roughly matches the grey the van was originaly painted inside.
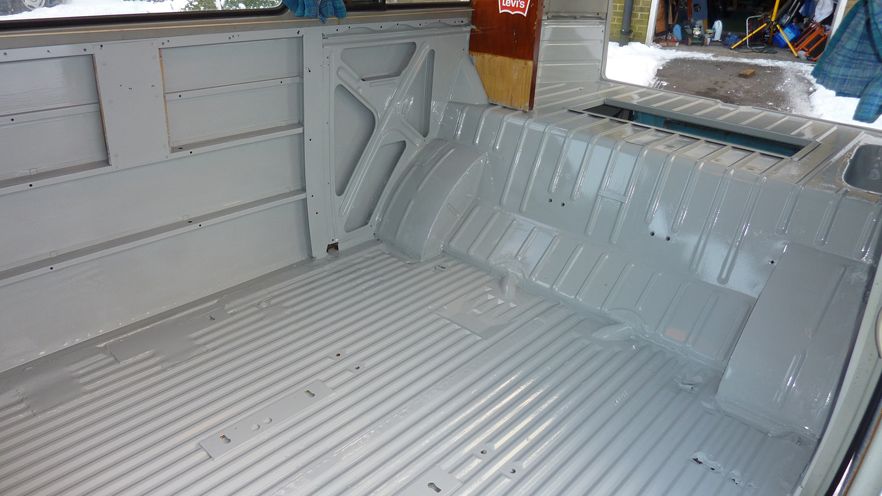
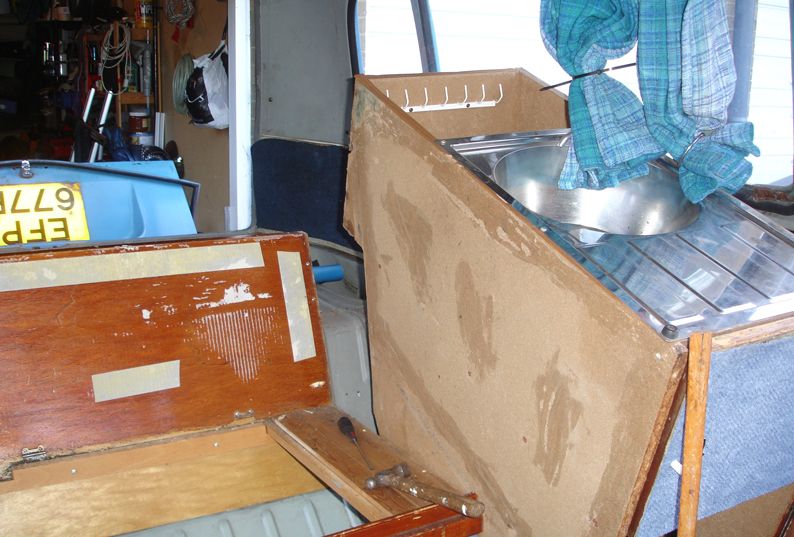
I have stopped at the window line as I will do that bit more carefully later. Its a shame, but pretty much all of what you see freshly painted will be hidden by insulation and carpet! But this way, I know that there is a decent barrier on the metal, with no rust.
The paint is applied with a brush only, and goes on really well.
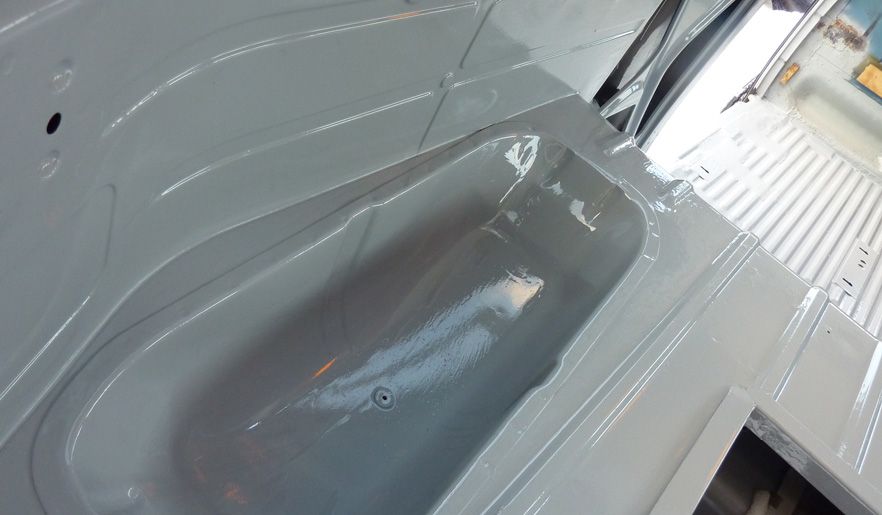
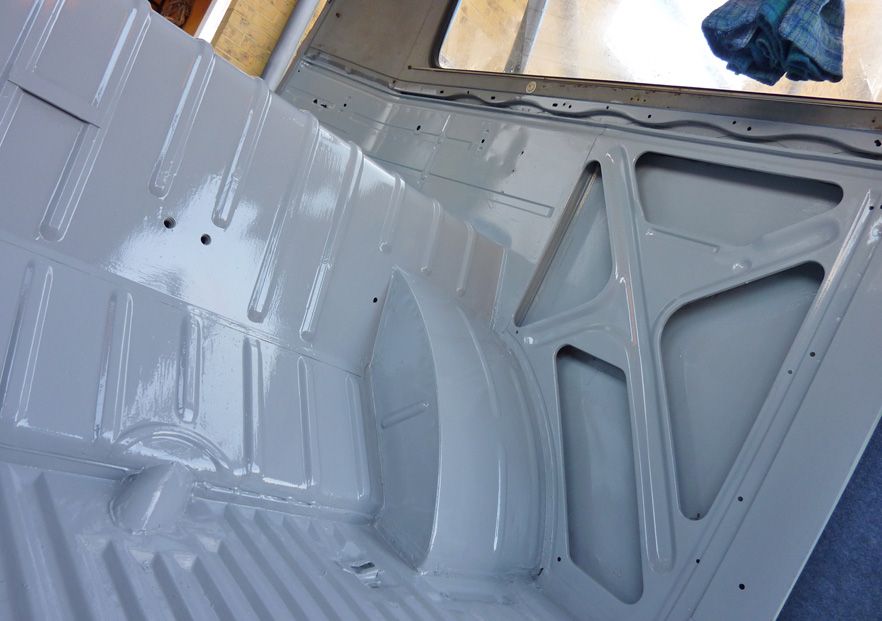
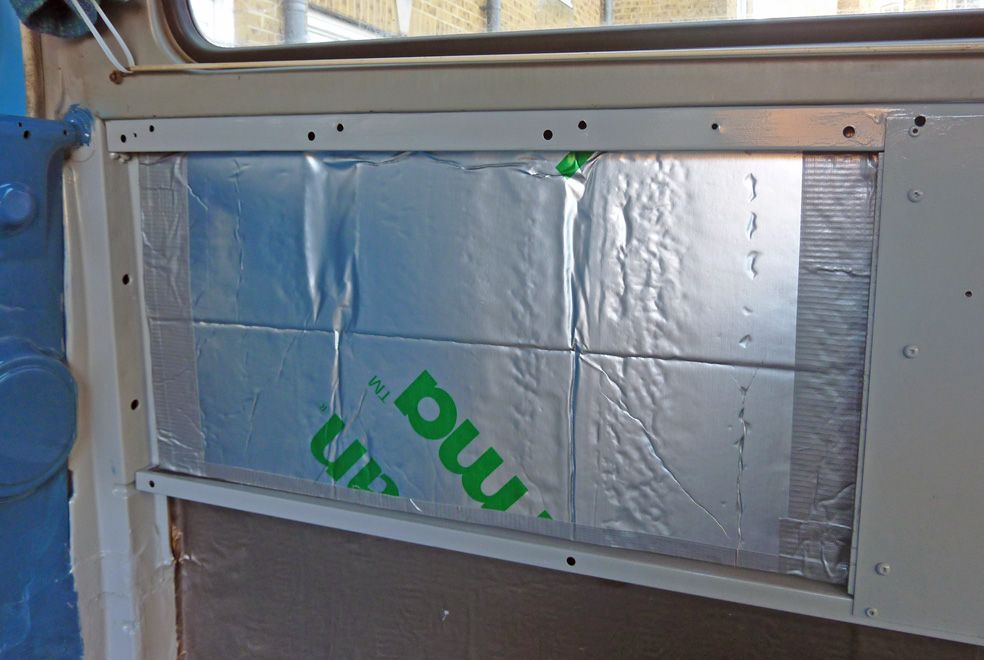
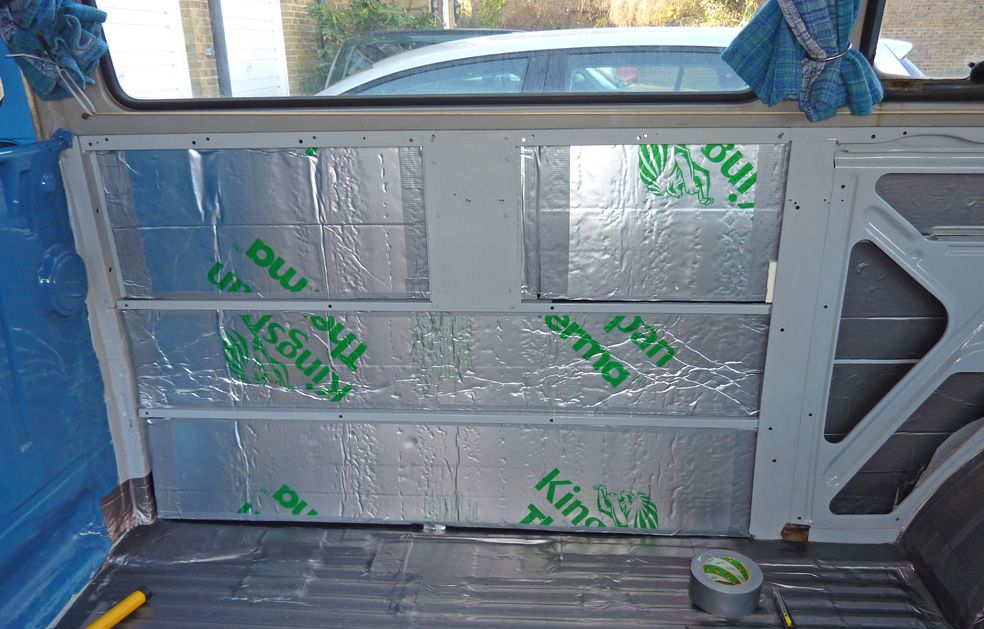
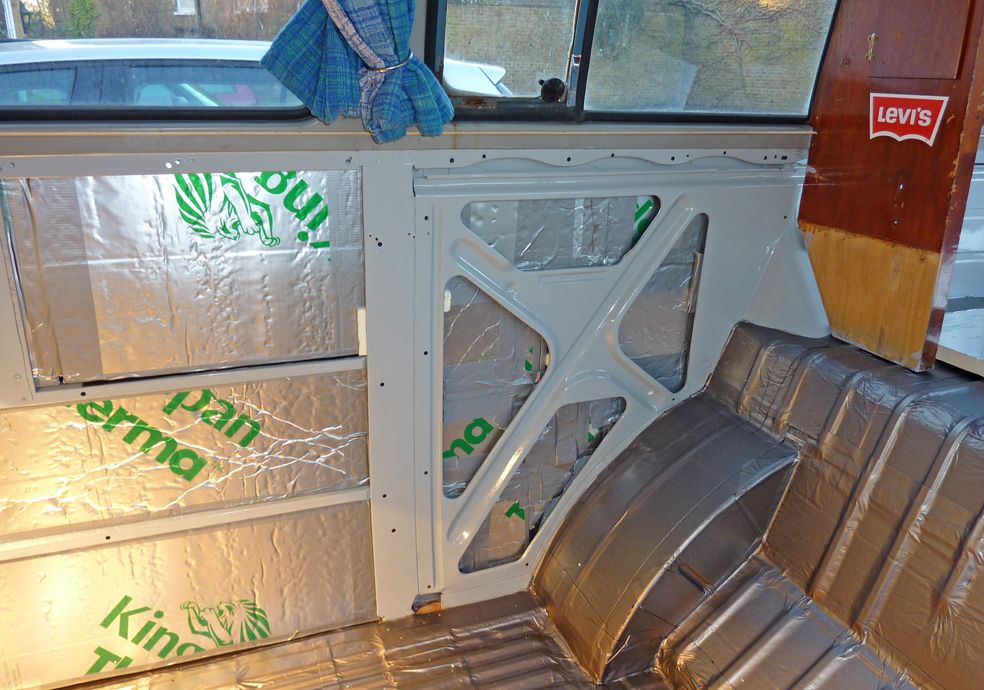
I shall be filling these cavities with insulation - more of that later.
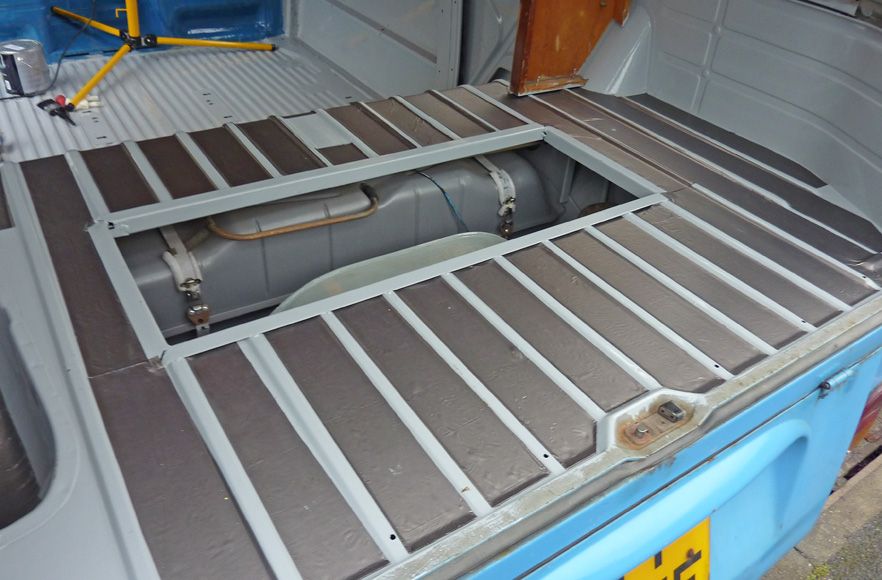
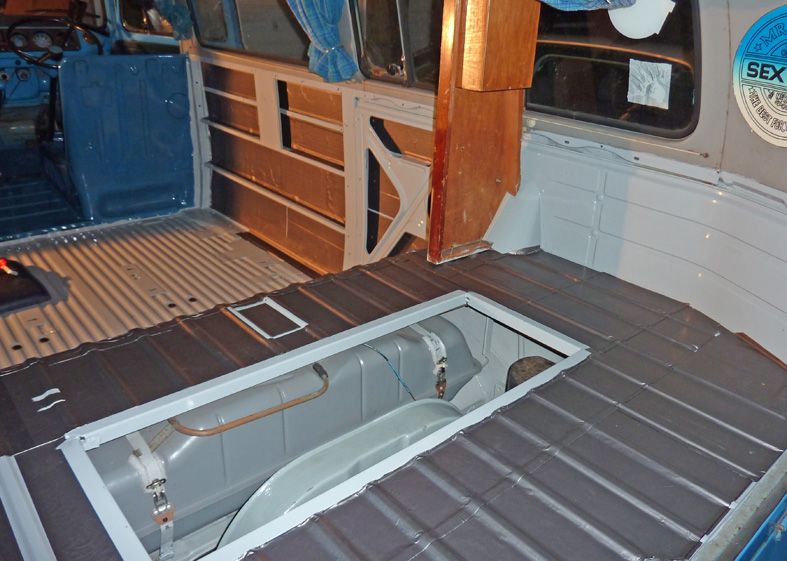
Another job at the rear of the van was finally tidying up the 'hatch' that I had created with a chisel all those years ago in a French campsite, after my oil cooler fell off - another story!
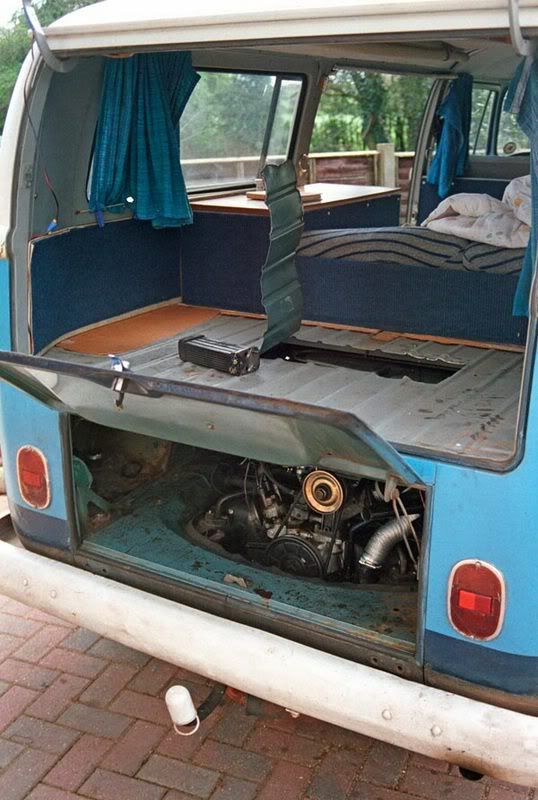
For years it looked like a sardine can.
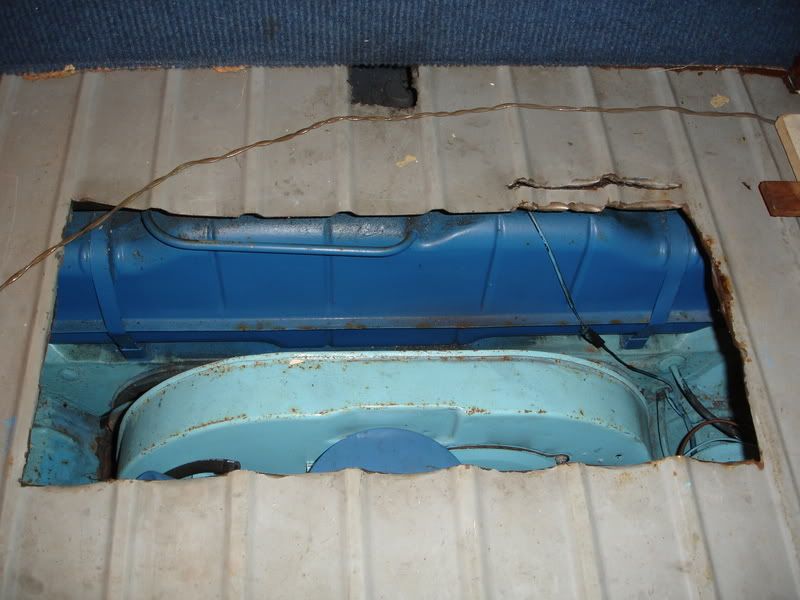
More recently I had tidied it up, but had to finish the job now before painting.
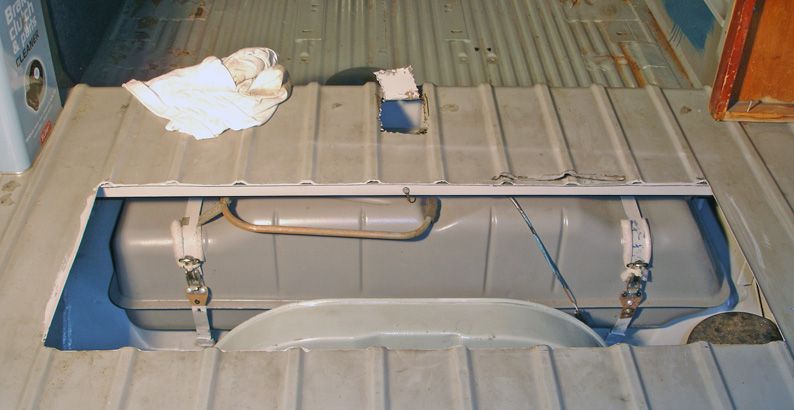
I welded some angle steel around the hole to tidy the edges.
Incidently, the smaller hole just in front of the new 'hatch' was made by a previous owner who had obviously had to get access to the petrol tank sender from above. I used a bit of the old floor I had trimmed out to make a neat panel to cover this, which I will screw down - usefull to have the access if I need it in the future as it is there already.
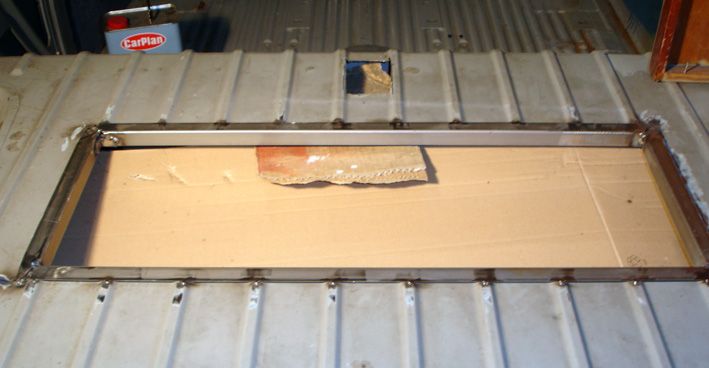
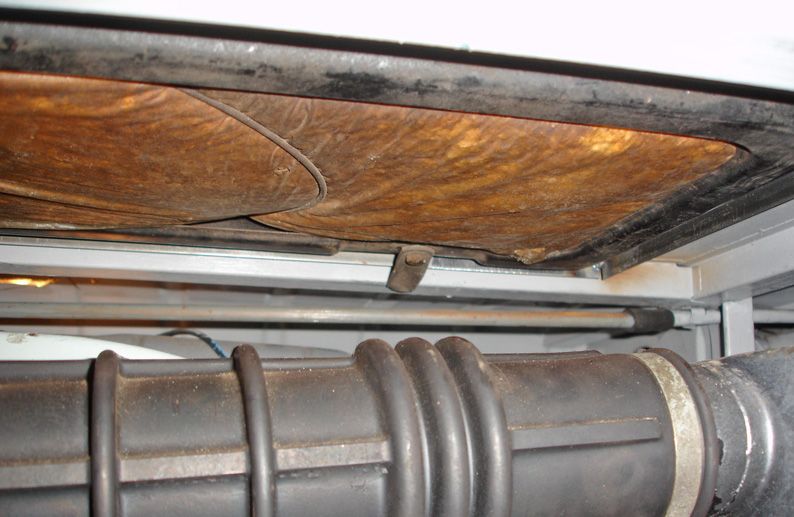
The 'original' hatch cover I bought off ebay a while back now fits perfectly (VW added an 'official' hatch above the engine in later Bays - makes working on the engine SO much easier - especially taking the engine out/in)
All looking much neater now!
Then it snowed, so of course I took the opportunity to go for a drive!
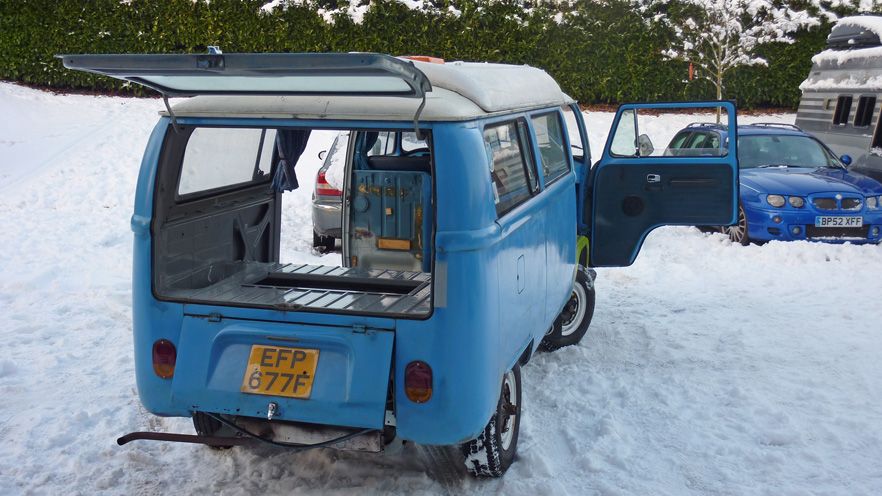

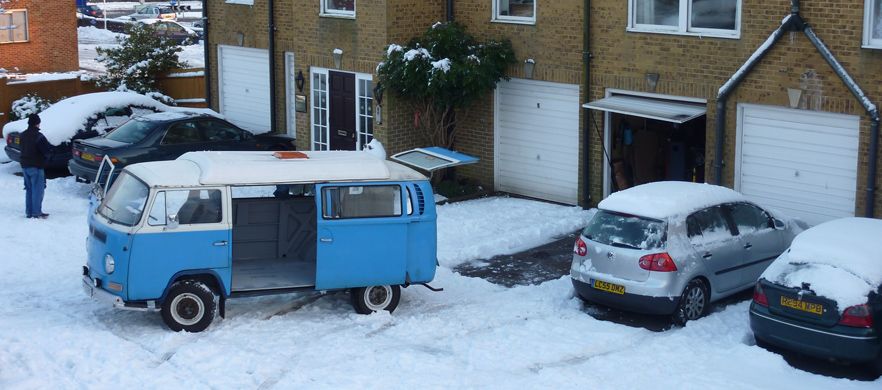
Really wanted to go and play (van is fully on the road - MOT etc) but resisted until I have finished rust-proofing everything - a lot of salt around right now!
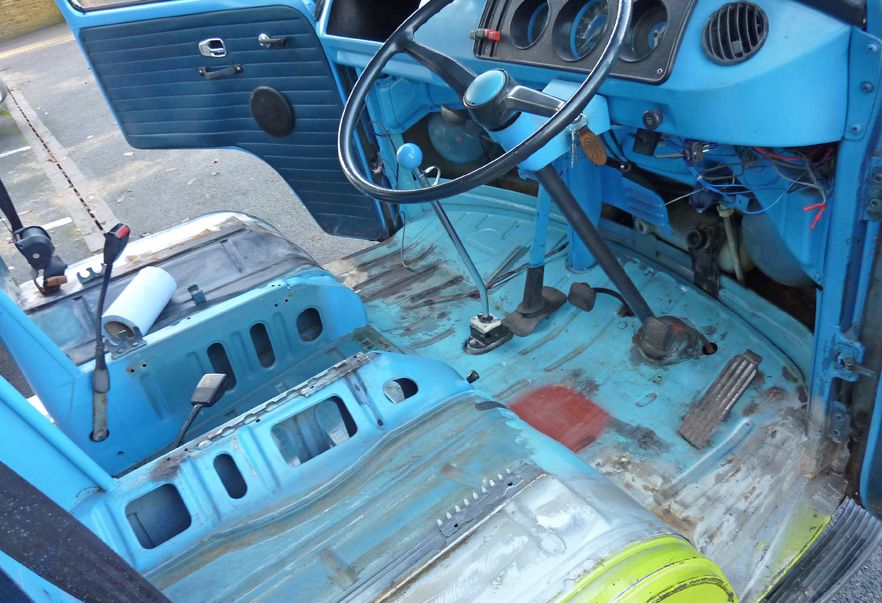
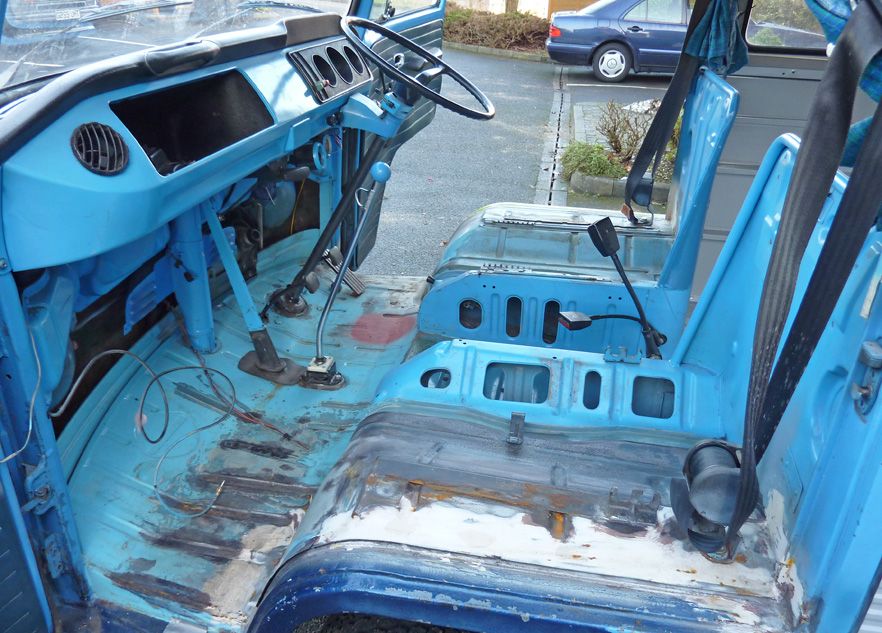
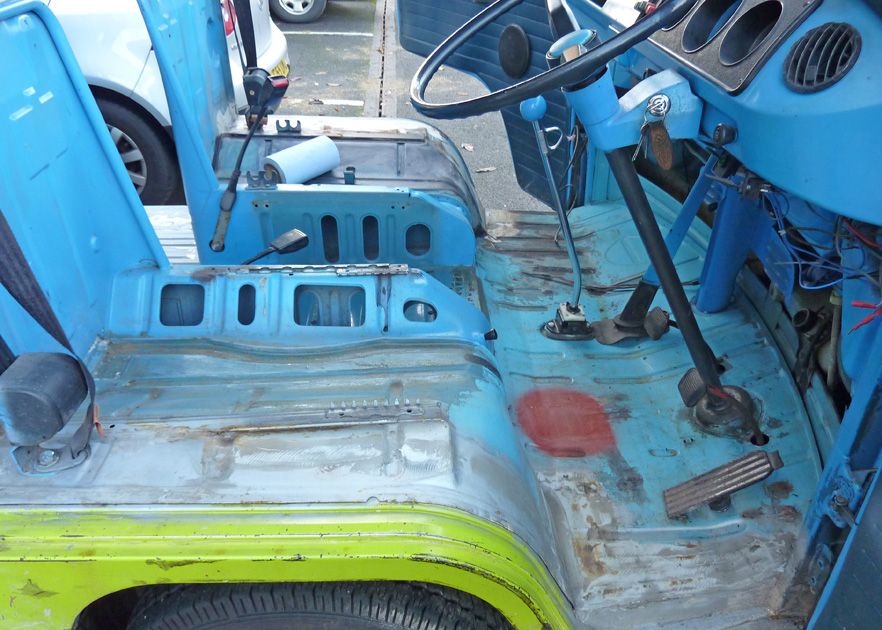
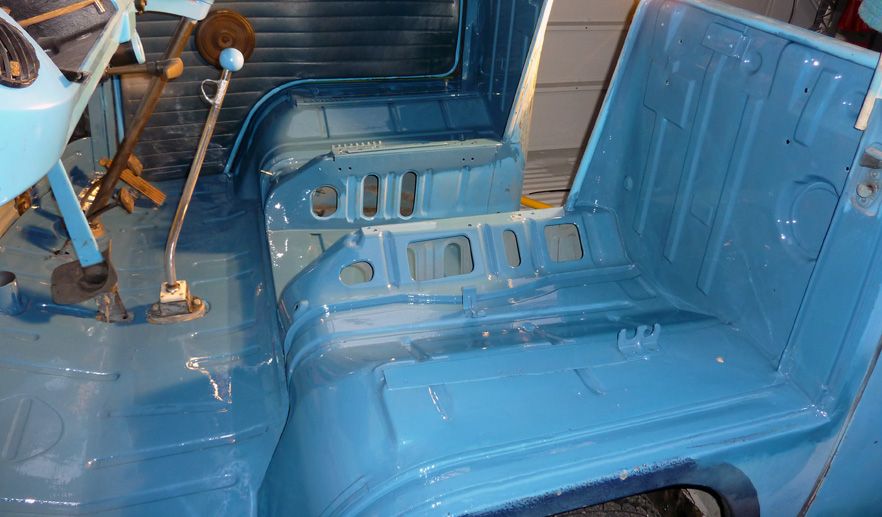
So....have now moved onto the cabin.
In the summer I replaced one of the arches - got loads of pics, and need to do a seperate thread on that some other time.
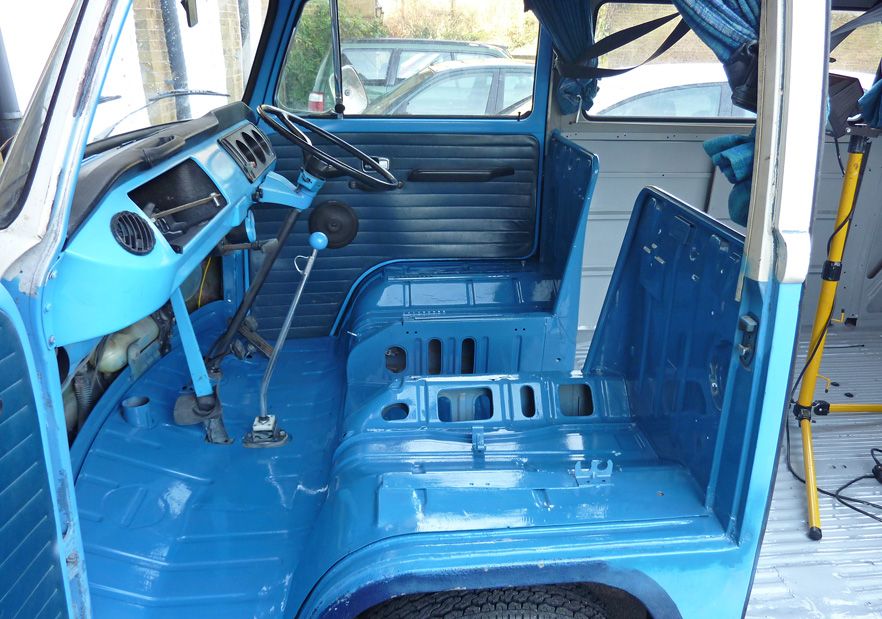
Ok - so the original original colour of the van is neptune blue. Long before I got it, it was painted another blue outside (and the white top) Then, I painted a lighter blue using Halfords spray cans - Lada Adriatic blue. You can see some original Neptune blue on the patch of floor inbetween the front seats.
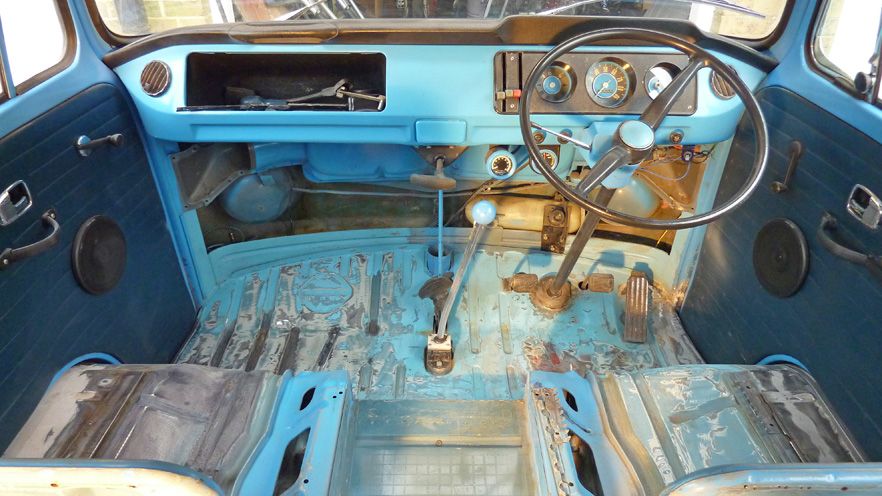
Now I want to take it back to a more classic colour - neptune is too far away from what I want 'my' van to look like, but have chosen a similar colour. I went to a pant supplier near Heathrow to get the grey Rustoleum, and whilst there looked at a RAL chart. Bloke said they could mix up any colour there and then, for the same price as a 'standard' colour, so I grabbed the chart and made the big choice! Could have spent weeks chosing - but he said they had some 'base' blue left over, so he mixed me up half a litre of my preferred choice for a fiver - enough to try it out - a 'tester'.
Well, I liked the colour, so I've used this can to do the front. This will be the colour of the outside as well - I'll do the dash, doors and trim later - again, this is just the 'base' going down for rust protection - again, hand painted but with a great result. Goes straight on, no primer, great coverage. I have applied two coats so far. Don't really need more, but just need to check it isn't patchy when it has properly cured.
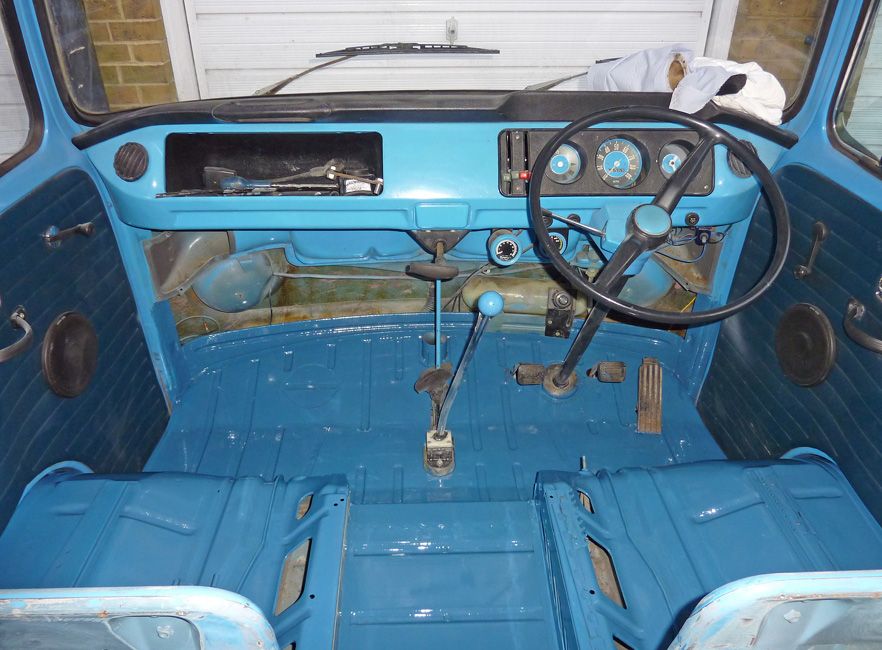
I'll take some better pic in the daylight if it stops sodding raining!
So - that where I am at the moment. Next stage is to start applying insulation - hopefully tomorrow. I want to get it done so I can rebuild the interior and get on and use the van. Hoping to add a few special features, making the interior mountain-bike friendly - but more of that later....
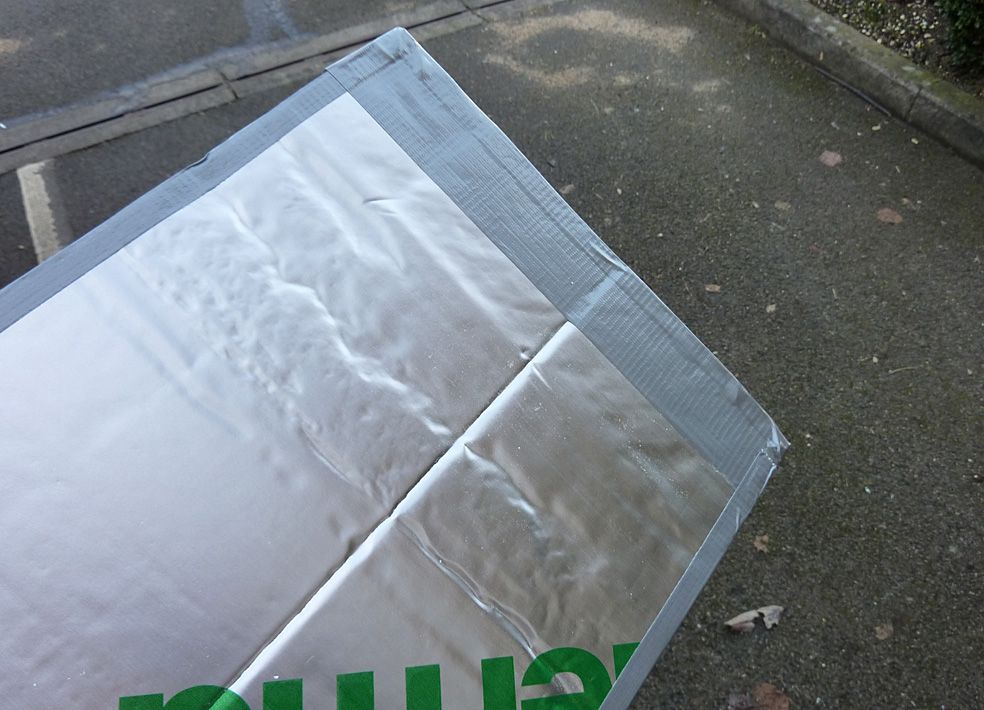
I shall be using flash tape (and some 'proper' sound deadening panels from Frost) and closed cell underfloor foam to cover the interior, with blocks in the side cavities...
...to be continued!!
phew.
Last time we saw it, I had just finished work on the underside, having cleaned and re-painted the chassis and added belly pans for weather protection:
Now the van is back on her wheels, I have carried on updating bits and bobs.
Having insulated the new heater tube under the pans, I moved to the engine end of the heating system.
First I had to repair a small rust patch inside the van, where the heater tubes just break into the interior:
...and then I used some of non-rusty bits of the old heater tube to repair the stubs that extend into the engine bay - the ends of these had turned to rust where they joined the plastic joining bellows - as seen here a few months ago!
Once painted, I added more of the thermawrap bubblewrap. I'll keep and eye on this, but I think it is far enough away from anything really hot to be ok.
I also wrapped the tubes as they came back together after passing over the torsion tube:
Then it was engine back in:
TOP TIP: As you can see, I keep a digi camera near me when doing these things! But can be really handy to either take pics to refer back to (especially where wiring is concerned!) or to see what things are looking like from a different perspective. Here are two examples. The first shows what the engine/gearbox join looks like behind the fan housing:
It shows the control arms for the air-flow flaps within the fan housing, details of how the tinware locates, accelerator cable tube etc etc
This second (unrelated) one is taken at the front of the van, reaching down in front of the handbrake and looking into the gap between the front panel and the floor. You can see the 'back' of the left indicator (low, obviously!)
The yellow crud is old waxoyl - the pink fluff is the remains of some loft insulation I had stuffed down there - removed now to replace with something better! It all looks ok there - a little bit of surface rust as a result of a small leak through the windscreen rubber - on the list!
Back to the rear of the van...and I am now moving onto the interior. I have decided to take all the interior out and re-paint the inside with the Combi-colour (Rustoleum) paint, after repairing any holes. I will be keeping the basic layout of the interior the same, with maybe a few tweaks and better materials.
...more of that loft insulation - all to be replaced.
I intend to insulate the interior for both warmth and quiet, hence the emptying of the interior - I need to insulate/isolate the engine cover. I tidied the floor, filled any old screw holes, and then gave a nice thick coat of light grey combi-colour. The colour roughly matches the grey the van was originaly painted inside.
I have stopped at the window line as I will do that bit more carefully later. Its a shame, but pretty much all of what you see freshly painted will be hidden by insulation and carpet! But this way, I know that there is a decent barrier on the metal, with no rust.
The paint is applied with a brush only, and goes on really well.
I shall be filling these cavities with insulation - more of that later.
Another job at the rear of the van was finally tidying up the 'hatch' that I had created with a chisel all those years ago in a French campsite, after my oil cooler fell off - another story!
For years it looked like a sardine can.
More recently I had tidied it up, but had to finish the job now before painting.
I welded some angle steel around the hole to tidy the edges.
Incidently, the smaller hole just in front of the new 'hatch' was made by a previous owner who had obviously had to get access to the petrol tank sender from above. I used a bit of the old floor I had trimmed out to make a neat panel to cover this, which I will screw down - usefull to have the access if I need it in the future as it is there already.
The 'original' hatch cover I bought off ebay a while back now fits perfectly (VW added an 'official' hatch above the engine in later Bays - makes working on the engine SO much easier - especially taking the engine out/in)
All looking much neater now!
Then it snowed, so of course I took the opportunity to go for a drive!
Really wanted to go and play (van is fully on the road - MOT etc) but resisted until I have finished rust-proofing everything - a lot of salt around right now!
So....have now moved onto the cabin.
In the summer I replaced one of the arches - got loads of pics, and need to do a seperate thread on that some other time.
Ok - so the original original colour of the van is neptune blue. Long before I got it, it was painted another blue outside (and the white top) Then, I painted a lighter blue using Halfords spray cans - Lada Adriatic blue. You can see some original Neptune blue on the patch of floor inbetween the front seats.
Now I want to take it back to a more classic colour - neptune is too far away from what I want 'my' van to look like, but have chosen a similar colour. I went to a pant supplier near Heathrow to get the grey Rustoleum, and whilst there looked at a RAL chart. Bloke said they could mix up any colour there and then, for the same price as a 'standard' colour, so I grabbed the chart and made the big choice! Could have spent weeks chosing - but he said they had some 'base' blue left over, so he mixed me up half a litre of my preferred choice for a fiver - enough to try it out - a 'tester'.
Well, I liked the colour, so I've used this can to do the front. This will be the colour of the outside as well - I'll do the dash, doors and trim later - again, this is just the 'base' going down for rust protection - again, hand painted but with a great result. Goes straight on, no primer, great coverage. I have applied two coats so far. Don't really need more, but just need to check it isn't patchy when it has properly cured.
I'll take some better pic in the daylight if it stops sodding raining!
So - that where I am at the moment. Next stage is to start applying insulation - hopefully tomorrow. I want to get it done so I can rebuild the interior and get on and use the van. Hoping to add a few special features, making the interior mountain-bike friendly - but more of that later....
I shall be using flash tape (and some 'proper' sound deadening panels from Frost) and closed cell underfloor foam to cover the interior, with blocks in the side cavities...
...to be continued!!
phew.
")