Lard's engine rebuild (* was "tight/on it's way out valve")

Early Bay Forum

Help Support Early Bay Forum:

This site may earn a commission from merchant affiliate links, including eBay, Amazon, and others.

lard

Well-known member
Joined
May 20, 2009
Messages
1,700
Reaction score
1
Location
Marlborough, Wilts
Hi,

Been having an issue over the last month or so with the van die'ing on idle - previously had an airleak that was resolved and during this period had pretty much every new ancillary going (carb, dizzy, elec ignition, inlet boots, cap, rotor, alternator, coil, leads e.t.c.) and it turned out to be a leaking servo pipe ( :shock: ) - all was then well for 7 months until a month ago when it started happening again,

Fired it up this morning no problems on choke - and was also running well when idling on my driveway this morning after I swapped over to my spare carb for around 30 minutes (revving it up and dropping back was fine, no issues at all) - took it for a drive and it instantly couldn't idle and needed loads of revs to keep going - seems to be when it's warmed up that I have this problem as a cold engine is o.k. whilst idling away on the drive,

I did pick up a tight valve when checking gaps after an oil change (all others were fine) - what are the symptoms of a valve on it's way out? I'd assume rough running (didn't note if this valve was exhaust or intake) - high revs it seems fine though doesn't sound quite right, low revs it just bums out,

Any thoughts welcome!
 
I should also add that I removed and blocked off the servo pipe to rule this out - the engine is also running hot (using the dipstick grab test) and bizzarely during the oil change I had a whole heap of crap in the sump, this was a grit like substance and was 2-3 mm deep on the sump plate.....may be related?
 
Are you absolutely sure your valve clearances are correct? My advice is go over them again making sure that you are adjusting valves on each cylinder at TDC on the FIRING stroke. Also check that your engine has around 30 degrees advance at around 3000 rpm - your advance mech may not be working and/or your timing is way out. Also check compressions - valves on the way out can often have burnt nicks in them that give low comp at low revs.

The gritty stuff on the oil strainer plate indicates and engine that has been very poorly maintained - long intervals between oil changes, strainer and mesh not cleaned at each change. DON'T listen to anyone who suggests flushing oil or other rubbish. If you use that you will kill your motor by putting all that crap throunh the bearings - it's better left as bottom sludge. Change the oil at 3K miles max - it should be a regular religious ritual..............
 
BJ1 said:
Are you absolutely sure your valve clearances are correct? My advice is go over them again making sure that you are adjusting valves on each cylinder at TDC on the FIRING stroke. Also check that your engine has around 30 degrees advance at around 3000 rpm - your advance mech may not be working and/or your timing is way out. Also check compressions - valves on the way out can often have burnt nicks in them that give low comp at low revs.

The gritty stuff on the oil strainer plate indicates and engine that has been very poorly maintained - long intervals between oil changes, strainer and mesh not cleaned at each change. DON'T listen to anyone who suggests flushing oil or other rubbish. If you use that you will kill your motor by putting all that crap throunh the bearings - it's better left as bottom sludge. Change the oil at 3K miles max - it should be a regular religious ritual..............

Cheers for the info - timing should be spot on as I've checked a few times now and changed the distributor and points to rule out of the equation - the oil change regime I can thankfully not take the blame for! every 1K or 6 months but not sure what the PO did but not as often by the sounds of it.

The valve gaps where set on the last oil change 6 months ago and since done about 500 miles - I check them as part of fault finding for this issue and it was only the one that needed adjustment - I've got a comp tester so will check compressions, I have readings from a year or so ago so can compare
 
i was having the same issue with not idling before my engine went pop. one of the pushrods blew itself out through the rocker assembly. not to make you worry or anything :oops: , i hadn't had much chance to check out the engine, so i probably had a few other issues. like beetle tinware, a badly broken carb and very few pipes being connected to the right thing. :lol:
 
antoine said:
i was having the same issue with not idling before my engine went pop. one of the pushrods blew itself out through the rocker assembly. not to make you worry or anything :oops: , i hadn't had much chance to check out the engine, so i probably had a few other issues. like beetle tinware, a badly broken carb and very few pipes being connected to the right thing. :lol:

lol - I'll take that as a worst case scenario :D

Though I had been thinking long term of upgrading at least to twin carbs to get a bit more poke - but had wanted the engine to first run well in stock setup, something I've never had nailed down 100% since I got the van - so rather than waste any more time on this one, which would appear to have been abused in it's lifetime, should I just bite the bullet and get a freshly built 1641?

Had started looking at forums on the usual vege/remtec reviews and have been slightly confused as to the best option - I'd budget circa £1500 - is this reasonable to get a 1641 with twin carbs? I've got all the ancillaries from my old engine.....thoughts appreciated!
 
Geeze said:
How much did the tight valve need adjustment by?
After only 500 miles, I'd be worried if it had tightened up by more than a thou or two :?

Hi - when I put it to cylinder 3 to adjust one had no gap at all - had to back it off to open it to 0.06 again, assume that's not a good sign?

Will check it again tomorrow night and see if it's still adjusted correctly - as it idled sweet then crapped out driving I'm wondering if putting it under load made the gap close up again?
 
Tested compression in cylinders 3 & 4 - 120 psi on both - this seems o.k. To me - though it's it's warm that I get the problem and iirc I don't want to be removing the plugs from a hot engine due to risk of stripping out the threads? Or did I just make that up? :)
 
lard said:
Geeze said:
How much did the tight valve need adjustment by?
After only 500 miles, I'd be worried if it had tightened up by more than a thou or two :?

Hi - when I put it to cylinder 3 to adjust one had no gap at all - had to back it off to open it to 0.06 again, assume that's not a good sign?

Will check it again tomorrow night and see if it's still adjusted correctly - as it idled sweet then crapped out driving I'm wondering if putting it under load made the gap close up again?

The barrels and the pushrods expand at different rates.
Although they have a gap when cold, once the engine is fully warmed up, they should have (theoretically) zero lash, ie. no gap. That's why when properly tuned and valve clearances set, aircooleds are notoriously rattly when cold but much quieter once all warmed up 8)

If the valve clearance is zero when the engine is dead cold, then the valve is still shutting and everything is ok but once the engine is hot, the pushrod is now holding the valve very slightly off the seat. Causes the poor running and means some of the full heat of combustion seeps round which gets to the valve stem which then fails...
Happens more on exhaust valves if they're tight because the inlet gets cooled by the intake charge.

Also all means that compression at cold will be fine (but it's still a good test, confirms it's likely to be valve related, not something else).

Good news is that if the compression is good and the bottom end is tight with no end float, then a top end rebuild isn't a big job and much cheaper than a complete new motor. But it's showing signs that would make me want to have the head off for an inspection. If you want to do another check before pulling the motor then one other test is to see if the exhaust port on that cylinder is getting much hotter than the other three.
 
Cheers for the advice - much appreciated,

I've started to think that I could do this myself - rather than take the easy (and expensive!) option of writing this engine off and putting another in, especially as I'm not 100% if this is the issue without dropping the engine - but if I need to take it out and spend some time & effort on the heads then I think it's money that will be well spent,

even if worse case I put the engine back in and still have the problem - it would be great to get the engine to a baseline condition and know that all is good - and also makes me learn which can't be a bad thing, haven't dropped the engine before so I might have some noddy questions about what to do once it's out!
 
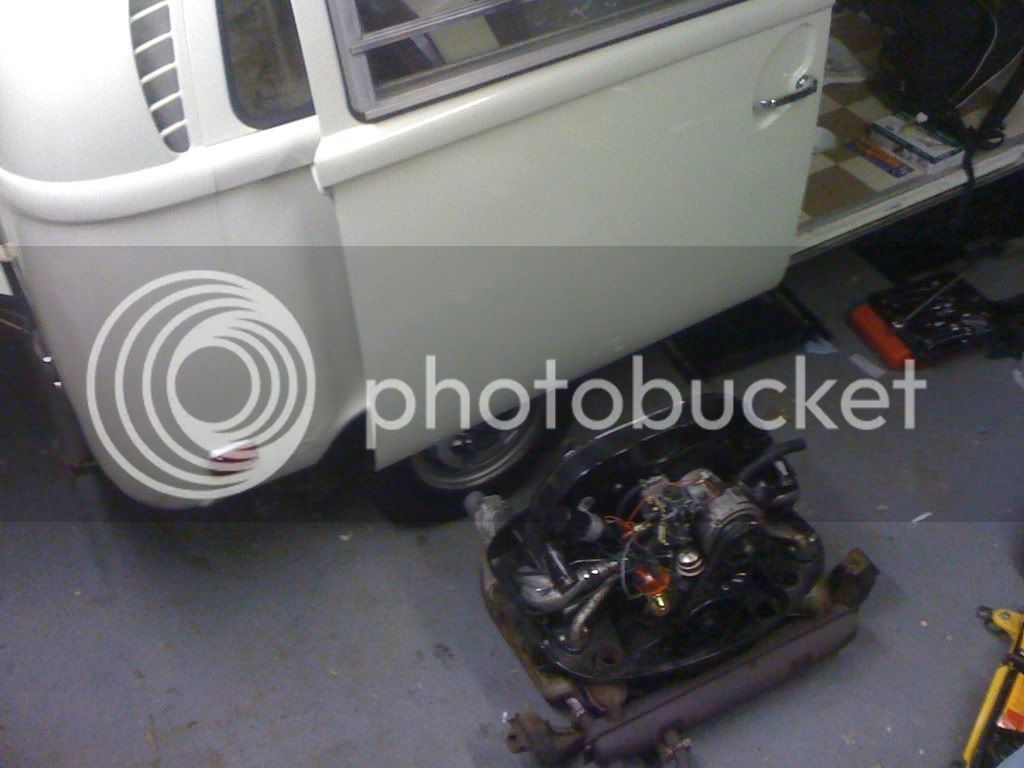
Well......that was easier than I thought :shock:

3cb849d2.jpg


slight issue with fuel hose not wanting to come away but some snips sorted that - also didn't chock the gearbox so going to raise it up now and strap in place

Going have a good search about to see what I should now be doing :D
 
When you raise your box, try to do it reasonably soon, don`t keep putting it off. I used a rachet strap on mine, and it worked a treat, also a bit more adjustment for when you is gonna slip him back in and want it all to line up ;) Just hooked it round the chassis both sides. Well it`s on the deck now ! :?

Ozziedog,,,,,,,,,,, Let the games begin !!! :lol: ;) :lol:
 
The famous 'it's only four bolts...' moment :lol:

If you don't have one already, Bentley manual is a good investment at this stage, far more reliable than google :D

Heads off is worryingly simple nut and bolt job, only 'technical' bit is shimming the rocker assembly if you put new heads on.
Oh, and if you don't have a decent torque wrench, nows the time to buy one 8)
 
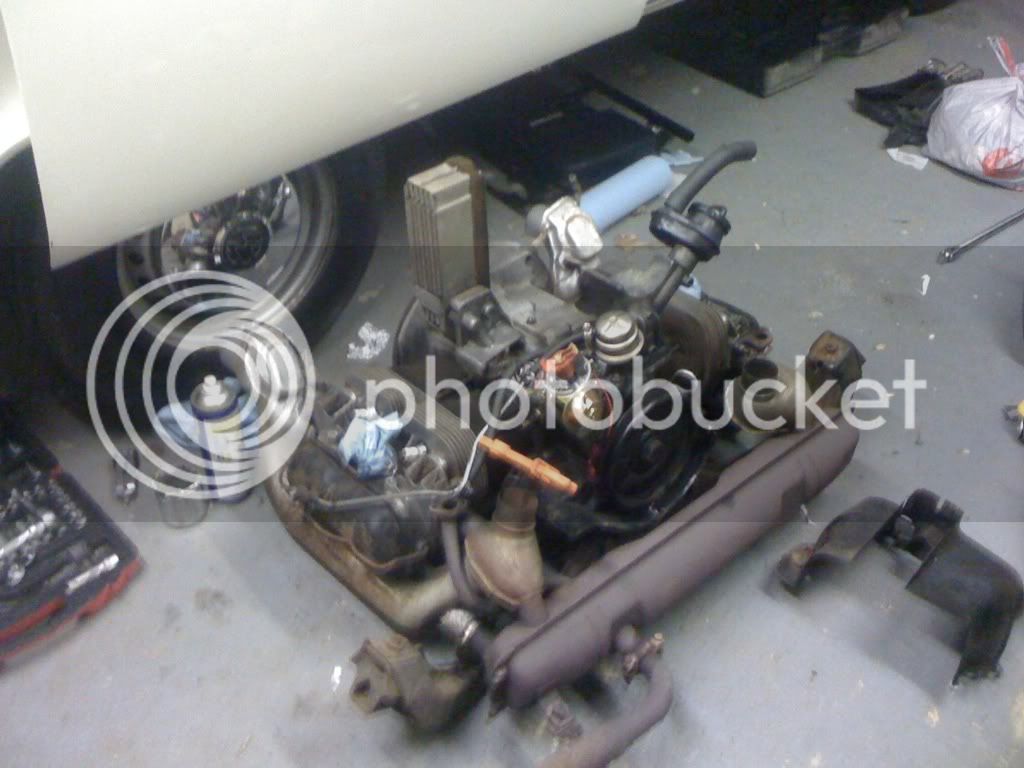
Making good progress so far - all the tin has been removed along with the manifold and alternator:

cbfa878e.jpg


Already started my parts list for when it goes back together:

Need:
top engine bolt
heater cable barrel
fuel filter
hose clips
Fuel hoses
inlet manifold boots
inlet manifold gaskets

Need to remove the heat exchangers and exhaust next to free up the heads and get ready to remove (I assume I'll need to chock up the block as it's likely resting on the heat exchanges at the moment)

The exhaust has seen better days and is quite corroded so I'd like to replace......hoping there's something after market that will drop in and keep the exchanges and not need any modifications? I'd like something that looks and sounds less weedy that the stock one?

And if I'm changing the exhaust (this is where my mind starts to wander) I could change out the carb .... and if I need new heads once they are off then I could go all the way and get a new set of barrels to bring it up to 1641....the case is fine with zero end float and I'm thinking whilst I'm taking it apart I can stick some uprated bits back on ...... and this is when I tell myself to calm down :D

Anyway - thoughts on modifications?

Optional:
exhaust
progressive carb
1641 barrels & pistons
2 x complete heads
push road tubes & seals
 
Ok, if it was me.....

Vintage speed exhausts seem to be really nicely built. But they're expensive. Failing that, there's a world of options out there, pays your money and takes your choice? Exhausts can really help even a stock motor breathe though...

Wouldn't do a progressive (and this from some who's got one, but in my defence, the bus came like that), still have horribly long intake runners and other design flaws. Remember, when the factory upgraded the carbs, they went for twin carb :msn4:

1641 is a potential upgrade, but only if you take advantage of the extra bore to help flow around the intake valve. If your current pistons and barrels are good, you won't notice the extra 60cc.

As you've already got twin port heads, you can either get what you have rebuilt (check for cracks first) or just get new ones. Off the shelf heads often still benefit from having the valves lapped in though. For pushrod tubes, some folk say always use new and some say it's ok to re-extend the old tubes by pullling them back out. I've done both, with mixed results, so don't have an off the cuff answer. But either way, invest in decent pushrod tube seals (not the cheap orange ones that come in the gasket sets), well worth it. Its that of just tip oil on your garage floor :lol:

Only other 'mod' I'd suggest would be ratio rockers (1.25:1), worthwhile pep without splitting the case. especially if you've got to shim the rocker pedestals anyway, and bolt up shafts because the stock spring and clip arrangements is just lame 8)
 
Thanks for your advice on this, I've also been researching a bit and *think* I've got a plan - I've also changed the title of the thread :)

Got the first head off from 3 & 4 - no cracks inside around the valves but there is one in the casing on the outside near the spark plug on 3 - just seems to be in the cooling fins and about 15mm long but I reckon get it changed if it's started to go - yet to take the other off but assume it's best to replace in pairs...only other issue noted so far is that the exhaust wasn't sealed properly on one side where it connects to the heads (loads of crap blown back onto this head) - could this have been the cause of my idling woes?

Had a look at the pistons - lot's of black enamel type stuff on the two I've seen but I'm now convinced that if I'm going to the expense of news heads then may just as well bite the bullet and upgrade it all in one go so will plump for the 1641 barrels and pistons,

Specced up the parts for a electric fuel pump to run twin carbs - machine7 are showing the weber 34 ICT's as back order - am assuming it's still the case of a false economy to save the £70 and get in stock empi's.... :shock:

It's getting expensive now so had a look at the vintage speed and whilst it does look great instead thinking of a bugpack single quiet pack - one question is can I still run this with heat exchangers? the pictures seem to indicate that I'll be missing the hot air pickup connections from the manifold....I'd really like to keep my heat exchanges if possible?

thanks!
 
As far as I understand it, heat exchangers and J tubes are interchangeable as long as the diameter is right. The heat exchanger is just a glorified J tube anyway, right?

I think Bugpack do 4-into-1 headers with the heat riser sections. Looks like they do from the pics. That's what you need for your single carb. If you're going twin carbs, might be easier to get a header without heat risers, so you don't have to block them off.
 
Cheers - *think* they come blanked and you have to drill if you need them so fingers crossed :)

also took a look at a few piccies on samba and it looks like the air hoses from the cooling shroud just need routing down and attaching directly to the heat exchanges (where before they went into the little box jobs on the old muffler)

Took the plunge and ordered the bits today from machine7 - heads are on back order but only a few days so will get to start the build up hopefully later this week,

Now stripped both heads off the block - other side again hasn't got anything iffy on the inside but the outside does have a crack again in the casing by one of the bolt holes, guessing it was incorrectly torqued (or torqued in the wrong order - or I did it taking it off!)

barrels on that side are also clean but with loads of black enamel type crap over the pistons and around the valves - assuming this is just from usage not any indicator?

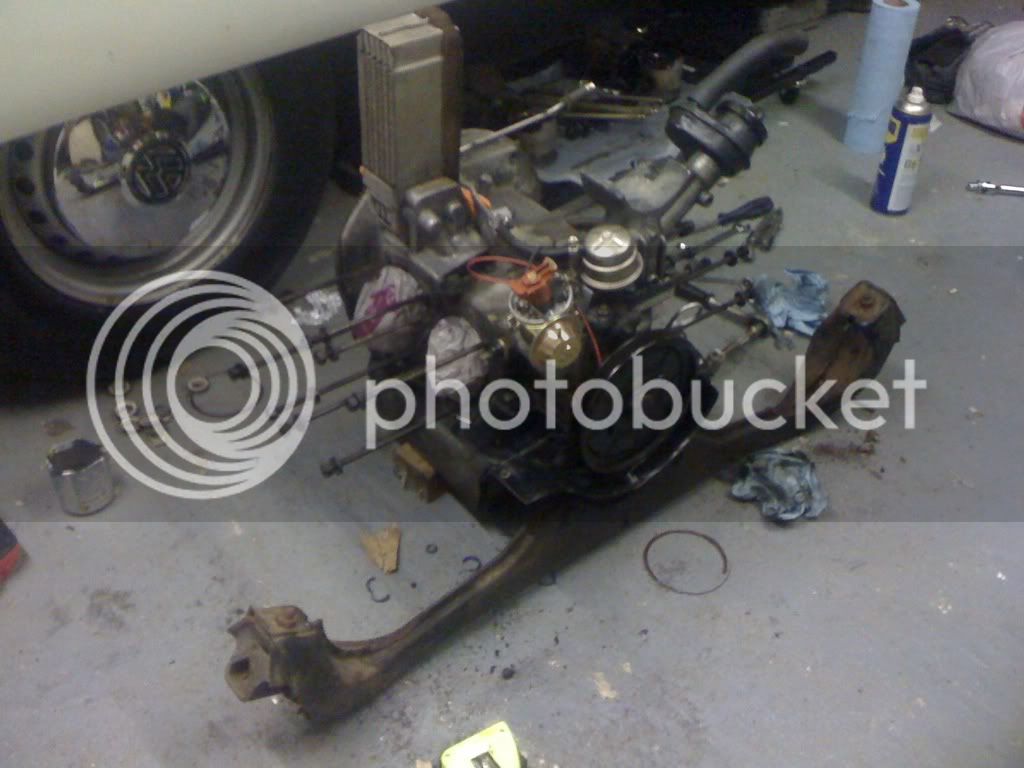
Here's progress so far - was going to clean up the case but don;t want to risk getting anything in the holes of the block so will just give it a wipe down as most of it will be hidden behind tin anyway:

8cedfd39.jpg


So tomorrow night it's remove fuel pump and blank off and then install the new pistons and barrels - any tips/gotcha's for this? I'm just going to fit new paper rings and re-use the fittings and circlips from the old pistons (as my theory is the barrels that hold the pistons in will have worn in tandem with the arms that bolt onto them?)
 

Latest posts

Top