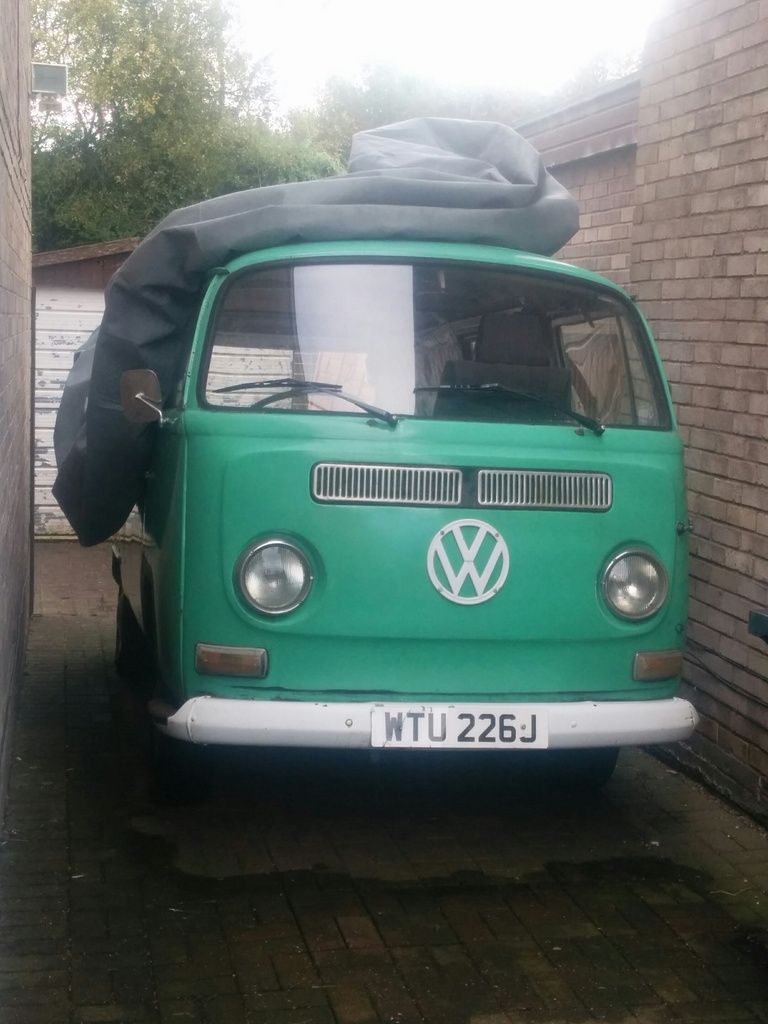
My 71' Tintop Dormobile

Early Bay Forum

Help Support Early Bay Forum:

This site may earn a commission from merchant affiliate links, including eBay, Amazon, and others.
I got around to spend some time tackling the rear vallance, which I had removed as a rainy day project :roll:

IMG_20160617_134846_zpsitvkrjk8.jpg

IMG_20160617_134900_zpsppkolkff.jpg


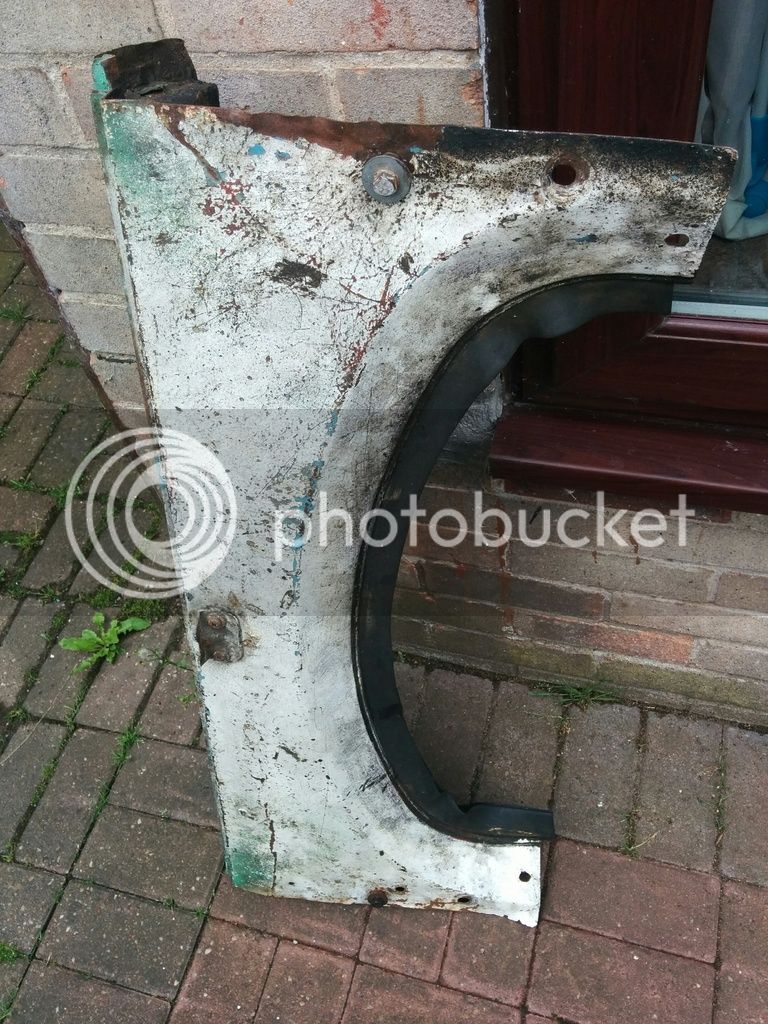
I was told it wasn't worth saving, but then I saw the price a genuine rear valance was fetching, and I soon set about mine!! :lol:

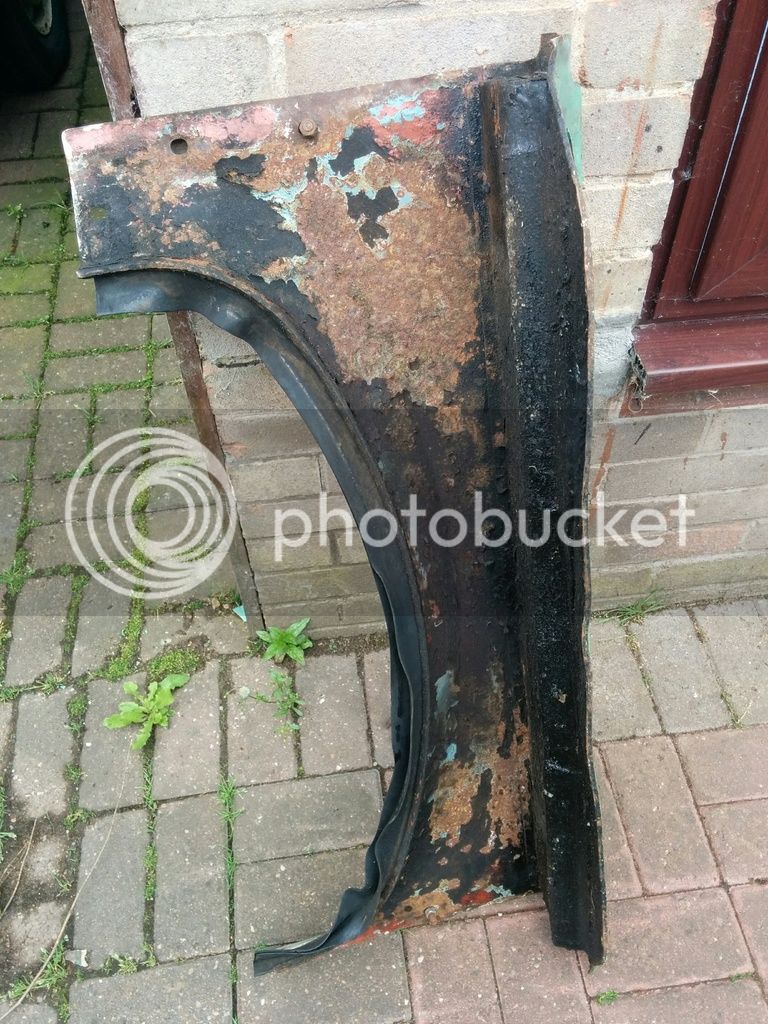
Straightened and sanded down, treated with Kurust

IMG_20161005_173325_zpsblucfpmp.jpg


And in primer

IMG_20161005_173856_zpskfpcqmap.jpg


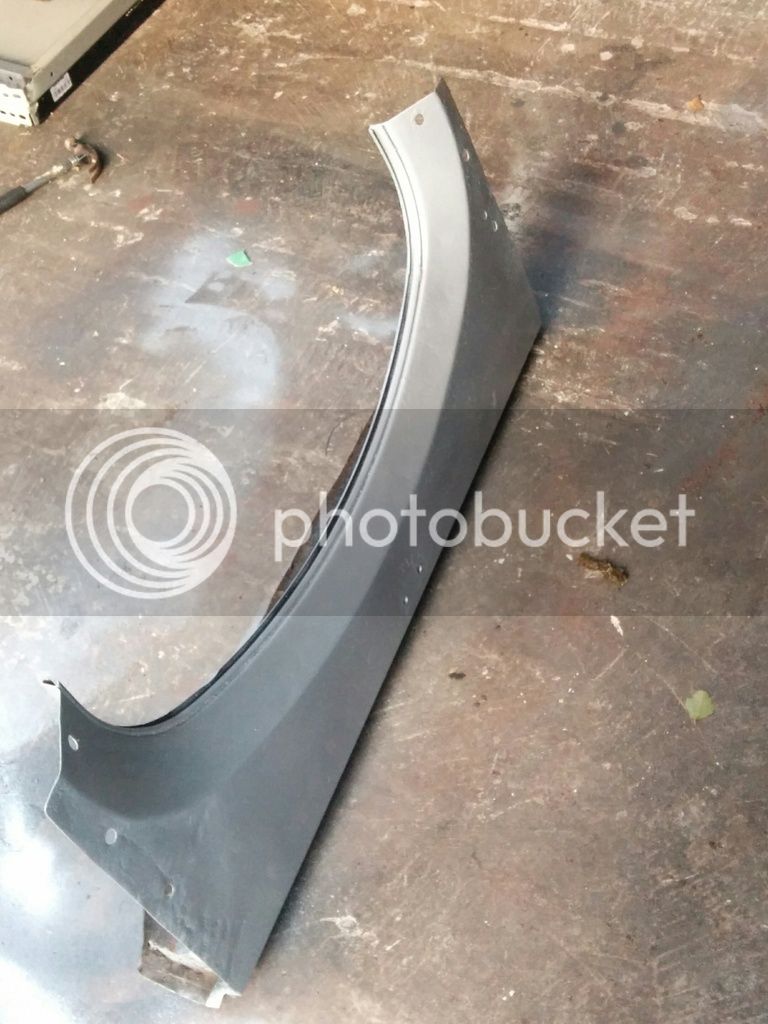
Just needs some welding work doing to its face, or perhaps I will get away rebuilding the face with fibreglass IDK. :msn4:

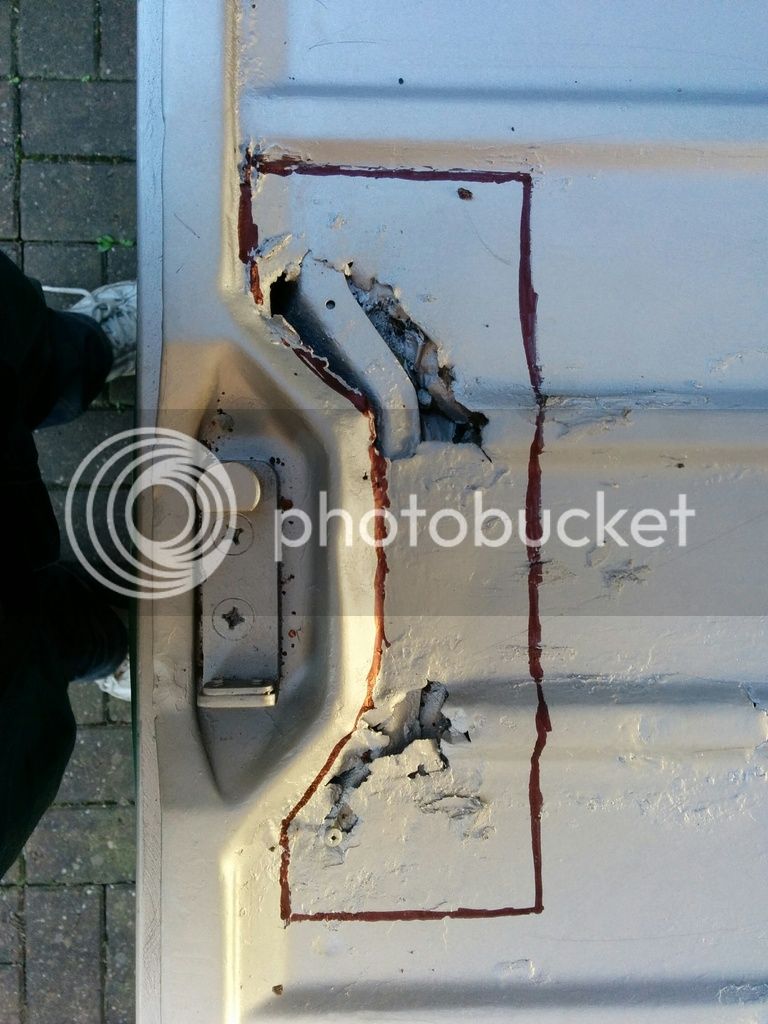
In other news, ive started working through the newly painted parts of my bus, marking areas that need some attention with the magic welding stick

IMG_20161005_173312_zpsxyb0eyzy.jpg


Lets hope we get another dry weekend before the weather turns...
 
gninnam said:
Just had a ganders at yer thread and good work so far :)

Thanks pal, its crackers how much time you have to throw at these busses and very little to show!
hopefully there will be some major changes over the next few weeks :msn4:
 
Waiting in for delivery...

So the time has come to remove the old, broken engine from the van.
I have never removed an engine before, and I must say it was very simple to do..
the weather had given out rain, so I left the cover draped over the van incase I needed to quickly cover it.

IMG_20161013_093952_zpsofdegfcf.jpg


Trolley jack was 30 quid from Argos.

IMG_20161013_112941_zpsu0uzgiid.jpg


Rolled the engine out on two skateboards :lol:

IMG_20161013_114516_zpsihzbsgur.jpg


Took the fan housing off, aswell as the coil and dynamo. I will need to strip all the tinware off eventually, and fettle, wirewheel and repaint them.
None of the tinware is too badly damaged, although I might end up buying a new fanhouse without the airducts as I wont be using them. Nice and clean look

IMG_20161016_135315_zpsgnv2p8vn.jpg


Lot of endfloat from this engine, and from what I can gather she has been round the clock once, and half way around again so its about time for her to expire :lol:
Stopped being able to keep oil in her.

Neways, I was waiting for a delivery, so after the engine was out, I was left twiddling my thumbs until my package came. Gave the dashboard a quick clean, and added a badge I had lying around

IMG_20161016_135245_zpsewc7ad1h.jpg


And then the parcel arrived.... 8)

IMG_20161016_135531_zpskhrczydd.jpg


Its another twinport 1600, out of a 73' bus originally. Thanks to Craig (Cornish Silver) on here, finally my bus has a working engine! Brought along with it the twin Weber 34ICTs which he had been running his bus with since he brought it from Alistair (Aogrady)

IMG_20161016_135705_zpsdxvxlur8.jpg


IMG_20161016_135854_zpsy1twdhea.jpg


Looks like im going to have a fun few weeks ahead... 8)
Next step, clean the engine bay before assembling the new engine

Thanks for reading,
 
Good luck with the setting up, hope all goes smoothly. Your thread has inspired me to clean my coloured dash light diffusers sometime soon, they look super clear and clean 8)
 
CornishSilver said:
Good luck with the setting up, hope all goes smoothly. Your thread has inspired me to clean my coloured dash light diffusers sometime soon, they look super clear and clean 8)
Thanks pal, and thanks again for all your help.

Hows the engine running?
 
Engine Stand + Modification

I decided to get myself an engine stand now that two engines were in my garage.
I plan to build up the tinware, carbs etc on CornishSlivers old engine, and then work on the engine out of my bus on rainy days, just so I have a potential backup.
Worst case scenario is I have a crash course in Aircooled, but the engine is toast like I thought... least I would know the twinport engine inside and out... :idea:

Neways, after doing a bit of research, and asking for a cheap and cheerful engine stand, I brought this beauty off fleebay.
http://www.ebay.co.uk/itm/262610361394
Bargain £38 quid. I was advised against buying a three wheeled stand, although cheaper they aren't very stable :lol:

IMG_20161025_214938_zpsgtq6xwia.jpg


The engine stand came with no bolts to connect it to the engine, and I did some digging on here and TheSamba, and I could not find anyone with a definitive answer to which bolts, lengths or adapters I needed.
Some people were even saying that this type of stand is not able to be connected to an Earlybay engine at all!
Most sellers of the parts weren't even listing their threads or lengths!

Thinking cap on.

There are two bolts on the top of the engine to transmission, both M10, one 70mm, the other 110mm. The bottom two are studs, meaning they are threaded on both sides. they are M10 x 82mm.
All of the bolts to the engine would have been too short to bolt onto the stand, and I could not remove the bottom two studs.

I went to my local fastenings wholesaler, and purchased M10 x 120mm X 4, a tonne of washers and appropriate nuts. These kinds of places normally serve the trades in large quantity orders, so over-the-counter small purchases like these are cheaper than you might think.

The top left bolt on the engine is not threaded into the engine body, wheras the bolt on the top right is captured with a welded nut onto the casing body.
For these two I used the following. M10 x 120mm Bolt, 11 Washers, and two Nuts each.
When attached to the stand bracket this meant they were both even. Any more washers would mean that there would'nt be enough thread on the right hand side.

IMG_20161025_215125_zpsmesf7die.jpg


The bottom two studs would not budge, and 2bh I didn't try very much to move them either. :lol:
I realized that the shape of the engine stand mount wouldn't let me use all four mounting points on the engine without some modification.
Instead I used an angle grinder to cut off two sections of thick steel from an offcut, and drilled two holes in each that would take the M10 thread
(this took absolutely forever and left me with tinnitus for the rest of the day :shock:)

For the bottom studs I used two Nuts, capturing the improvised adapter. Then a M10 x 120mm Bolt, 2 Nuts and 2 Washers

IMG_20161025_215221_zpssydll24g.jpg


IMG_20161025_215439_zpstnaohsoj.jpg


IMG_20161025_215258_zpskquq9l1v.jpg


Hope this helps someone in the future when they are attempting something simmilar.

Thanks for reading,
 
It is with regret that we have made the decision to sell the Bus. :|

It's been sat on our drive now for over two years and we are about to move house. It was a well thought out decision, and I know one I will regret long term, but the Bus has to go.

I have posted the Bus up for auction on EBay with a starting price of £750, I have also taken selection of pictures today.

EBay link here: https://tinyurl.com/z5ynofy

Included is the 1600 engine I brought off CornishSilver, Alastair's old bus, complete with J tubes and twin Weber 34 ICT, as well as the vans original engine that needs some serious work and a bunch of tinware.

Also two sets of front seats, two out of a BMW M3, and two microbus seats I sourced from down oxfordshire

There's also a tonne of engine spares, and cables, belts etc in three large boxes
 

Latest posts

Top