hi all
after having many splitty`s, bugs, kg`s i decided to buy a bay, a vehicle that i had very limited knowledge on as to changes over the years. i was searching for a while and after getting a few, lets say not very helpful comments from sellers, that done themselves out of a sale, i found this one.
its not pretty but i can see through that. mechanically its sound, and the underside is great too, albeit due to a coating of under-seal :roll: something i don't normally like to see but in this case it saved it from certain death i guess. drove the 320m to Ilfracombe viewed it, test drove it and to be honest it couldn't pull the skin of custard. so went against my better judgment and struck a deal. drove it to croyde where we spent the weekend surfing. had a tinker with the carb and it drove loads better, even managed the drive home and cruised at 65 -70 mph all the way.
plans: get the bodywork done, just bought the front arches, correct lower front panel and a rust free tailgate, searching for a pair of cab doors. and lose that god awful rag top. maybe fit a dormobile top or something like that. the guy i bought it off did not know what conversion it originally was, so if anyone knows of how i could find out
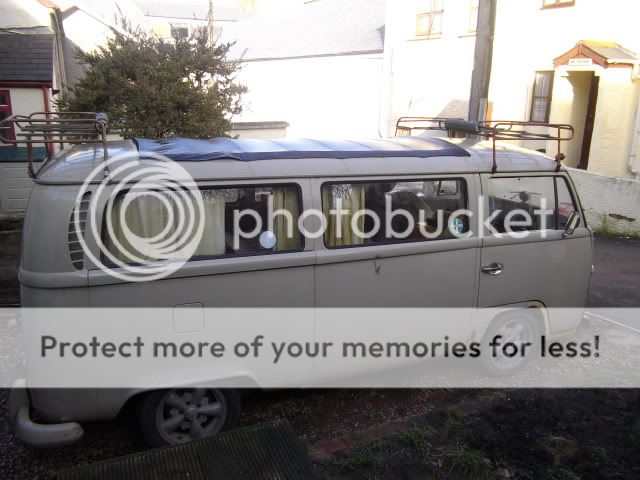
i didnt buy the racks, he didnt want to sell them.


thats all the pics i have at the mo, will be sure to post progress pics up as and when.
after having many splitty`s, bugs, kg`s i decided to buy a bay, a vehicle that i had very limited knowledge on as to changes over the years. i was searching for a while and after getting a few, lets say not very helpful comments from sellers, that done themselves out of a sale, i found this one.
its not pretty but i can see through that. mechanically its sound, and the underside is great too, albeit due to a coating of under-seal :roll: something i don't normally like to see but in this case it saved it from certain death i guess. drove the 320m to Ilfracombe viewed it, test drove it and to be honest it couldn't pull the skin of custard. so went against my better judgment and struck a deal. drove it to croyde where we spent the weekend surfing. had a tinker with the carb and it drove loads better, even managed the drive home and cruised at 65 -70 mph all the way.
plans: get the bodywork done, just bought the front arches, correct lower front panel and a rust free tailgate, searching for a pair of cab doors. and lose that god awful rag top. maybe fit a dormobile top or something like that. the guy i bought it off did not know what conversion it originally was, so if anyone knows of how i could find out
i didnt buy the racks, he didnt want to sell them.
thats all the pics i have at the mo, will be sure to post progress pics up as and when.