my first complete build 69 bay deluxe from Texas

Early Bay Forum

Help Support Early Bay Forum:

This site may earn a commission from merchant affiliate links, including eBay, Amazon, and others.
Kdashh all I can suggest about engine rebuilding is to read forums matey as these places are invaluable for information and advice . I had the long block built by Steve strong at a cost of 625 which I think is a really good price,plus Steve was really knowledgable on running in prosieger ,as for the rest of it I just took my time putting it back together , I am aiming to get the engine back in this weekend weather permitting ,,
 
Hi Dave
Yea good forum Dave signed last July ,some really great threads on here and get a lot of inspiration and good feedback....

As for the Puck I think I,ll leave the curtains for Mich to fit ....
 
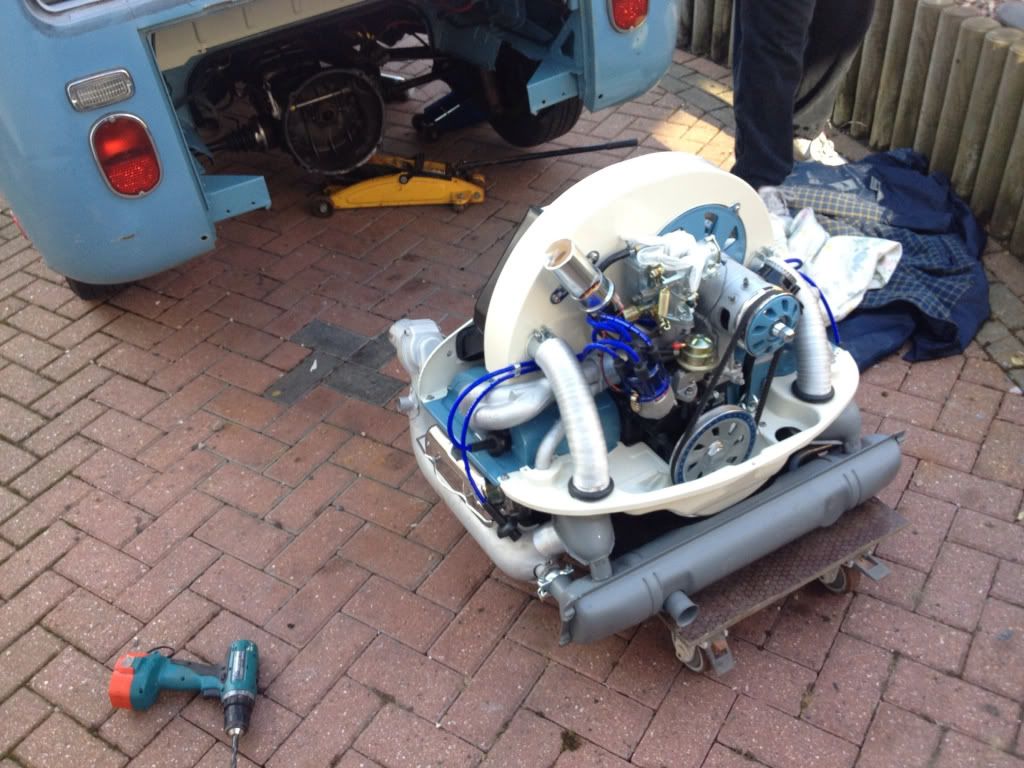
It's seems like ages waiting for the weather to clear up and today was the day,
In goes the engine


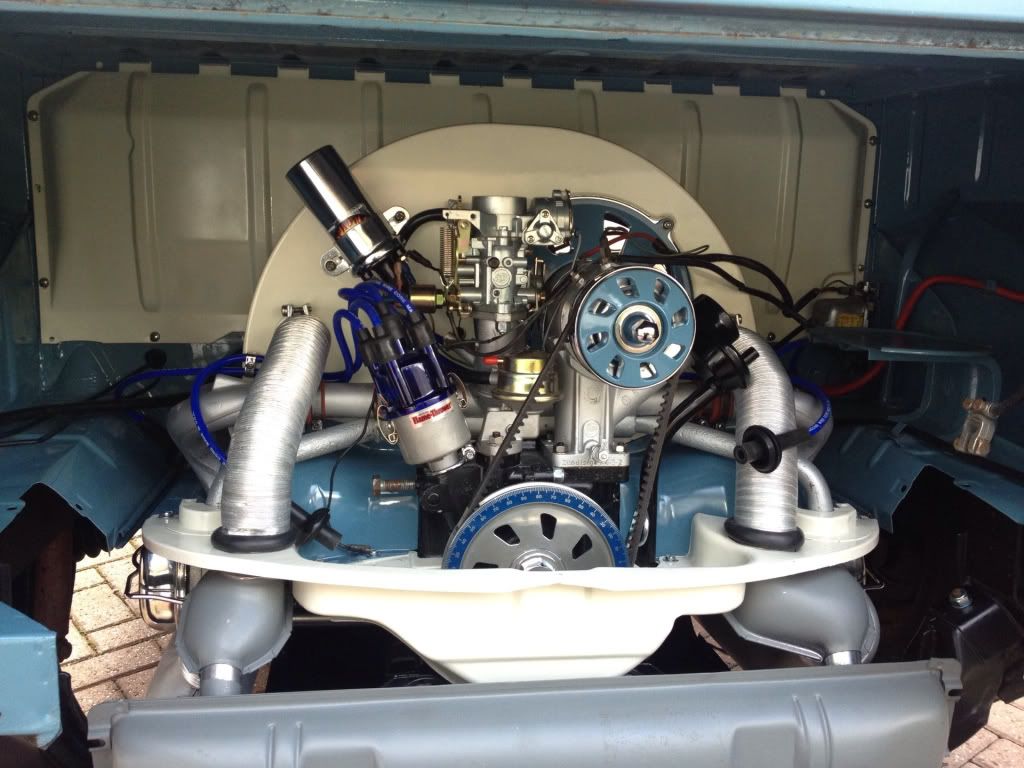
Finally in!
Can't fire her up as the shred it different on the block to the one on oil pressure switch, Not the ending I had wished for but not worth the risk on just blocking to hole with a bolt !
So will have to wait till I get the right one.
 
your engine looks fab, can you tell me what its painted with etc.. thankyou :D
 
69billy said:
your engine looks fab, can you tell me what its painted with etc.. thankyou :D

Hi 69Billy
I painted with cellulose as the chap down the body shop said it would be fine and as my other bay was painted using same paint with no issues ..
kev
 
Found out that the hole for the oil pressure had for some reason been tapped out to m12 :evil: so the m10 oil switch would,nt fit .
but have found that Demon tweaks do an adapter m12 male to m10 female :D
 
Hi all
Can any one recommend some one near to me that tunes air cooled
I'm near Brighton
Cheers kev
P.s engine running quite sweet just need that professional toutch As do t want to run her to lean
 
:( not happy van failed mot today on all the lights as they are american spec....doe anyone know how to do the conversion ,,,strange it should fail on this as it had mot on it when i brought it..... :evil:
 
What did he mean by all the lights, didnt he explain what you needed to do.
Im guessing headlights must dip to wrong side, wrong colour lenses at rear etc.
Shouldnt be to hard to sort, not after fab work you did on engine and gearbox rebuild.
 
Try Karl @ Wolfsburg Wizards for a tune up.
http://wolfsburgwizards.webs.com/" onclick="window.open(this.href);return false;

Have your rear indicators been moved in to the reverse lights? Thats what mine has, so you can keep the all red rear lenses. It won't pass the MOT with the indicators in their original location.
 
dubscum said:
61 stu said:
seeing that engine bay makes me want to do mine, awesome looking bus 8)

I know what your saying Stu, seeing that engine makes me wanna ...... look at more while drinking beer :D

to be honest Ash thats about as far as my engine overhaul will go to ;)
 
Saw the bus running round the streets this morning, guess the lights are all sorted and bus now MOT'd, look forward to seeing you at Volksworld on Sunday.
 
Time for a bit of an update on my progress
I've been lucky to secure a corner at one of the workshop at my place of work so I am now tackling to body work
3jdFt.jpg

Striped out and for the hardwork
KgTCP.jpg

A few gremlins to sort

XEtdB.jpg


HWCyd.jpg


K5VOI.jpg

JFjxi.jpg

17YxA.jpg

o0NOF.jpg


So that's where I am at at present ,there will be a few mor long nights to follow im sure,
 
Just a quick update on my progress
After many hrs of rubbing down and uncovering any rust demons I am now at the stage of repairs
It has been nicknamed the U boat...
worked hard on getting the panel straight on one side so far as the panel bracing from new has put quite a lot of imperfections in the panels ,most have been removed with hammer and dolly but could not get to the ones where bracing has been spot welded ,so some filler had to be applied all for the right reasons .
LEzo7.jpg

uDcdr.jpg

We found that most of the rust demonds where around the window apertures,
Here is a before and after
dObA7.jpg

GT0ot.jpg

Cooling the panel so as not to distort
ruEey.jpg

e2DFg.jpg

Also replaced sill as there where a few perforations many at one end ,but easier to replace whole cill
5aUHm.jpg


So that's where we are so far....kev
 
Another update on my progress,to be honest and a lot of you out there must have felt the same way that I have over the past weeks . I seem to be putting so many hrs and don't seem to be getting any where fast.i can't believe just how much work is involved in bringing one of these back to life.my respect goes out to all you people that have gone and are going through a restore.
After the last few evenings and today I feel all my hard work is paying off as one side completed ,etch primed and primed ,
5pOqN.jpg

Last bit of rotten metal
E7tZX.jpg

zjPq5.jpg

zECn1.jpg

szK4f.jpg

Had a few bits sent off for soda blasting,as seen in pic reweilding back in place as had to remove to expose rust
sBMWH.jpg

And here she is looking all one again .
G0nIa.jpg

Thought I'd just show this bit of American engineering ,made us laugh
Throttle pedal was looking a bit worse for ware so I had brought one at dubfrezze
iRgjX.jpg

Last time I saw one of these it was on a gate lol
OQzMF.jpg


Well that's it for now ,I will be starting the repairs on passenger side in the following evenings....
 

Latest posts

Top