Winter work thread

Early Bay Forum

Help Support Early Bay Forum:

This site may earn a commission from merchant affiliate links, including eBay, Amazon, and others.

creationblue

Well-known member
Joined
Jul 12, 2007
Messages
5,376
Reaction score
541
Location
Bristol
So its been a fantastic summer out in the bus, hope you guys have enjoyed your van's as much as I have and covered some trouble free miles!

Thought I'd start a thread documenting winter jobs that need attention on my bus and you can add yours too. Maybe we will get some inspiration to crack on together!

I need to address a bubble under the paint on the windscreen, I've noticed some rust marks under my Jalousie side windows too although this isn't really getting worse and I really like my bus to wear its scars with pride rather than have it with perfect paint, so want to avoid a complete panel paint!?

The main thing that annoys me is how the water runs into the cab floor via both cab doors! Not always, depends on the wind direction and how it is parked! In fact its been leak free this last few months. I addressed this a few years ago with vapour membranes but I am going to have to do it again! Also I noticed that already the off-side cab door is bubbling through on the undersection that sits over the wheel tub, not visible on the outside but eating through nonetheless!

Another thing is my rear tailgate, it pulls in to far on the near side and I would like to adjust it except for the fact the cap-head bolts holding the door to the hinges just wont budge!

My slider lock was the best lock on the van but just lately the key won't always turn and the catch on the inside either isn't working correctly or I am unaware of its proper use, need to sort this for security obvs.

I managed to get hold of Red9 Design this week and have ordered the parts needed to take the slop out of the steering, the CSP rear drums/late bay stub axles & replacement leaky cylinders and perished rubber CV boots have been ordered and will be fitted in the coming weeks.

There are probably a few more things that I have forgot, like changing the Westy fridge to the Waeco one, but I am still in two-minds as to whether this is worthwhile...

Edit #1 Installing heat to the cab via the Corvair motor, I’ve had a plan to do this for a while with a direction of how to do it. It’s very similar to the VW method so shouldn’t be to difficult
 
Last edited:
I’m looking at the north coast 500 next year so I’m going to:
drop the engine and change the oil cooler and fit my tinwear properly.
Ive got the van booked in for a blister on the drivers door and a rusty wheel arch.
I’m going to fit my new madmatz front cab mats and kick panels
Renew my rear brakes
 
Hopefully moving back home for Christmas having done some building work. Best bit is I'll have a double garage with a pit in it :)
Then the jobs list can get attacked again!
That sounds great. I wouldn’t move house for the world , it’s only little but I have a fab garage. That’s the one thing is I’ve got an exceptionally high water table so it makes a pit next to impossible but I would love one or a hoist but my roof is too low.

Ozziedog,,,,,,,,,not jealous one little bit,,,,,,much :)
 
Not used my bus nearly enough this year and not slept in it once :(
However , a bit of work planned for the winter … I just broke an engine lid hinge so that needs sorting and I plan to address some rust along the lower edge of the engine lid. I’ve finally found a good paint match so am happy to tidy it up.
Otherwise, some general servicing and tinkering to hopefully look to get a better season next summer. :)
 
That sounds great. I wouldn’t move house for the world , it’s only little but I have a fab garage. That’s the one thing is I’ve got an exceptionally high water table so it makes a pit next to impossible but I would love one or a hoist but my roof is too low.

Ozziedog,,,,,,,,,not jealous one little bit,,,,,,much :)
As long as you can dig the hole mate then all good. They make the pit totally watertight like a bathtub, with steps and jacking plates cast into it. Then you back fill the hole with concrete 👌
 
As long as you can dig the hole mate then all good. They make the pit totally watertight like a bathtub, with steps and jacking plates cast into it. Then you back fill the hole with concrete 👌
I’m sure I’ve seen these, they do various versions that look like fish ponds liners in fibreglass. But I’m kicking 70 soon and I’d hate to upset the damp course under my garage. What’s the chances of it not being a tad brittle after being down for fifty plus years. I’ll wimp out I think.

Ozziedog,,,,,,,, would be nice though. :)
 
So winter work underway. As usual you start something and it just goes deeper and deeper. As I stated I needed to sort a blister on my door. This turned into a complete rebuild. Still cheaper than getting a rust free door JUST. None of this is my work by the way I found a great guy in Bridgend.
 

Attachments

  • IMG_7194.png
    IMG_7194.png
    2.4 MB
  • IMG_7186.png
    IMG_7186.png
    1.5 MB
  • IMG_7187.png
    IMG_7187.png
    1.8 MB
  • IMG_7188.png
    IMG_7188.png
    1.1 MB
  • IMG_7189.png
    IMG_7189.png
    1.1 MB
  • IMG_7192.png
    IMG_7192.png
    1.6 MB
Forgot to add the door had 3mm of filler and someone had glued a patch on the base. Also the framing on the inside of the door was also glued on. All metal now bought a skin from Heritage. Into the arch next dreading it.
 
So rear CSP drums are being fitted next week along with shortened late bay half-shafts, weepy cylinder being replaced and perished rubber DS boots. I picked up some Boxster wheels cheap and whilst fitting one to see if I like the look I realised that the wheel caps wouldn't go on the fronts, so.............. after some thought I found a guy that supplies Wilwood disc/callipers with Porsche (112/205) brake kits to fit early & late spindles and in my case Red9 Design. These will look much better behind the Boxster wheels (if I decide to go with them) and of course will be an upgrade on the current late bay disc/calliper set-up, which always seem to rub on the nearside.
Will post up pictures etc once complete.

Also have picked up sparkplugs, carb gaskets, fuel lines and clips, oil & filter. And I found an engine seal kit in the garage that I will need to fix my crank seal leak that started recently. Will do the servicing whilst the engine is out in the next month or so.

Got a dilemma on the paint front, screen needs to come out to sort a rust bubble, painter is insisting on painting the whole front panel but its a little crinkled where the over-riders kissed the panel in its previous life in the USA and I happen to like this patina. I was hoping the work could be done and paint blended in, but there are a few stone chips that are starting to look a bit scruffy and maybe a newly painted front panel is the way to go 🤷‍♂️
Trouble you have in modern days blending will work but highly recommend on single k rather than 2k paint. You find base coat is water based and lacquer will need to be 2k or single pack and that’s done on an edge to edge process on clear coat. The best way would be cellulose paint as that’s what I used to do in the 80’s when repairing all the older vehicle back in the times. I let you know how mine goes when repaired from a paintshop in Bristol but that edge to edge as mentioned.
 
Last edited:
Back around maybe 12/13 years ago Clive (RIP) @ The Old Dub Shop repaired the screen and the painter at the time did a fantastic job of blending it in, you really wouldn't know. I believe the painter was Yanick (spell?) who now runs a paint shop somewhere in Bristol.......
 
Back around maybe 12/13 years ago Clive (RIP) @ The Old Dub Shop repaired the screen and the painter at the time did a fantastic job of blending it in, you really wouldn't know. I believe the painter was Yanick (spell?) who now runs a paint shop somewhere in Bristol.......
I heard of that name somewhere in Bristol. Yeah people can be very good at making blends work and also work of a hard line so you loose the edge. We have a catch up on how mine went as it looking good with the panel repaired and in primer now. They took my screen out to find no issues with panel.
 
Back around maybe 12/13 years ago Clive (RIP) @ The Old Dub Shop repaired the screen and the painter at the time did a fantastic job of blending it in, you really wouldn't know. I believe the painter was Yanick (spell?) who now runs a paint shop somewhere in Bristol.......
That'll be Janek at Coola Classics, he's now in Tickenham.
 
Have been working trough jobs to get it ready for sale in the spring, so far repaired the cracked paint, got the engine started, found some loose drive shaft bolts and started a good clean.
 
Im cracking on with stuff atm, full service done, new seat belts, done, new windscreen wash switch and pipes - in progress.
Also a general tidy up of the front cab, including seat removal and possible new trim, but will have to see what it looks like after a good clean up! :)
 
I'll be taking our's into the factory i work, over the christmas shutdown so i can have plenty of room for:

Long overdue gearshift plate, & new linkage bushes, as far as practical without dropping gearbox.

Rear adjustable spring plates seem to have no boomerang spacers fitted behind torsion endcaps, so endcaps are bolted tight up to the plates = little/slow suspension movement. Have some new spacers to fit.

Front beam adjusters appear to be set equal positions, both look set at highest notches. That can't be right so going to try moving the lower adjuster 3 notches round to slightly stiffen one spring set against the other. Front ride is very soft & relies on coilovers to prevent arches rubbing, having flipped balljoint spindles for the main drop. Hope it will stiffen ride & slightly lower it more too.

Clean & top up any clear waxed areas underneath. Going to try Bilt hamber Dynax UC so i still see the chassis colour, rather than a dark coating.

Good checkover everything underneath, VS exhaust gaskets might be blowing, valve clearances & oil change.
 
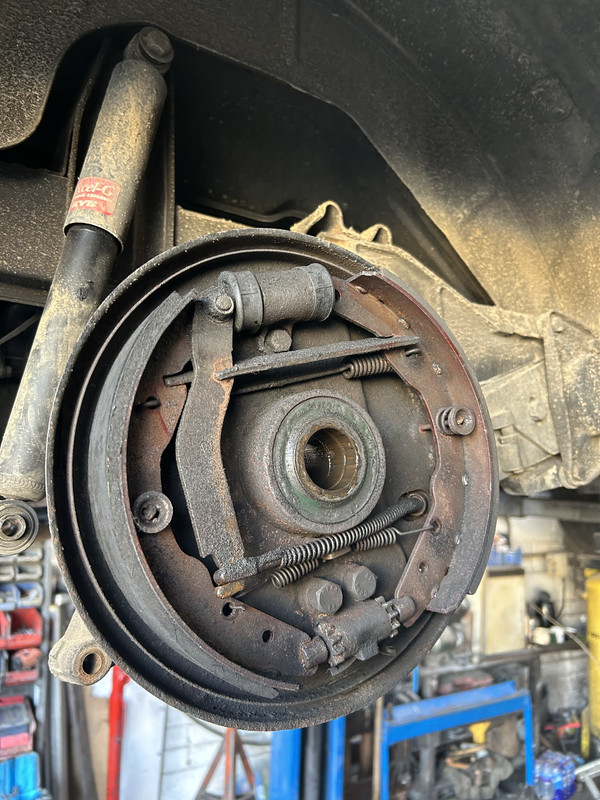
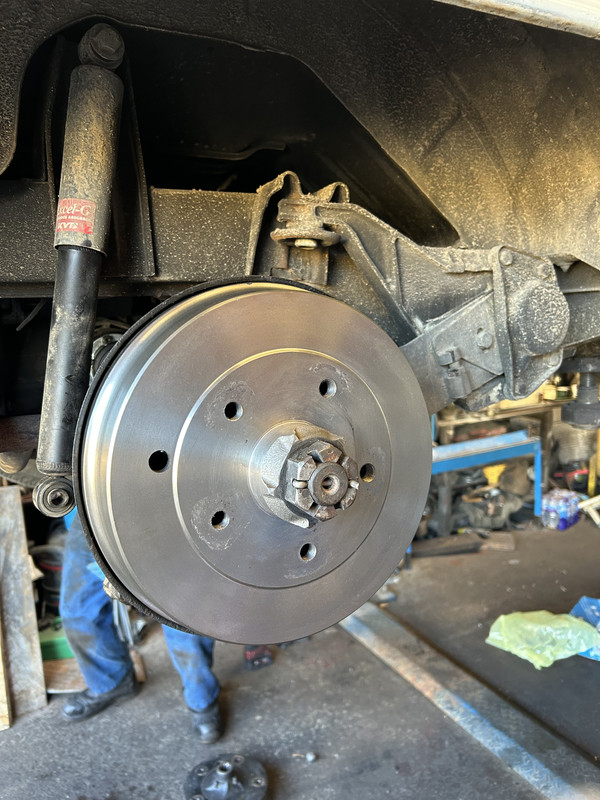
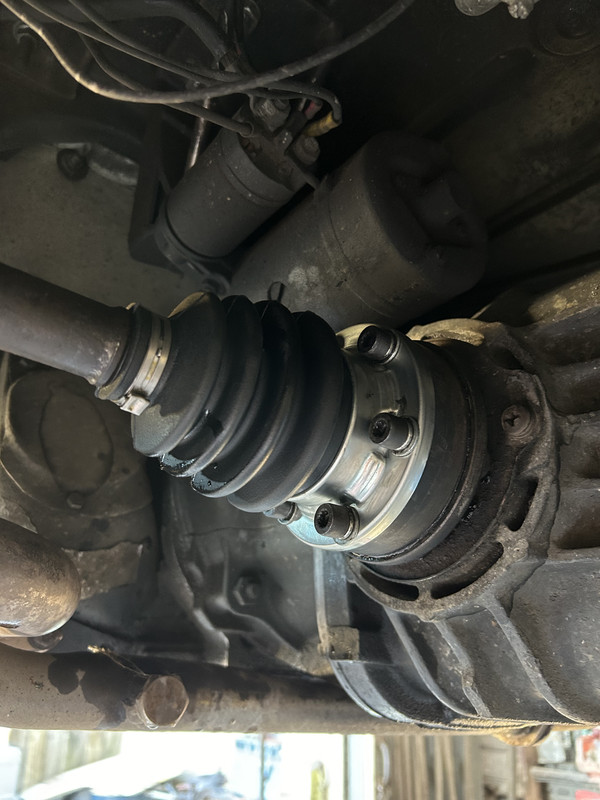
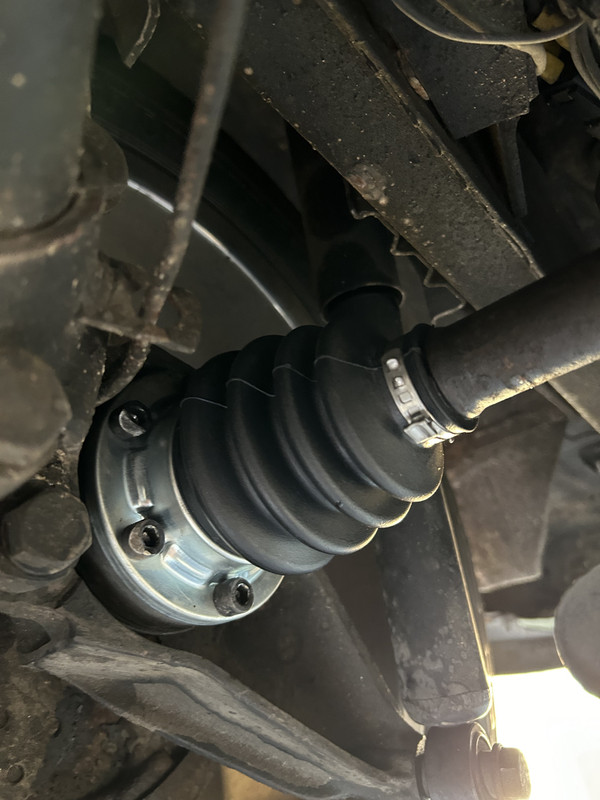
So stage one of the brake upgrade/modification completed, late bay shorter half shafts fitted with machined CSP Porsche drums, along with a new cylinder and new inner and outer CV boots.

The brake pedal is now solid, I’ve never in 17years had the brakes feeling so good! Handbrake is now 2 clicks and holds on a hill! Another first haha!

Here is the state of the old pads with a weeping cylinder, pads are soaked in brake fluid and were changed

IMG-3163.jpg


New Porsche pattern CSP drums machines for shorter half shafts thus giving more room under the arch for the wheels.

IMG-3167.jpg


All boots were perished so replaced and re-greased

IMG-3168.jpg


IMG-3169.jpg


Rear tyre was so close to the arch it was ridiculous, now a good inch so able to take a wider wheel.....

IMG-3171.jpg


However, all this work hasn’t come without its issues. The Teledial rear wheels now rub on the adjuster arms. But I will be fitting different wheels which are 7” wide rather than 6” with an offset of 50 so need to measure up and get some spacers for these to fit with the centre caps.

I have ordered some Wilwood 4pot calipers and discs for the front, this will fit the late bay spindles on the Red9 wishbone beam. Should have some nice tuckage with the ET50 wheels, but I’m sure some issues will follow. Watch this space…

All above work carried out by CJ Motors in Bristol
 
Last edited:

Latest posts

Top