1968 Campervan conversion

Early Bay Forum

Help Support Early Bay Forum:

This site may earn a commission from merchant affiliate links, including eBay, Amazon, and others.
Thank you both...
8)

After my father in law work and following his advice I rushed to a paint shop. A couple of months later this was the result:

200613104551_foto_01.jpg


200613104634_foto_02.jpg


200613104710_foto_04.jpg


20061310488_foto_06.jpg


20061310493_foto_07.jpg


(after so manny years with only one colour I decided to use a two tone scheme)

2006131192_foto_12.jpg


20061311107_foto_13.jpg


200613111112_foto_14.jpg


200613111156_foto_10.jpg


200613111236_foto_09.jpg


200613111313_foto_08.jpg


200613111336_foto_11.jpg
 
After, with his help and my father's we started assembling her again. But first, I needed to get all windows and doors seals (they were all still the original seals):

2006131152627_foto_01.jpg


2006131152746_foto_14.jpg


2006131152931_foto_02.jpg


2006131153050_foto_03.jpg


2006131153240_foto_04.jpg


200613115355_foto_06.jpg


2006131153616_foto_11.jpg


2006131153741_foto_09.jpg


200613116757_foto_07.jpg


20061311696_foto_08.jpg


2006131161059_foto_12.jpg


2006131161152_foto_13.jpg


2006131161234_foto_10.jpg


and at the time, the new ones I bought:

2006131161825_foto_01.jpg


2006131161952_foto_02.jpg
 
My 1/4 lights and "opening side quarter lights" were were completely ruined:

2006131165921_foto_01.jpg


2006131165935_foto_02.jpg


2006131165949_foto_03.jpg


2006131171752_foto_04.jpg


2006131173020_foto_05.jpg


2006131173110_foto_04.jpg


2006131173156_foto_03.jpg


so I bought a 2nd hand pair in better condition.
I also bought a pair of louvered windows:

2006131195142_IMG_0814.JPG


and once they get here I dismantled and restored them but they are not as they should be so I'm going to do it all over again. Besides I already have all their new seals.

20062102722_IMG_0829.jpg


20062102941_IMG_0831.jpg


20062103121_IMG_0830.jpg


20062103244_IMG_0834.jpg


20062103421_IMG_0835.jpg


20062103538_IMG_0838.jpg


20062103652_IMG_0837.jpg


20062103915_IMG_0832.jpg
 
ib-bus, thanks... but they are not as goog as they should be.... but they will 8)

At the time I gave them a good brushing with soap and water, then I used a 600 grit sand paper after some polish... and in some places a litle bit of paint. To finish I used varnish...
A few years later I brought from San Francisco the complete seal kit... It's just one of many things I have to redo :mrgreen:

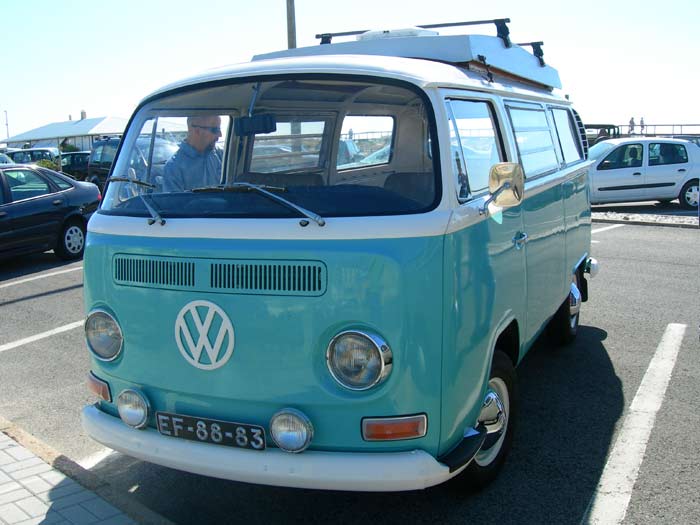
Once the paint job was done, it was time to begin assembling her again:

20062215149_IMG_0851.jpg


20062215239_IMG_0870.jpg


the door seal that I fist bought were a real crap... and their assembling even worse. Lots and lots of glue everywhere... :|

20062315581_foto_37.jpg


200623155937_foto_36.jpg


200623161022_foto_19.jpg


200623161245_foto_16.jpg


200623161531_foto_18.jpg


At least I learned how to put the windshield (and all the other windows):

20062316547_foto_25.jpg


200623164411_foto_20.jpg


200623165118_foto_22.jpg


20062316530_foto_23.jpg


200623165932_foto_21.jpg


20062317136_foto_11.jpg


20062317331_foto_12.jpg


an hair dryer to warm and make the seal a litle more flexible:

20062317925_foto_09.jpg


or from type2.com email list:

"Hey Folks,
Before I move on to the subject line, did anyone else find it amusing today that a billion dollar spacecraft can suffer from a faulty fuel gauge just like our old buses? Anyway, I installed a new used windshield in my '75 last Sunday, bringing my total windshield installs to 5.
It went in easier than any I've done before, total time less then 10 minutes. I put the gasket on Saturday, then Sunday I let it sit in the sun for about 3 hours. The gasket was soft and very warm to the touch, which I believe helped a great deal.
My wife (who has always has the job of pulling the cord from the inside) couldn't believe it went in so fast, and is convinced it is going to fall out! I know some consider installing a windshield a daunting task, but it has always gone fairly well for me-the only one I've cracked was when reinstalling a windshield that may very well have been an original, and if so would have been 26 years old.
Four of these were on Bays, and one Vanagon, which ironically the Vanagon was the worst of all. We had to pull it and start over 3 times before it would seat. So, if you need to install a windshield, pick a sunny day!

Jeff "

at the end, the bus was like this:

20062317459_foto_01.jpg


200623174548_foto_02.jpg
 
more assembling.

the entire electrical system was a disgrace:

20062318230_foto_14.jpg


20062318423_foto_13.jpg


20062318619_foto_15.jpg


200623181013_foto_04.jpg


200623181130_foto_05.jpg


200623181356_foto_06.jpg


I ended up leaving it for another day :mrgreen:
 
more assembling :mrgreen: :

200631623168_IMG_0943.jpg


2006316231745_IMG_0944.jpg


2006316231830_IMG_0945.jpg


2006316231935_IMG_0954.jpg


2006316232034_IMG_0957.jpg


2006316232150_IMG_0952.jpg


2006316234538_IMG_0947.jpg


2006316234634_IMG_0949.jpg


2006316234726_IMG_0953.jpg


2006316234826_IMG_0951.jpg


the result of seals mishandled is this:

2006316234924_IMG_0946.jpg


200631623534_IMG_0948.jpg


2006316235341_IMG_0955.jpg


200631711746_borrachas.jpg


200631711833_borrachas_zoom.jpg


and at the end of the day:

20063170347_IMG_0942.jpg
 
I asked the guys in the paint shop to paint my original license plates.... bad idea!

200651921158_IMG_0926.jpg


So, once at home, I painted them again:

200651921344_IMG_1253.jpg


200651921512_IMG_1254.jpg


20065192236_IMG_1256.jpg


200651922336_IMG_1257.jpg


200651922424_IMG_1258.jpg


200651922535_IMG_1485.jpg


200651922646_IMG_1488.jpg


200651922815_IMG_1496.jpg


200651922853_IMG_1497.jpg
 
Once she came home again I continued to assemble the missing parts.
First, I had to restore her wheels:

20065915203_IMG_1177.jpg


200659152119_IMG_1178.jpg


after sandblasting and a rust treatment:

20066912711_IMG_1524.jpg


20066912735_IMG_1528.jpg


and being painted ....

200662632822_IMG_1607.jpg


200662632916_IMG_1609.jpg


200662632948_IMG_1610.jpg


200662633015_IMG_1608.jpg


.... using a two color scheme:

2006627225811_IMG_1639.jpg


2006627225833_IMG_1640.jpg


2006627225856_IMG_1641.jpg


2006628191152_IMG_1645.jpg


2006628191237_IMG_1644.jpg


2006628191318_IMG_1646.jpg


and my baby moon hub caps:

200663012029_IMG_1653.jpg


200663012119_IMG_1654.jpg


200663012210_IMG_1655.jpg


200663012257_IMG_1656.jpg
 
my still original door cards:

20066912558_IMG_1526.jpg


20066912631_IMG_1527.jpg


The paintshop guys didn't cover my pedals and steering column well... they were full of white color drops... and
so I had to pait them again:

20066913110_IMG_1522.jpg


20067520559_IMG_1673.jpg


20067520563_IMG_1674.jpg


20066913142_IMG_1523.jpg
 
some more parts from Justkampers:

20066262594_IMG_1587.jpg


2006626300_IMG_1588.jpg


2006626360_IMG_1590.jpg


20066263630_IMG_1589.jpg


200662631552_IMG_1594.jpg


200662631823_IMG_1605.jpg


200662631855_IMG_1606.jpg


Interior light already in place:

200662631939_IMG_1604.jpg


and a pair of Justkampers shelves:

200662632211_IMG_1598.jpg


200662632623_IMG_1591.jpg


200671105629_IMG_1687.jpg
 
and a pair of under seat floor mats from Justkampers (sold later on):

200671103625_IMG_1679.jpg


200671104657_IMG_1681.jpg


200671104729_IMG_1680.jpg


e depois de uns pequenos cortes (em locais que até vêm marcados)...

200671104924_IMG_1682.jpg


200671105018_IMG_1683.jpg


200671105128_IMG_1685.jpg


200671105247_IMG_1686.jpg


200671105329_IMG_1688.jpg
 
And this was the first trip since I started this adventure:

carrinhas.jpg


Dscn1072.jpg


but there's a lot more to come.....
:mrgreen:
 

Latest posts

Top