68 Bay - finally getting her back on the road! Update 24/04

Early Bay Forum

Help Support Early Bay Forum:

This site may earn a commission from merchant affiliate links, including eBay, Amazon, and others.

angus

Well-known member
Joined
Jan 8, 2007
Messages
703
Reaction score
1
Location
Surrey
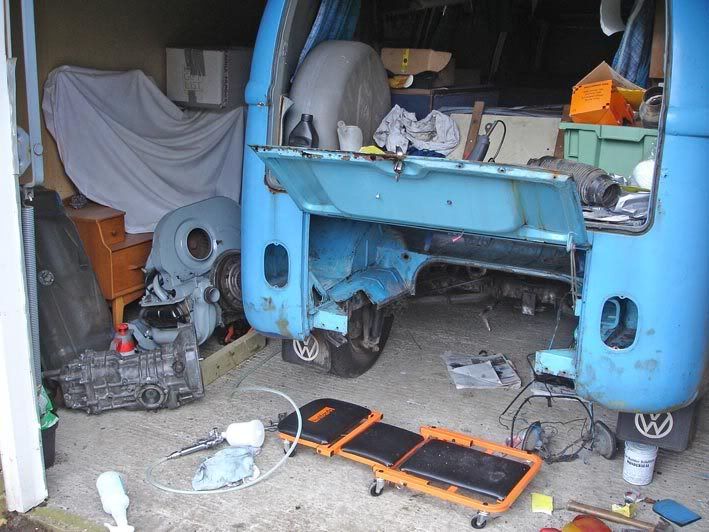
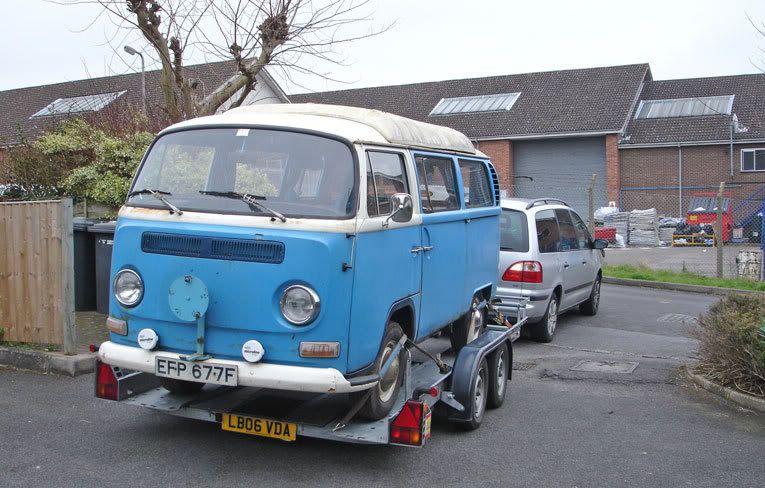
Now I finally have my van located where I am, I can start working towards getting her back on the road - needs to be in the next month!

van-05.jpg


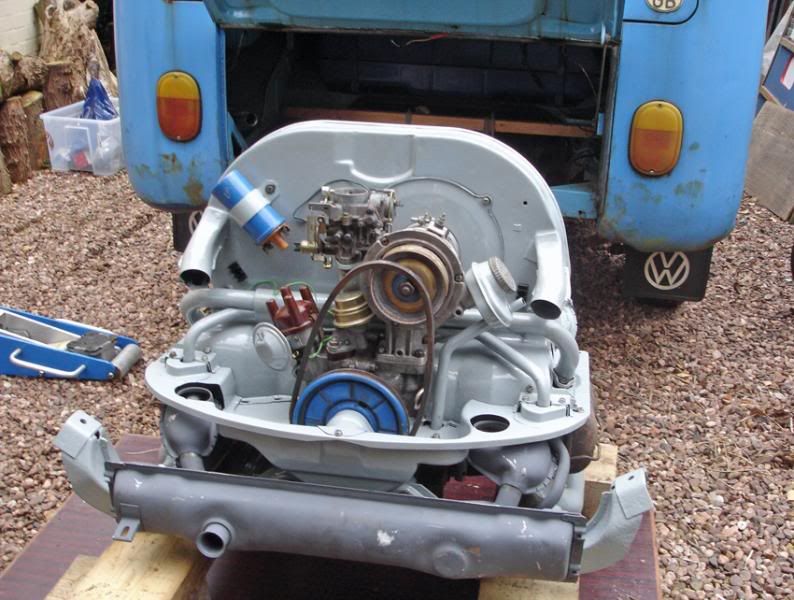
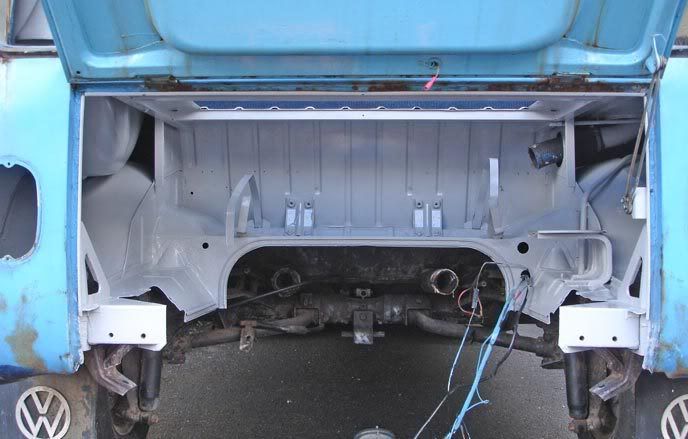
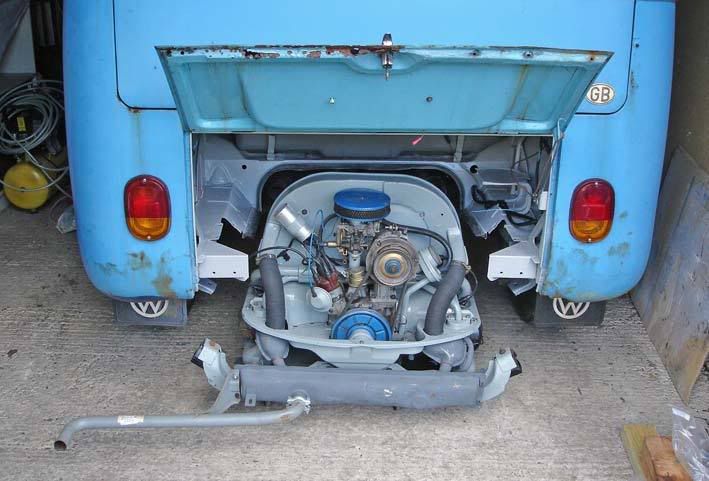
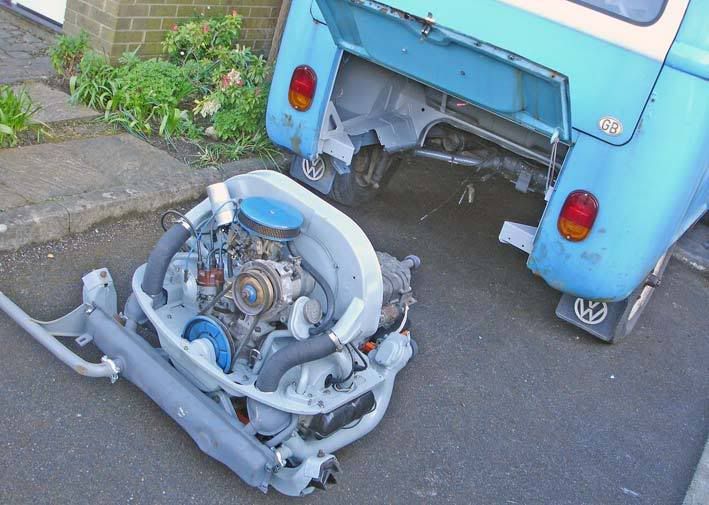
Having put the engine back in and started her up a few weeks ago, it is now all out again so I can check a few things underneath.

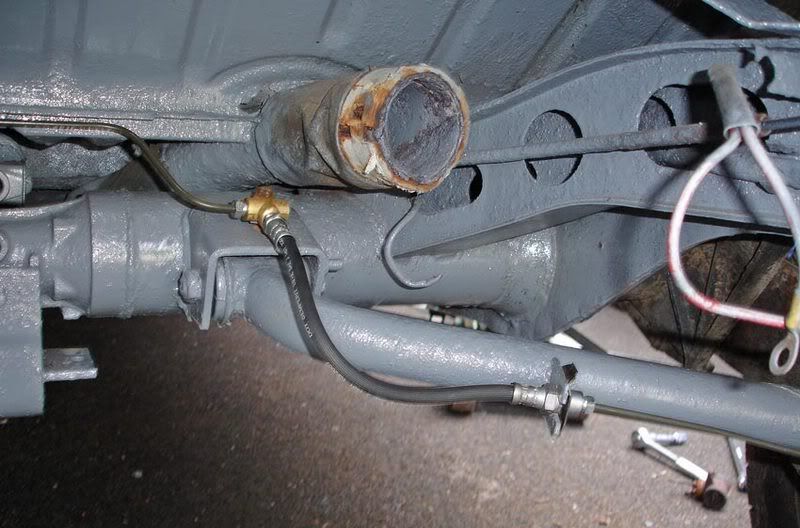
I am going to replace all the brake pipes, which is easier to do with things out of the way.

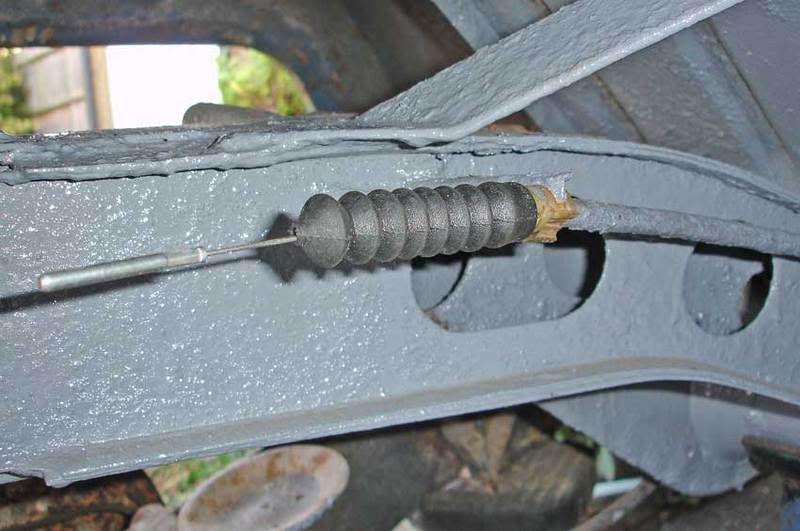
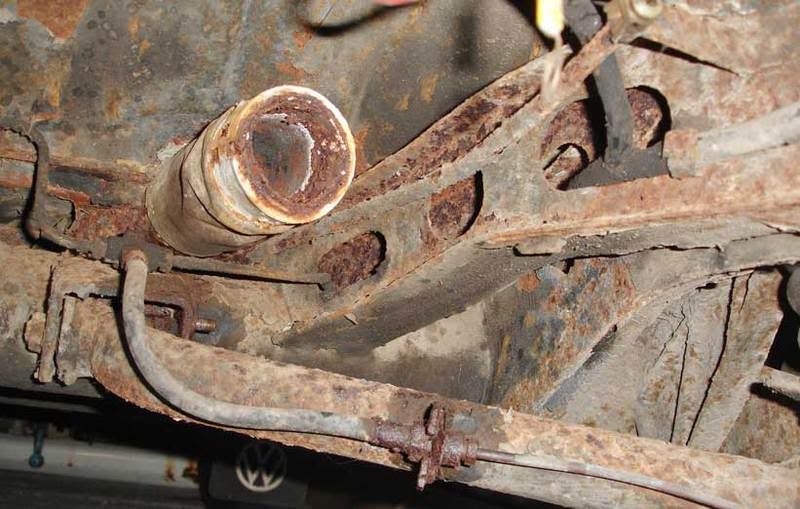
Main reason for removal again was to get to the CV joints - rubbers had gone, so I am replacing all 4. These came off reasonably well - was dreading touching the many bolts that hold them on, but came off ok with care.

rear-empty.jpg


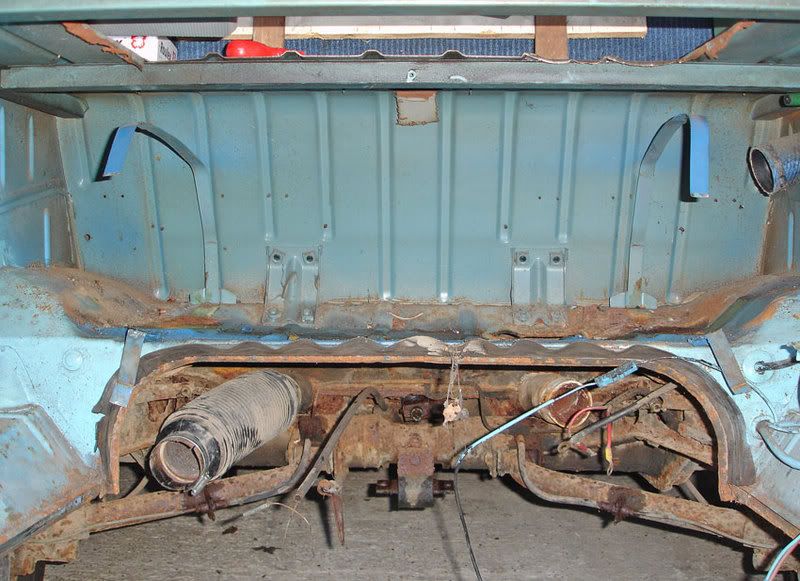
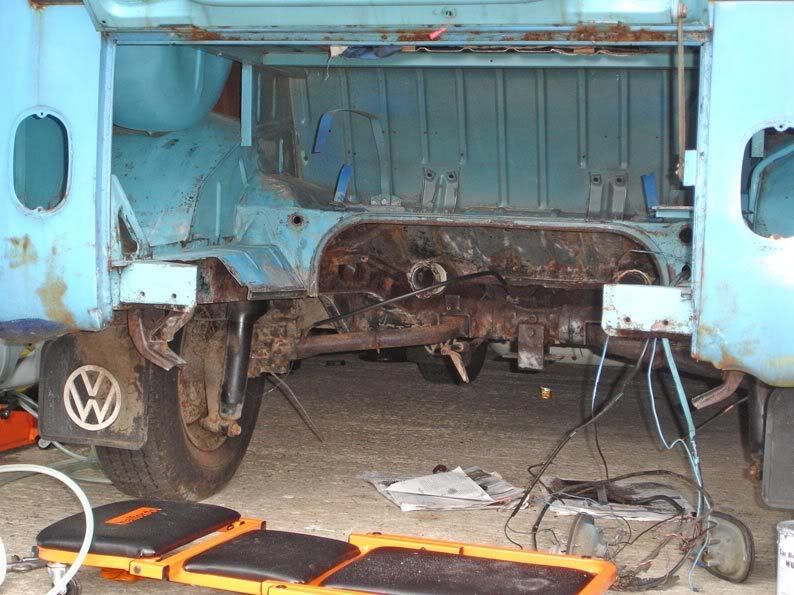
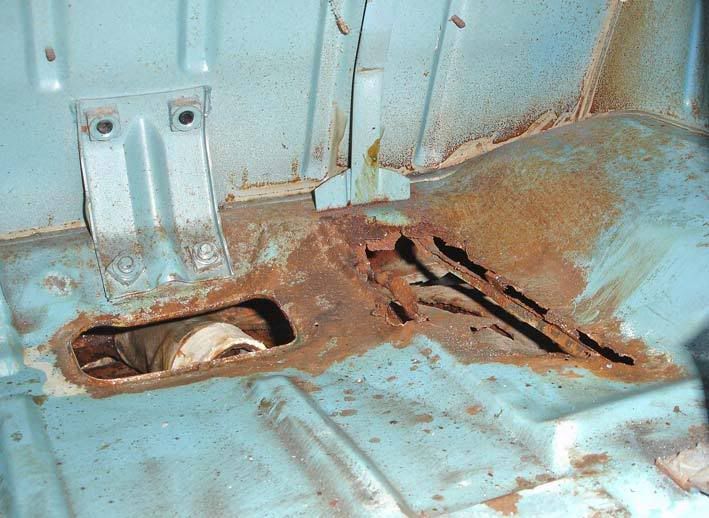
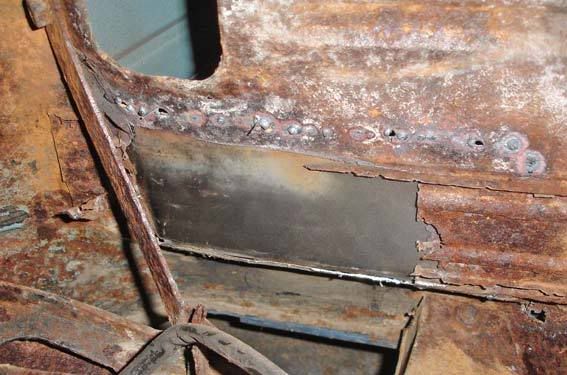
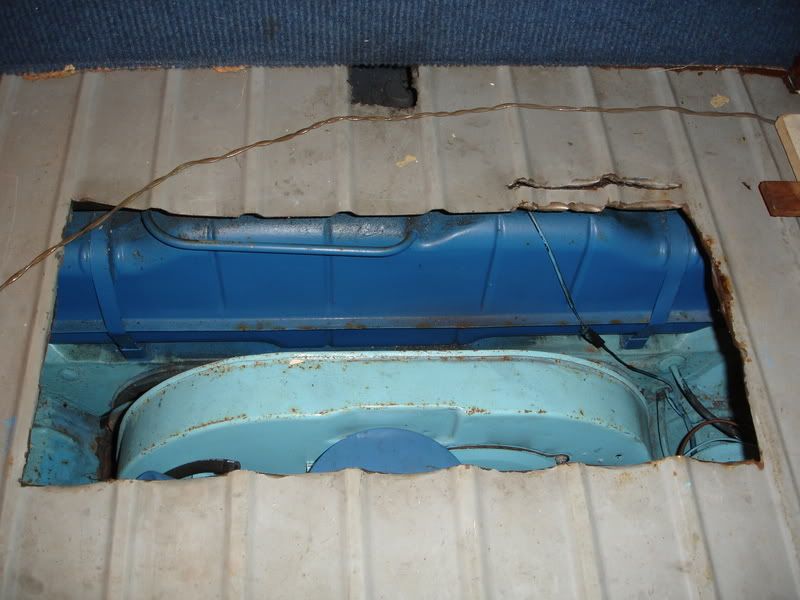
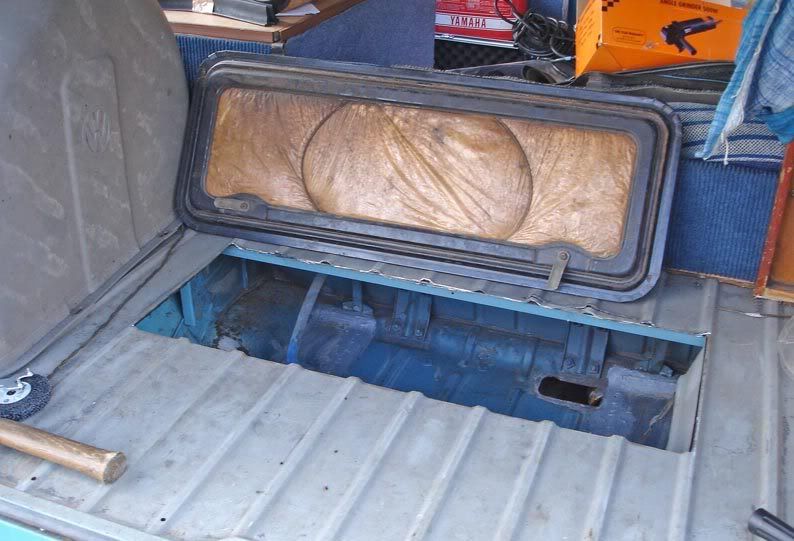
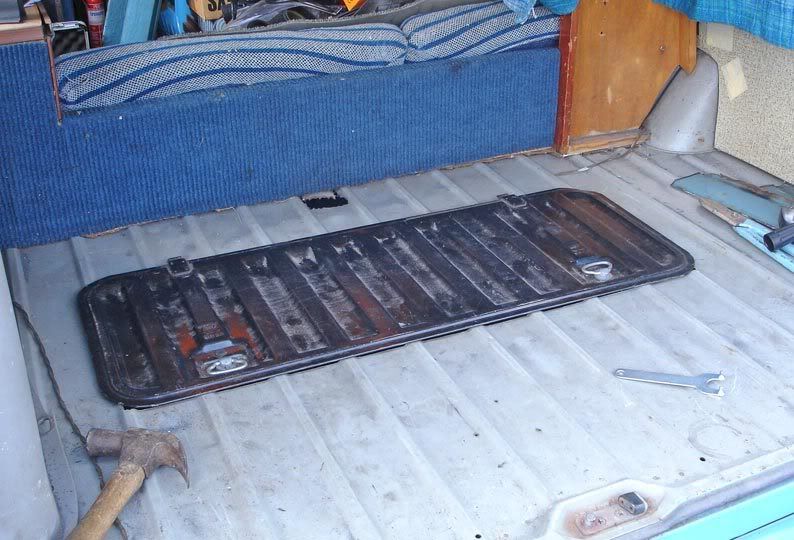
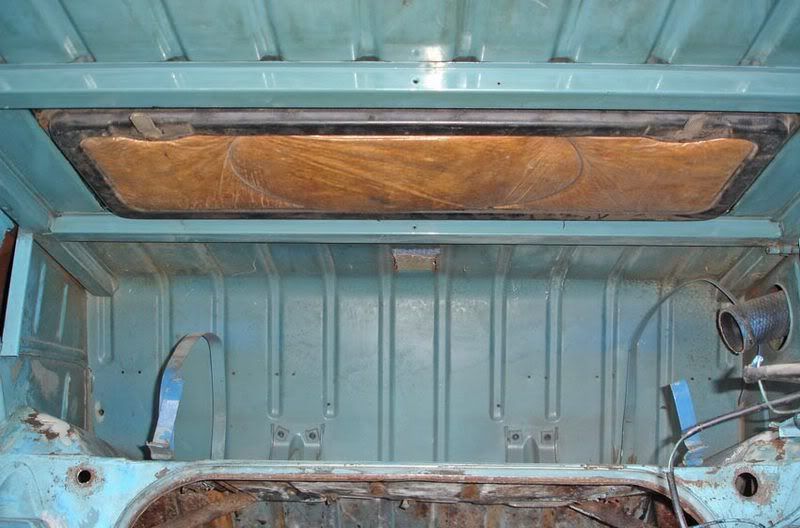
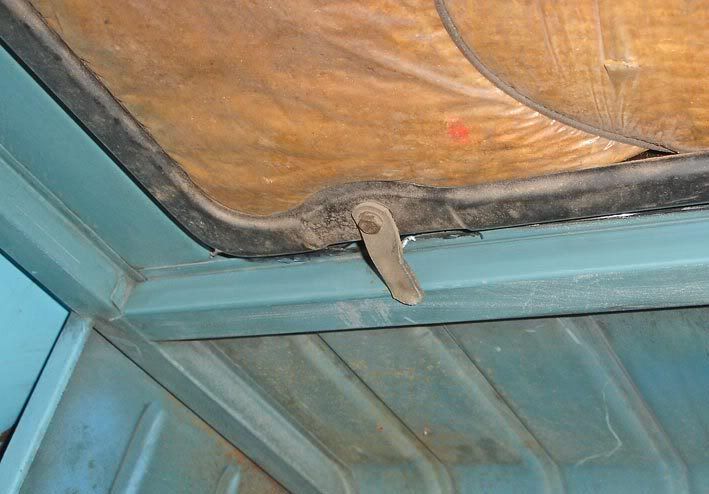
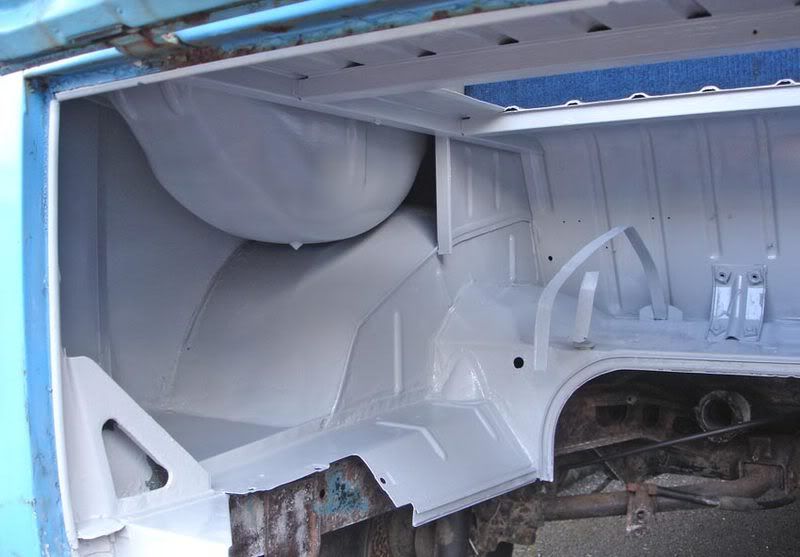
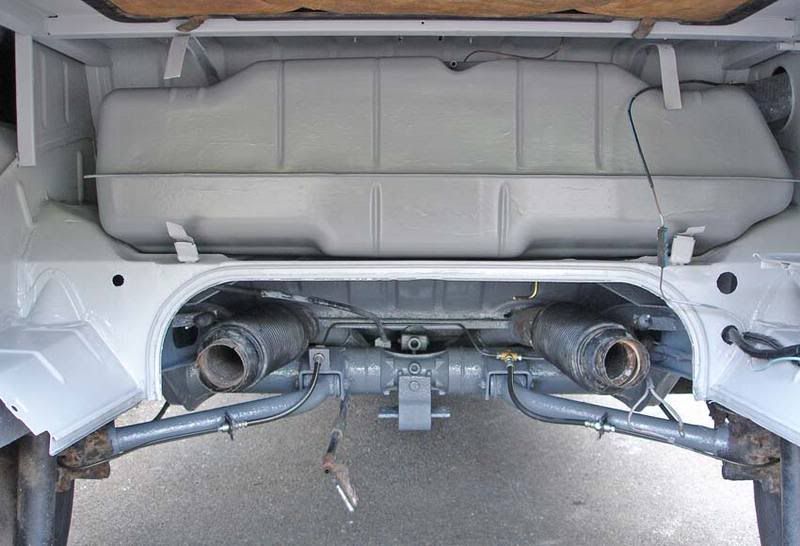
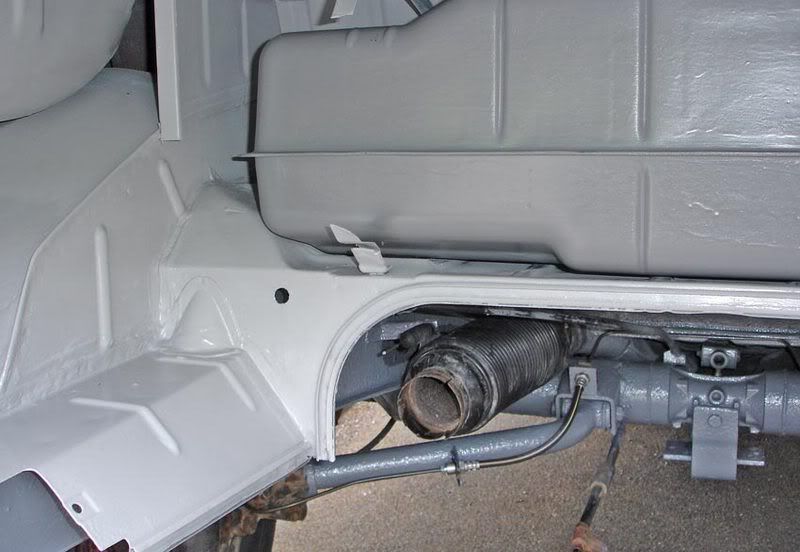
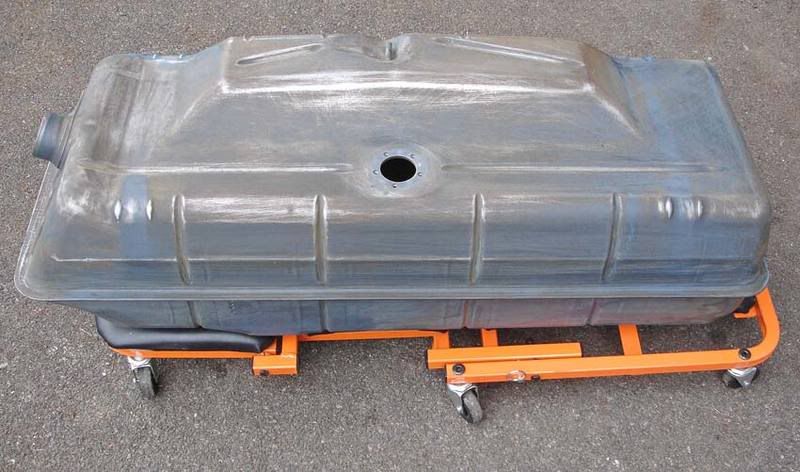
It meant I could also take the fuel tank out for the first time. I can give it a good clean, fit the fuel sender I bougt about 10 years ago, and change the pipes. I also needed to inspect some rust on the panel underneath the fuel tank - I had to make sure the tank itself was not rusting:

hole.jpg


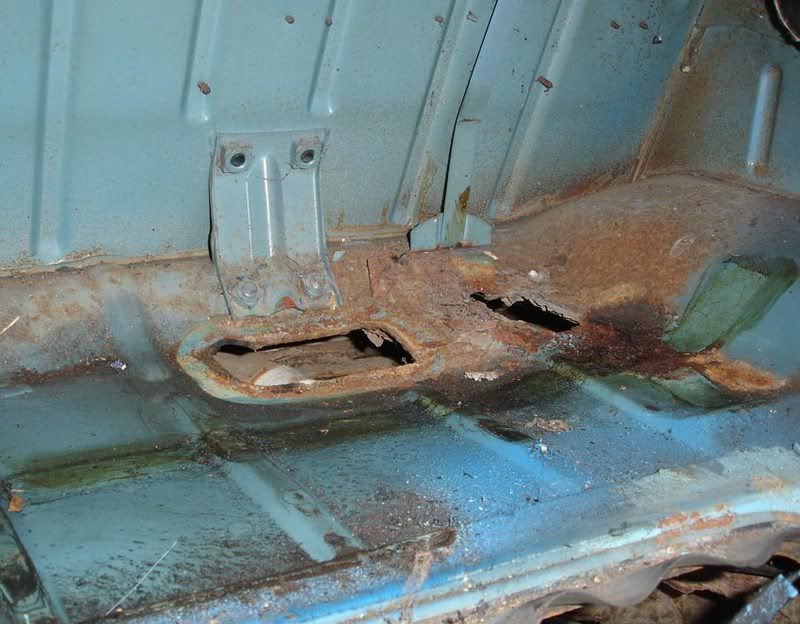
Tank is fine, but I shall need to patch the panel underneath, which I assume is not available anywhere!

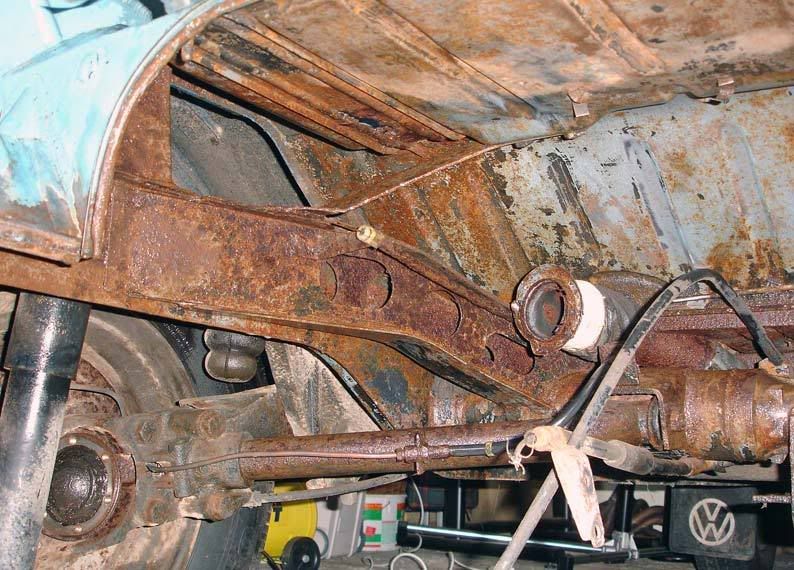
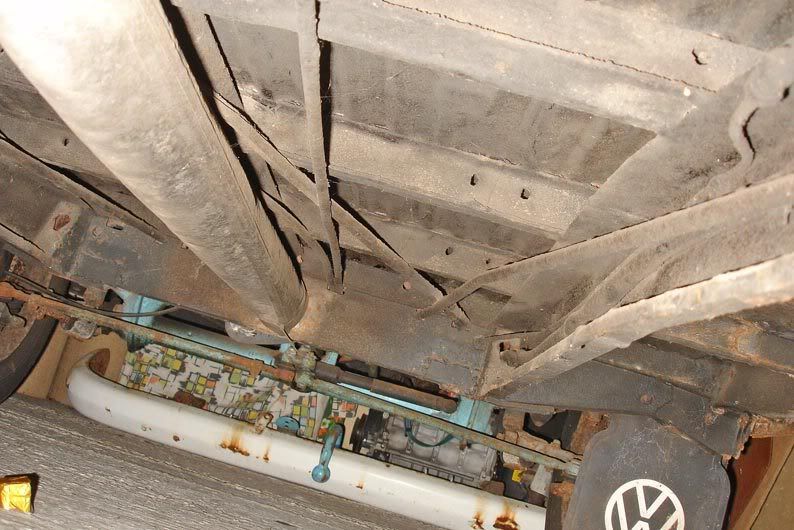
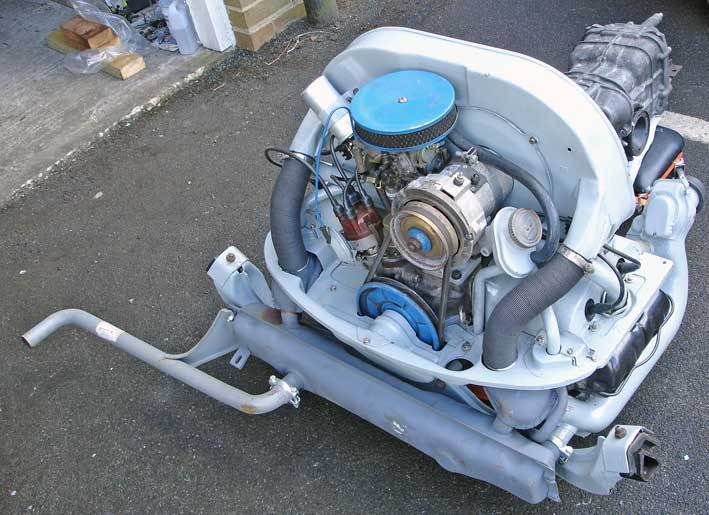
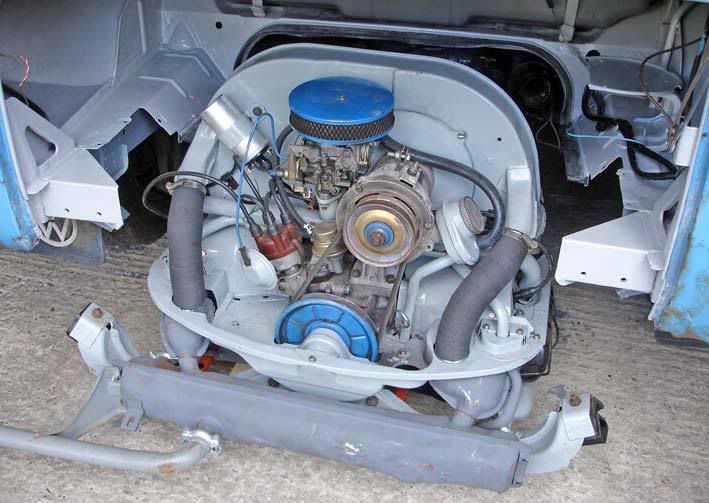
I want to clean all this up whilst I can:

rust.jpg


I'll probably paint the underneath and engine bay interior with the same light grey smoothrite I used for the engine - keeps everything light - any suggestions for how to treat the surface rust first though? I'd like to sand blast all the loose stuff off then coat with something pre-paint.


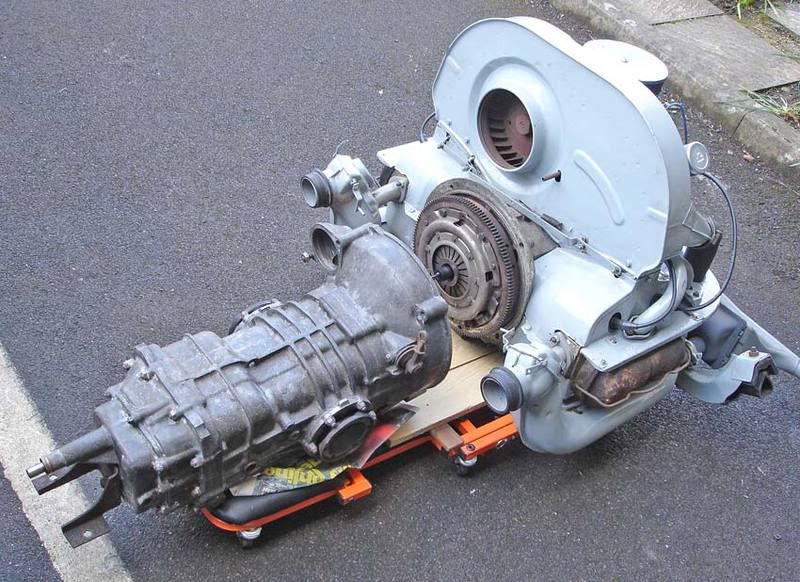
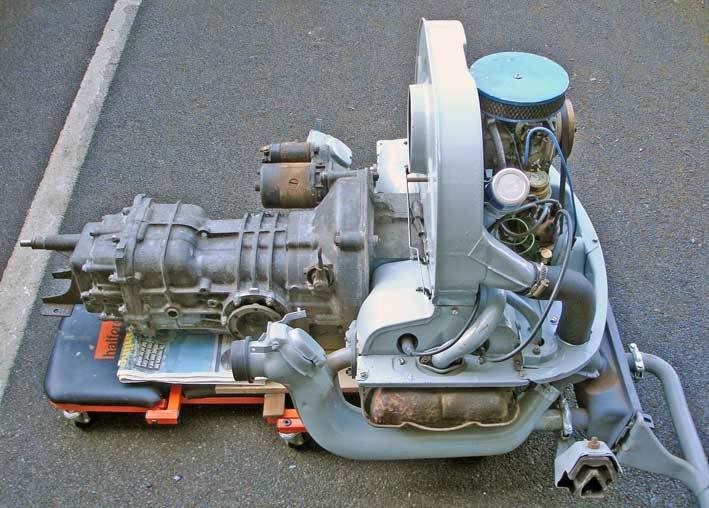
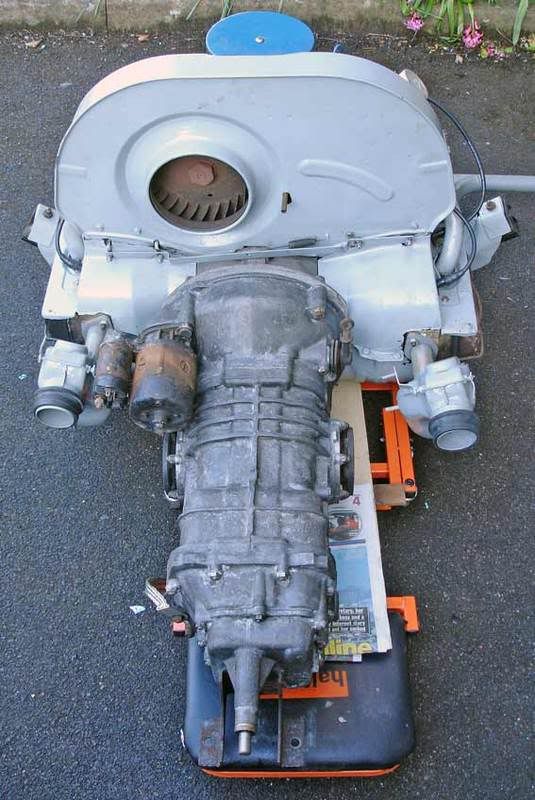
I'm giving the gearbox a quick clean - first time I have ever had it out and I suspect the oil inside is pre-80s at the least!! It will no doubt benefit from a good flush and re-fill. What could I paint this with? Same thing? Its not so much to do with aesthetics, more once everything is clean it is much nicer to work on and easier to see if something is leaking. This will not be a show van!

gbox.jpg


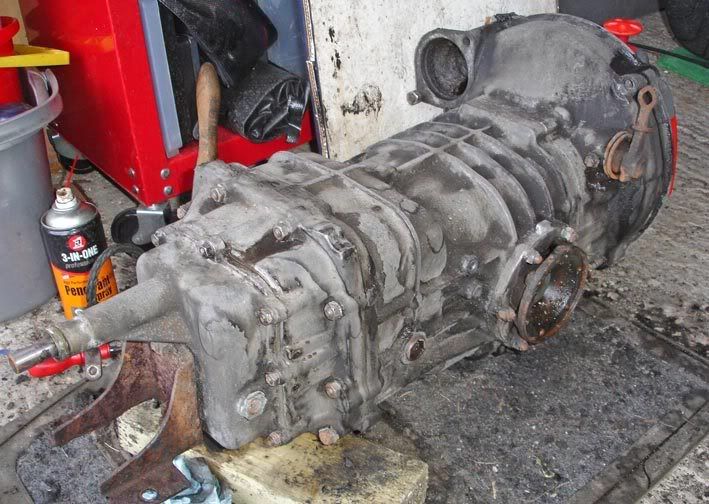
Assuming this hole is a breather - only found it because 'oil' leaked out when I turned the box upside down!

breather.jpg


Updates as they come!
 
Yep! Just a few - some more recent ones:
http://forum.earlybay.com/viewtopic.php?f=1&t=6296&p=61447#p61447
engine stuff:
http://forum.earlybay.com/viewtopic.php?f=4&t=4001&p=40465#p40465
and some older ones:
http://forum.earlybay.com/viewtopic.php?f=2&t=733&p=6559#p6559

and some more on our website linked below...
 
Right - time for an update after a few days work. Not helped by the weather - bright sun, wheel van out of garage to work on, downpour - push back in again, sun comes out :x

Update of desired result - getting the van back on the road after 6-7 years off it! My first car, this van will never be sold, and is not going to be a show van! Some of the vehicles guys on here have are stunning, and the result of a lot of time, skill, patience and often money! I just want to drive my van again, so apologies now for any shortcuts that make the more diligent of you draw breath! :) I'm not a welder, or a painter!!

garage-1.jpg


So - engine and gearbox out, mainly so I could change CV joints easily, and get to/replace brake lines. Of course, as soon as you take anything apart, more work is revealed. So I want to prevent things getting any worse in terms of rust. Hopefully in a couple of years I'll have the time/space/money to do this properly, with a full sand blast etc etc, but for now its prevention rather than restoration!

I ordered a load of stuff from Frost.co.uk, based around the POR-15 range, so some cleaner, some rust 'sealer' and some POR 15 paint (gray) - intention is to clean off what is under the van and treat with this for now. I'd love to be able to do it properly with a blast etc etc now, but it just isn't possible right now.

ready-for-paint.jpg


Removed most of loose rust and sprayed with Metal Ready:

chassis-rust.jpg


You can sand, poke and probe this all day. Scraping was most effective actually. I'll be replacing heater cables, clutch cable etc etc.

Had to clean up, cut out and patch 2 holes that had been under the fuel tank. My welder is a SIP from Halfords, bought about 15 years ago and gasless - perfect for welding a rusty van! Still, I managed to get some weld to hold and add some patches.

hole-1.jpg


Not finished at this point...

patch.jpg


shocking! :oops:

A view taken looking forward whilst I'm under there:

underside.jpg


The plan was to use POR 15 under the van, and Hammertite in the engine bay itself. Couldn't find any smooth grey that I used for the engine anywhere, so mixed my own pot. Had to do all the painting in one go, as no chance of matching again!

I wanted to be close to this colour shown here that I had previously tarted the engine up with....

engine6.jpg


Desperately wanted to get some paint on but had to be patient and clean more, then thought I'd better fit the hatch I had bought off ebay a few months ago, before painting the underside of the rear boot area...

DSC00254.jpg


I had cold-chiseled the hole years a go on a French campsite when fixing an oil cooler that had snapped off. Cut hole to lift fan housing out of engine bay - quite proud at the time, but never got round to fixing hole, which has had a piece of wood in it for a decade!

So, I used an angle grinder to cut nice straight edges to the correct size:

hatch-1.jpg


Hatch fits really well:

hatch-2.jpg


I'll need to make a gasket and some hooks for the tabs to fit under, but that should be pretty straight forward.

hatch-3.jpg


Biggest bonus was that the catches actually fit under the cross-member in the engine bay, which is perfect! I'll protect the paint somehow...

hatch-catch.jpg


So finally I was ready to paint the engine bay itself today. I'd finished the dodgy welding, sealed the seams etc. Sanded and dusted etc etc. Paint went on really well - I wanted a light colour to make things easy to see.

grey-bay.jpg


grey-bay-2.jpg


Just before painting, sanding revealed this chassis number that I had never seen before, just on the side below the oil-bath air filter stand:

number.jpg


I'd also cleaned up the gearbox by this time:

gearbox.jpg


I was going to paint it but settled for just sealing it. I think I need to replace an oil seal though.

Have dismantled and cleaned the half-shafts ready to re-assemble.

Worse 'should-be-easy-but-takes-for-ever' job so far - changing the gearbox linkage fitting that sits just above the axle tube and joins to the box itself. Bloody hell what a bitch of a job - can hardly get to the damn thing - old one is nicely corroded in place, rubber falling out. Took ages to get it out, and almost as long to get the new one on!! I can see why it is designed as it is, but blimey what a pain!!

From what I can see the bracket is fixed to the gear change rod with an axle. This axle is hollow, and made up from folded sheet - took me a while to figure out why - you then screw a coarsly threaded screw/bolt into this hollow tube, after it has been inserted into the gearchange rod. The centre of this tube has been crimped, so that the screw can screw into it and clamp up the rubbers of the bush. I then figured out that as it does this, it also spreads the tube itself outwards, thus fixing it firmly inside the gearchange rod. If you have see it, that may make sense! Anyway, hopefully that will reduce the feel of stirring custard when changeing gear.

I have started to remove the old brake pipes, so that is the next job. Paint underside as much as I can (just the rear)
Thread the new heater and clutch cables through.
I need to clean and paint the fuel tank - going for a darker grey. Fit a new fuel sender I bought years ago. Try and re-fix the straps I cut to remove the tank in the first place. Need to find some padding for under the tank. Replace all pipes obviously.
Re-assemble CV joints, then back in with the engine and gearbox.
Balance brakes/handbrake etc, replace windscreen wipers, check all the front steering joints etc and fiddle with the steering box - then, find an MOT place to get it tested and see what else I need to do!! Re-register van (long story!) Got 3 weeks until I want to use the van again!

More pictures as I continue with the jobs listed above....
 
Few more pics.

grey-bay_3.jpg


I have now coated most of the underside at the back with POR 15. I have mainly done the bits I can only get to with the engine and gearbox out - I can get to a lot of the sides with the wheels off. As I say, presevation rather than restoration, so should be more protection than was there before.

grey-bay-4.jpg


Loads of little jobs you forget about. Main one being the wire to the fuel sender - which I remembered to plug in AFTER I had put the tank back in, fitted fuel lines etc etc - couldn't reach, so one scratched tank-out later, its on....

fuel-tank.jpg


Tank pre-painting. I wanted it to be a darker grey than the rest of the engine bay, and mixed up some Hammertite, but not quite as dark as I wanted - will do for now. Time is ticking and I need to get an MOT!

grey-bay-5.jpg


Took the rear wheels off to fit new cylinders to go with the new pipework. Long one down the length of the van is a bugger to slide in - still need to connect the front up, but rear is done so engine can go back in. Heater tubes back on, new heater cables in - first time I have had proper ends to the heater cables in 17 years!!

heater-cable.jpg


Tomorrow evening I'm going to re-fit the engine. I think I'll fit the gearbox to the engine outside the van, and then fit both at once - got to be easier to line up clutch splines etc that way, and a good chance to take some shots of the whole drivetrain unit...to be continued!
 
Angus

Glad to see you show the same level of finish on the bus as you do on the 7, keep it up mate it looks great (makes Hank's engine bay look positively untidy :mrgreen: )
 
Cheers Graham! :mrgreen: - although this is only about 1/5th of the van.....

Right - update time. Last night I finished the engine bay, ready for the engine to go back in.

slammed-engine.jpg


See - decided to slam the engine, not the van!!

engine-gearbox-1.jpg


Wanted to take a few shots of the engine and gearbox together outside the van - never seen that before. I think it just goes to prove what a beautifully simple and compact design the engine is - pretty much unchanged from pre-war days....

engine-2.jpg


engine-side-2.jpg


engine-gearbox-2.jpg


Joined the 2 together - SO much easier out of the van!! I had bought one of the plastic line-up tools for making sure the clutch is centralised, but it was fine. I changed the oil seal on the gearbox output shaft - my, the old one was a bugger to get out!! Came out eventually in about 213 pieces....

almost-in.jpg


Lined everything up, and lifted into position. We hooked the gearbox mount into position, then just lifted the rest of the engine into position - never had an install so easy!! Was desperate to start her up again, so I'll come back to half shafts tomorrow, along with connecting the heater cables and tubes correctly.

engine-below-van.jpg


Connected up wiring - nothing. Then remembered that nice new earth strap from gearbox to van - popped that on, and there was the ignition light. Joined up fuel, turned key, engine started!!

engine-in-3.jpg

(rear valance not fixed in!)

engine-in-4.jpg


It still hasn't been tweaked or adjusted since sitting for 7 years! Couldn't resist a video clip of the occasion! Its just an engine starting, but.......

http://s146.photobucket.com/albums/r254/caterhamnut/Video Clips/?action=view&current=VanEngine2.flv

(Have a look at 'Abbeville Fun' whilst you are there, to see us 'looking after' our 7 :roll: :mrgreen: )

So - engine in!! Halfshafts to refit - would have been easier with just the gearbox in, but should be fine - at least everything is clean! Connect all the other pipes and cables up (clutch etc) - then back to the front to finish brake pipes, pedals (I have put new cables in everything - except handbrake) - check all electrics, sort out the sodding split rubbers on the ball joints, balance brakes - then I think it is MOT time - hopefully get something booked in the next few days....
 
Just made a list :shock:
Connect brake pipes at the front
Check front pipes/change
Bleed and balance brakes/handbrake
Connect and adjust clutch
Fix and connect fuel tank
Check all lights/electrics
Buy new wiper blades
Change at least 2 ball joint rubbers, if VW Heritage can post something that was ordered on Monday.
Connect up heater tubes/cables

...I'm sure there is more!
Will probably need new tyres, but can do that after/before re-test - unless I'm really lucky I'm sure I'll have to have a retest for something!!
 
Blimey - so, putting the engine and gearbox in together was a dream - easy as pie. If I had known how difficult it was to get the half shafts back in again with the engine in place (I took them out with the engine out/gearbox still in the van) I would have put the gearbox in seperatly!! What, 32 bolts? Thats it - should take 10 minutes max, but on your own, under the van, trying to lie upside down, hold one shaft in place with ones arm over your head, and then try and fit a bolt, then try and re-align the CV joint itself so it butts up flat against the other plate - never again!! Took all evening and managed to pull just about every shoulder muscle. Oh, for a pit.......
 
Big day [today!] Saturday - first MOT in 8 years. Not quite ready, so an early start tomorrow before the longest drive it has done for that long - praying we make it there! Still got a few bits and pieces to fix - need to pick up a few switches from Halfords on the way, along with wiper blades....I can't imagine it will get through in one go, but need to know what needs fixing...fingers crossed there is no welding.
 

Latest posts

Top