68 Deluxe - Back to full height

Early Bay Forum

Help Support Early Bay Forum:

This site may earn a commission from merchant affiliate links, including eBay, Amazon, and others.
Ha-ha - yes - I was wondering how to get through the bulkhead without just poking duct through a hole - I can cut a neat hole no probs, but it just seemed half-arsed - then I remembered it's 50mm and it would be so convenient to get the engine bay works complete like this. :) Impressed myself there. :shock:

I'm on a tight budget so anything tidy and free cheers me no end. :D 8)
 
ZedBed said:
Ha-ha - yes - I was wondering how to get through the bulkhead without just poking duct through a hole - I can cut a neat hole no probs, but it just seemed half-arsed - then I remembered it's 50mm and it would be so convenient to get the engine bay works complete like this. :) Impressed myself there. :shock:

I'm on a tight budget so anything tidy and free cheers me no end. :D 8)

Inside every Inventor there is a VW nut bursting to get out.....! or is that the other way around.... :roll: :lol: :lol: :lol:

I sense a warm glow inside! :D
 
ZedBed said:
Merlydog said:
Does one have heat Sarah?
You can see what my interior is to be built around - a hot air duct. :) All gather round...

I'm afraid the only heat I experience is that from a rusty set of heat exchangers Steve! I'd love a toasty camper but if I were to try and fit one of those I'd end up with exhaust fumes in the cab and heat in the engine bay! :lol:
 
More heating... nearly there...

I thought I should have a clean up and paint a few things so I could install the heater permanently.
DSCF3825.jpg


And I remembered the fuse for the heater so fitted that, as well as the fused wiring for the reverse light.
DSCF3827.jpg


I'll need a second battery which is why I cut the wheel well out, so I made a Heath-Robinson battery hold-down from bus bits - a few bits of bent steel, an engine lid hinge, a T4 air filter/carb spring clip and same engine oil bath filter hold-down clip. I was bored!
I'll take it back out and tart it up now that I know it works mechanically. The carb spring and hold-down clip work a treat.
DSCF3828.jpg


Painted bits with a random mixed up can that said "red" on it. Not a bad match - got lucky there - I just wanted to stop it rusting before it started! I'll do it properly when I paint the floor, which will be after I get the interior at least half together and back out again. Just enough paint for these bits and it ran out. As you can see from the side panels VW's attitude in 68 seems to have been "if you can't see it don't waste paint on it".
DSCF3830.jpg


I'm gathering internal bits and bobs but not had time to do anything with them. I don't want anything new inside the bus, though the ceiling panels I'll have to draw a line at. The interior will be custom built day bus style - if that means what I think it does. :lol: I want to be able to camp in it, but I don't want that to be too obvious. So no permanent curtains/rails, hidden cupboards and stuff. I've got a pair of ka elec window winders do do something amusing with I hope - though no idea what yet. :?
 
HOT RODDER !!!!thats the sort of thing i would do.nice job.never throw bits away as you never know when they will come in handy :msn4: --------------got boxes full :oops: ;)
 
Just caught up on your thread and doing a grand job :mrgreen:

Will be so good when the heater is fully functioning inside the van :D
 
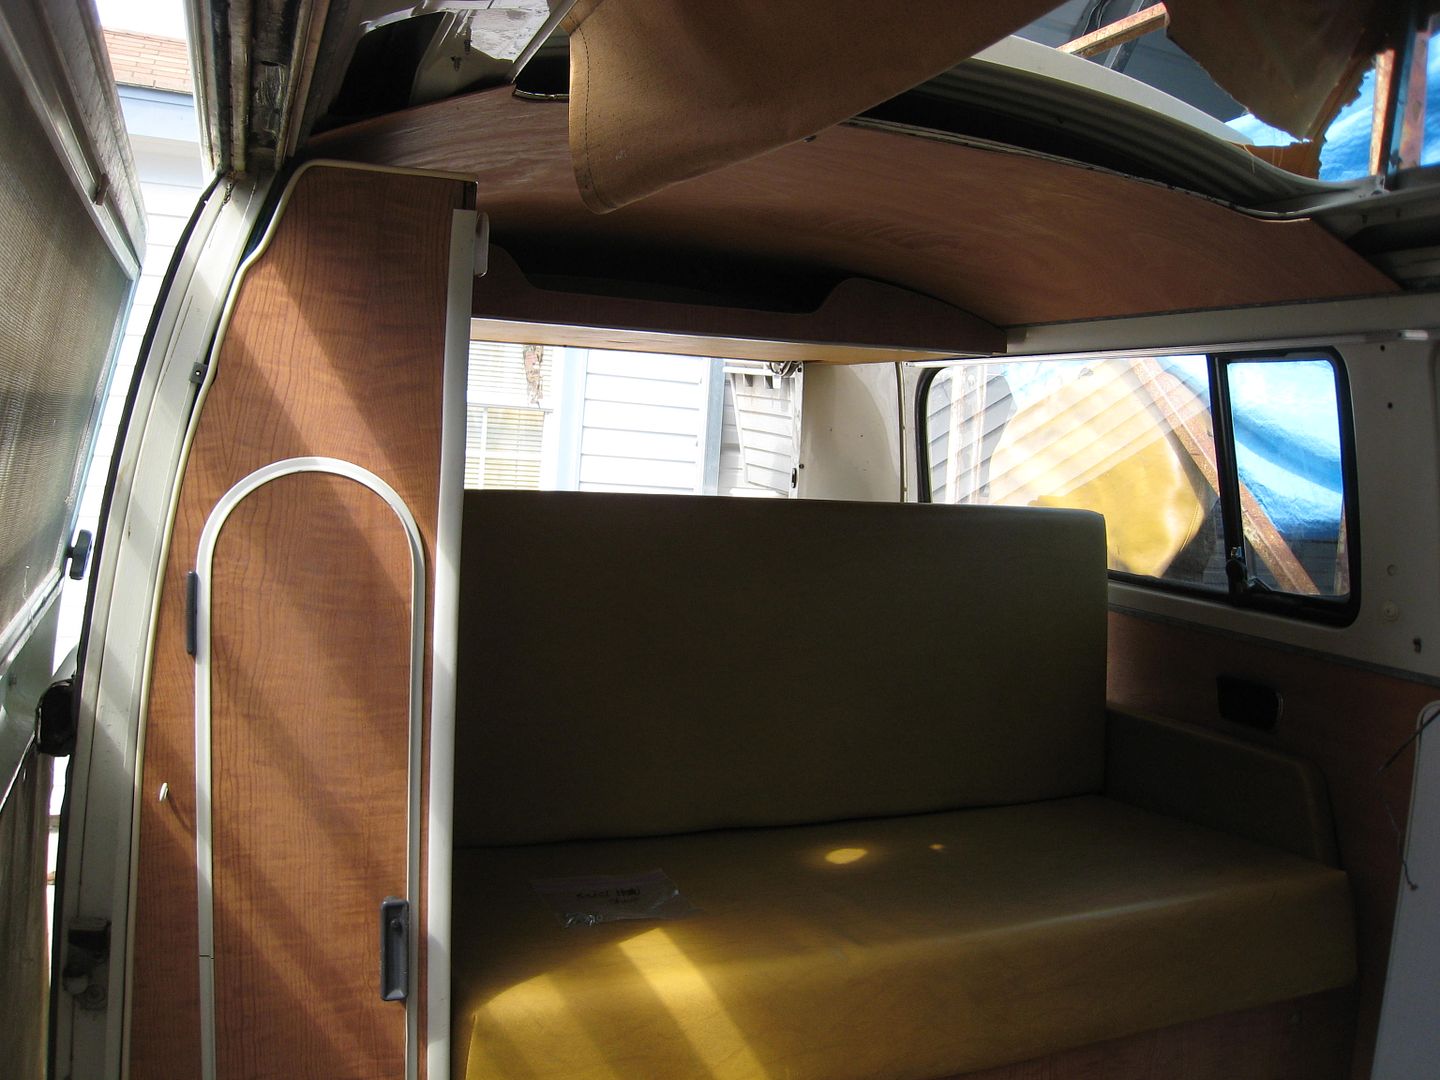
Been doing some thinking but not a lot of doing. Today I thought I'd have a bash at the ply headliner. It had a knackered cloth one originally but wood will compliment the look I want inside. First I cut the front panel out using a mates late bay Westy as a template. I'd been trying to buy a set from Grazy but not sure what's happening there. I cut it out using my trusty angle grinder. Worked a treat.
DSCF3848.jpg


Because it had a fabric headliner I had to spot drill the strips off that the liner fits too above the doors - this stuff.
DSCF3849.jpg


Also I need strips to hold the roof up. Nearly £100 from anyone selling them. No thanks that's daylight robbery. I had some oak beading I'd had made when I renovated an old summerhouse. Not right but with some routing I made a cut-out step to catch the panel and rounded the corners that would be towards the inside of the van. What I did was first route a groove in some scrap that I could feed the the strips through, drilled a hole for the router blades to spin in and clamped the router to the wood with welding clamps. I could then set up different blades and make what I wanted.
DSCF3846.jpg


Here's the strip fitted. It's pretty slim and a soft wood would have split and broken. I'm not hot on screws showing, but again they won't look out of place by the time I've finished. It looks rather natty I think.:)
DSCF3855.jpg
 
So I fitted the front part first. It was a bugger to get in. 3.6mm is too thick. I could hear it creaking and splitting as I maouvred it in place in the time honoured fashion, but it did twang into place eventually. Needs finishing at the front. I had to cut the "horns" off the front corners as it just wouldn't bend enough.
DSCF3850.jpg


Westy ones are way thinner, but the main difference is that outer layer grain runs the other way. Ply is always made with the outer ply grain running end to end for strength - to stop it bending over it's length. Because a std ply sheet isn't wide enough to stretch across the van, I had to use it longways and it didn't like to bend. I couldn't get bigger sheets locally. Or thinner ones that were any good.

Anyway, this is how to fit them if you didn't know.

First get them in upside down.
DSCF3851.jpg


Then if you're using this type of ply you'll need one of these.
DSCF3852.jpg


Then push up one side.
DSCF3853.jpg


Then don't stop to take pictures while it's so stressed it's about to snap before you push the last bit up.
DSCF3854.jpg


Not sure where to go from here. :( Prob need thinner stuff or bigger sheets but nobody seems to stock them around here. Back to the drawing board. At least the strips are conquered and I know what I need.
 
sparkywig said:
Looks tidier than a galv strip that's for sure....
Thanks Sparkers. I generally don't like to see screws and screw cups - it looks lazy. I considered trying to make an oak J section, but it would never work without being too chunky, so I'm going to have to love the screws. :) I'm V pleased with the strips though.
 
I feel your pain on the wood paneling headliner. I too have to make all new headliner/passenger area roofing. What ever it is called LOL. I did the same thin as you, in the back of my bus though. I didn't realize they used 5x5 sheets of paneling. I can only find 4x8 sheets at the local do it yourself stores (Home Depot). So I did the same as you and cut it long way's, which made the grain go the opposite of what it should go. I did luck out and unless you look real close, you can't tell that it snapped.

It's kind of hard to see in the pic, but about a foot up on the right, is where it cracked. Luckily the visible part is on the top and you can only see somewhat of a odd line or valley. Not sure what to call it exactly, but it's not to visible.

IMG_1623.jpg


I have been told I can get 5x5 or 5x8 sheets of birch somewhere here in CA. I just don't know where yet. LOL I need to contact the "pro" part of Home Depot or maybe a lumber yard specializing in wood only, to see if they can special order it for me. I know it will probably be some what expensive so I am kind of procrastinating on it. LOL So I am currently running around with just the back portion done. Above my head it is bear metal and screws that hold the pop top bracket! LOL
 
Someone offered me 5x5 sheets of birch ply for £20 each + £25 delivery but that's too much. If I went that route and also bought the strips it would be cheaper to get a cloth headliner installed! I'm trying to save money - not make £easy profit for someone who chops 10x5 sheets in half, kind though the offer was I suppose.

Now thinking I might add a spine down the middle which would get me over the hurdle and might be quite 8)
 
What do you do as the weekend is ticking away and you didn't get very far with plan A? Plan B!

We have an old drapers cabinet. Lots of little draws behind up and over glass doors. It's made so you can suite them up without side panels and just have one on the ends - this one has one whole end and one with just the front bit of the end. With me? Doesn't matter. So it comes to bits quite easily. 8)

A spine down the middle means I'll be able to flex the panel more easily in two pieces with the grain the right way. Having found how springy this stuff is, I wanted the spine to be firmly fixed so it can't twist while I'm putting the first panel in. For each end of my bits of cupboard I made 2 L brackets, then spot welded them to a plate to span across the back.
DSCF3865.jpg


As you can see they have a groove in each side ideal for panel slottage - and they came off the cupboard so easily... One piece of cupboard wasn't quite long enough to span two roof panels and each piece had an "embelishment" at one end. It would have been rude to the designer not to let them live on... :)
DSCF3866.jpg


I managed to salvage enough ply to make 2 panels and slotted them in. Then I fed another piece of beading through the router to make cover strips for the panel joins and screwed them in place.
DSCF3873.jpg


Embelishment in action...
DSCF3876.jpg


DSCF3870.jpg


...and another following behind.
DSCF3877.jpg


One thing's certain - nobody else will have a ceiling like mine. :eek:

But can you see the silly mistake I made?
 
I had considered doing a split roof like yours after I failed the first time round in making it in a single piece (with an offcut I had from something else that wasn't particularly suited to the job as it was too thick). I have to say I really like the way it is looking on yours!

When my bus is back on the road and I can chuck everything stored inside it back in to the garage I can tackle the interior a wee bit again!
 
Merlydog said:
Light?
That's ingenious Mr Zedbed.. Looks factory fit :D
You mean old and battered? :lol:
Yes light. Well actually the wires. I don't like the lights and they use a lot of power for very little light, but I've trapped the live wire for the front one under the panels. That fuse is gonna be blown. I'm going to uplight. :)
 
gvee said:
I had considered doing a split roof like yours after I failed the first time round in making it in a single piece (with an offcut I had from something else that wasn't particularly suited to the job as it was too thick). I have to say I really like the way it is looking on yours!

When my bus is back on the road and I can chuck everything stored inside it back in to the garage I can tackle the interior a wee bit again!

I'd found this for inspiration.
headlining1.jpg
 

Latest posts

Top