

Preferably the 200mm as you have more availabilty and options on the clutch.
You are using an out of date browser. It may not display this or other websites correctly.
You should upgrade or use an alternative browser.
You should upgrade or use an alternative browser.
Diary of a virgin (engine rebuilder) - still signs of leaking..
- Thread starter Termite
- Start date
Help Support Early Bay Forum:
This site may earn a commission from merchant affiliate
links, including eBay, Amazon, and others.
- Joined
- Mar 22, 2011
- Messages
- 214
- Reaction score
- 1
Dropped it off this morning along with a flywheel and both cranks.
I have googled. Let's hope I pick them up next weekend ok. Seemed easier to drop them off then get sent posted off somewhere.
I have googled. Let's hope I pick them up next weekend ok. Seemed easier to drop them off then get sent posted off somewhere.
- Joined
- Mar 22, 2011
- Messages
- 214
- Reaction score
- 1
atafonso said:Preferably the 200mm as you have more availabilty and options on the clutch.
At least I've got that bit right.
Got quite a collection of engine parts after stripping those enignes down...

- Joined
- Mar 22, 2011
- Messages
- 214
- Reaction score
- 1
During the tidy up of the workshop, I took a look at the 1300 cylinder heads. They are original VW and don't appear to be cracked. Would they be worth getting flycut to fit 1600 barrels/pistons to rather than buying new heads from EMPI or someone?
They can be flycut, but you have to reduce compression by using shims under the barrels. The genuine ones normally cool better than the aftermarket of today, although the new Empi heads are very good in the sense of having more material around the combustion chamber, thus reducing the chance of cracks but to the expense of not cooling as much as the gen VW. In your engine, i would use the ones you have providing you set the correct compression ratio.
Abel
Abel
- Joined
- Mar 22, 2011
- Messages
- 214
- Reaction score
- 1
So getting them flycut is the suggestion? I suppose that with new valves would be a hellnof a lot cheaper.
I'll strip the heads this week so I can properly inspect them, then I can drop them at TES when I pick the case up, or find someone more local to do it.
I'll strip the heads this week so I can properly inspect them, then I can drop them at TES when I pick the case up, or find someone more local to do it.


$34.88
$42.48
Tamiya 51616 VW Bus Type 2 (T1) Remote Control Car Accessory Body RC Model Making
HopMeUp


$21.60
$29.91
ハセガワ Hasegawa HMCC11 1:24 Scale VW Type 2 Pick-Up Truck Model Building Kits
Amazon Japan


$27.95 ($13.98 / Count)
Marketplace Auto Parts Window Crank Handle Set of 2 - Chrome with Black Knob - Compatible with 1968-1978 Volkswagen Beetle
Parts Geek LLC


- Joined
- Mar 22, 2011
- Messages
- 214
- Reaction score
- 1
Another slight twist and a shedload of questions...
I had a second pair of 1300 cylinder heads in the garage at my Mum's and I took a look at those tonight, stripping the valves out and cleaning up the combustion chambers to check for cracks. The valve seats are also a hell of a lot better than the 1600 heads I split down previously. They are crack free, so getting a pair fly cut now seems a decent option. The valve sizes were 35mm (must have been 35.5 and I mis-measured) and 32mm. These are the two heads, let me know if anyone spots anything alarming!

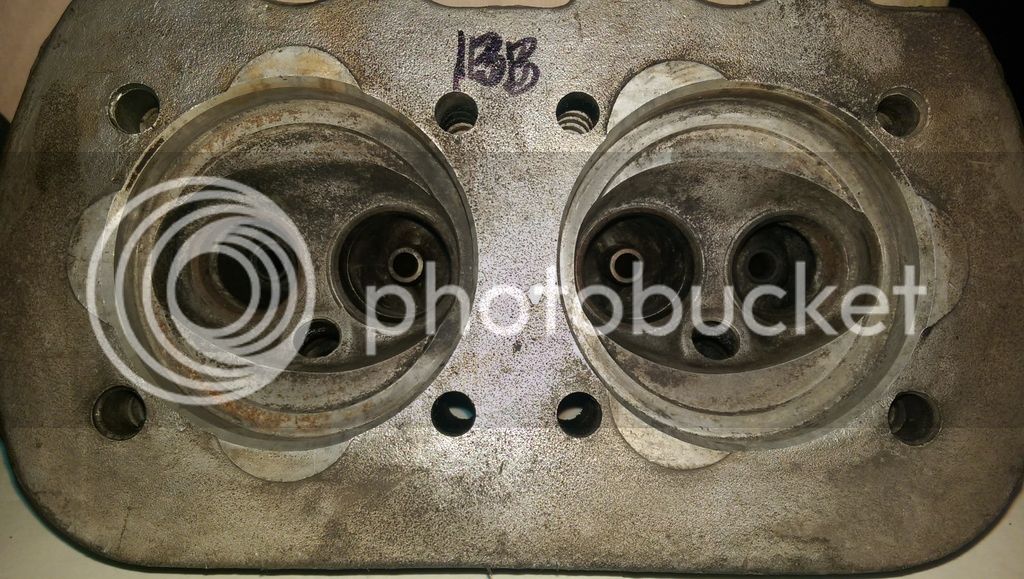
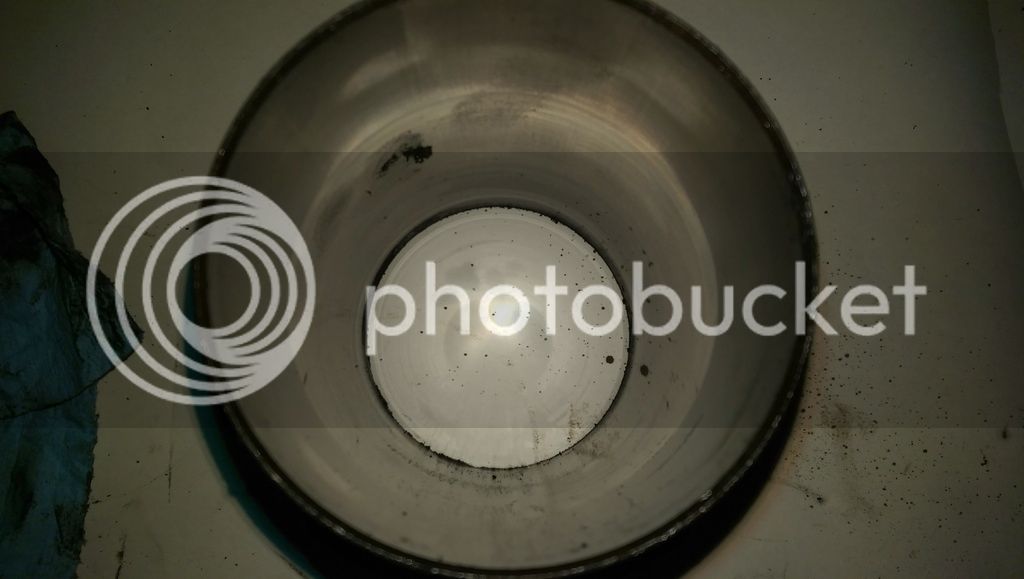
Now to the pistons... the set of 4 that came off of the 1600 engine have dished pistons. All the pistons have burnt oil marks either side around the gudgeon pins and are covered in crud on the head of the piston, but none have nay major scoring to the pistons or barrels. Any main damage/marks are a big rust streak down one of the barrels.


The piston I took a close look at looks like it will clean up alright and this is one of the other barrels that I did wipe out.
I also measured one of the piston and barrels (I didn't have time to do all 4) with a digital caliper and the ring gaps with a feeler gauge (I measured the gap between the top of the ring and the piston, not the gap between the two ring ends when compressed). These are the measurements:
Top of piston - 85.4mm
Base of piston - 85.8mm
Top ring gap - between 0.25 and 0.30mm
Middle ring - 0.05mm
Bottom ring - 0.10mm
Top of barrel - 85.9mm
Base of barrel - 85.9mm
Do these sound usable if I cleaned them up and out a new set of rings on them? If they do, am I far better off just getting the heads flycut for 1600 and cleaning up these pistons than buying a new top-end rebuild kit with non-German parts?
I had a second pair of 1300 cylinder heads in the garage at my Mum's and I took a look at those tonight, stripping the valves out and cleaning up the combustion chambers to check for cracks. The valve seats are also a hell of a lot better than the 1600 heads I split down previously. They are crack free, so getting a pair fly cut now seems a decent option. The valve sizes were 35mm (must have been 35.5 and I mis-measured) and 32mm. These are the two heads, let me know if anyone spots anything alarming!


Now to the pistons... the set of 4 that came off of the 1600 engine have dished pistons. All the pistons have burnt oil marks either side around the gudgeon pins and are covered in crud on the head of the piston, but none have nay major scoring to the pistons or barrels. Any main damage/marks are a big rust streak down one of the barrels.


The piston I took a close look at looks like it will clean up alright and this is one of the other barrels that I did wipe out.

I also measured one of the piston and barrels (I didn't have time to do all 4) with a digital caliper and the ring gaps with a feeler gauge (I measured the gap between the top of the ring and the piston, not the gap between the two ring ends when compressed). These are the measurements:
Top of piston - 85.4mm
Base of piston - 85.8mm
Top ring gap - between 0.25 and 0.30mm
Middle ring - 0.05mm
Bottom ring - 0.10mm
Top of barrel - 85.9mm
Base of barrel - 85.9mm
Do these sound usable if I cleaned them up and out a new set of rings on them? If they do, am I far better off just getting the heads flycut for 1600 and cleaning up these pistons than buying a new top-end rebuild kit with non-German parts?
Heads looks ok, get new exhaust valves and keep the intake ones. Flycut for 1600 barrels then measure the cc's of each head. If they don't match, you have to use different cylinder shims in order to have the same compression ratio on both sides of the engine. You MUST calculate the compression and adjust with shims, 1300 heads with no shims will give too high compression and that's no good.
Clean the pistons well first; check if you can see the machine marks on the outside all the way to the top. If not, they are worn. The barrels should have no ridge, then you can just hone them and reuse. If it has a ridge, it could work, but will not perform properly and the piston can rattle when taking the foot of the gas, very distinticve sound.
My suggestion if buying new pistons: Don't buy 1641, buy the 1600 as the cylinder walls are thicker and more durable. 1641 have a shorter life and not viable as the increase in cc's is marginal.
Abel
- Joined
- Mar 22, 2011
- Messages
- 214
- Reaction score
- 1
Yes - I've read about the 1641cc pistons being a touch thinner and sometimes having issues which has put me off of it.
The pistons I had last night definitely have machine marks on them running all around the barrel to the top. There's no rush to buy a top-end rebuild kit apart from the fact everyone keeps selling out of them. Heritage have suggested 1641cc pistons and barrels as a replacement for their out of stock 1584s, but I am wary still.
The only ridge on the barrels was oily crud, so a good clean seems like the order of the day to properly assess them along with the pistons. Fingers crossed them are reusable.
I think getting those heads cut is the right way to go. I will give the engine shop a ring later to see how the case and crank got on and have a chat to them. I was planning on getting new exhaust valves. Would it be worth just doing new intake valves as well or trying to clean up the old ones and relapping them in? I think intake valves are around £8 each, so another £32 to do both.
If the pistons and barrels are as you describe, they can be used after a thorough clean specially the ring channels. The barrels would benefit from a hone, just buy a glaze breaker on ebay, use a hand drill at slow speed and go up and down not allowing stop going up and down while the drill rotates. All you need is to break the glaze and give a cross hatch finish while keeping the pattern of the hone at an angle of 45°. I normally use some brake fluid as lubricant and helps with cutting better.
Keep the intakes valves as they are better quality and do not suffer as the exhaust due to the charge of air and fuel cooling them. You MUST replace the exhaust ones to have peace of mind, they normally drop after 30-50k miles generally on n.3 cylinder, the hottest running of them all. Don't forget to lap all the valves, they always need a valve job.
Abel
- Joined
- Mar 22, 2011
- Messages
- 214
- Reaction score
- 1
Thanks for the advice. Can't wait to clean them up and have a proper look. Would you suggest new rings for the pistons?
Sure, specially if you hone the cylinders.Termite said:Thanks for the advice. Can't wait to clean them up and have a proper look. Would you suggest new rings for the pistons?
- Joined
- Mar 22, 2011
- Messages
- 214
- Reaction score
- 1
Pistons and cylinders cleaned up ok last weekend, so I've ordered the rings for them as well as everything else I needed for the build.
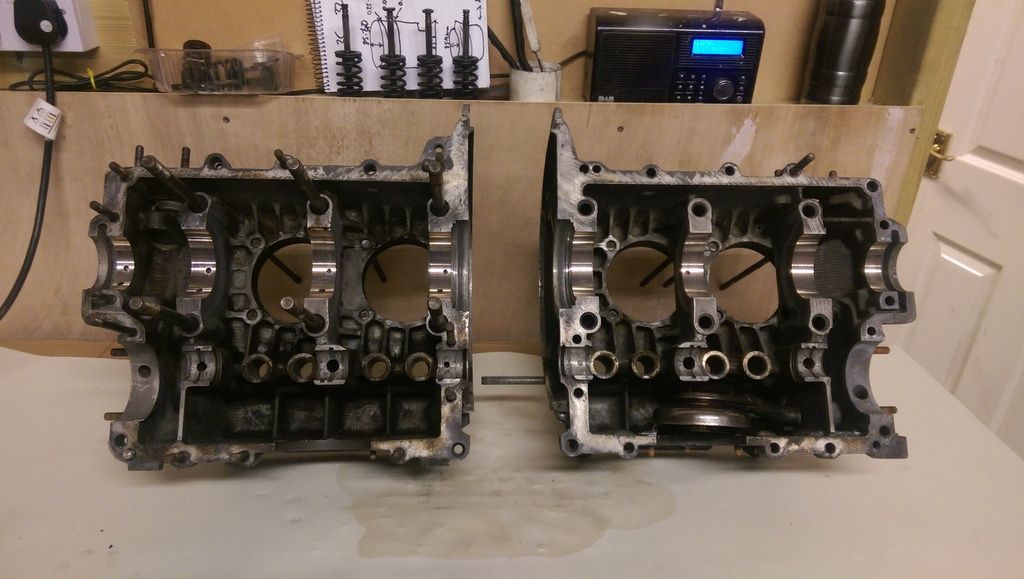
I collected the engine case, flywheel and crank last weekend and the cylinder heads that were flycut were delivered back to me today.
Barrels and pistons paired up and colour co-ordinated with cable ties as permanent pen doesn't hold up to degreaser!
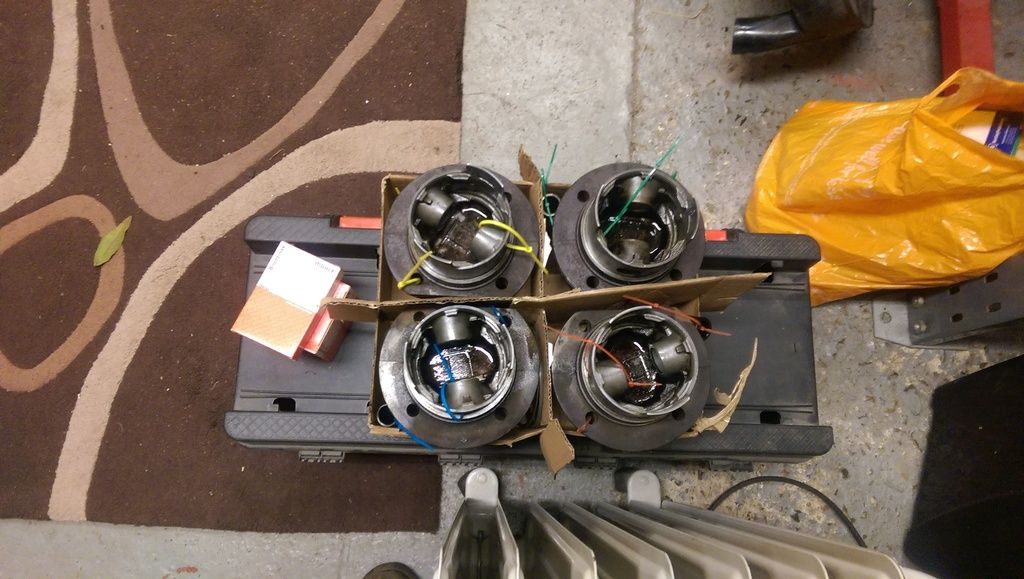
Engine case line bored 0.50mm
Refaced flywheel
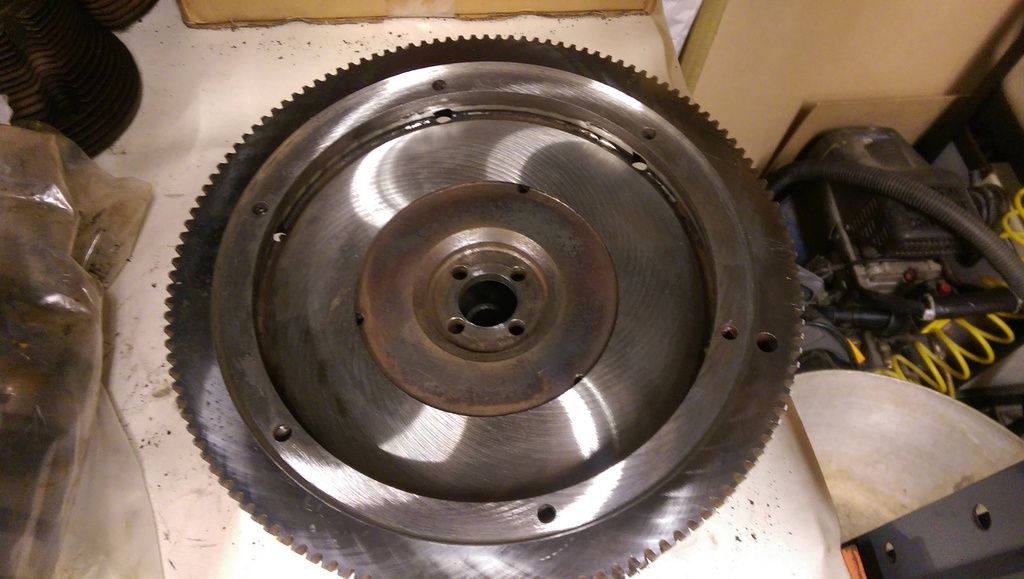
1300 heads flycut for 1600 barrels and pistons

Tomorrow will be a final clean of the case with a couple of cans of brake and carb cleaner and a few toothbrushes, plus a blow out with the airline to ensure there's nothing in the case from it being line bored. Then it should be on to putting the bottom end together.
I collected the engine case, flywheel and crank last weekend and the cylinder heads that were flycut were delivered back to me today.
Barrels and pistons paired up and colour co-ordinated with cable ties as permanent pen doesn't hold up to degreaser!

Engine case line bored 0.50mm

Refaced flywheel

1300 heads flycut for 1600 barrels and pistons

Tomorrow will be a final clean of the case with a couple of cans of brake and carb cleaner and a few toothbrushes, plus a blow out with the airline to ensure there's nothing in the case from it being line bored. Then it should be on to putting the bottom end together.
minty
Well-known member
Nice job, I'm doing very something similar at the moment after I got hold of a 1300 twin port. Can I ask who did the work on the heads? I have a decent pair of 1300 heads that I would like to reuse to get it to 1600.
Cheers
Martin
Cheers
Martin
- Joined
- Mar 22, 2011
- Messages
- 214
- Reaction score
- 1
I got the heads done at The Engine Shop (TES) in Erith (http://www.theengineshop.info" onclick="window.open(this.href);return false") . They cost £70 to get machined. I was happier trying to reuse VW ones than get new. I've got a new set of valves for one head and a new pair of exhaust valves for the other.
. They cost £70 to get machined. I was happier trying to reuse VW ones than get new. I've got a new set of valves for one head and a new pair of exhaust valves for the other.
Does anyone know whether you are supposed to "key" the two halves of the engine case before you put the case sealant on? I wasn't going to, just tried to take the worse of the crap off of it with a scotch pad. But someone was up the workshop today and passed comment on saying it should be keyed. I haven't seen that on any videos etc..
. They cost £70 to get machined. I was happier trying to reuse VW ones than get new. I've got a new set of valves for one head and a new pair of exhaust valves for the other.Does anyone know whether you are supposed to "key" the two halves of the engine case before you put the case sealant on? I wasn't going to, just tried to take the worse of the crap off of it with a scotch pad. But someone was up the workshop today and passed comment on saying it should be keyed. I haven't seen that on any videos etc..
- Joined
- Mar 22, 2011
- Messages
- 214
- Reaction score
- 1
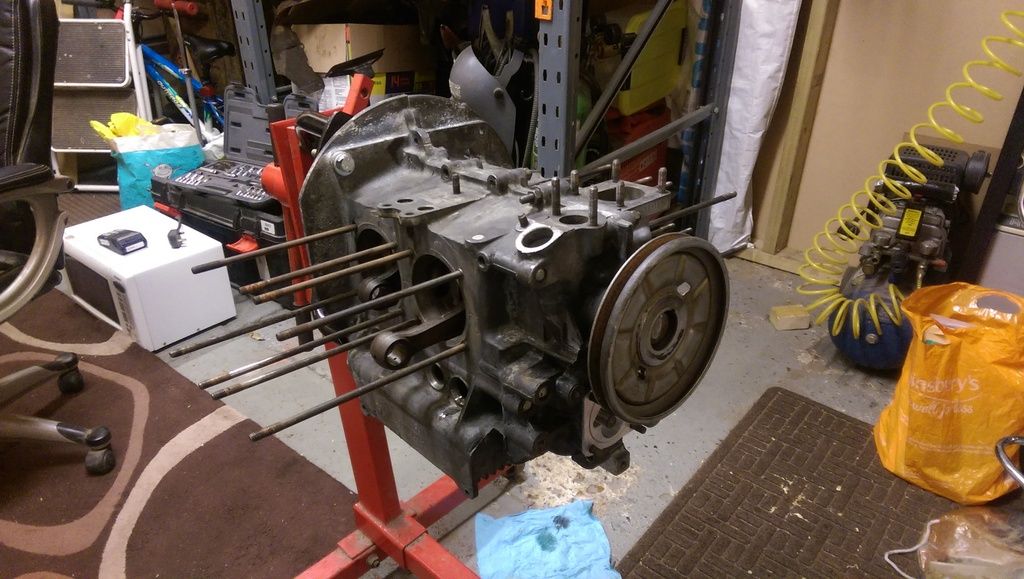
So been busy cleaning the case edges and assembling the bearings and gears on the crank, all with a coating of assembly lube and a drop of engine oil. Put the crank in the case half and it spins nice and freely. If I put the other case half on and torque up the 6 main case bolts, it seems to spin a touch tight.
How freely/tight should it spin in the case with nothing attached? If I put the pulley on a bit I can turn it freely, but it always seems to take a bit of effort to get it to start turning.
I've had the case apart several times and have tried removing some of the bearings to see if it makes a difference. It seems that the thrust bearing is the one that makes it a bit tighter to turn when torqued. It's definitely seated correctly in the case. Is it a case of turning it over a few more times to free it up or should I be overly concerned?
If you assemble it like that it will seize. Probably one of the dowel pins is too long or the line bore is too tight.
Is not that easy assembling the engine after machining. One thing is to strip, clean and put back together, another thing is to assemble after machining. If the maching is not done properly, sometimes is very hard to make things work as you have to adjust bearings, polish crank, etc.
Give me a call and i will guide you through.
Abel
- Joined
- Mar 22, 2011
- Messages
- 214
- Reaction score
- 1
I went away for the weekend and haven't done much bar a couple of hours this evening. Probably obvious, but I was referring to a specs sheet I had with the torque values on them. The large case nuts said 25 ft lbs and a torqued them straight to that number.... Had a flick through a couple of books and it said they should be torqued to 15, 20 and then finally 25. Did that and it turns over lovely and smoothly with no tight spots. Guess its part of the learning curve....
Today I left the case assembled with the con rods attached to the crank and the camshaft in as well, giving it a turn over by hand to ensure it felt smooth and no tight spots. Felt nice to me. So next weekend will be the final assembly of the lower half with case sealer this time as I now feel as happy as I can be with the fit if the bearings, crank, cam etc..
Thanks for the comments and feedback so far.
- Joined
- Mar 22, 2011
- Messages
- 214
- Reaction score
- 1
Quite a productive, if not frustrating weekend on the engine this week. Got the lower half of the engine assembled with gasgacinch on the case halves. Prior to this, I had test assembled the thing at least half a dozen times and I was sure that I had the con rods the right way up. Well the con rod fairies must've popped in over night and swapped them up the other way as when I was at the point of pushing the case halves together with the sealant on, I noticed the marks on them were facing downwards. A quick disamssemble and 180 degree flip soon sorted them out!
I was going to lap the valves into place and set the heads up today as well. I'd bought new exhasut studs and went to take the old ones out. 5 came out fine, 3 are stuck fast - one of those snapped. The two remaining ones I cannot back out using the two nut trick as both back off the stud. So cutting them and drilling them out seems the only option. That gave me the hump, so I moved onto something a bit easier and honed the cylinders instead with the honing tool I bought.
Had a go with a spare cylinder just to get the hang of it without risk of buggering up one of the ones I planned on re-using. A quick spray of WD40 and 10 back and forths with my cordless drill on speed 1 seemed to put a nice cross hatch in them. Another spray and a wipe out, then it was time to mask the edges of it and give them a spray with satin black. I will give them a couple of seconds with the honing tool again when I am up there next weekend, then wipe some engine oil round the inside of them to stop any rust.


A couple of questions...
1) Does anyone know if the little rubber washers that go on the studs which the rocker gear fits onto come in the gasket set? Forgot to have a look when I was up there earlier.
2) The piston rings I got from JustKampers seem to have a different style oil ring in them, nothing like the ones that came off the pistons. Is this just what they are like nowadays?
- Joined
- Mar 22, 2011
- Messages
- 214
- Reaction score
- 1
I've been pretty busy, but have managed to do some stuff on the engine. I reassembled one of the cylinder heads today with new valves that were lapped in and amazingly didn't leak! Have'nt had quite the same joy with the assembled halves of the engine though...
The first time I assmebled the engine, when I checked it the day after there was a couple of oil drips on it at the front and back of the case on the bottom seam. This oil is just oil I've used in asembling the engine and rub on the bearings with assembly lube. So I tore the engine apart again last weekend, cleaned the gasgacinch off the case and then went around the case again cleaning as much ground in dirt that I could stil see off with 600 grit wet n dry. This time I put a touch more sealer on it and reassembled. Checked the engine in the evening and no sign of oil leaking. I left the engine on the stand at 90 degree angle so no oil would sit in the sump.
Turned it back over in the week and left it. Checked it today and while there were no drips, there appeared to be signs of oil along the join like it had still seeped through. Much better than last time as no drips, but still don't think it's right. What else can I try or do I just leave it? Not sure I have the heart to strip and clean it yet again... If I thought I had done something wrong or I can do something different, then I'd be tempted, but I cannot see what else I can do differently that might stop it.
Similar threads
- Replies
- 0
- Views
- 177