You are using an out of date browser. It may not display this or other websites correctly.
You should upgrade or use an alternative browser.
You should upgrade or use an alternative browser.
Restoring Mollie (69 Bay) 500+ Photos
- Thread starter Nick-Rackham
- Start date

Help Support Early Bay Forum:
This site may earn a commission from merchant affiliate
links, including eBay, Amazon, and others.
Nick-Rackham
Well-known member
Bit of an update
Doing the rear tub I noticed the bumpstop hanger looked suspect so chopped it off

Cut it out

Cut an off cut to size

Tacked in

Seam welded in

Ground back

Spent a little time building this bad boy up. All seems to be where it should but need to get Ted at Slamwerks to mod the lower trailing arms. So will be stripping it back, cleaning up, painting bits and then back together again")

Surprising how quick flash rust forms using air tools. Have an air filter but still get moisture out of the tools and this is what happens! Using electric tools for cleaning back and then getting etch on quick to try and reduce this!!

So it's fully welded in, took a while, and not the easiest of jobs, but hopefully the other side will be quicker now I know what I'm doing

Starting to come together now. Got the Autocraft arch panel clamped in place and checking for fit

Cleaned up behind bracing and good coat of zinc primer to protect

Seems to fit OK, bit of fettling needed as the original panel was so knocked about it's stretched and warped!

Cut to size

Tacked in

Welded in

Cleaning up and etching around repair to protect whilst cleaning welds up


Front edge welded in

Cleaned up and sealed

Taking shape need to clean up a bit!!

Started the window repair on the same panel!

Rotten all the way along!

Not sure how I'm going to sort this bit! maybe spot blast it and lead load it?

Spot welded

Meanwhile James is cleaning up underneath, finishing a few welds off and giving a coat of Rust FormulaX and then a couple of coats of Rust Bullet


Looks awesome, well chuffed Cheers Bud, appreciate the help
Meanwhile had a bit of shrinkage on the arch panel, so cut and re welded, still not 100% happy, but I'll live with it for the moment!

Where's Grazy?

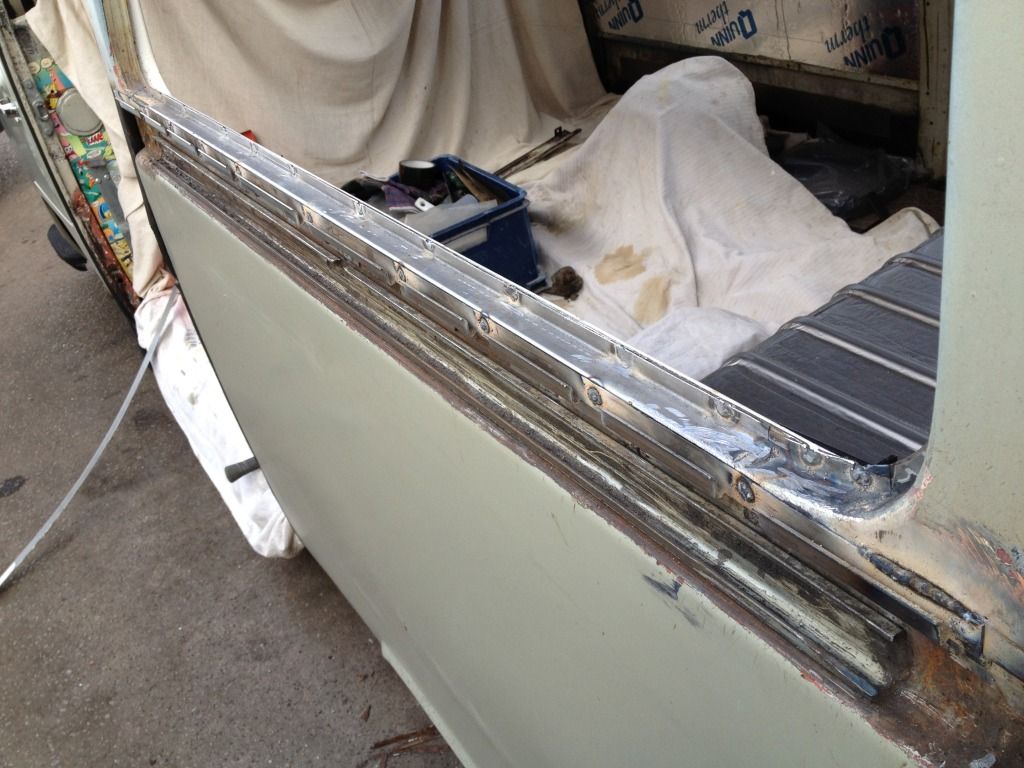
So now the underneath is finished, time to check the fit of the floor. Genuine panels from Schofields with the RHD conversion plate

Looks good but the later floor panels don't fit the same as the early ones, and as the return lip on the rear bulkhead is a bit suspect, I bent a return in the end of the floor plates upwards at 90 degrees and will lap weld the rear of the floor to the rear bulkhead panel. Will be just as strong and hopefully remove a rust trap too!
Just like this

First job to prep the underside once the rear edge is folded so I'll pass over to my assistant Grazy

And then panel wiped. cleaned and some RustBullet going on

Back inside, started thinking this needs some attention pretty soon!

and back outside Grazy going for the second coat

And that's kind of where we're at Hoping to get the small bits in the floor area done today and then get the floor plates spot welded in!
Doing the rear tub I noticed the bumpstop hanger looked suspect so chopped it off
Cut it out
Cut an off cut to size
Tacked in
Seam welded in
Ground back
Spent a little time building this bad boy up. All seems to be where it should but need to get Ted at Slamwerks to mod the lower trailing arms. So will be stripping it back, cleaning up, painting bits and then back together again
Surprising how quick flash rust forms using air tools. Have an air filter but still get moisture out of the tools and this is what happens! Using electric tools for cleaning back and then getting etch on quick to try and reduce this!!
So it's fully welded in, took a while, and not the easiest of jobs, but hopefully the other side will be quicker now I know what I'm doing
Starting to come together now. Got the Autocraft arch panel clamped in place and checking for fit
Cleaned up behind bracing and good coat of zinc primer to protect
Seems to fit OK, bit of fettling needed as the original panel was so knocked about it's stretched and warped!
Cut to size
Tacked in
Welded in
Cleaning up and etching around repair to protect whilst cleaning welds up
Front edge welded in
Cleaned up and sealed
Taking shape
need to clean up a bit!!
Started the window repair on the same panel!
Rotten all the way along!
Not sure how I'm going to sort this bit! maybe spot blast it and lead load it?
Spot welded
Meanwhile James is cleaning up underneath, finishing a few welds off and giving a coat of Rust FormulaX and then a couple of coats of Rust Bullet
Looks awesome, well chuffed
Cheers Bud, appreciate the help Meanwhile had a bit of shrinkage on the arch panel, so cut and re welded, still not 100% happy, but I'll live with it for the moment!
Where's Grazy?
So now the underneath is finished, time to check the fit of the floor. Genuine panels from Schofields with the RHD conversion plate
Looks good but the later floor panels don't fit the same as the early ones, and as the return lip on the rear bulkhead is a bit suspect, I bent a return in the end of the floor plates upwards at 90 degrees and will lap weld the rear of the floor to the rear bulkhead panel. Will be just as strong and hopefully remove a rust trap too!
Just like this
First job to prep the underside once the rear edge is folded so I'll pass over to my assistant Grazy
And then panel wiped. cleaned and some RustBullet going on
Back inside, started thinking this needs some attention pretty soon!
and back outside Grazy going for the second coat
And that's kind of where we're at
Hoping to get the small bits in the floor area done today and then get the floor plates spot welded in!OLIVE-BAY
Well-known member
- Joined
- Dec 7, 2010
- Messages
- 528
- Reaction score
- 0
cool nice work there..keep it up be finished in no time 8)
Nick-Rackham
Well-known member
Cheers Want to get the complete back end done up to B posts by Jubilee Bank Holiday weekend and then the fun starts on the front end!!
Want to get the complete back end done up to B posts by Jubilee Bank Holiday weekend and then the fun starts on the front end!!OLIVE-BAY
Well-known member
- Joined
- Dec 7, 2010
- Messages
- 528
- Reaction score
- 0
Nick-Rackham said:Cheers
good luck seems achievable by your recent work rate, front end...my experience is easier
Nick-Rackham
Well-known member
OLIVE-BAY said:Nick-Rackham said:Cheers
good luck seems achievable by your recent work rate, front end...my experience is easier
Can't be any slower to do!!


$27.95 ($13.98 / Count)
Marketplace Auto Parts Window Crank Handle Set of 2 - Chrome with Black Knob - Compatible with 1968-1978 Volkswagen Beetle
Parts Geek LLC


$28.56
$32.43
Airfix Quickbuild Volkswagen Light Blue Camper Van Brick Building Model Kit, Multicolor
Amazon Global Store UK


Nick-Rackham
Well-known member
A very very sad day! My Daughter decided that my "Garage Hoodie" was destined for the bin so she's taken a picture of it and it's now been dumped! My favourite Hoodie, purchased from GAP in January 2003 has served me well

So, once a new, i.e. the next oldest Hoodie was found, it was time to crack on! not many pics, but this has taken nearly all day!!
Cleaned back the contact points on the underside of the floor, cleaned up the top hats and I Beams, plenty of weld through primer and then got the off side half in


and then managed to fettle the near side half ready to get welded in one evening this week

Hoping floor will be in, welds ground back and all cleaned up before next weekend!
So, once a new, i.e. the next oldest Hoodie was found, it was time to crack on! not many pics, but this has taken nearly all day!!
Cleaned back the contact points on the underside of the floor, cleaned up the top hats and I Beams, plenty of weld through primer and then got the off side half in
and then managed to fettle the near side half ready to get welded in one evening this week
Hoping floor will be in, welds ground back and all cleaned up before next weekend!
A sad sad day for your hoodie bud !! , it did have more holes than a cheese grater !!
Hope you get the floor in , and welds ground down before next saturday as ill be along with me paintbrush at somepoint
Good work fella
Hope you get the floor in , and welds ground down before next saturday as ill be along with me paintbrush at somepoint
Good work fella
creationblue
Well-known member
Nice work Nick, tho im sure Grazy could have worked faster if he put his tea cup down :lol:
creationblue
Well-known member
Grazy said:i actually nearly took a big swig out of that cup of anti rust paint as i also had a mug of tea on the floor !! :shock:
Could have been the 1st EarlyBay Death by missadventure :lol:
Nick-Rackham
Well-known member
Better get some jars or something to put the paint in for next weekend dude!!
Sent from my iPhone using Tapatalk
Sent from my iPhone using Tapatalk
Nick-Rackham said:Not sure how I'm going to sort this bit! maybe spot blast it and lead load it?
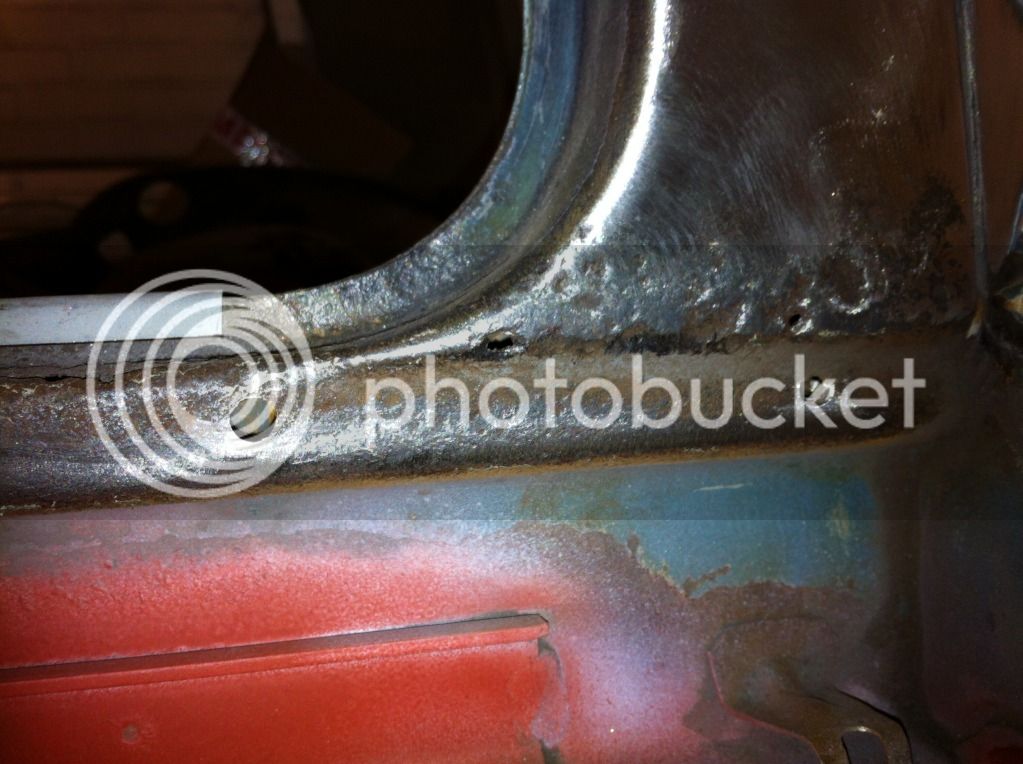
Hello Nick, good progress.
JK do a repair panel that fits nice and is a decent piece of metal.
Nick-Rackham
Well-known member
lol yes it was!! Finger pulled outZedBed said:Wasn't it about a year ago we were discussing fitting this floor? Pull your finger out! :lol:
Sent from my iPhone using Tapatalk
Nick-Rackham
Well-known member
cheers Wigsparkywig said:Nick-Rackham said:Not sure how I'm going to sort this bit! maybe spot blast it and lead load it?

Hello Nick, good progress.
JK do a repair panel that fits nice and is a decent piece of metal.

I'll have a look see on the site tomorrow! Will save a bit of faffing about!Sent from my iPhone using Tapatalk
Nick-Rackham
Well-known member
Cheers Nick
Ordered the repair panel from JK (Cheers SparkyWig ) Hopefully they'll arrive this week. Got to get out and get that floor finished off so Grazy can bring his brushes over!!
Ordered the repair panel from JK (Cheers SparkyWig
) Hopefully they'll arrive this week. Got to get out and get that floor finished off so Grazy can bring his brushes over!! Nick-Rackham
Well-known member
Cheers Kev
New toy arrived well, old toy but new to me

Had to give it a go!

Awesome, pulled a deep point of shrinkage out really quick anyway, window repair panels from JK being delivered today so hopefully I can crack on with that now too
New toy arrived
well, old toy but new to me
Had to give it a go!
Awesome, pulled a deep point of shrinkage out really quick
anyway, window repair panels from JK being delivered today so hopefully I can crack on with that now too