1972 Crossover Dormobile - Full Restoration Work In Progress

Early Bay Forum

Help Support Early Bay Forum:

This site may earn a commission from merchant affiliate links, including eBay, Amazon, and others.
Good work dude.

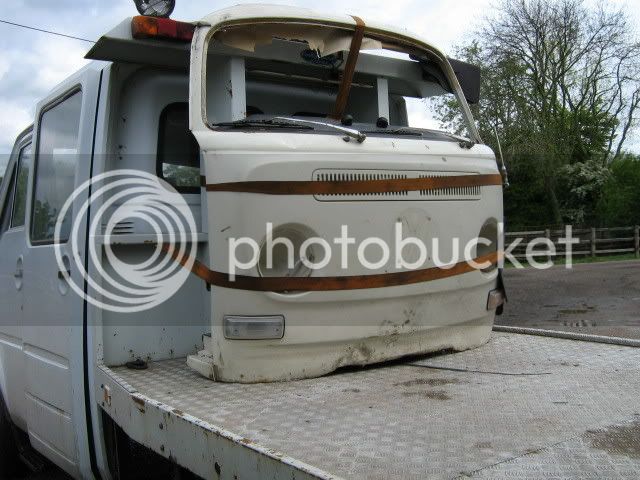
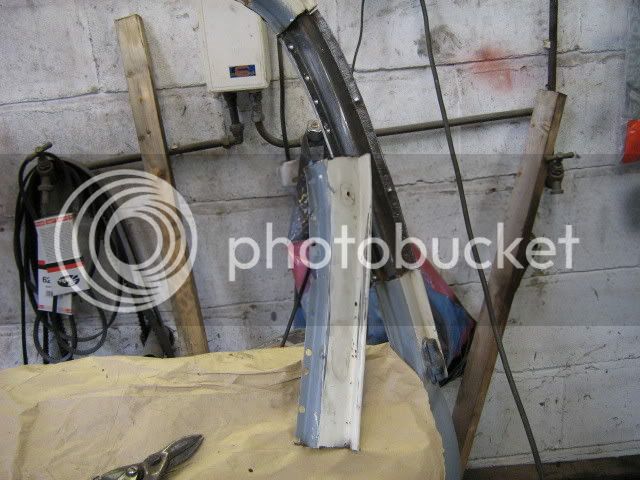
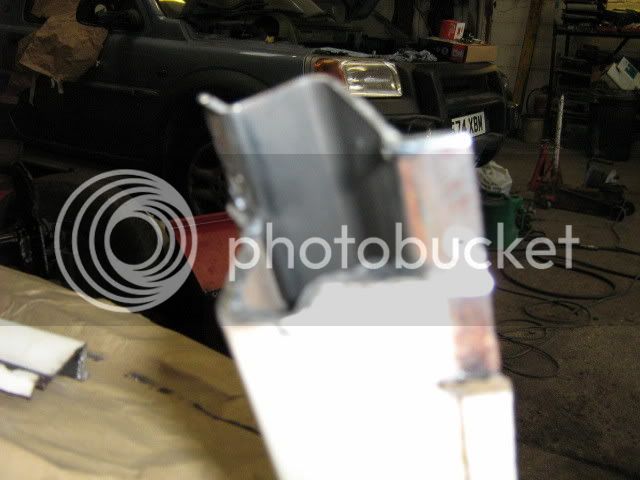
How are you going to join the A pillars? On mine I cut a larger section of the A pillar front panel skin off the donor and rotten sections first.Then worked out the best place to join using the best metal possible.Then you will notice that the main A pillar itself under the skin is two halves of box section.So rather than cut straight through and but weld it up,cut each half at different lengths so you stagger the join in the box section(for extra strengh in the joint).With careful measuring and cutting you can get it right first time without having to trim it later.Using a hacksaw rather than a grinding disc will give you more acurate and neater cuts here.I maybe could have put more distance on the staggers,but I'm happy with how it turned out.Good luck with it! Oh also you'll find some wires going up the pillars for the interior lights and stuff.On mine I accidently cut them because I didn't know they where there at first,I remade them later,so it's probably better if you can take them out first.

Snap with the front panel
IMG_0851.jpg


IMG_0898.jpg

IMG_0900.jpg
 
cheers mate. ye i was going to cut the a Pillars at different hieghts as your pictures show. i had already seen your thread, but now i have a good reference in my thread to make my life easier. unsure what i will be doing yet with repect to attching the bottom onto the chassis legs because the end of mine look a little thinner that when they left the factory. what i was thinking was using the bumper mounts on the front clip, so therefore notch the chassis legs i already have and notching the ones on the clip to give me some strength.

i'll have to think quite abit in the meantime

NaFe
 
reconditioned arms from coolair look tidy....

i dont envy you fitting a front clip :shock:
 
Haveacamper said:
Johnny said:
reconditioned arms from coolair look tidy....

i dont envy you fitting a front clip :shock:

what you mean it'll be a piece of cake :?

just a tack here and a tack there


Dont need no tacking just use some blu-tac & pritt stick, like the PO would have done :lol:
 
pop a set of hinges on it and weld the cab doors shut for a cool front opening custom job.
 
another bit of a boring update, but an update all the same. i decided to remove the heater channel that travels up and over where the beam is to make a little bit more space for priming. while i took the heater channel out i found some rough diamonds. i've seen the thread of the stash of weed under someone's belly pan, but diamonds in the heater channels:

30042008118xo9.jpg


ok so they weren't diamonds... think its just had a smashed windscreen at some point. i knew the windscreen wasnt original and this just emphasises this.

once i got the heater channel out i proceeded to be a little bit anal and sand it back to clean metal and primer it ready for some high temp paint and some new insulation. the reason why i'll paint it in this paint is because i'll be plumming the propes straight into this part of the eater channel.

et voila!

30042008120yb0.jpg
 
i've now primered the connecting bit that goes through the floor and this weekend i managed to give them both 2 coats of high temp paint. unsure it needs high temp paint, but as i already had some i though ti'd use it.

also i spent the rest of my time down the barn finally tidying up all of the underside above the front beam and the area that is below where the cab floor sits.

05052008123qt3.jpg


05052008124tj2.jpg


05052008121hu4.jpg


i think i can now start to look at both prepping my new front and welding my new chassis sections in by my rear jacking points. you can see in the last picture the cross chassis member still black. this needs to be replaced as this is lookng pretty flimsy. however, this will be left alone until i have refitted those rear chassis members.
 
Haveacamper said:
23042008094ie3.jpg

if you remember this^^^^^

well after finding out that the trailor in the same barn as me is to be taken out this w/e for hay cutting i thought i better address getting the bus back on its wheels... although it will only be temporarily. i couldnt have timed it better really because my dad (aka my rofessional welder was coming down the van with me this evening.

the rust was so bad that i had to cut into the thicker plate the the beam will be bolted two. i.e. the bolting face....

13052008140ae5.jpg


a plate was then cut out after we made a template in cardboard. this was made out of 16gauge (1.5mm) and then tacked in....

13052008142wz4.jpg


then another plate of the same thickness was welded in place to create the extra thickness and match flush with the bloting face and seam welded

13052008144fg1.jpg


then the beautiful welded was ground back to resemble what the original should have looked like and primered.....

13052008145by2.jpg


not bad hey??? i'm sure my dad could make a living out of this welding you know!!!

also managed to get the centre chassis section welded in further to it being tacked. also tacked the rear outrigger in place, lined up the new sill and tacked it to the outrigger too.

i think tomorro the plan is to tidy up the other bolting face and finish off cutting small rotten chassis sections out and replacing with good new
 
So, I've decided that by the time i cut out all of the bad bits of my rear cargo floor then i wouldnt have much decent stuff left. therefore, i'm opting for a replacement floor from schofields. due to pick it up at bristol VF in a few wks time. therefore, this
22052008158pv0.jpg


soon became this
22052008159zm9.jpg


the tophat sections were in good condition and dont need to be replaced(think this is a first for me) :) i started to sand down the tophats and start priming away.

i've also been hand sanding my fuel tank down this week and i've primered this up ready for spraying tomorro. think i'm just going for black. i know that i've gone with bright red for my beam and black seems a bit boring, but i thought that because its behind the firewall noone (not even me) is going to see it. unless i put a perspex firewall in :? not sure how much of a fire retarant this would be :)

anyway, photos will follow next week. i'm away this bank holiday w/e so nothing for me on the van
 
nice welds, tidy not to high and hardly any spatter, can i borrow him for a few months? :p

good to see more progress... loxy your turn to get your arse in gear :p
 
cheers dan!

well while i was away galavanting the bank holiday weekend doing the usual like watching indiana and having BBQ in sunny Cardiff on sunday :) my fuel tank was being sprayed black after I had spent a good few hours sanding it down. i think i will give it a coat of lacquer as the paint isnt the hardest. but here are the results...

img0416as3.jpg


img0417at5.jpg


img0418oi1.jpg


...thanks to my dad's spray man :)
 
some nice work there dude keep it up, coming along nicely :D

never know might get to park mine next to yours when there both done :)
 
new floor has arrived. a bit of draft fit means that a little work is still needed.


wheels arches have been excessively plated and new rear tubs are among my mass of parts a have in the barn, but still i need to make a cut or two to get the floor to fit.

same on both sides


schofields have provoded me with the extension piece to fit here so it should close that section off quite nicely.


however, floor was removd and the front most tophat was primered. going to replace it now though. only the middle section of it is good so more hassle than it would be worth to fix. the central chassis section below it also needs replacing, but that was already known. i will get my dad on the case to make another section without the heater channel hole in it.

off for the weekend now. i'm going to pick up these wheels from deva dubs:

http://www.volkszone.com/VZi/showthread.php?t=455131

NaFe
 

Latest posts

Top