You are using an out of date browser. It may not display this or other websites correctly.
You should upgrade or use an alternative browser.
You should upgrade or use an alternative browser.
Cunning Bus Project
- Thread starter cunning plan
- Start date


Help Support Early Bay Forum:
This site may earn a commission from merchant affiliate
links, including eBay, Amazon, and others.
cunning plan
Well-known member
- Joined
- Jul 15, 2008
- Messages
- 2,625
- Reaction score
- 1
- Location
- Northamptonshire
- Year of Your Van(s)
- 1968
- Van Type
- Clipper / Microbus
Still quite a lot D@vey 
Wireing loom, interior, engine, box, glass, etc... :msn4:
Update:
Bus has been put back by the shortage of needle bearings in the UK - :shock:
Ordered from two different suppliers now, both have them on back-order :? I have been wire-wheeling the inside-front clip, ready for paint whilst I am waiting.
cunning plan
Well-known member
- Joined
- Jul 15, 2008
- Messages
- 2,625
- Reaction score
- 1
- Location
- Northamptonshire
- Year of Your Van(s)
- 1968
- Van Type
- Clipper / Microbus
Finally got the illusive needle bearings through the post today. Means I can go to the agricultural engineers on the way home from work tomorrow where they can pop the old ones out and tap the new ones in for a drink.
Saves me buying a slide-hammer - these guys are used to playing with combine-harvesters, so the beam on a bus should be no problem for them.
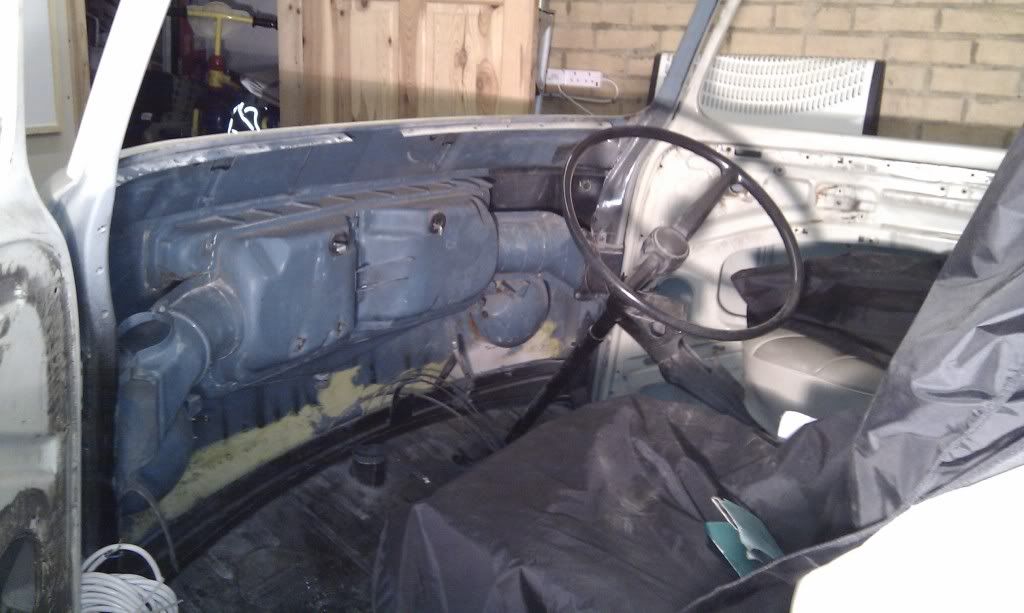
Whilst I am waiting, I am still stripping out, wire-wheeling and cleaning up the inside-front panel. I also took out most of the manky old wiring loom. I have just left enough to attach to a new loom and pull it through the chassis channels using the old loom.
Saves me buying a slide-hammer - these guys are used to playing with combine-harvesters, so the beam on a bus should be no problem for them.
Whilst I am waiting, I am still stripping out, wire-wheeling and cleaning up the inside-front panel. I also took out most of the manky old wiring loom. I have just left enough to attach to a new loom and pull it through the chassis channels using the old loom.
cunning plan
Well-known member
- Joined
- Jul 15, 2008
- Messages
- 2,625
- Reaction score
- 1
- Location
- Northamptonshire
- Year of Your Van(s)
- 1968
- Van Type
- Clipper / Microbus
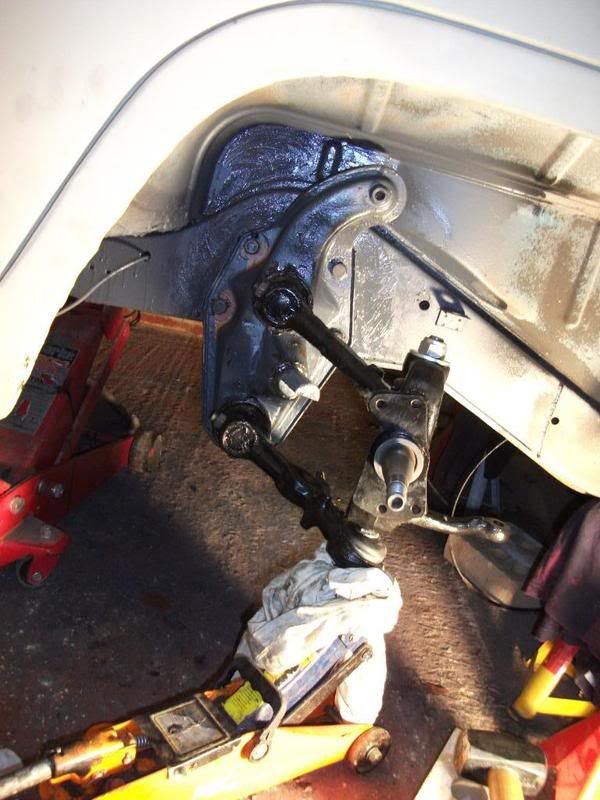
Did a few hours today.
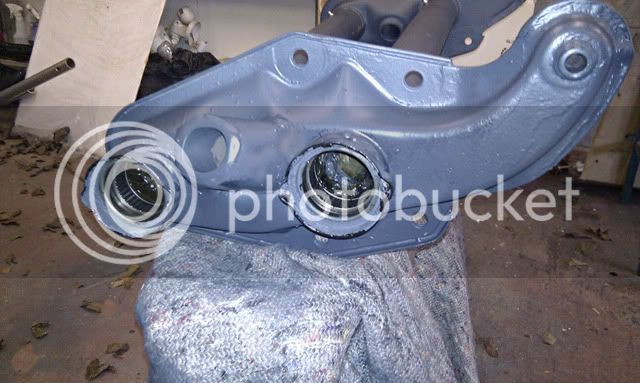
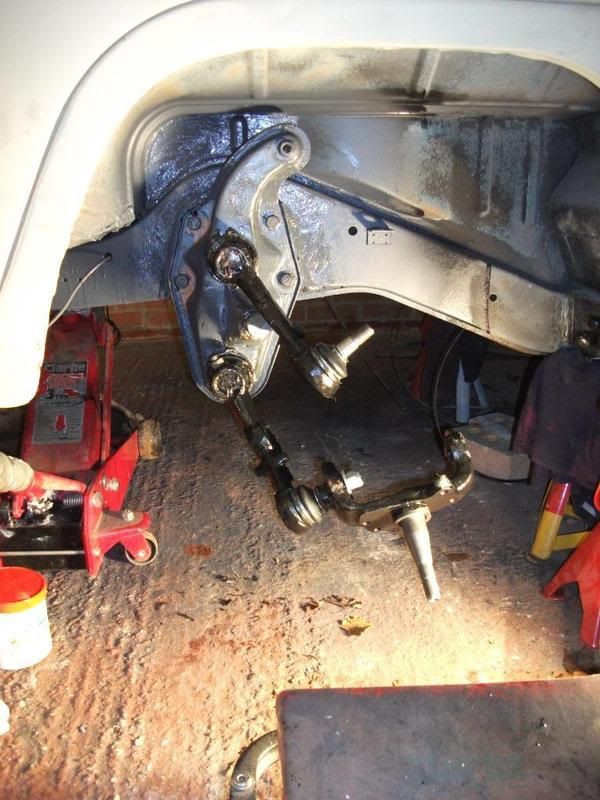
Here is the beam with the new needle-bearings installed.
New grease-nipples all round (don't think they will get used that much, but whilst I was at it I thought I may as well replace what I can).

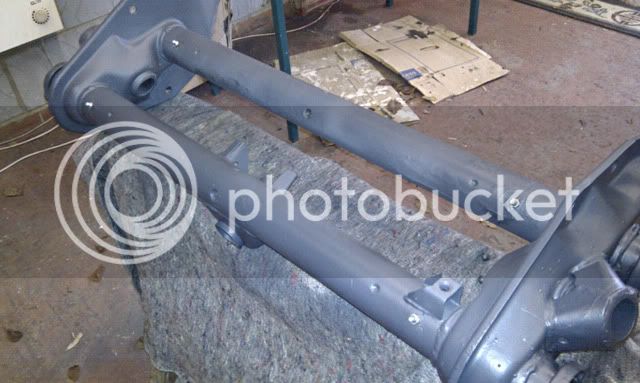
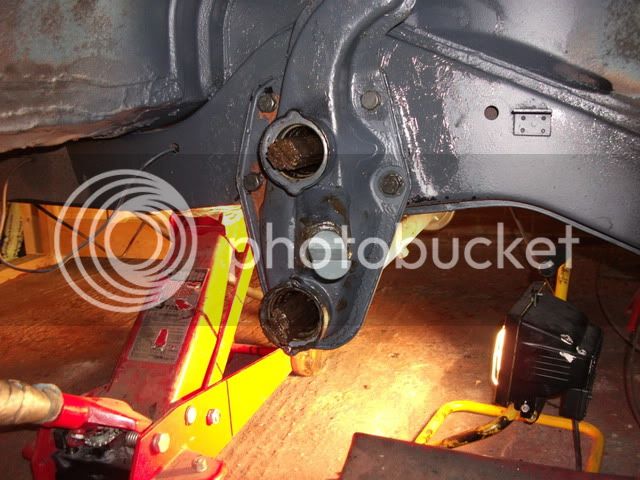
Greased up the chassis (that's why it looks wet) and slid the new beam on. It took a couple of goes up and down to get it just right, but went on OK. I found it hard to use the jack and hold the weight of the beam at the same time so my girlfriend kindly did the jacking part whilst I positioned it.
You can see the difference with the old beam next to it that I was using as extra security incase the bus fell off its axle stands as we were banging about with the beam.
So, some paint has scratched because of the jack / hammering etc - but I was expecting that to be honest - I just knew it wouldn't go on and look all painted and fresh still, especially as I greased everything, there was grease stuck to everything :lol: Plan is to touch up the damaged areas when the bus is on the chassis rollers. So the next step is to install the T-Haus kit :mrgreen:
Here is the beam with the new needle-bearings installed.
New grease-nipples all round (don't think they will get used that much, but whilst I was at it I thought I may as well replace what I can).
Greased up the chassis (that's why it looks wet) and slid the new beam on. It took a couple of goes up and down to get it just right, but went on OK. I found it hard to use the jack and hold the weight of the beam at the same time so my girlfriend kindly did the jacking part whilst I positioned it.
You can see the difference with the old beam next to it that I was using as extra security incase the bus fell off its axle stands as we were banging about with the beam.
So, some paint has scratched because of the jack / hammering etc - but I was expecting that to be honest - I just knew it wouldn't go on and look all painted and fresh still, especially as I greased everything, there was grease stuck to everything :lol: Plan is to touch up the damaged areas when the bus is on the chassis rollers. So the next step is to install the T-Haus kit :mrgreen:
cunning plan
Well-known member
- Joined
- Jul 15, 2008
- Messages
- 2,625
- Reaction score
- 1
- Location
- Northamptonshire
- Year of Your Van(s)
- 1968
- Van Type
- Clipper / Microbus
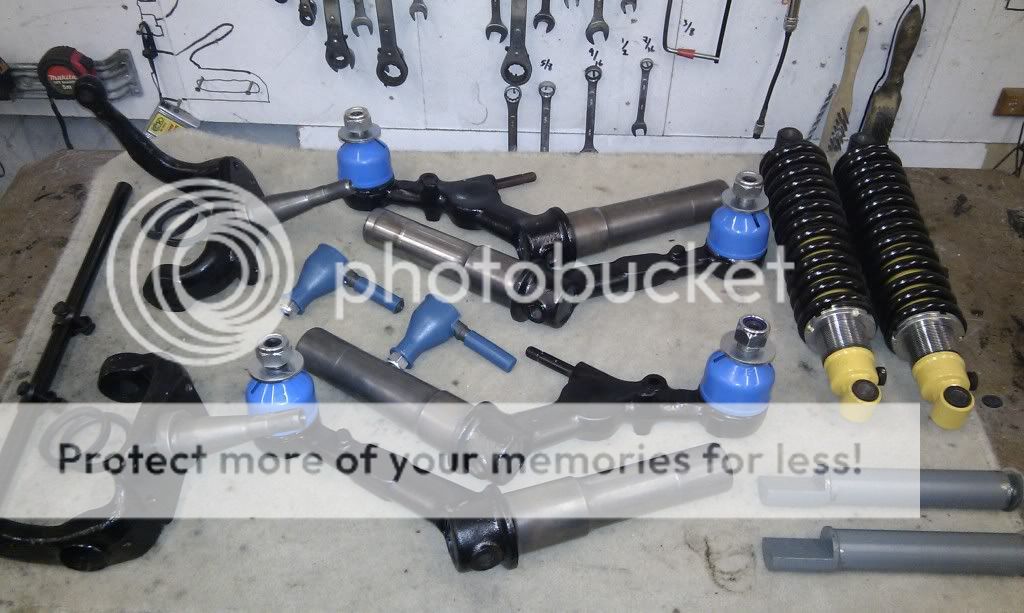
Leaves are in and lined up!
Modified bump-stop in one side.
It wouldn't fit right at first as it was too long, so I cut off 10mm. I will do the same for the other side.
First part of the T-Haus kit going on - the torsion arms :mrgreen:
Modified bump-stop in one side.
It wouldn't fit right at first as it was too long, so I cut off 10mm. I will do the same for the other side.
First part of the T-Haus kit going on - the torsion arms :mrgreen:
dubdubz
Well-known member
cunning plan said:Leaves are in and lined up!
Modified bump-stop in one side.
It wouldn't fit right at first as it was too long, so I cut off 10mm. I will do the same for the other side.
First part of the T-Haus kit going on - the torsion arms :mrgreen:
any more details of the bumpstops - source/price, and pics of the 'rear' :shock: of the tower to see the back of the bumpstop.
what did you have to do to the beam to get it to work?
[apols if you have already covered this]


$28.56
$32.43
Airfix Quickbuild Volkswagen Light Blue Camper Van Brick Building Model Kit, Multicolor
Amazon Global Store UK


$124.78
Revell 07009 Volkswagen T1 Samba Bus Model Kit, 1:16 Scale 27.2 cm, Multi-Color, 223
Outstanding Outlet USA


$27.95 ($13.98 / Count)
Marketplace Auto Parts Window Crank Handle Set of 2 - Chrome with Black Knob - Compatible with 1968-1978 Volkswagen Beetle
Parts Geek LLC


Airtime
Well-known member
cunning plan said:
Looking good, but isn't the bumpstop upside down in this pic? :?: Or doesn't it really matter, because you're lowering it with spindles?
cunning plan
Well-known member
- Joined
- Jul 15, 2008
- Messages
- 2,625
- Reaction score
- 1
- Location
- Northamptonshire
- Year of Your Van(s)
- 1968
- Van Type
- Clipper / Microbus
dubdubz said:any more details of the bumpstops - source/price, and pics of the 'rear' :shock: of the tower to see the back of the bumpstop.
what did you have to do to the beam to get it to work?
[apols if you have already covered this]
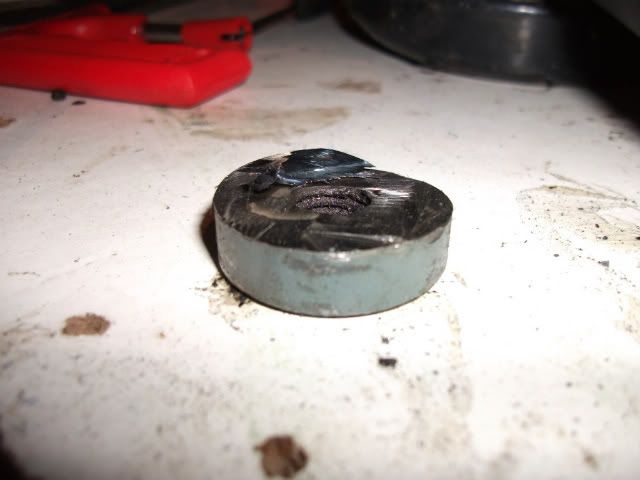
They are R9 stops that you could buy with their kit - of which I am only using the coil-overs :roll:
It is just a cylinder tube with a ridge to stop it falling all the way through the hole and the other end is held in with a washer and a bolt. The tube has a thread in.
You can see them in this picture:
gninnam said:Well done so far 8)
Nice pictures also
8)
Airtime said:Looking good, but isn't the bumpstop upside down in this pic? :?: Or doesn't it really matter, because you're lowering it with spindles?
I thought this too, but I am going to see where the torsion arm gets to with the wheel on etc, then turn the stop if I need more clearance.
:msn4:
cunning plan
Well-known member
- Joined
- Jul 15, 2008
- Messages
- 2,625
- Reaction score
- 1
- Location
- Northamptonshire
- Year of Your Van(s)
- 1968
- Van Type
- Clipper / Microbus
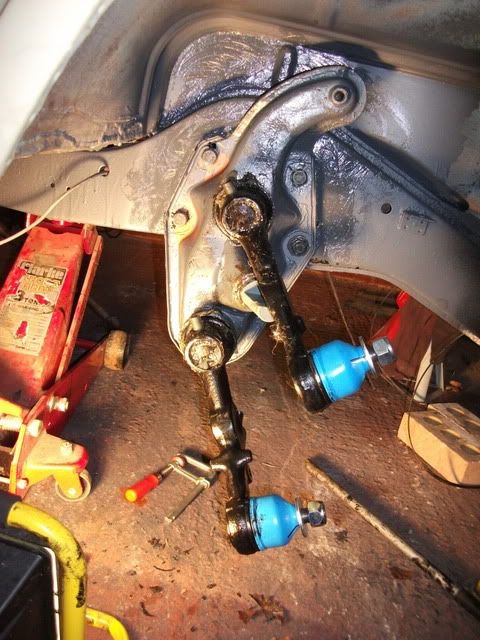
I put the first side spindles on today!
Tip for anyone else with the T-Haus kit - if you can't get the spindle on using the method described by T-Haus (bottom first), do the top one first hand tight, then lift up the spindle yourself with someone else jacking the lower one up, then they should just fit together. I found doing the bottom first quite hard and the jack kept slipping. :msn4:
Once you have the bottom one on hand-tight too, you will notice you can't get your socket / torque wrench onto the nut as the bottom of the top torsion arm will be in the way. To solve this just fully tighten the top nut up which pulls the torsion arm up just enough to get your socket onto the bottom one 8)
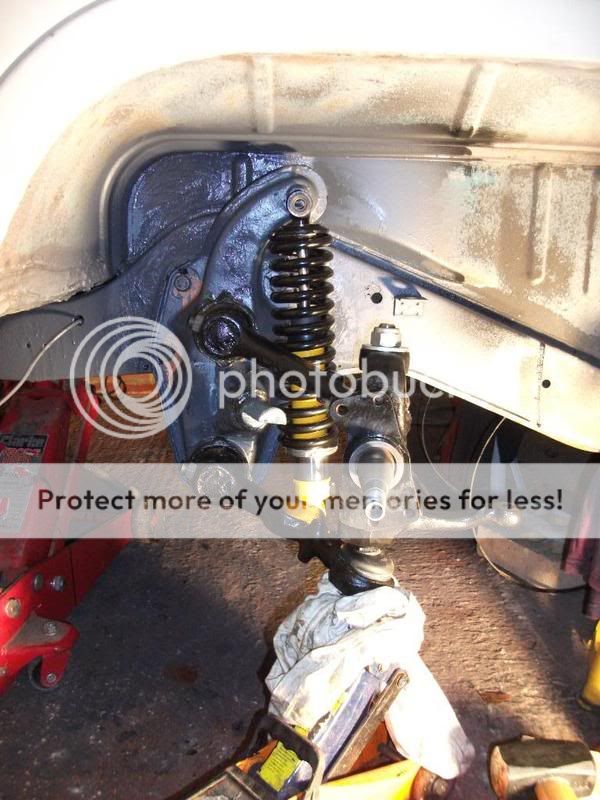
Positioned the coil-overs. I just ordered the fixings from Volksbolts as I didn't want to use the manky old ones with all this other new kit going on.
Note: That isn't rust on the beam, it is copper grease as those two bolts were a little tough to go in due to paint on the threads.
Tip for anyone else with the T-Haus kit - if you can't get the spindle on using the method described by T-Haus (bottom first), do the top one first hand tight, then lift up the spindle yourself with someone else jacking the lower one up, then they should just fit together. I found doing the bottom first quite hard and the jack kept slipping. :msn4:
Once you have the bottom one on hand-tight too, you will notice you can't get your socket / torque wrench onto the nut as the bottom of the top torsion arm will be in the way. To solve this just fully tighten the top nut up which pulls the torsion arm up just enough to get your socket onto the bottom one 8)
Positioned the coil-overs. I just ordered the fixings from Volksbolts as I didn't want to use the manky old ones with all this other new kit going on.
Note: That isn't rust on the beam, it is copper grease as those two bolts were a little tough to go in due to paint on the threads.
dubdubz
Well-known member
8)
Hi, nice work, got the same setup on my bus except I fitted the RED9 tie bars instead of the original torsion bars so just wondering what the ride is going to be like and if you will be able to adjust it, are going to fit adjusters on the beam aswell ?
cunning plan
Well-known member
- Joined
- Jul 15, 2008
- Messages
- 2,625
- Reaction score
- 1
- Location
- Northamptonshire
- Year of Your Van(s)
- 1968
- Van Type
- Clipper / Microbus
Cheers andyo11.
I wanted a bit more support than the R9 kit gives, so I chose to put the leaves back in to give full suspension again and leave the lowering job to the dropped-spindles. The coil-overs are there to further complement the ride and have the adjustable damping / shocks - with the added extra of being able to raise if I wanted (not that I do :lol: ).
I was thinking hard about fitting adjusters, but decided that the 3.5" drop of the dropped spindles will be low enough anyway. Hopefully.... :? :msn4:
How does yours ride? Do you have adjusters?
cunning plan
Well-known member
- Joined
- Jul 15, 2008
- Messages
- 2,625
- Reaction score
- 1
- Location
- Northamptonshire
- Year of Your Van(s)
- 1968
- Van Type
- Clipper / Microbus
I don't think so, but I have no idea until I can test it out for real. :shock: arty0021:
Alex at T-Haus recommends fitting coil-overs with the dropped spindles, so they should be OK. I am hoping the amount of adjustability in them, given you can adjust spring height and damper / shock pressure, I can get the ride pretty much exactly as I want it. :satanlook:
arty0021: Alex at T-Haus recommends fitting coil-overs with the dropped spindles, so they should be OK. I am hoping the amount of adjustability in them, given you can adjust spring height and damper / shock pressure, I can get the ride pretty much exactly as I want it. :satanlook:
gninnam said:Looking very good 8)
With you using the coil-overs and the original torsion bars, will it not firm up the ride too much?
Afraid I agree, I think its going to be rock hard with the original torsion bars and coil overs together, hope I'm wrong but both the torsion bars and the coil overs are designed to be used on their own, I know you will get a drop using the dropped spindles but I cant see you being able to adjust it. :? :msn4:
cunning plan
Well-known member
- Joined
- Jul 15, 2008
- Messages
- 2,625
- Reaction score
- 1
- Location
- Northamptonshire
- Year of Your Van(s)
- 1968
- Van Type
- Clipper / Microbus
I have the 2-4" drop R9 kit, so those coil-overs will drop a stock bus down to 4" or raise it back up to a 2" drop from stock.
The T-Haus dropped spindles are a 3.5" drop. So, If I want to ride on the spindles / torsion leaves alone, I just lower the coil-overs to 3.6 / 3.7" to make the leaves take the weight but use the coil-overs to dial-in the ride spring.
Alternately, I can just raise the springs to make it spungy.
Either way, I would 100% rather have the leaves in and dropped spindles than the R9 coil-over on it's own! If I don't like the ride, all I have to do is replace the coil-overs with some lowered shocks or something, as at least all the hard work fitting dropped spindles is done
We will see when I it's back on the road. Nothing can be as bad as the ride was before on adjusters alone on their lowest setting :roll: :?
As I say though, Alex at T-Haus recommends running coil-overs with the dropped spindle kit to infinitely adjust the ride.
OK, very interesting this, will be putting my torsion bars back if all goes well with yours, my ride is bit bouncy but I have not tried to adjust the damping yet so it could be that. I have no adjusters on the beam and to make mine work with the dropped spindles I had to buy some slightly longer springs for the coil overs (not cheap), could have saved the cash and fitted the torsion bars back maybe ! Good luck with it dude you're doin a great job 8)
cunning plan
Well-known member
- Joined
- Jul 15, 2008
- Messages
- 2,625
- Reaction score
- 1
- Location
- Northamptonshire
- Year of Your Van(s)
- 1968
- Van Type
- Clipper / Microbus
Yeah, I've done a lot of research recently after rebuilding the beam to see which route to go to lower it properly - hence why I have the R9 kit and the T-Haus :lol:
Still not sure if I should have put adjusters in too, but Graham L's bus on this thread convinced me that the spindles alone will be low enough..
http://forum.earlybay.com/viewtopic.php?f=1&t=28735" onclick="window.open(this.href);return false;
Have you got any pictures of yours? Project blog link?
Still not sure if I should have put adjusters in too, but Graham L's bus on this thread convinced me that the spindles alone will be low enough..
http://forum.earlybay.com/viewtopic.php?f=1&t=28735" onclick="window.open(this.href);return false;
Have you got any pictures of yours? Project blog link?
cunning plan
Well-known member
- Joined
- Jul 15, 2008
- Messages
- 2,625
- Reaction score
- 1
- Location
- Northamptonshire
- Year of Your Van(s)
- 1968
- Van Type
- Clipper / Microbus
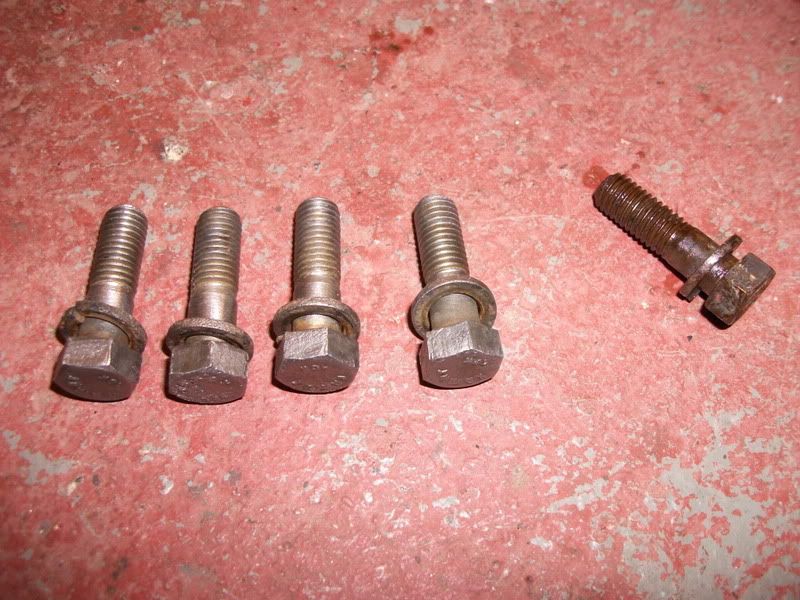
I temporally fitted the drum back on for now. I cleaned up some bolts in vinegar - you can see before and after. 8)
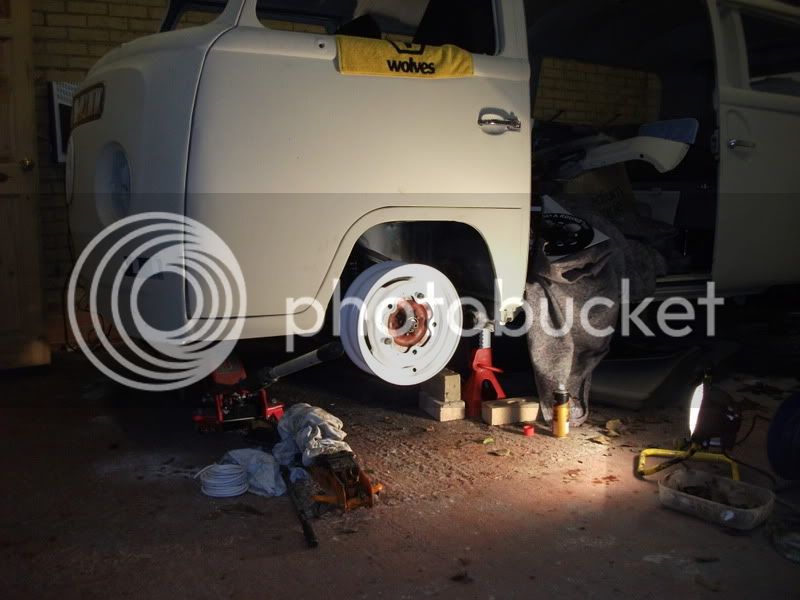
Picked up some 15" Splitty rims from a '62 bus at the weekend (cheers Wayne!). Thought I would see what they look like on..

Similar threads
- Replies
- 8
- Views
- 311