You are using an out of date browser. It may not display this or other websites correctly.
You should upgrade or use an alternative browser.
You should upgrade or use an alternative browser.
Newbie ( Ugly Duckling )
- Thread starter JAY-1977
- Start date


Help Support Early Bay Forum:
This site may earn a commission from merchant affiliate
links, including eBay, Amazon, and others.

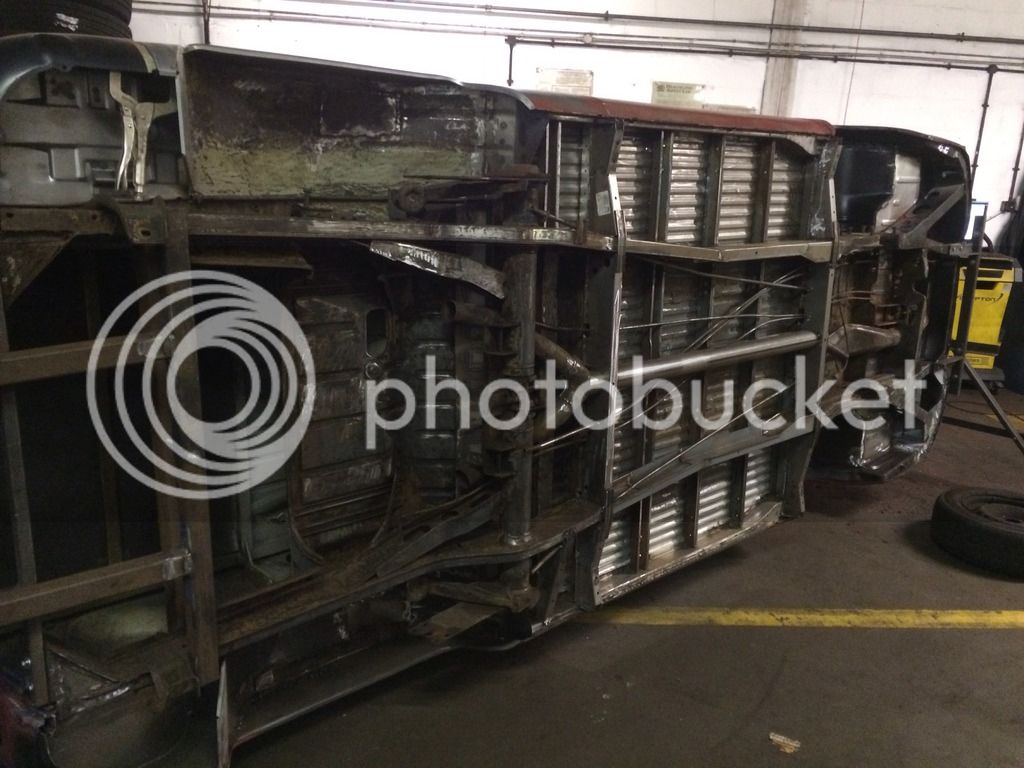
Has it really been 6 months since I last worked on The Duckling!! Well a productive weekend sort of lol!
 [/
[/
Underneath welded an cleaned down!
[url=http://s1024.photobucket.com/user/jason_thompson6/media/image.jpg4_zpsewhhtxm0.jpg.html][img]http://i1024.photobucket.com/albums/y307/jason_thompson6/image.jpg4_zpsewhhtxm0.jpg[/url][/
Strengthing plates put in!
[url=http://s1024.photobucket.com/user/jason_thompson6/media/image.jpg6_zpsnq3rjtxn.jpg.html][img]http://i1024.photobucket.com/albums/y307/jason_thompson6/image.jpg6_zpsnq3rjtxn.jpg[/url][/
Close for paint!
[url=http://s1024.photobucket.com/user/jason_thompson6/media/image.jpg8_zpsrusogayj.jpg.html][img]http://i1024.photobucket.com/albums/y307/jason_thompson6/image.jpg8_zpsrusogayj.jpg[/url][/
Etch primer done!
[url=http://s1024.photobucket.com/user/jason_thompson6/media/image.jpg11_zpss9rahjlm.jpg.html][img]http://i1024.photobucket.com/albums/y307/jason_thompson6/image.jpg11_zpss9rahjlm.jpg[/url][/
No such thing as Too much seam sealer!
[url=http://s1024.photobucket.com/user/jason_thompson6/media/image.jpg13_zps6i8j3a5y.jpg.html][img]http://i1024.photobucket.com/albums/y307/jason_thompson6/image.jpg13_zps6i8j3a5y.jpg[/url][/
[url=http://s1024.photobucket.com/user/jason_thompson6/media/image.jpg17_zpshmkxcmwf.jpg.html][img]http://i1024.photobucket.com/albums/y307/jason_thompson6/image.jpg17_zpshmkxcmwf.jpg[/url][/
Little teaser!
[url=http://s1024.photobucket.com/user/jason_thompson6/media/image.jpg14_zpsz8xdzth0.jpg.html][img]http://i1024.photobucket.com/albums/y307/jason_thompson6/image.jpg14_zpsz8xdzth0.jpg[/url][/
Getting there!
[url=http://s1024.photobucket.com/user/jason_thompson6/media/image.jpg16_zpsk3akfuyu.jpg.html][img]http://i1024.photobucket.com/albums/y307/jason_thompson6/image.jpg16_zpsk3akfuyu.jpg[/url][/
Run out of U-pol Raptor paint, 4ltrs was no where near enough!! Feeling another 8 might just do it!! Lol
 [/
[/Underneath welded an cleaned down!
[url=http://s1024.photobucket.com/user/jason_thompson6/media/image.jpg4_zpsewhhtxm0.jpg.html][img]http://i1024.photobucket.com/albums/y307/jason_thompson6/image.jpg4_zpsewhhtxm0.jpg[/url][/
Strengthing plates put in!
[url=http://s1024.photobucket.com/user/jason_thompson6/media/image.jpg6_zpsnq3rjtxn.jpg.html][img]http://i1024.photobucket.com/albums/y307/jason_thompson6/image.jpg6_zpsnq3rjtxn.jpg[/url][/
Close for paint!
[url=http://s1024.photobucket.com/user/jason_thompson6/media/image.jpg8_zpsrusogayj.jpg.html][img]http://i1024.photobucket.com/albums/y307/jason_thompson6/image.jpg8_zpsrusogayj.jpg[/url][/
Etch primer done!
[url=http://s1024.photobucket.com/user/jason_thompson6/media/image.jpg11_zpss9rahjlm.jpg.html][img]http://i1024.photobucket.com/albums/y307/jason_thompson6/image.jpg11_zpss9rahjlm.jpg[/url][/
No such thing as Too much seam sealer!
[url=http://s1024.photobucket.com/user/jason_thompson6/media/image.jpg13_zps6i8j3a5y.jpg.html][img]http://i1024.photobucket.com/albums/y307/jason_thompson6/image.jpg13_zps6i8j3a5y.jpg[/url][/
[url=http://s1024.photobucket.com/user/jason_thompson6/media/image.jpg17_zpshmkxcmwf.jpg.html][img]http://i1024.photobucket.com/albums/y307/jason_thompson6/image.jpg17_zpshmkxcmwf.jpg[/url][/
Little teaser!
[url=http://s1024.photobucket.com/user/jason_thompson6/media/image.jpg14_zpsz8xdzth0.jpg.html][img]http://i1024.photobucket.com/albums/y307/jason_thompson6/image.jpg14_zpsz8xdzth0.jpg[/url][/
Getting there!
[url=http://s1024.photobucket.com/user/jason_thompson6/media/image.jpg16_zpsk3akfuyu.jpg.html][img]http://i1024.photobucket.com/albums/y307/jason_thompson6/image.jpg16_zpsk3akfuyu.jpg[/url][/
Run out of U-pol Raptor paint, 4ltrs was no where near enough!! Feeling another 8 might just do it!! Lol
 [/
[/A few of me getting busy painting the U-pol Raptor on, was an enjoyable weekend working on her for a change!!
[url=http://s1024.photobucket.com/user/jason_thompson6/media/image.jpg2_zpsagaseri5.jpg.html][img]http://i1024.photobucket.com/albums/y307/jason_thompson6/image.jpg2_zpsagaseri5.jpg[/url][/
[url=http://s1024.photobucket.com/user/jason_thompson6/media/image.jpg5_zpsuk7ly3ds.jpg.html][img]http://i1024.photobucket.com/albums/y307/jason_thompson6/image.jpg5_zpsuk7ly3ds.jpg[/url]
- Joined
- Nov 13, 2012
- Messages
- 261
- Reaction score
- 0
Just read through your thread. Wow that's a lot of new metal, great work!
Must be nice painting the underneath.
Woz
Must be nice painting the underneath.
Woz
Little bit more done this week! Nothing major tho. "Every little helps"
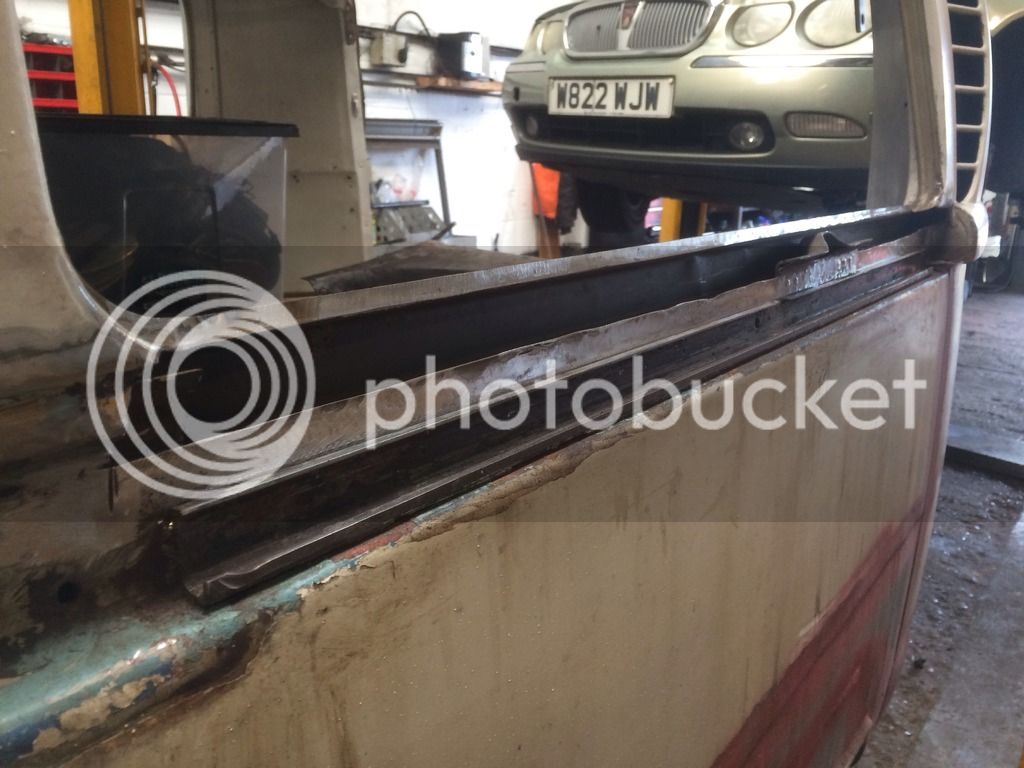
Was dreading doing the window repairs above the sliding door rail, just because of the amount of grease to clean away :| but glad it done now!
 [/
[/
Cut out bad metal in with new metal!
[url=http://s1024.photobucket.com/user/jason_thompson6/media/image.jpg11_zpsyvpkm9zr.jpg.html][img]http://i1024.photobucket.com/albums/y307/jason_thompson6/image.jpg11_zpsyvpkm9zr.jpg[/url][/
[url=http://s1024.photobucket.com/user/jason_thompson6/media/image.jpg14_zpsz9l2bhih.jpg.html][img]http://i1024.photobucket.com/albums/y307/jason_thompson6/image.jpg14_zpsz9l2bhih.jpg[/url][/
[url=http://s1024.photobucket.com/user/jason_thompson6/media/image.jpg13_zpskmgkl4xm.jpg.html][img]http://i1024.photobucket.com/albums/y307/jason_thompson6/image.jpg13_zpskmgkl4xm.jpg[/url][/
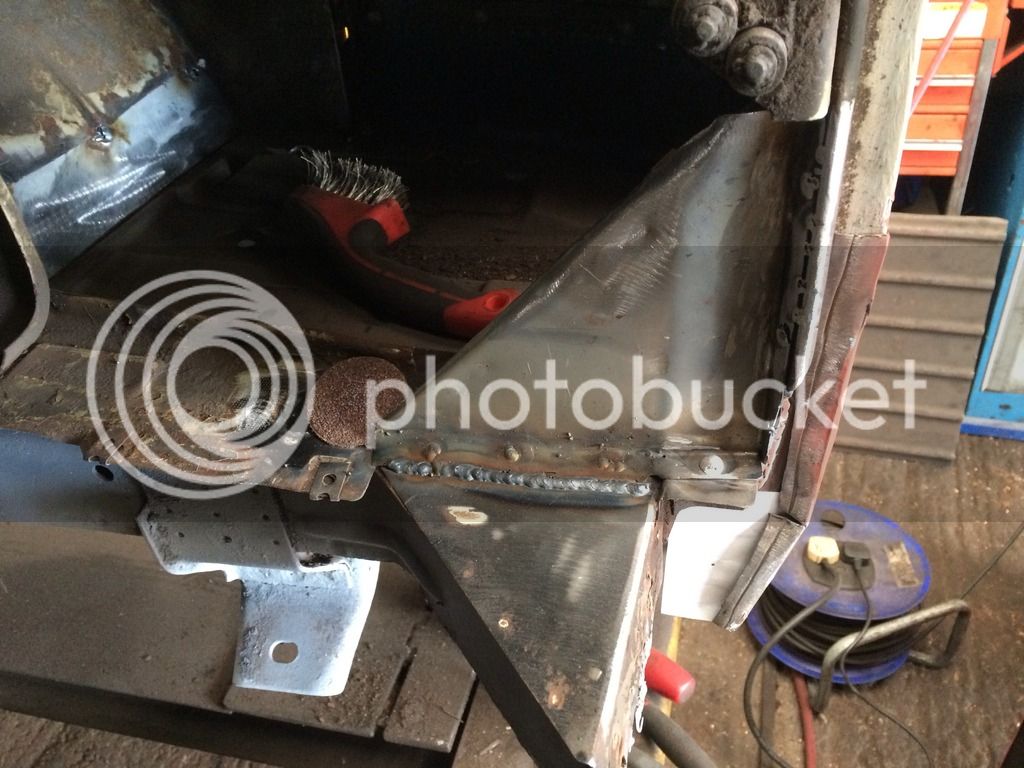
Tank area repairs too.
[url=http://s1024.photobucket.com/user/jason_thompson6/media/image.jpg1_zpso4tdsvyq.jpg.html][img]http://i1024.photobucket.com/albums/y307/jason_thompson6/image.jpg1_zpso4tdsvyq.jpg[/url][/
[url=http://s1024.photobucket.com/user/jason_thompson6/media/image.jpg2_zpshfjbo2xy.jpg.html][img]http://i1024.photobucket.com/albums/y307/jason_thompson6/image.jpg2_zpshfjbo2xy.jpg[/url][/
And rear repairs made too!
[url=http://s1024.photobucket.com/user/jason_thompson6/media/image.jpg3_zpsqolg0klj.jpg.html][img]http://i1024.photobucket.com/albums/y307/jason_thompson6/image.jpg3_zpsqolg0klj.jpg[/url][/
[url=http://s1024.photobucket.com/user/jason_thompson6/media/image.jpg4_zpsutaipteh.jpg.html][img]http://i1024.photobucket.com/albums/y307/jason_thompson6/image.jpg4_zpsutaipteh.jpg[/url][/
[url=http://s1024.photobucket.com/user/jason_thompson6/media/image.jpg6_zps1ra8wsg4.jpg.html][img]http://i1024.photobucket.com/albums/y307/jason_thompson6/image.jpg6_zps1ra8wsg4.jpg[/url]
 [/
[/
[url=http://s1024.photobucket.com/user/jason_thompson6/media/image.jpg9_zpsrpyzicwr.jpg.html][img]http://i1024.photobucket.com/albums/y307/jason_thompson6/image.jpg9_zpsrpyzicwr.jpg[/url][/
Till I get some more time to tinker!
The Duckling is getting there albeit slowly!
Was dreading doing the window repairs above the sliding door rail, just because of the amount of grease to clean away :| but glad it done now!
 [/
[/Cut out bad metal in with new metal!
[url=http://s1024.photobucket.com/user/jason_thompson6/media/image.jpg11_zpsyvpkm9zr.jpg.html][img]http://i1024.photobucket.com/albums/y307/jason_thompson6/image.jpg11_zpsyvpkm9zr.jpg[/url][/
[url=http://s1024.photobucket.com/user/jason_thompson6/media/image.jpg14_zpsz9l2bhih.jpg.html][img]http://i1024.photobucket.com/albums/y307/jason_thompson6/image.jpg14_zpsz9l2bhih.jpg[/url][/
[url=http://s1024.photobucket.com/user/jason_thompson6/media/image.jpg13_zpskmgkl4xm.jpg.html][img]http://i1024.photobucket.com/albums/y307/jason_thompson6/image.jpg13_zpskmgkl4xm.jpg[/url][/
Tank area repairs too.
[url=http://s1024.photobucket.com/user/jason_thompson6/media/image.jpg1_zpso4tdsvyq.jpg.html][img]http://i1024.photobucket.com/albums/y307/jason_thompson6/image.jpg1_zpso4tdsvyq.jpg[/url][/
[url=http://s1024.photobucket.com/user/jason_thompson6/media/image.jpg2_zpshfjbo2xy.jpg.html][img]http://i1024.photobucket.com/albums/y307/jason_thompson6/image.jpg2_zpshfjbo2xy.jpg[/url][/
And rear repairs made too!
[url=http://s1024.photobucket.com/user/jason_thompson6/media/image.jpg3_zpsqolg0klj.jpg.html][img]http://i1024.photobucket.com/albums/y307/jason_thompson6/image.jpg3_zpsqolg0klj.jpg[/url][/
[url=http://s1024.photobucket.com/user/jason_thompson6/media/image.jpg4_zpsutaipteh.jpg.html][img]http://i1024.photobucket.com/albums/y307/jason_thompson6/image.jpg4_zpsutaipteh.jpg[/url][/
[url=http://s1024.photobucket.com/user/jason_thompson6/media/image.jpg6_zps1ra8wsg4.jpg.html][img]http://i1024.photobucket.com/albums/y307/jason_thompson6/image.jpg6_zps1ra8wsg4.jpg[/url]
 [/
[/[url=http://s1024.photobucket.com/user/jason_thompson6/media/image.jpg9_zpsrpyzicwr.jpg.html][img]http://i1024.photobucket.com/albums/y307/jason_thompson6/image.jpg9_zpsrpyzicwr.jpg[/url][/
Till I get some more time to tinker!
The Duckling is getting there albeit slowly!
- Joined
- Feb 2, 2015
- Messages
- 661
- Reaction score
- 453
- Location
- Llanasa
- Year of Your Van(s)
- 1970
- Van Type
- Early Bay
Fab thread ... Keep up the good work !!!
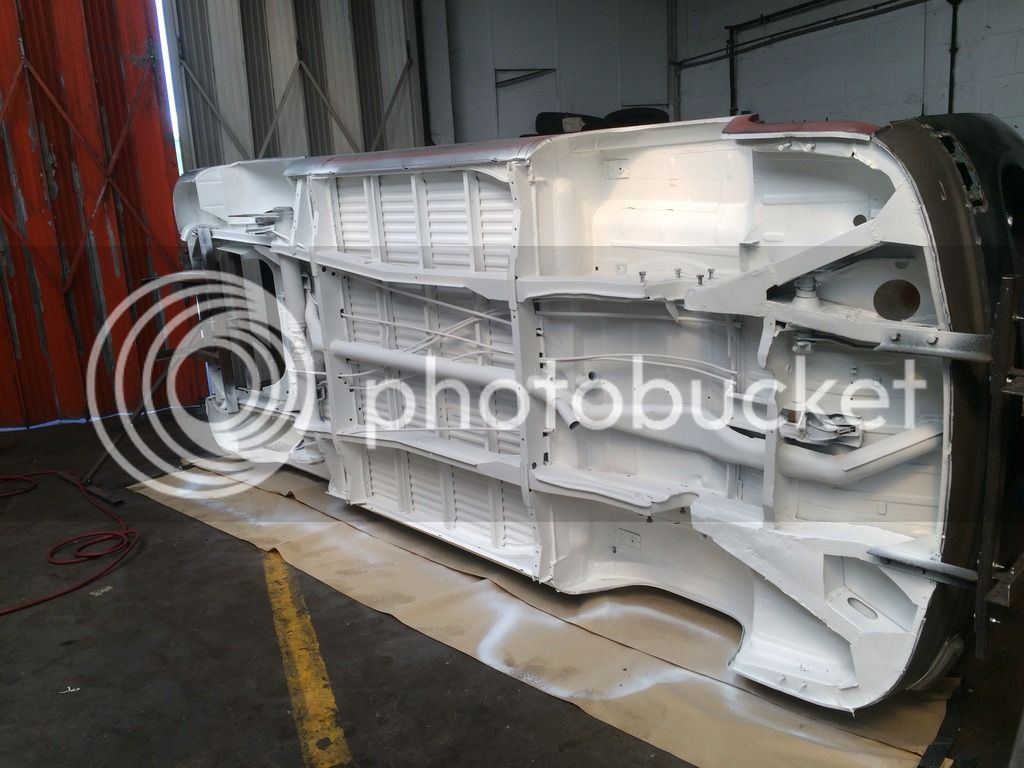
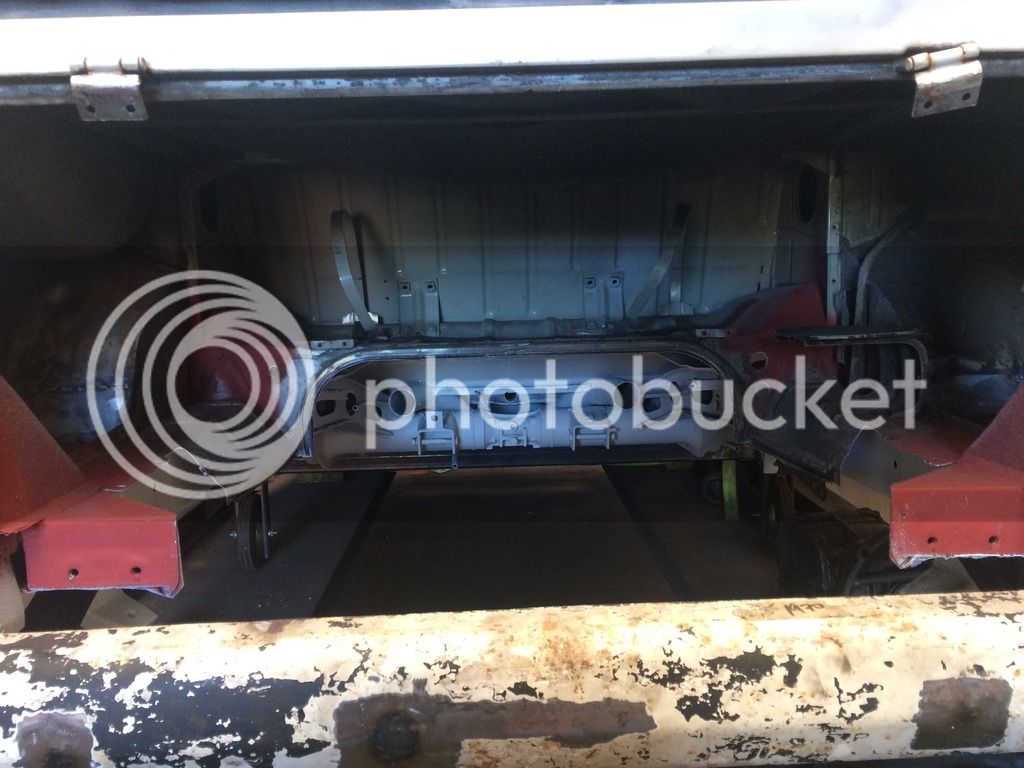
So the underside is finally finished and in paint (u-pol raptor super white)! Looks good an feels an even better accomplishment!!
 [/
[/
[url=http://s1024.photobucket.com/user/jason_thompson6/media/image.jpg12_zps7jukihb4.jpg.html][img]http://i1024.photobucket.com/albums/y307/jason_thompson6/image.jpg12_zps7jukihb4.jpg[/url][/
[url=http://s1024.photobucket.com/user/jason_thompson6/media/image.jpg9_zpsrf2lrhmz.jpg.html][img]http://i1024.photobucket.com/albums/y307/jason_thompson6/image.jpg9_zpsrf2lrhmz.jpg[/url][/
So there we have it pleased as punch with the outcome! Was wondering whether to paint over it in body colour or leave it white??? Lower body colour will be a pale white/yellow!! Opinions welcome??? Cheers all
 [/
[/[url=http://s1024.photobucket.com/user/jason_thompson6/media/image.jpg12_zps7jukihb4.jpg.html][img]http://i1024.photobucket.com/albums/y307/jason_thompson6/image.jpg12_zps7jukihb4.jpg[/url][/
[url=http://s1024.photobucket.com/user/jason_thompson6/media/image.jpg9_zpsrf2lrhmz.jpg.html][img]http://i1024.photobucket.com/albums/y307/jason_thompson6/image.jpg9_zpsrf2lrhmz.jpg[/url][/
So there we have it pleased as punch with the outcome! Was wondering whether to paint over it in body colour or leave it white??? Lower body colour will be a pale white/yellow!! Opinions welcome??? Cheers all
Not much been achieved recently but still plodding along albeit slowly, very slowly!


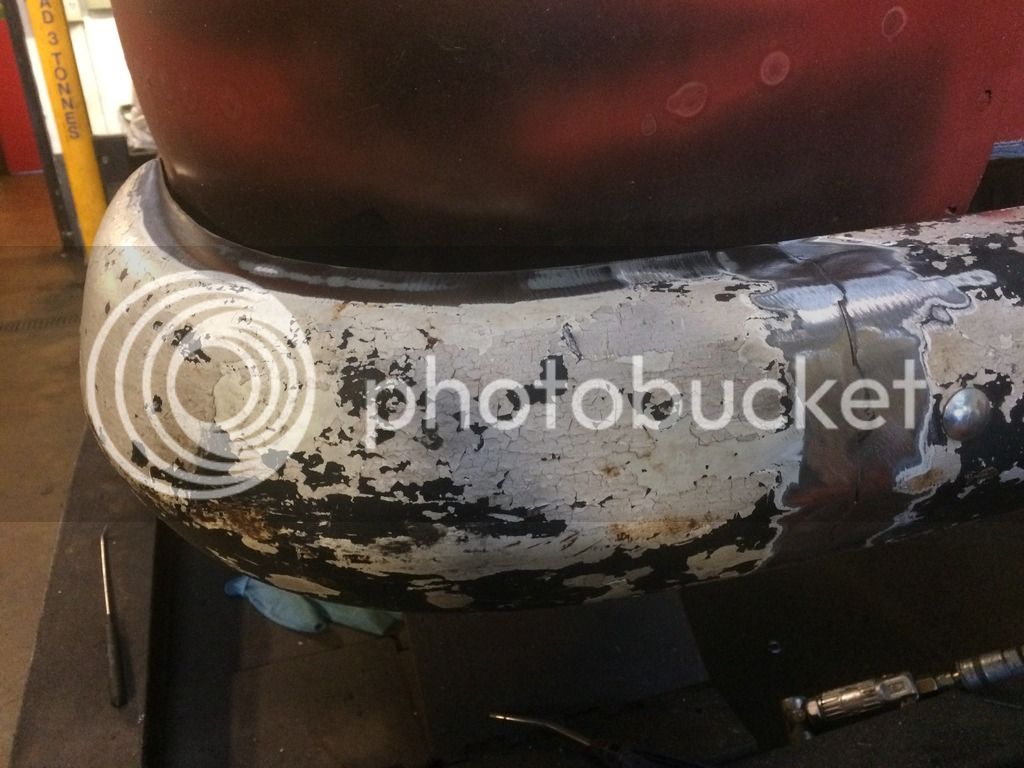
Rear bumper shortened as not a fan of the large gaps all around the bumper so a lil nip and tuck was called for!
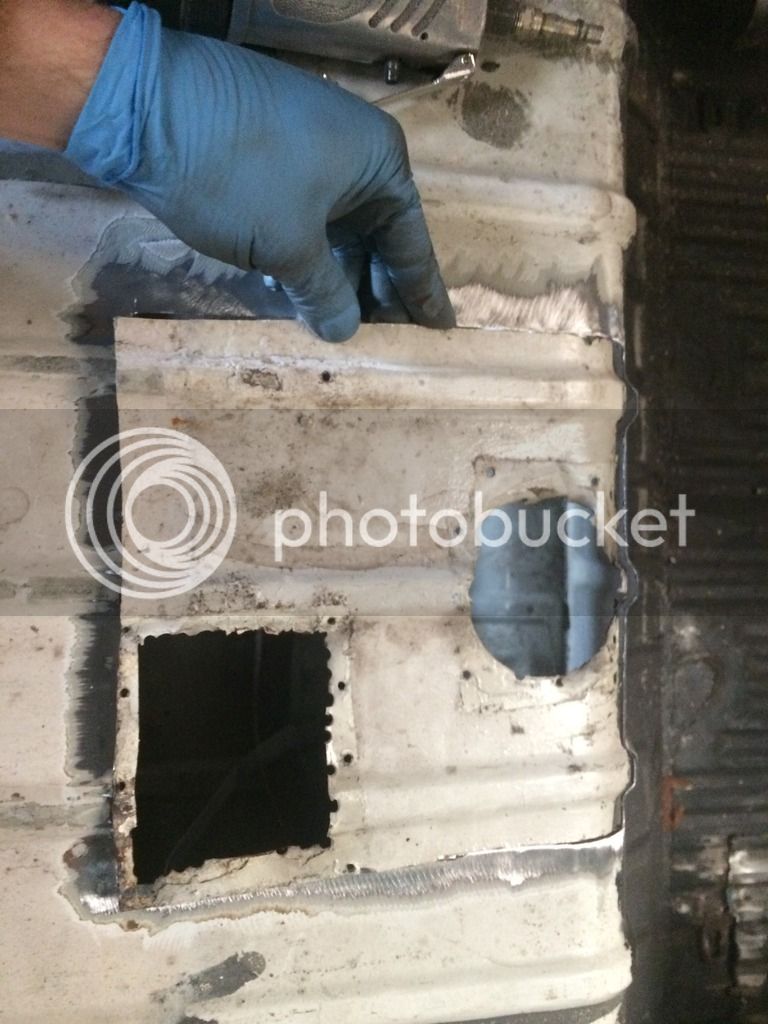
Previous owners attempts at finding the fuel sender!
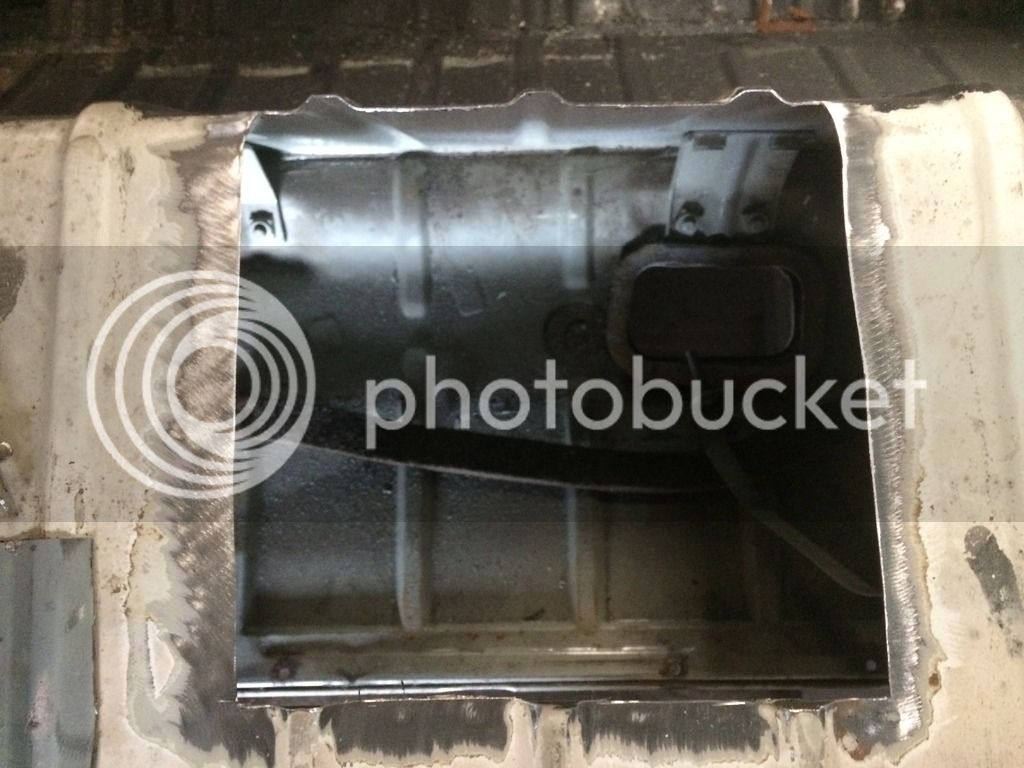
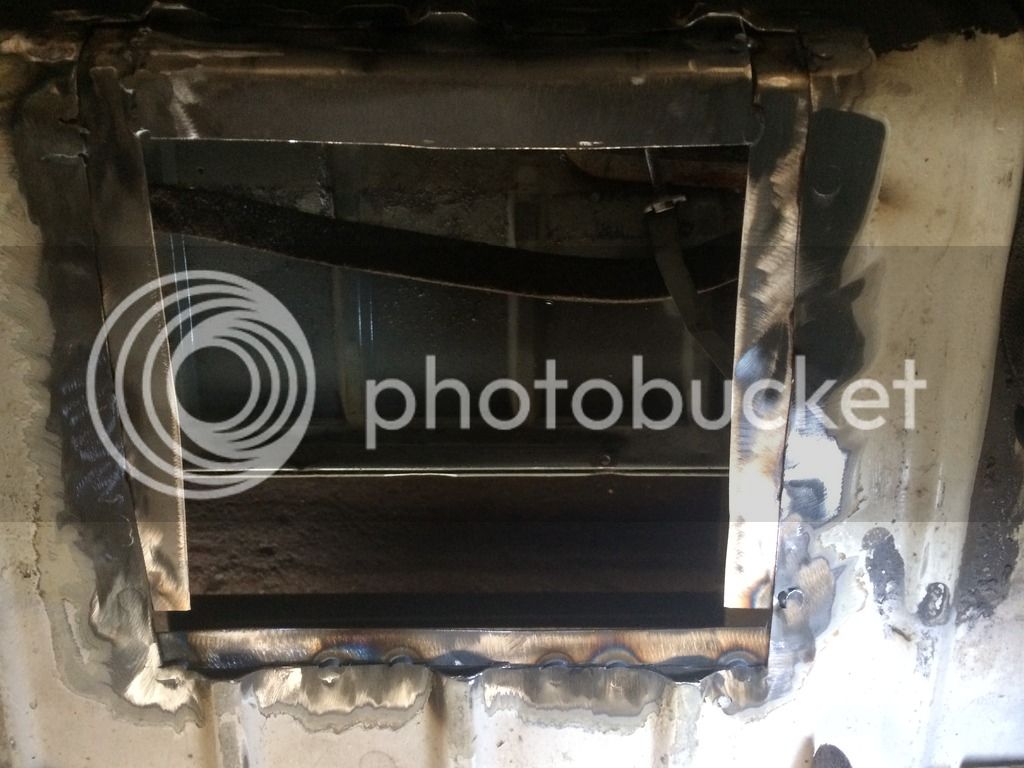

Fuel sender/tank/hose/previous owners bodge made better.
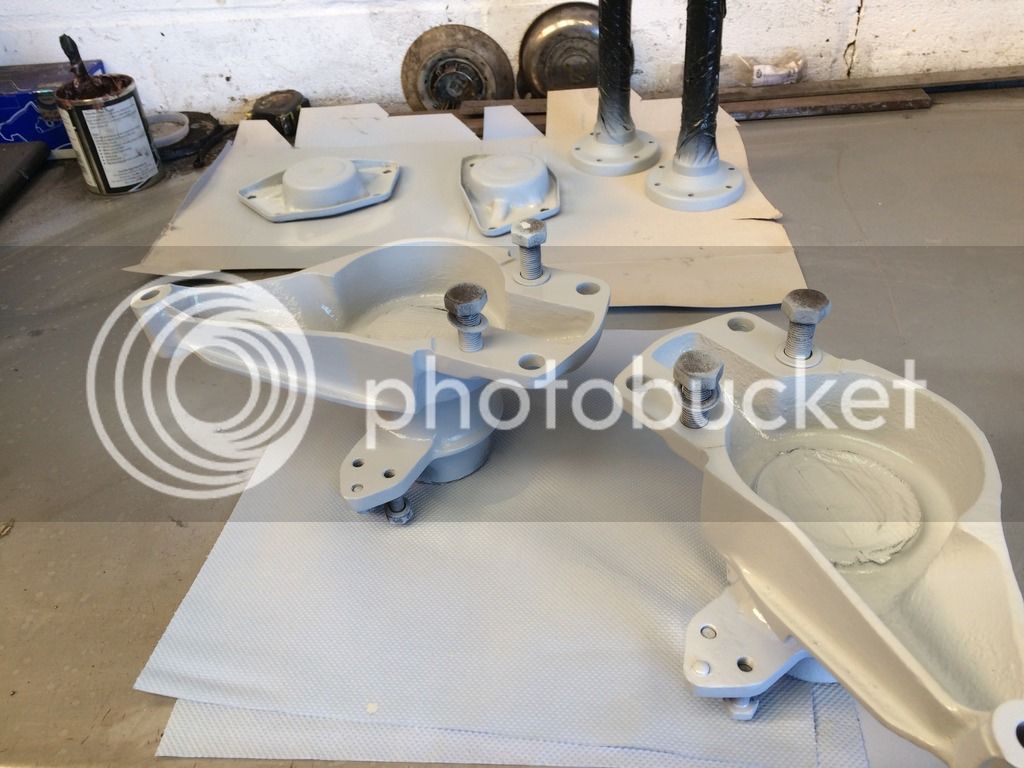
That's all so far, but I do have all the new complete French slammer suspension front and rear and banded 15" steels to go on in next few weeks so keep watching")


Rear bumper shortened as not a fan of the large gaps all around the bumper so a lil nip and tuck was called for!

Previous owners attempts at finding the fuel sender!


Fuel sender/tank/hose/previous owners bodge made better.
That's all so far, but I do have all the new complete French slammer suspension front and rear and banded 15" steels to go on in next few weeks so keep watching
 [/
[/[url=http://s1024.photobucket.com/user/jason_thompson6/media/image_zpsvgnr9rvg.jpeg.html][img]http://i1024.photobucket.com/albums/y307/jason_thompson6/image_zpsvgnr9rvg.jpeg[/url][/
[url=http://s1024.photobucket.com/user/jason_thompson6/media/image_zps8ovqitgp.jpeg.html][img]http://i1024.photobucket.com/albums/y307/jason_thompson6/image_zps8ovqitgp.jpeg[/url][/
[url=http://s1024.photobucket.com/user/jason_thompson6/media/image_zpsfxfpuypq.jpeg.html][img]http://i1024.photobucket.com/albums/y307/jason_thompson6/image_zpsfxfpuypq.jpeg[/url][/
[url=http://s1024.photobucket.com/user/jason_thompson6/media/image_zpsvkrobmxf.jpeg.html][img]http://i1024.photobucket.com/albums/y307/jason_thompson6/image_zpsvkrobmxf.jpeg[/url][/
[url=http://s1024.photobucket.com/user/jason_thompson6/media/image_zpslc2ut6ob.jpeg.html][img]http://i1024.photobucket.com/albums/y307/jason_thompson6/image_zpslc2ut6ob.jpeg[/url][/
[url=http://s1024.photobucket.com/user/jason_thompson6/media/image_zpsf3qguceg.jpeg.html][img]http://i1024.photobucket.com/albums/y307/jason_thompson6/image_zpsf3qguceg.jpeg[/url][/
[url=http://s1024.photobucket.com/user/jason_thompson6/media/image_zpsqoqd40kb.jpeg.html][img]http://i1024.photobucket.com/albums/y307/jason_thompson6/image_zpsqoqd40kb.jpeg[/url][/
[url=http://s1024.photobucket.com/user/jason_thompson6/media/image_zps1bcqof7g.jpeg.html][img]http://i1024.photobucket.com/albums/y307/jason_thompson6/image_zps1bcqof7g.jpeg[/url][/
I know it don't look like much has changed but engine bay and underside has had another coat of raptor in bottom half body colour which I'm well pleased with!! Oh and starting to put stuff back together, I've rear brakes front hubs and suspension :o
toffo24
Well-known member
Wow great work

Ok so above photo and below photo show a clip that I'm after if anybody can help in anyway??


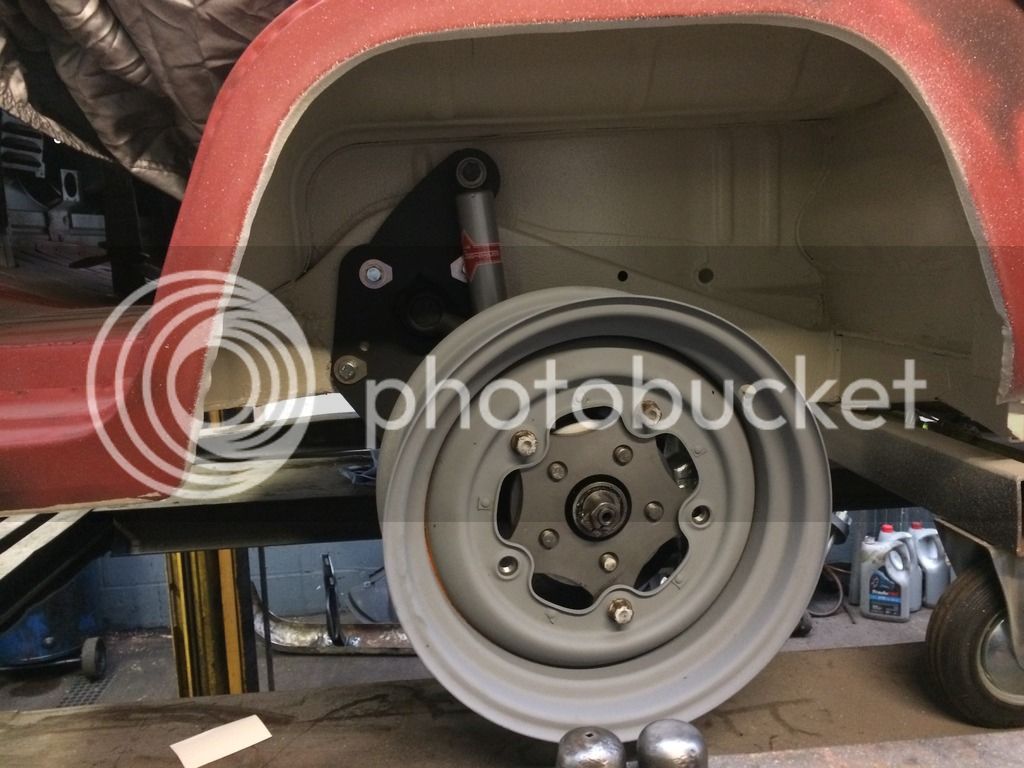
Tried my banded steels on, think it will be close with wheel/tyre and arch, but we will soon see!!

More on it tomorrow, the front goes on
More done today, nearly time to go on its wheels for first time in like a year! If only I had some late bay wheel nuts lol :x
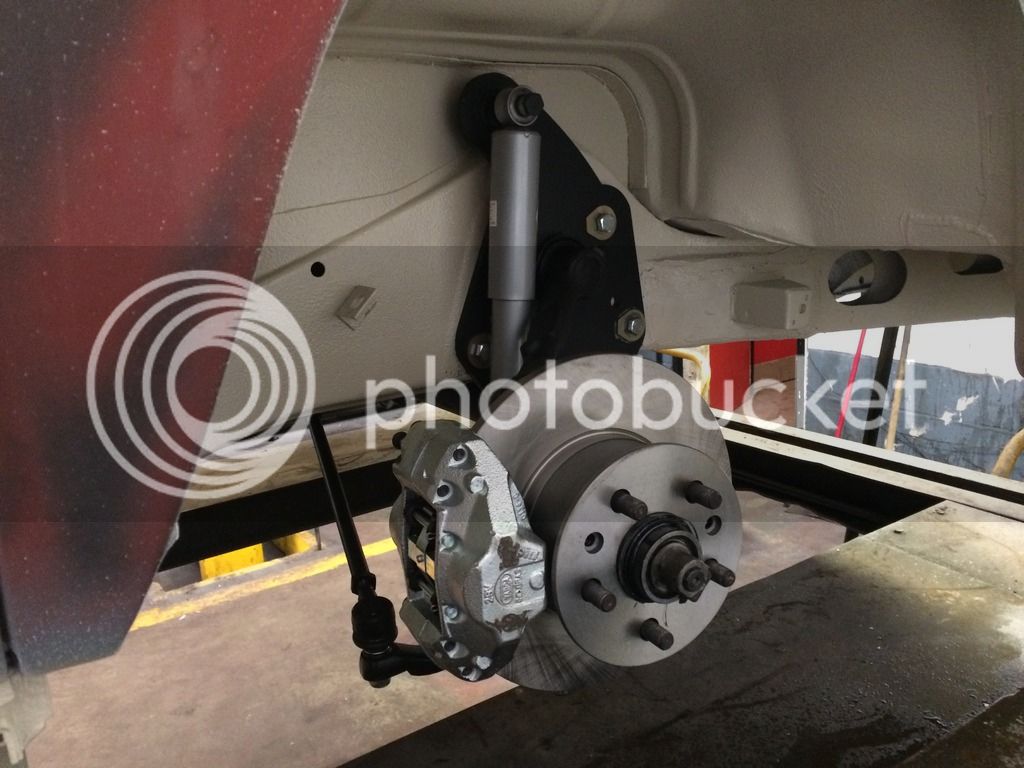
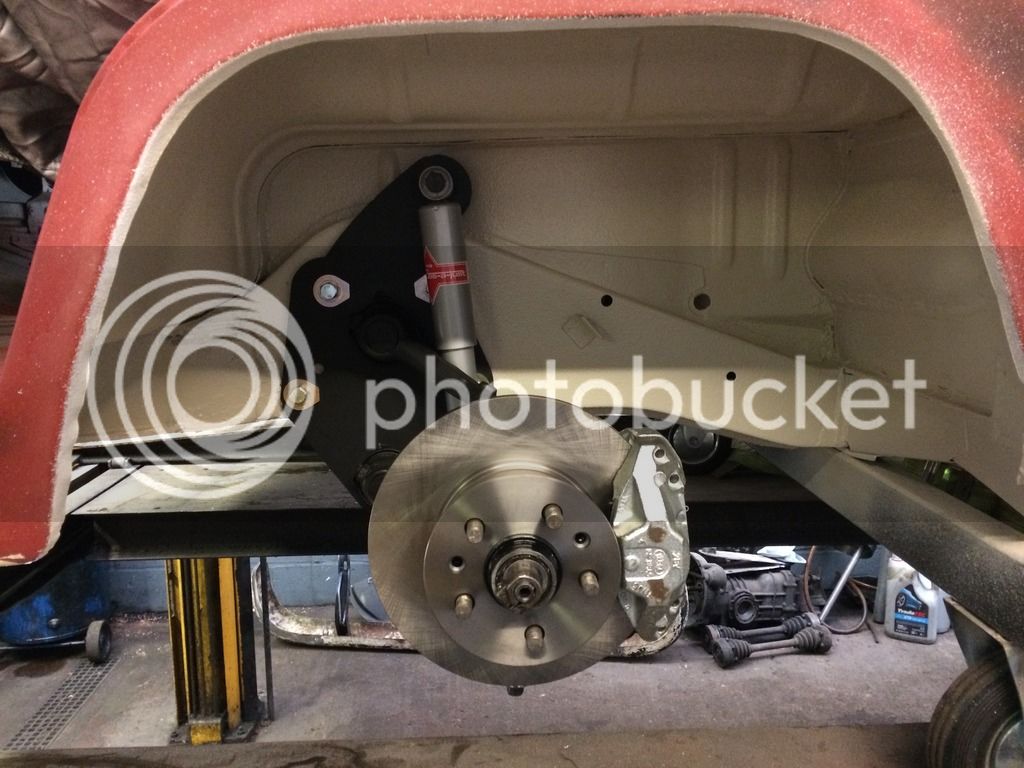
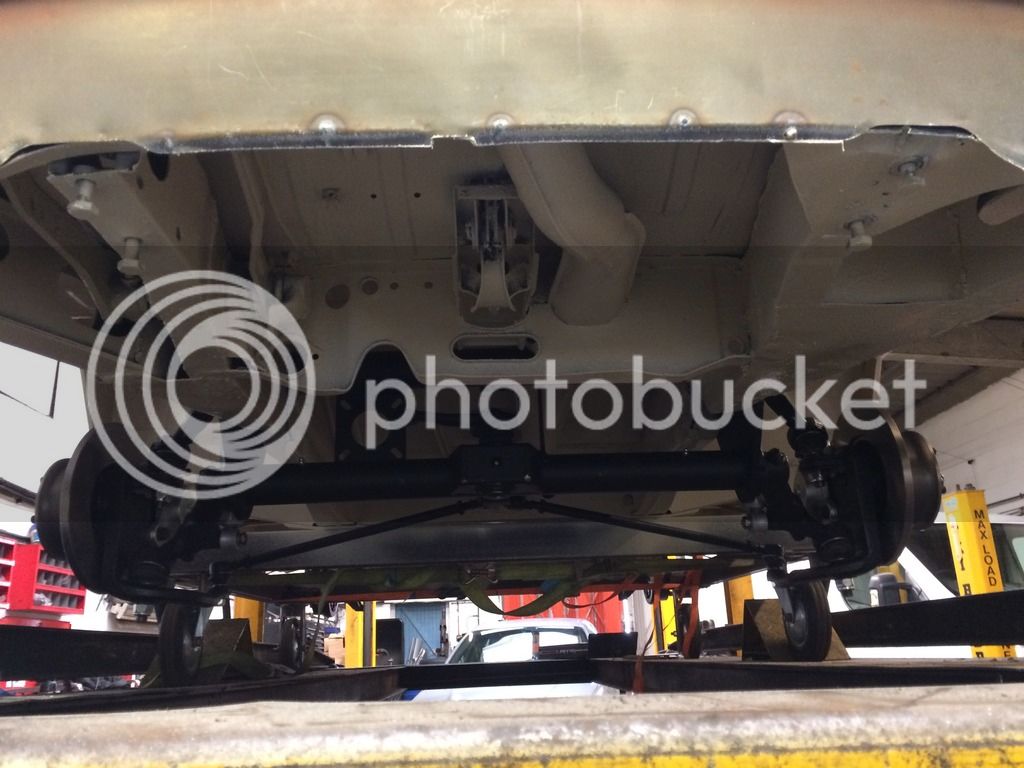

French slammer setup, thanks to Graham at Midland Earlybay! Very easy to install just wanna see ride height now!!


French slammer setup, thanks to Graham at Midland Earlybay! Very easy to install just wanna see ride height now!!


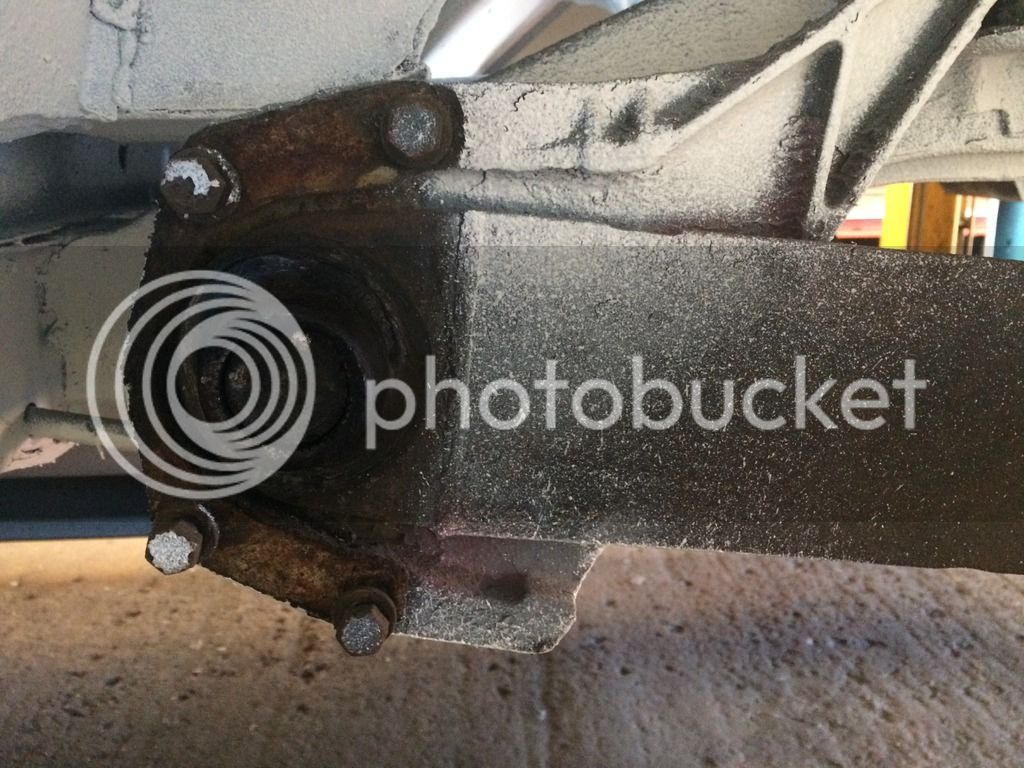
Rear suspension bushes, has anyone else had issues installing them? Was a nightmare to install,seemed to big but fitted the cup and over rear arms separately but just not together?? Ended up using old bushes on inner side of adjustable rear arms and new bushes on outer side!
Did you get new bushes that had had their inner surface widened to fit the new adjustable spring plates? If not - that'll be your problem, they need to be of a larger inner diameter, but the same outer diameter to suit the increased springplate pivot size.
Sent from my iPad using Tapatalk
Sent from my iPad using Tapatalk


image free hosting
Few updates, fuel tank in, gearbox cleaned up an primered, and cab area all in raptor body colour!! Well chuffed
Had o go with the doors today!! N/s door was badly corroded in the bottom rear corner!! Had to make new corner from scratch!


In the last photo can anyone tell me where/how the brace attaches?? Looks like it welds to bottom of inner but where does top attach to? The new skin maybe?? How??
In the last photo can anyone tell me where/how the brace attaches?? Looks like it welds to bottom of inner but where does top attach to? The new skin maybe?? How??

Similar threads
- Replies
- 17
- Views
- 1K
- Replies
- 1
- Views
- 519