


I'm interested in that.
You are using an out of date browser. It may not display this or other websites correctly.
You should upgrade or use an alternative browser.
You should upgrade or use an alternative browser.
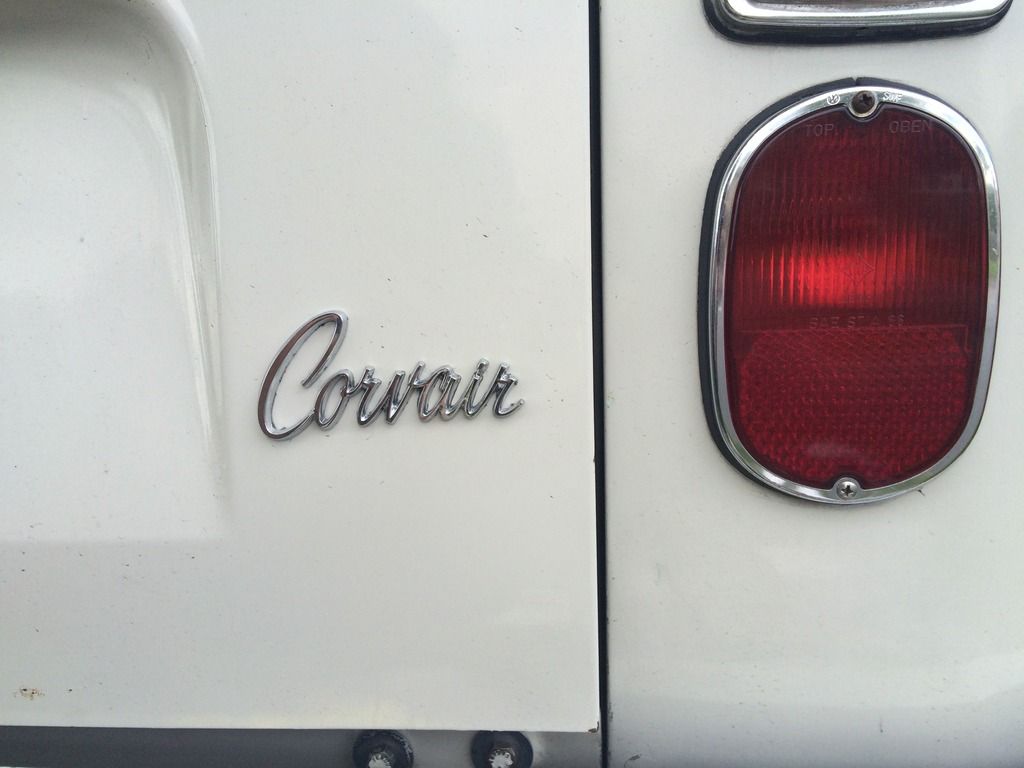
Spring Valley Bus meets Corvair
- Thread starter creationblue
- Start date
Help Support Early Bay Forum:
This site may earn a commission from merchant affiliate
links, including eBay, Amazon, and others.
creationblue
Well-known member
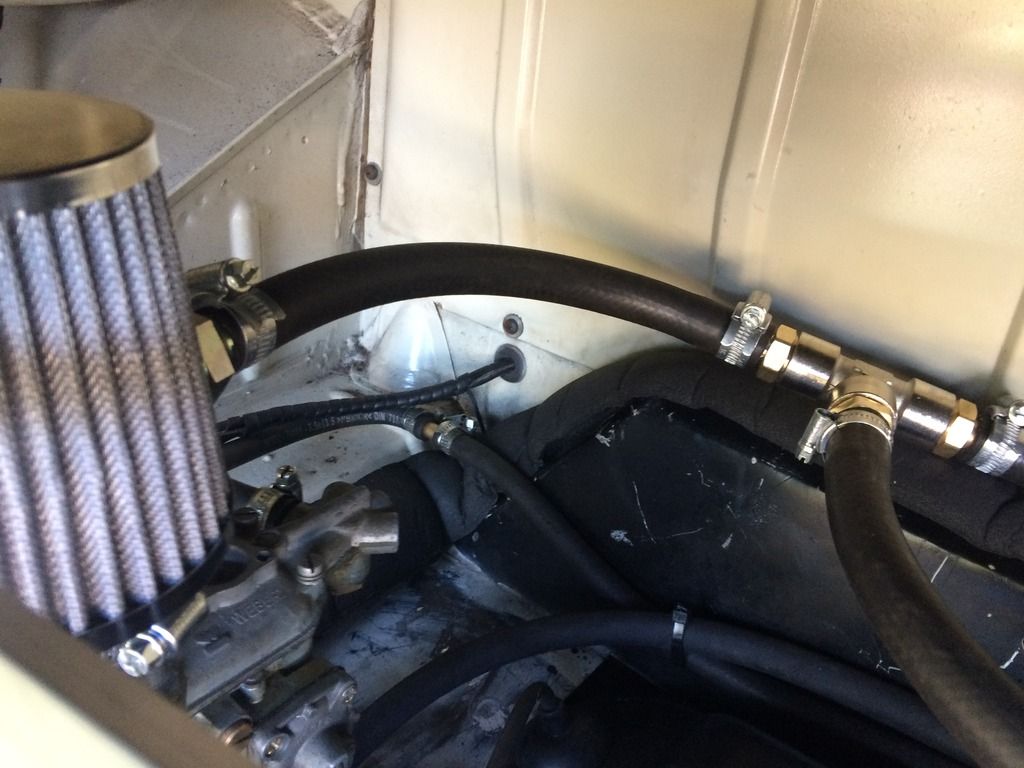
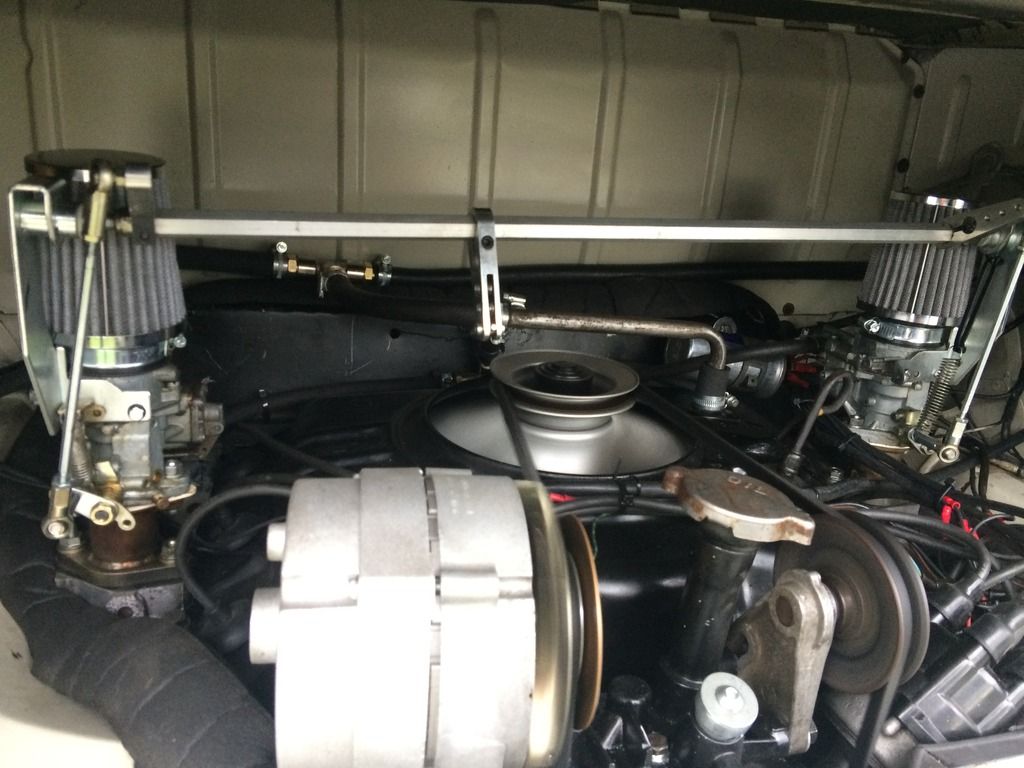
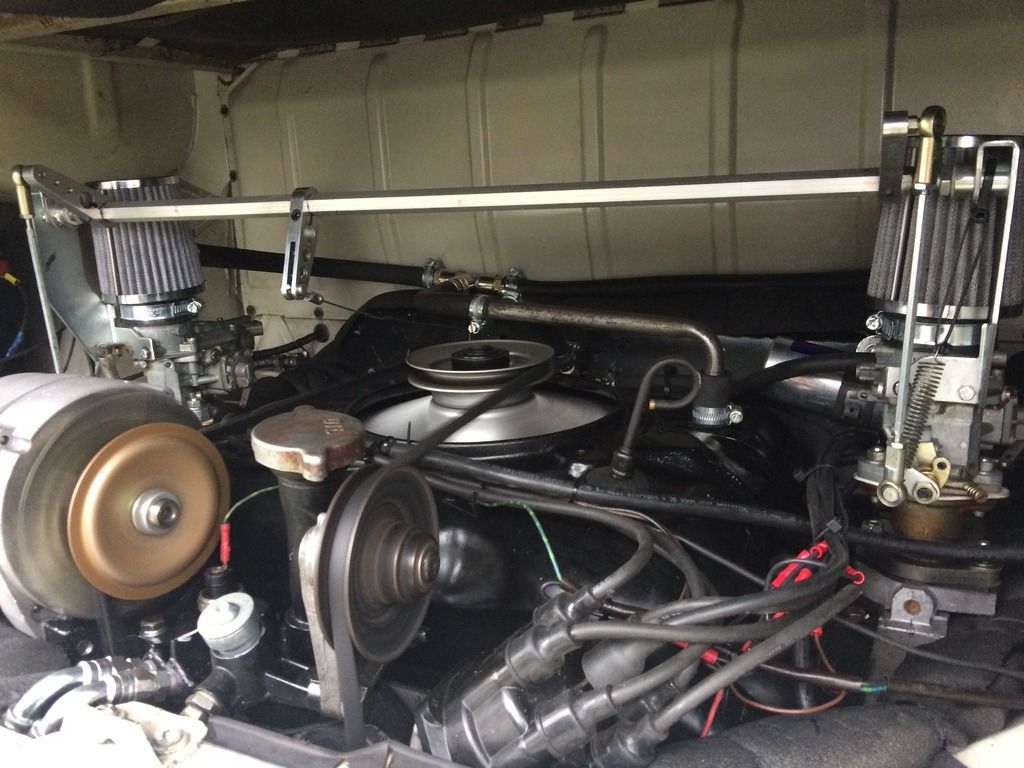
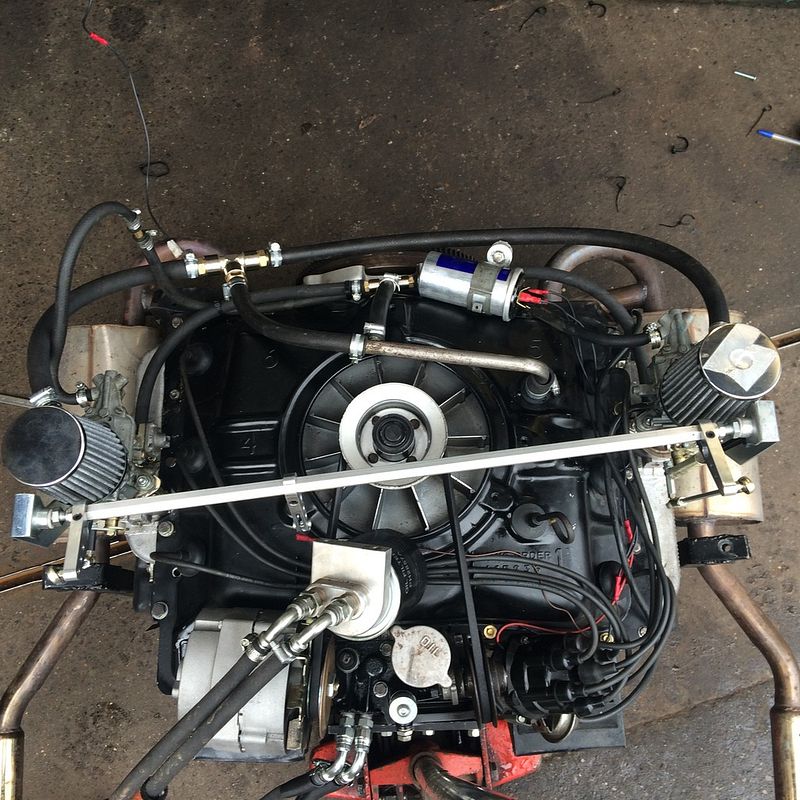
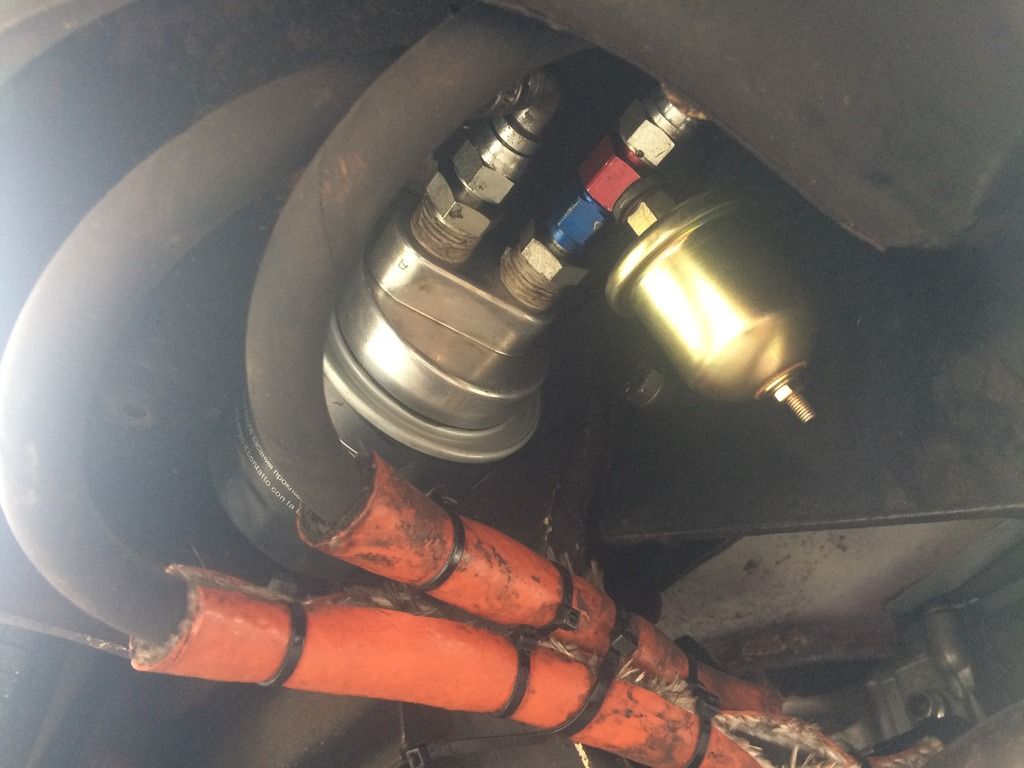
Not much relevance to Earlybays or volkswagens for that matter but the corvair engine required a PCV (positive crankcase ventilation) system.
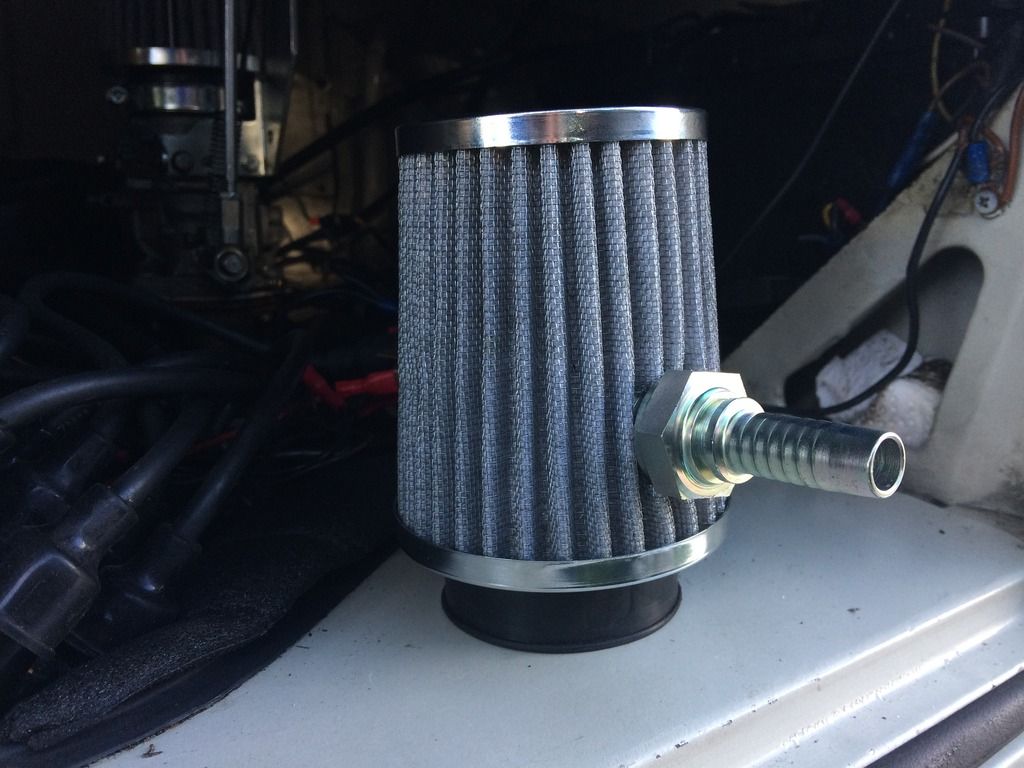
As you can see there is a small filter next to the R/H carb
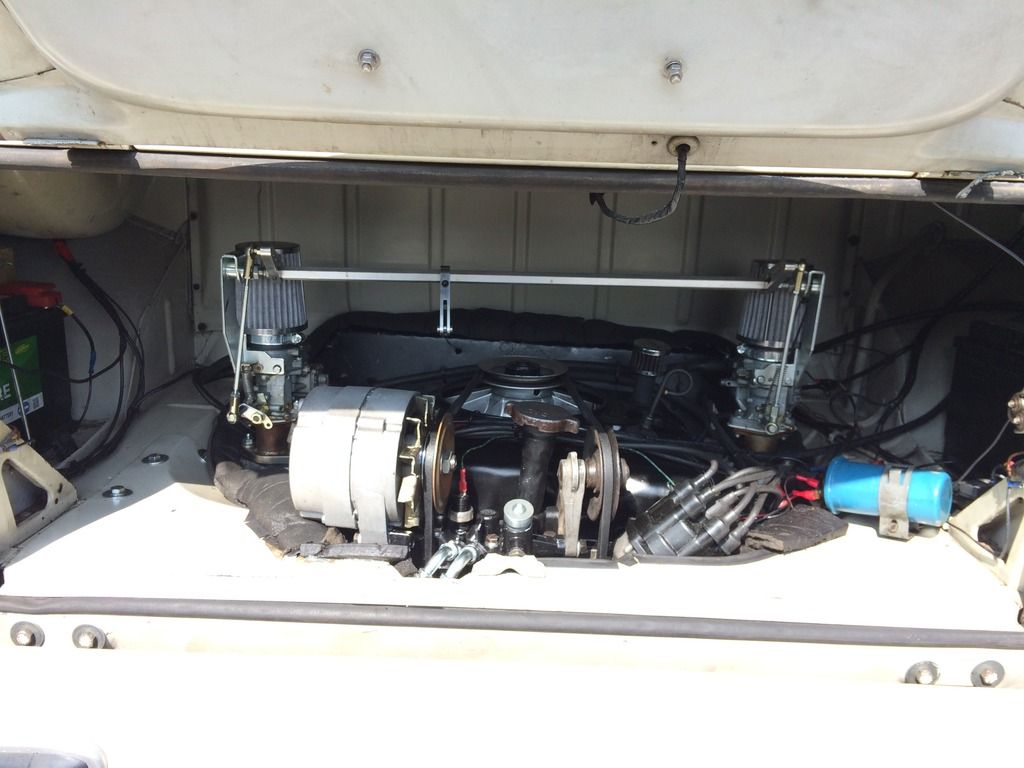
This is the crankcase breather hole. The Corvair guys pointed out to me that you need vacuum from the balance pipe between the inlets on the carbs plumbed in to the crankcase vent then the blowback gas to be vented back into the carbs. Now I have been unhappy about the small amount of oil vapor that excapes the filter making my engine bay dirty so I took the advice and got some pipe and fittings from a local hydraulic company (yes the fittings are rather industrial :lol: ) and came up with this.
The metal pipe you see was the original PVC breather pipe that vented into the original 'saucepan' filter, I cut this down to suit, it has an outlet with a pinhole that connects to the carb balance pipe, this is the important bit for crankcase pressure relief.
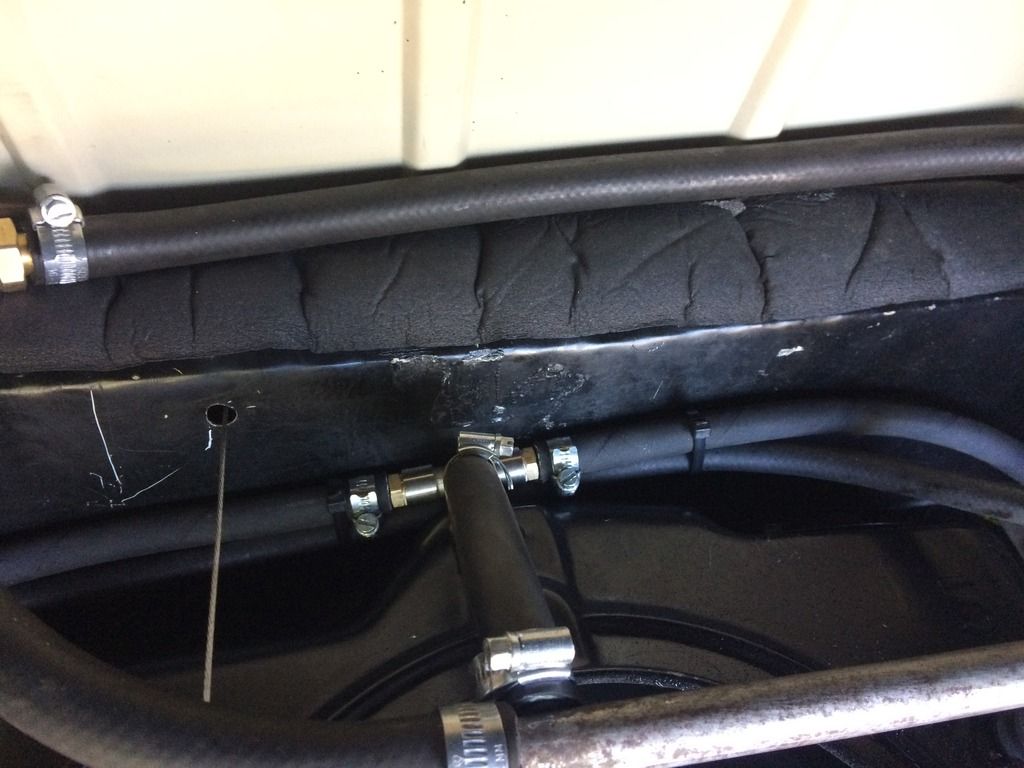
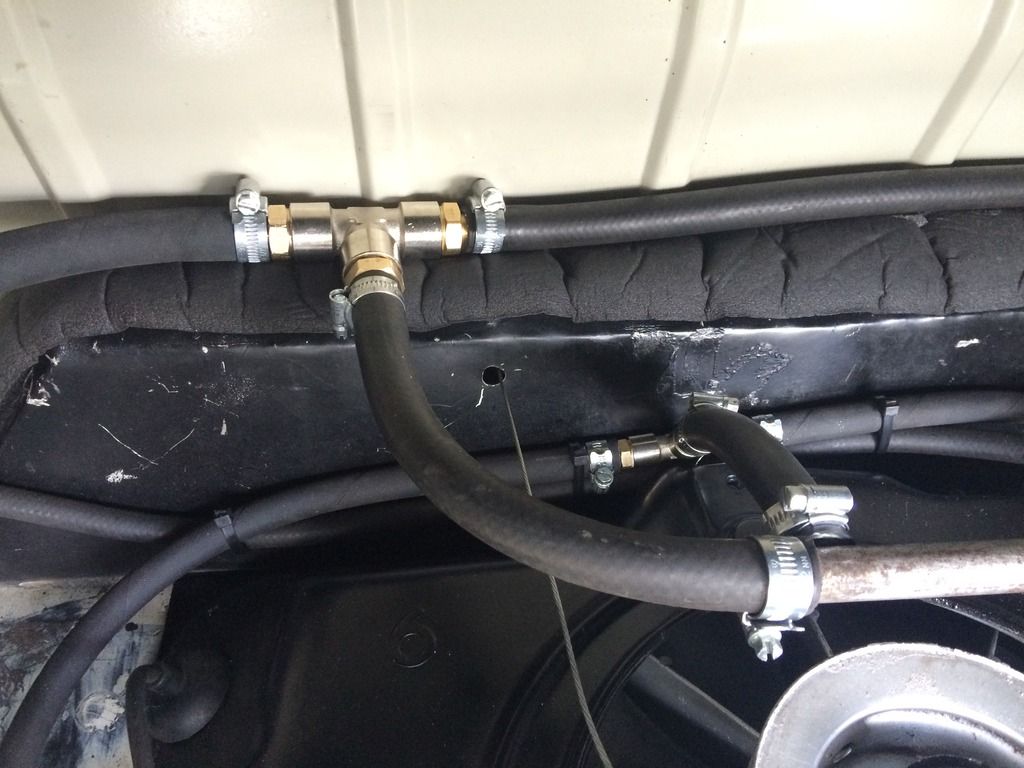
This is where I tee'd off the balance tube between inlet tracks.
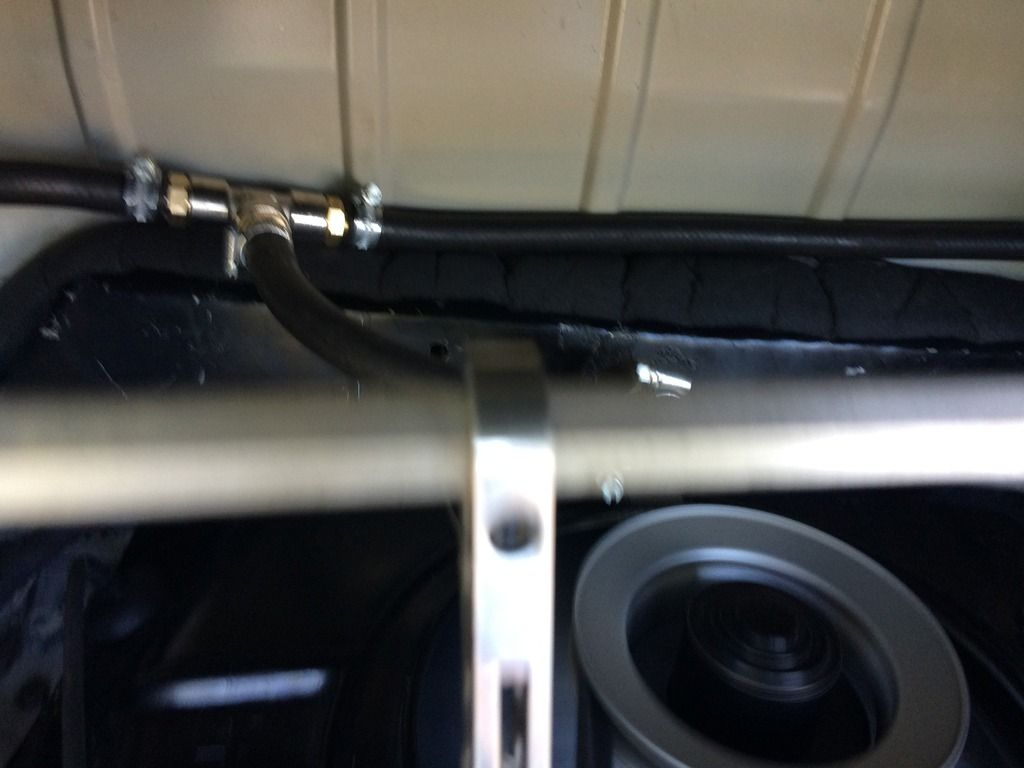
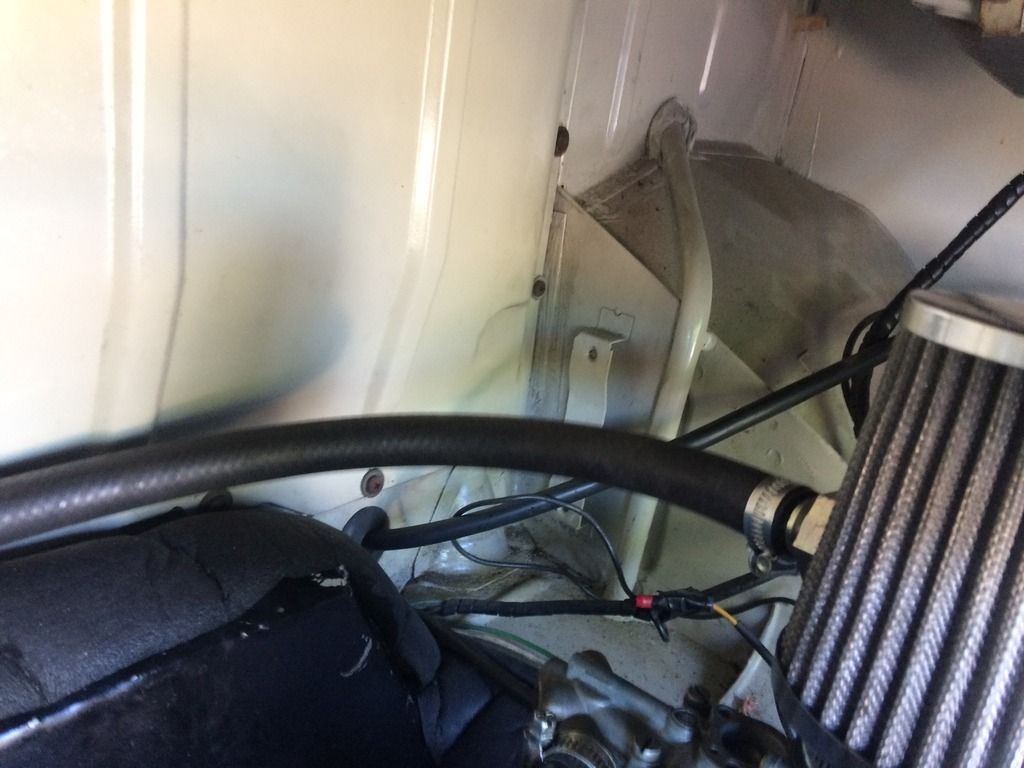
And here is the breather carb return
And the other side
I've not driven it yet but the corvair fellas say that's how it should be done, I know a couple on here have Vair engines so it may be of interest.
Next up fitting a new clutch. Again! 8)
As you can see there is a small filter next to the R/H carb

This is the crankcase breather hole. The Corvair guys pointed out to me that you need vacuum from the balance pipe between the inlets on the carbs plumbed in to the crankcase vent then the blowback gas to be vented back into the carbs. Now I have been unhappy about the small amount of oil vapor that excapes the filter making my engine bay dirty so I took the advice and got some pipe and fittings from a local hydraulic company (yes the fittings are rather industrial :lol: ) and came up with this.

The metal pipe you see was the original PVC breather pipe that vented into the original 'saucepan' filter, I cut this down to suit, it has an outlet with a pinhole that connects to the carb balance pipe, this is the important bit for crankcase pressure relief.

This is where I tee'd off the balance tube between inlet tracks.

And here is the breather carb return

And the other side

I've not driven it yet but the corvair fellas say that's how it should be done, I know a couple on here have Vair engines so it may be of interest.
Next up fitting a new clutch. Again! 8)
creationblue
Well-known member
It was Stu this time last year. Then the Corvair spewed oil and ruined it 
Engine will be out again so will repaint the tin I made and remount the coil out the way.
After some research I have found that the cause of my slipping clutch is probably due to either the KEP pressure plate loosing it's force or the metal woven clutch disc gone for a Burton. The original Vair kit was supplied with only a 1300lb P.P or a 1600lb plate if the engine was modded, So if this is correct then I won't have to go to stage2 and therefore no need to install a hydraulic clutch 8) still means I'll have to fork out for another clutch which after only a 1000 miles or so is poor show but that's the price of modification I guess.
It will certainly be interesting to see what condition the clutch is in when you manage to remove it - my guess is on the pressure plate!
Do you have the 1300lb fitted at the moment?
All that torque will be epic when you get this resolved! Be worth it in the end mate!
Do you have the 1300lb fitted at the moment?
All that torque will be epic when you get this resolved! Be worth it in the end mate!
creationblue
Well-known member
It's a KEP stage1 plate that is 1700lb, this is suitable for just under 180ft/lb which I'm probably close to, coupled with the weight of the van I assumed was the problem. A stage2 clutch is heavy as hell and will mean my leg will shake like a shitting dog :lol:


$27.95 ($13.98 / Count)
Marketplace Auto Parts Window Crank Handle Set of 2 - Chrome with Black Knob - Compatible with 1968-1978 Volkswagen Beetle
Parts Geek LLC


$28.52
$32.43
Airfix Quickbuild Volkswagen Light Blue Camper Van Brick Building Model Kit, Multicolor
Amazon Global Store UK


creationblue said:and will mean my leg will shake like a shitting dog :lol:
No change there then, I've seen you dance.....
creationblue
Well-known member
sparkywig said:creationblue said:and will mean my leg will shake like a shitting dog :lol:
No change there then, I've seen you dance.....
That's outrageous!
You were dancing to the a different track! :lol:
creationblue
Well-known member
So having installed the breather system I was a bit short of hose meaning the Tee didn't sit quite righ on the bulkhead, so got some more hose and sorted that out. It didn't really notice but I can sleep happier now :lol:
Seeing the tools are out it was time to move the coil to somewhere less intrusive, had to extend the cabling...
There, that's better, now hiding behind the carb.
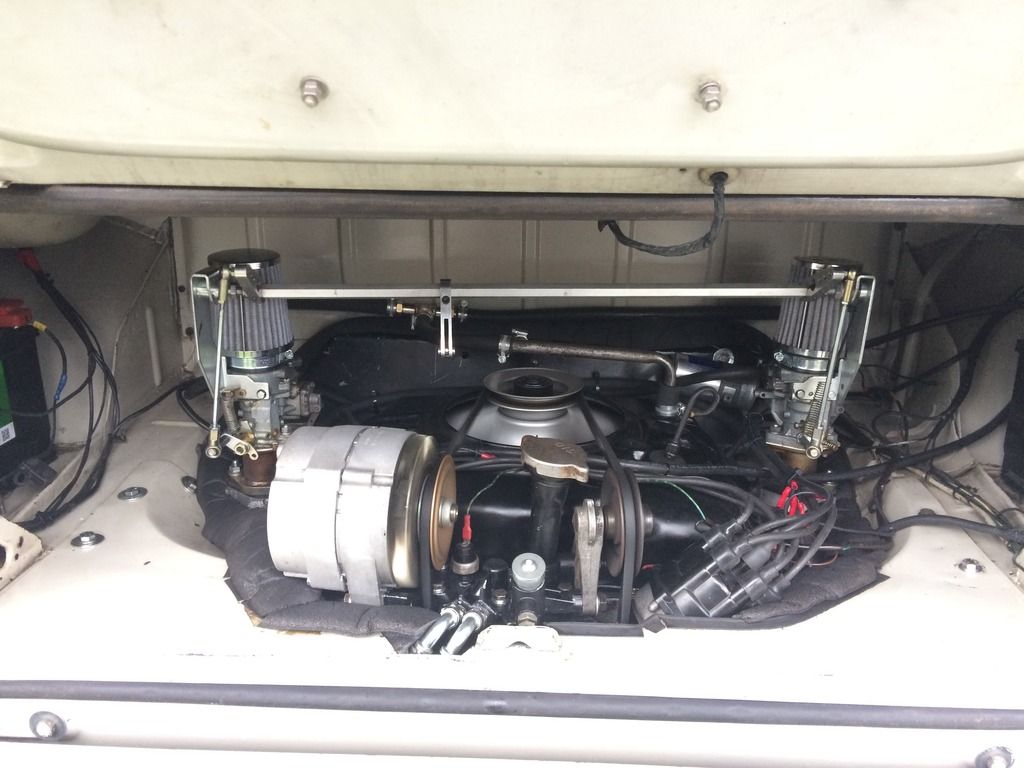
And just incase you didn't know what lies beneath
Next to fit a new engine lid seal, oh did I say I needed to take out the motor to change the clutch? :roll:
Edit. I'll paint the black tin again when the engines out. It looks a state!

Seeing the tools are out it was time to move the coil to somewhere less intrusive, had to extend the cabling...
There, that's better, now hiding behind the carb.


And just incase you didn't know what lies beneath

Next to fit a new engine lid seal, oh did I say I needed to take out the motor to change the clutch? :roll:
Edit. I'll paint the black tin again when the engines out. It looks a state!
creationblue
Well-known member
engine out tonight after work, with the help of Nick and Paul when it mattered it was all done in a few hours. The clutch plate was contaminated with oil which is annoying to say the least as I wouldn't have fitted it and replaced it with new. Anyway seeing as I bought a new KEP stage 1 P.P and a disc I fitted them both as a matter of course (I have a spare KEP plate if anyone needs one).
A few pics
Nice empty engine bay, if only I had more time I would have cleaned it and painted a few things.....maybe next time
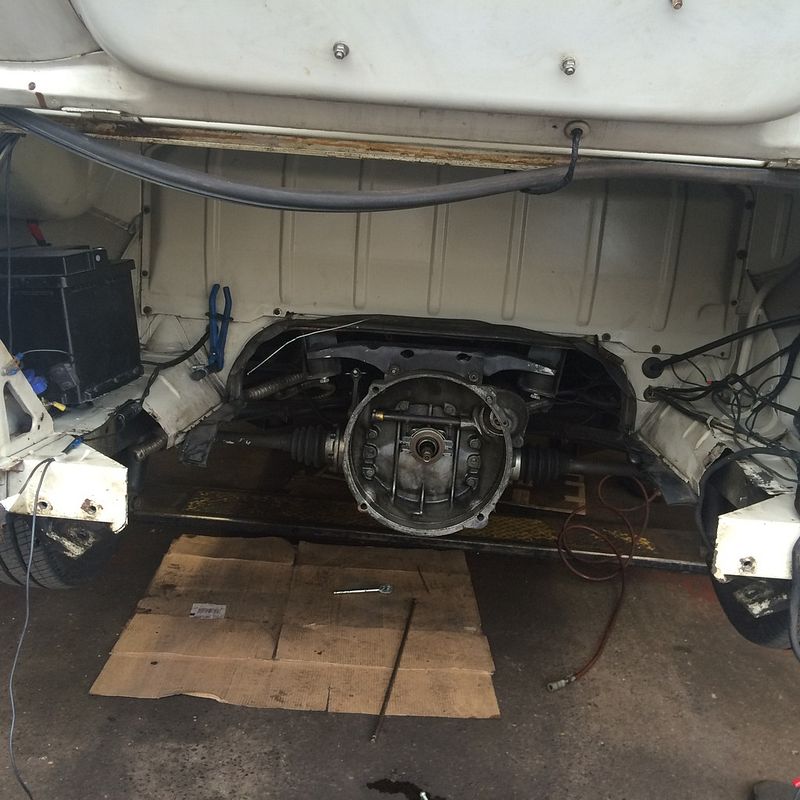
'65 Corvair 2.7 164cc 110hp in all its glory
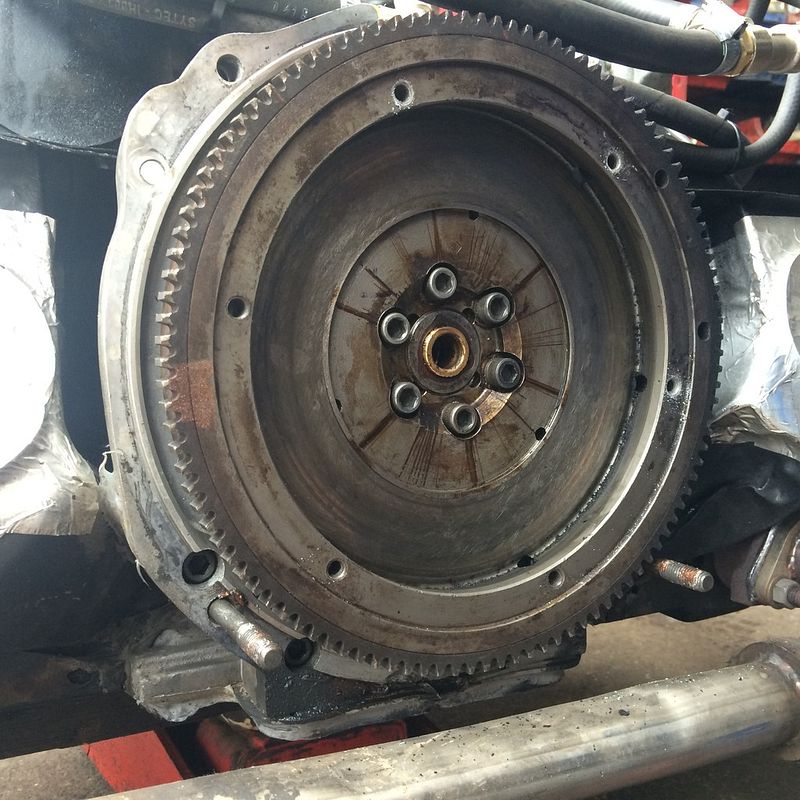
Hybrid flywheel consisting of 6v beetle ring gear and corvair flywheel, no oil leak here
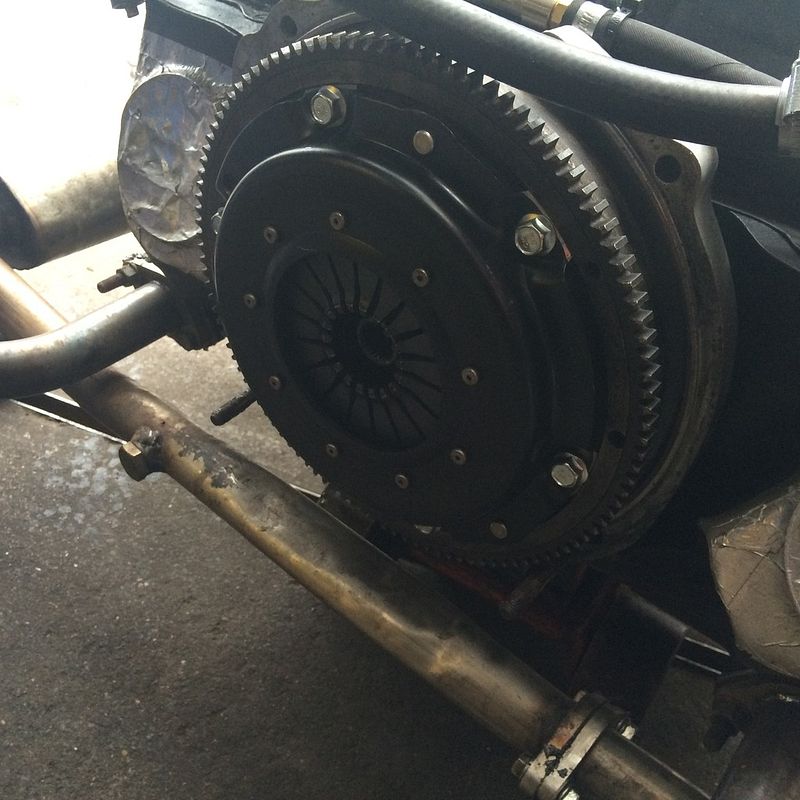
New stage 1 PP and copper disc fitted and ready for action Sir!
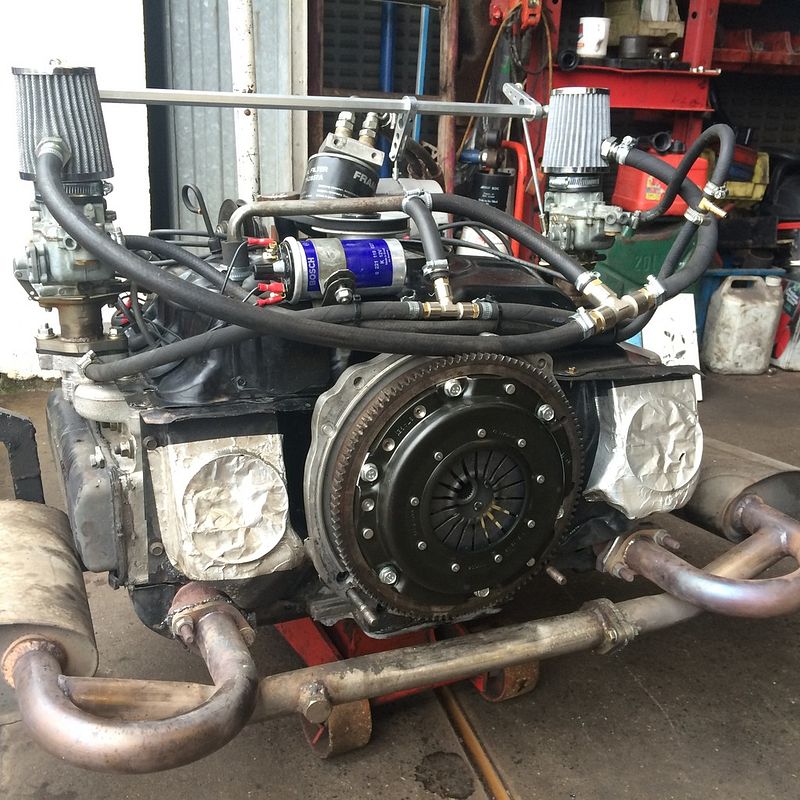
And ready to go back in
Ran well on the way home. I'm pretty sure it's a job well done and the contaminated disc was at fault.
A few pics
Nice empty engine bay, if only I had more time I would have cleaned it and painted a few things.....maybe next time

'65 Corvair 2.7 164cc 110hp in all its glory

Hybrid flywheel consisting of 6v beetle ring gear and corvair flywheel, no oil leak here

New stage 1 PP and copper disc fitted and ready for action Sir!

And ready to go back in

Ran well on the way home. I'm pretty sure it's a job well done and the contaminated disc was at fault.
creationblue
Well-known member
It would have been contaminated when the engine seized last time out. I wouldn't have reused it, but I didn't build it :roll:
Anyway, I will rewire the engine just to take out the few connectors and generally tidy things up now that it's all fresh in my mind again. Nearly there now
Anyway, I will rewire the engine just to take out the few connectors and generally tidy things up now that it's all fresh in my mind again. Nearly there now
Airtime
Well-known member
Great work! 8)
Bundy said:Cracking mate.
You'll be able to do burnouts now :lol:
Not until he's on the way home.....
creationblue
Well-known member
Another day on the bus today. A few jobs needed doing.
1st off was to replace the spacers on the westy roof rack
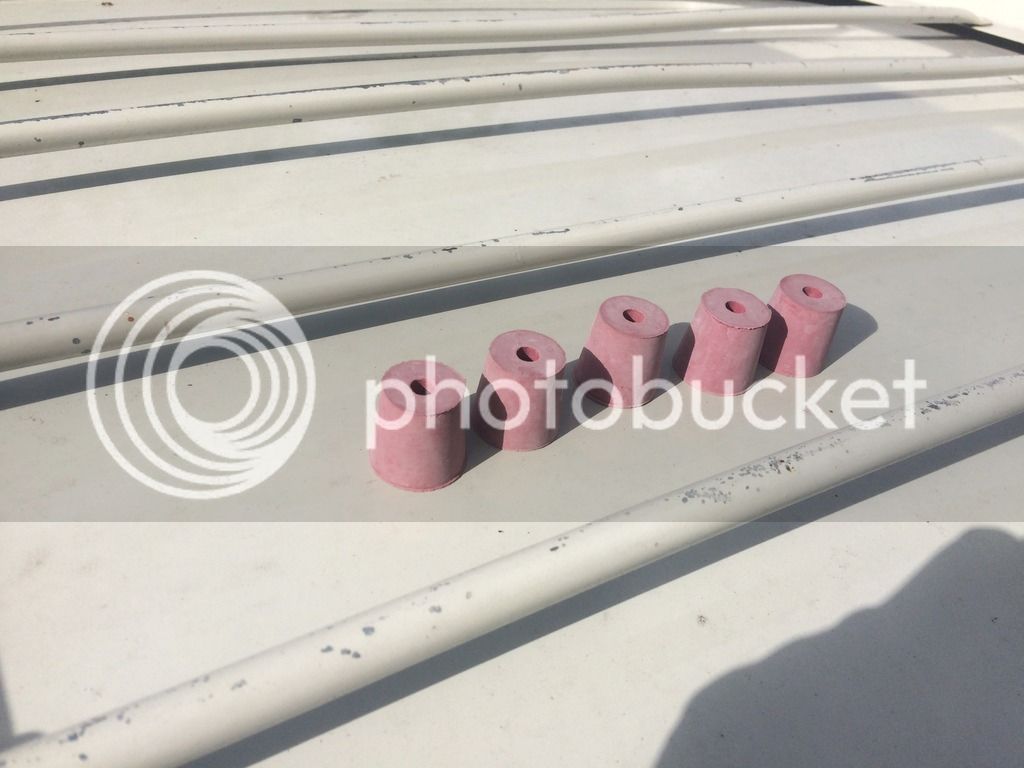
A nice easy job to start with, the originals had just about had their day!
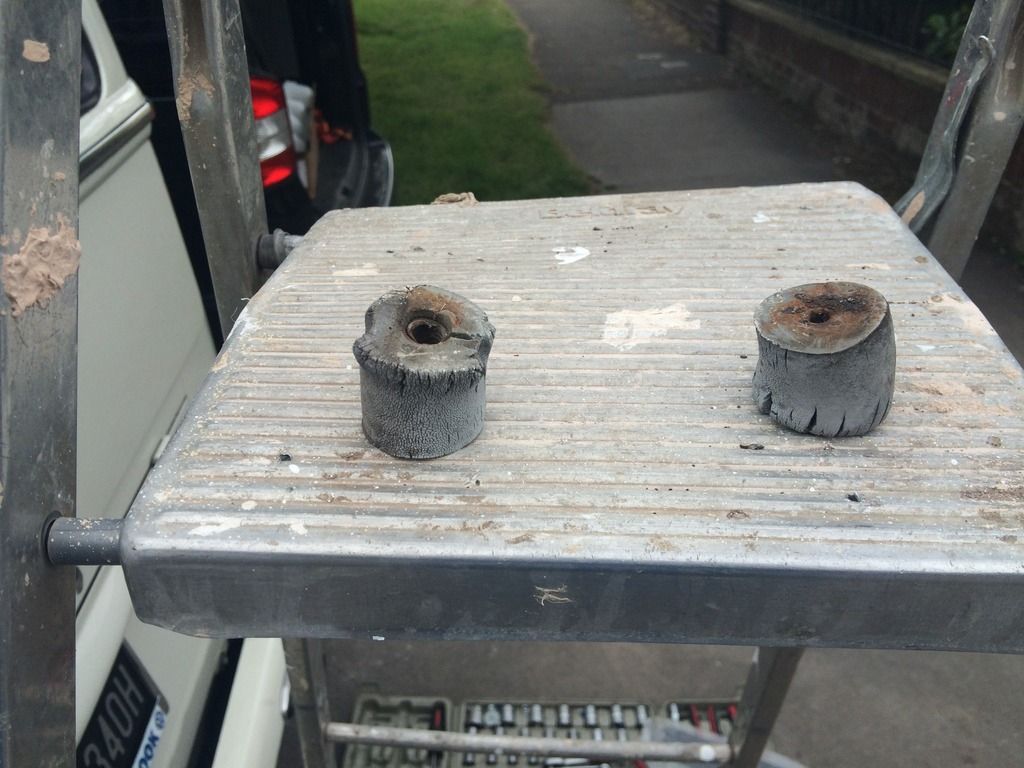
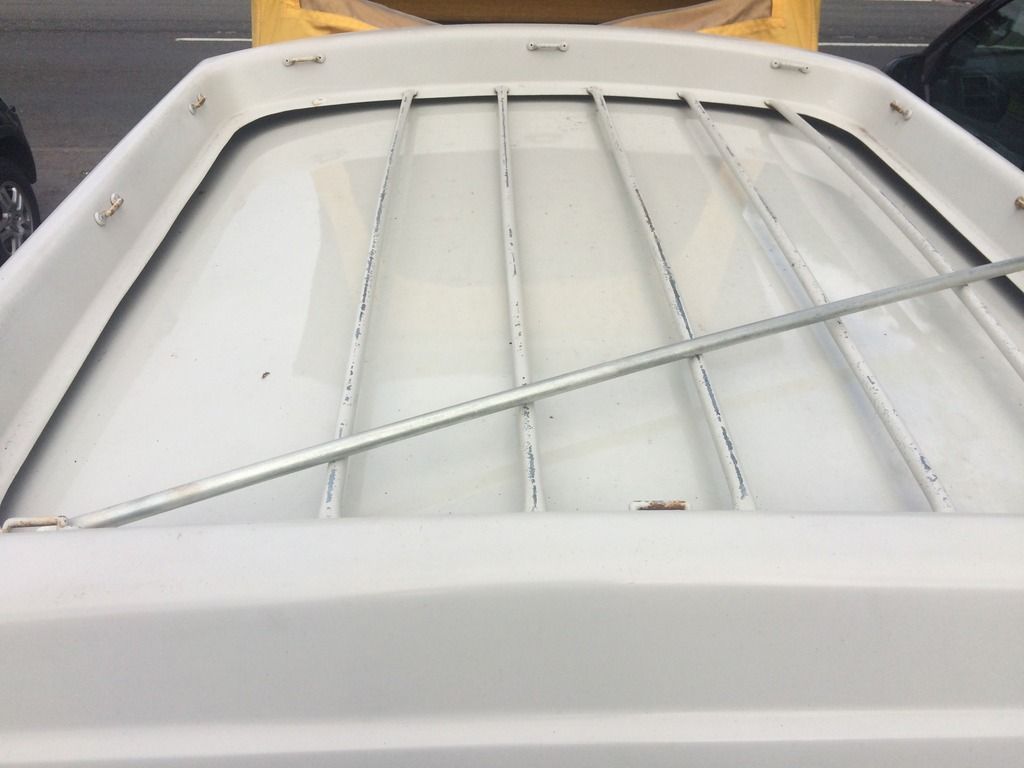
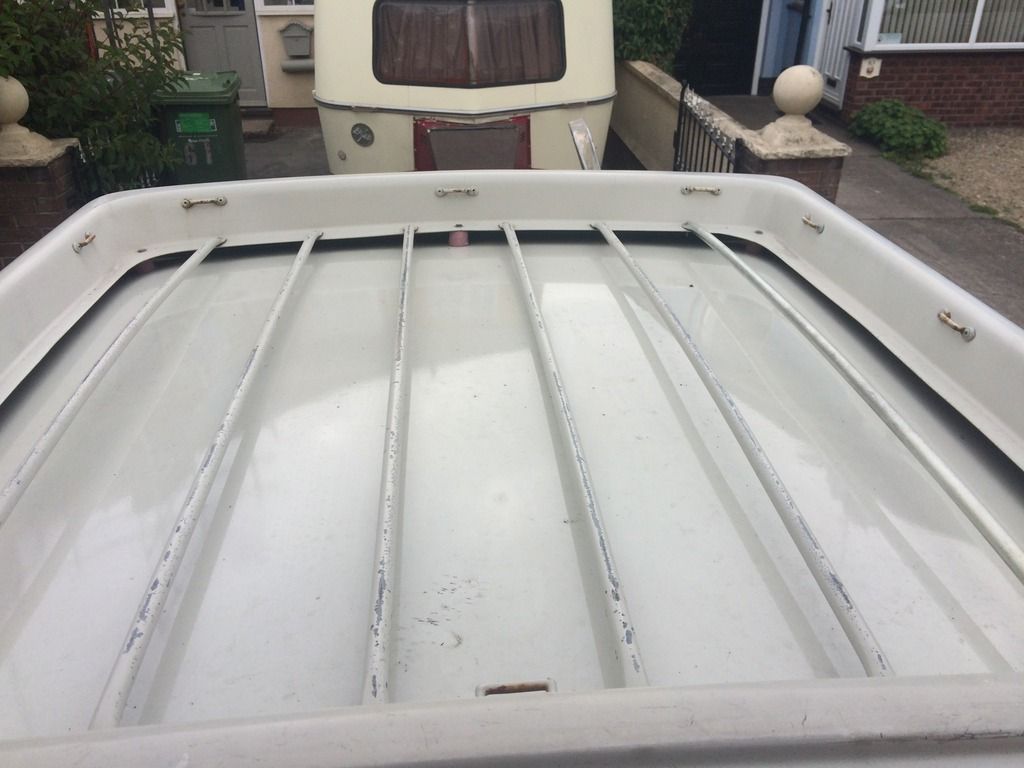
Now I've been missing a roof rack bar since I had the bus in 2007, so finally got around to replacing it
Next up I wanted to fit a pressure gauge so I keep an eye on the Chevy
Sender was fitted at the filter
and there she goes
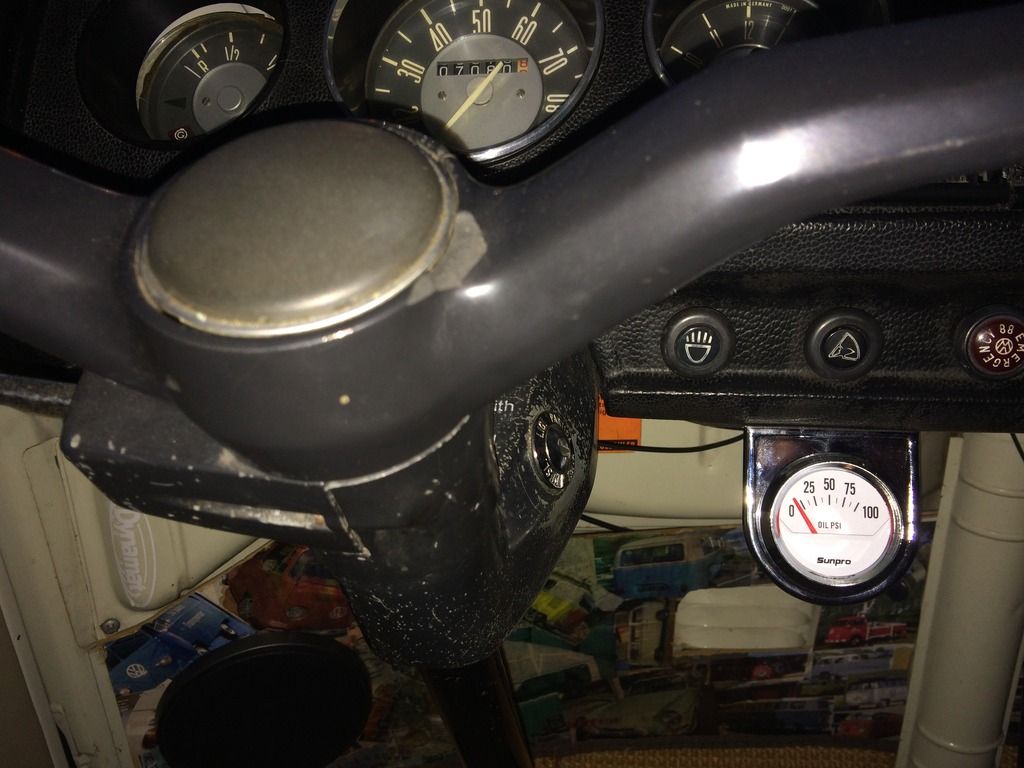
There is a temperature sender on the engine, I have a sunpro temp gauge and temporarily wired it up but it didn't work. Anyone have any ideas? I'll find out how to test the sender and go from there. Just see the connection in this pic
Whilst the kick panel was off I set about looking at what was leaking on them....
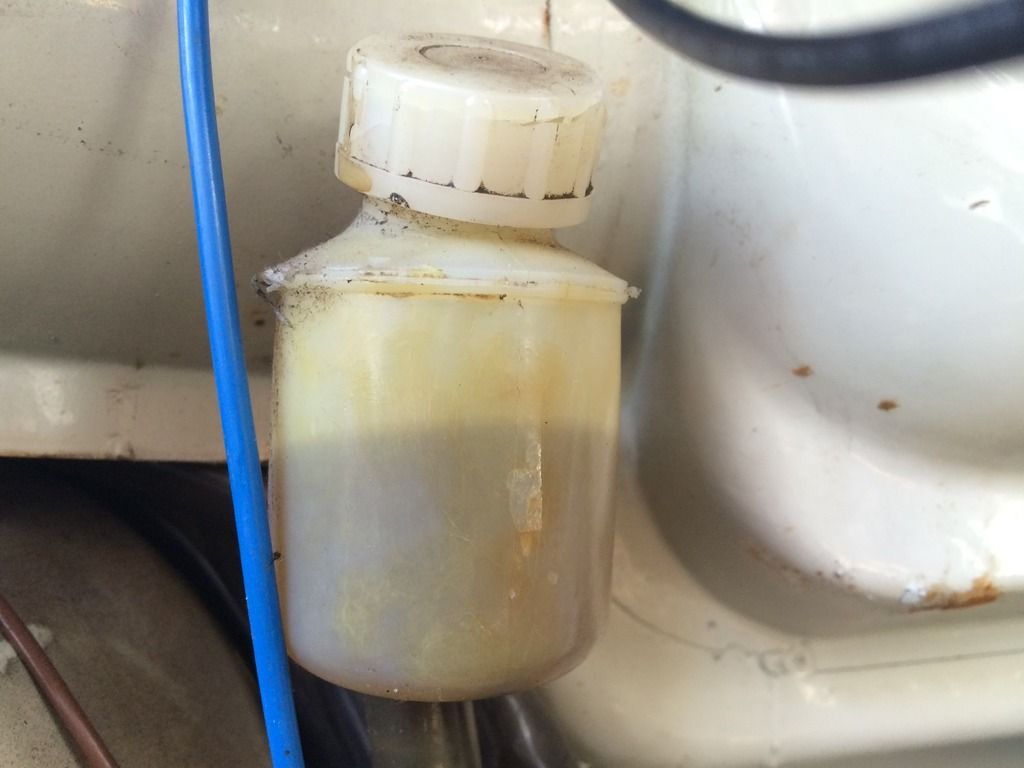
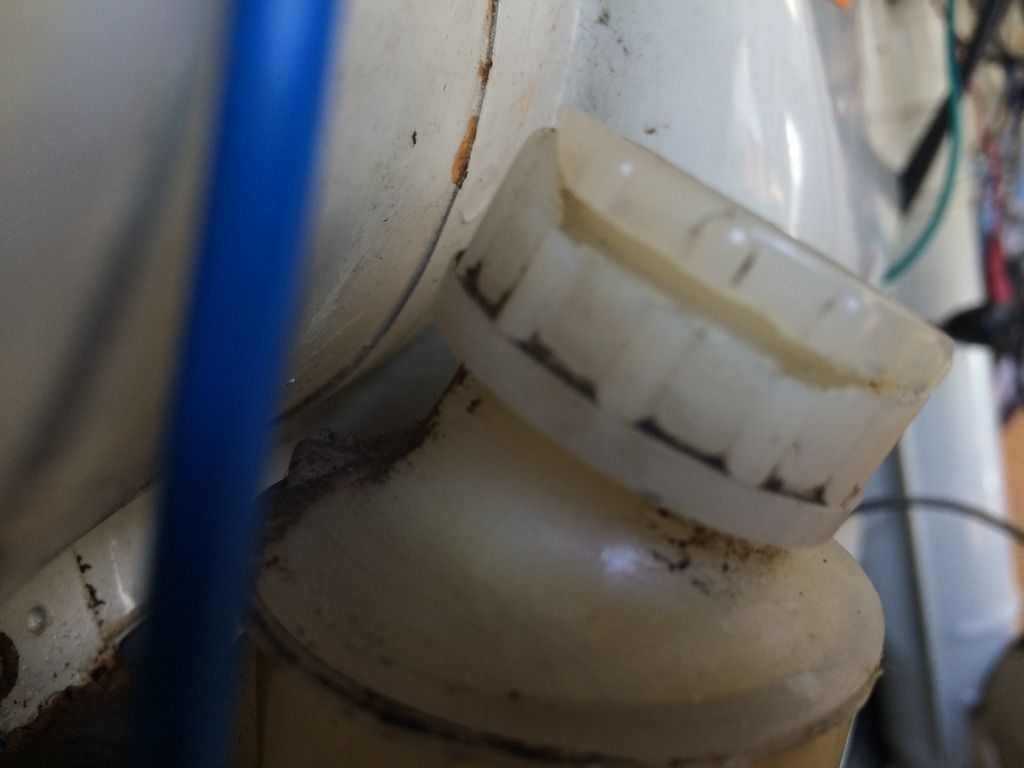
You can see the plastic is delaminating and causing a leak, the cap is shagged too :lol:
Are these available??
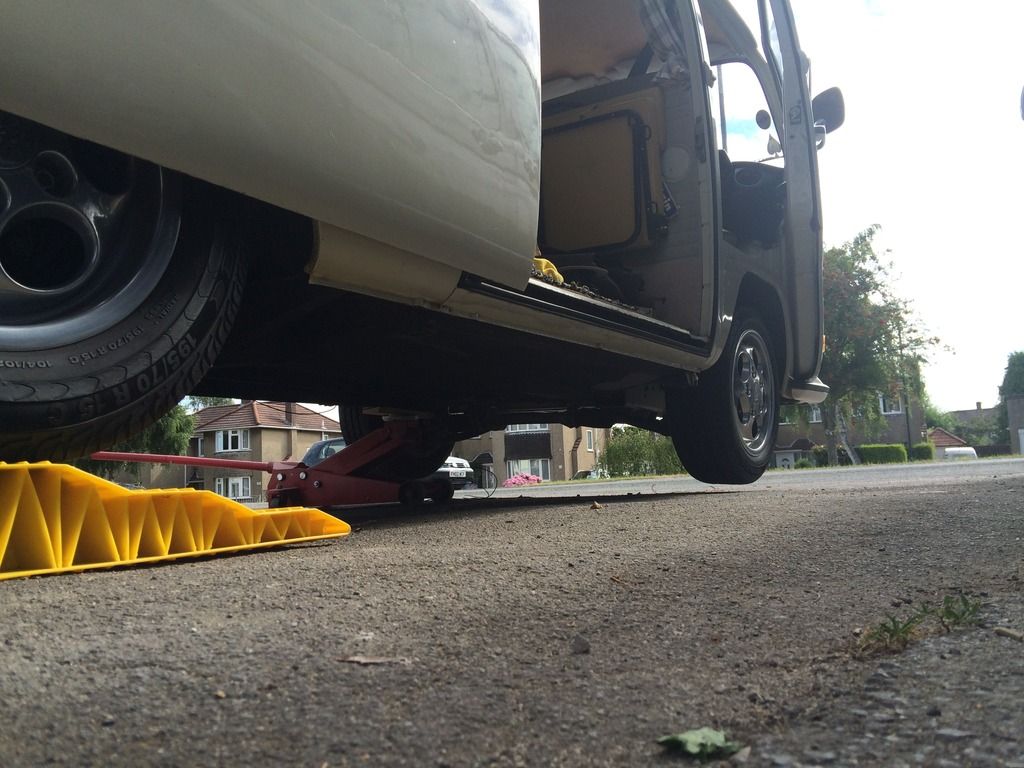
Levitation pic 8)
I then took out the dormobile cooker & the amp as I'm taking the caravan and want to save some weight :msn4: then took everything out and gave it a damn good vacuum!
Next up was the Eriba. It's an '88 model pan familia 3 birth. It came with a knackered front box that looked awful
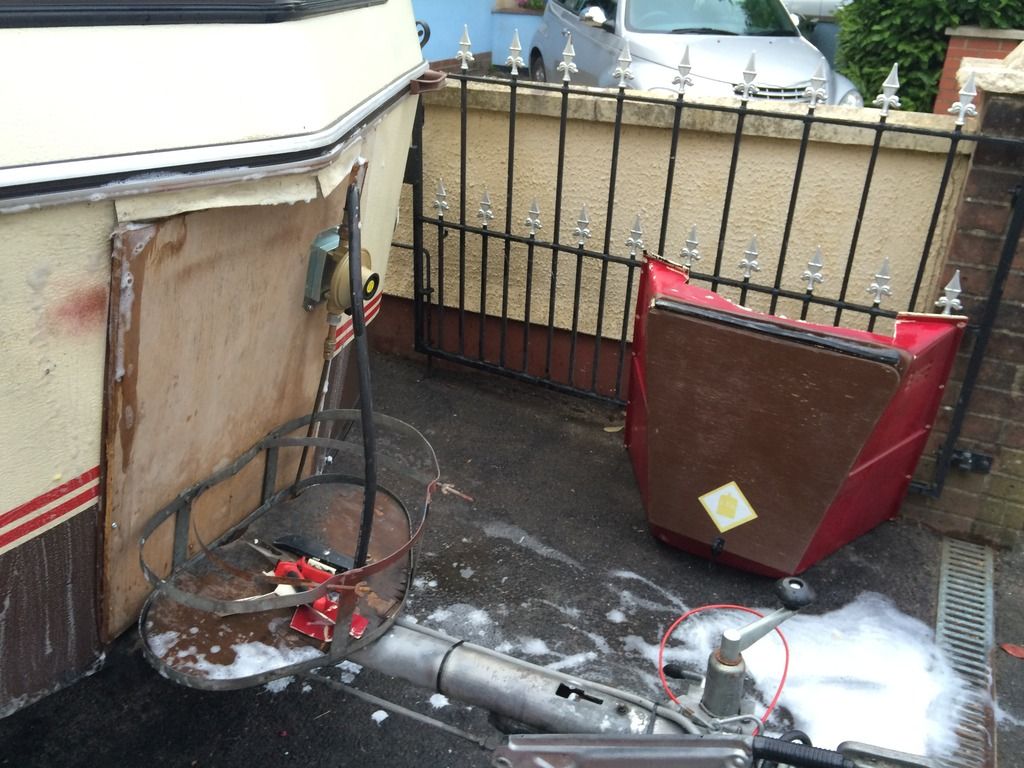
So stripped it down and set about trying to fit this new one

Now I'm not sure where is was made, of for what caravan for that matter :? But with A LOT of fettling with a dremmel I managed to attached it after a fashion!
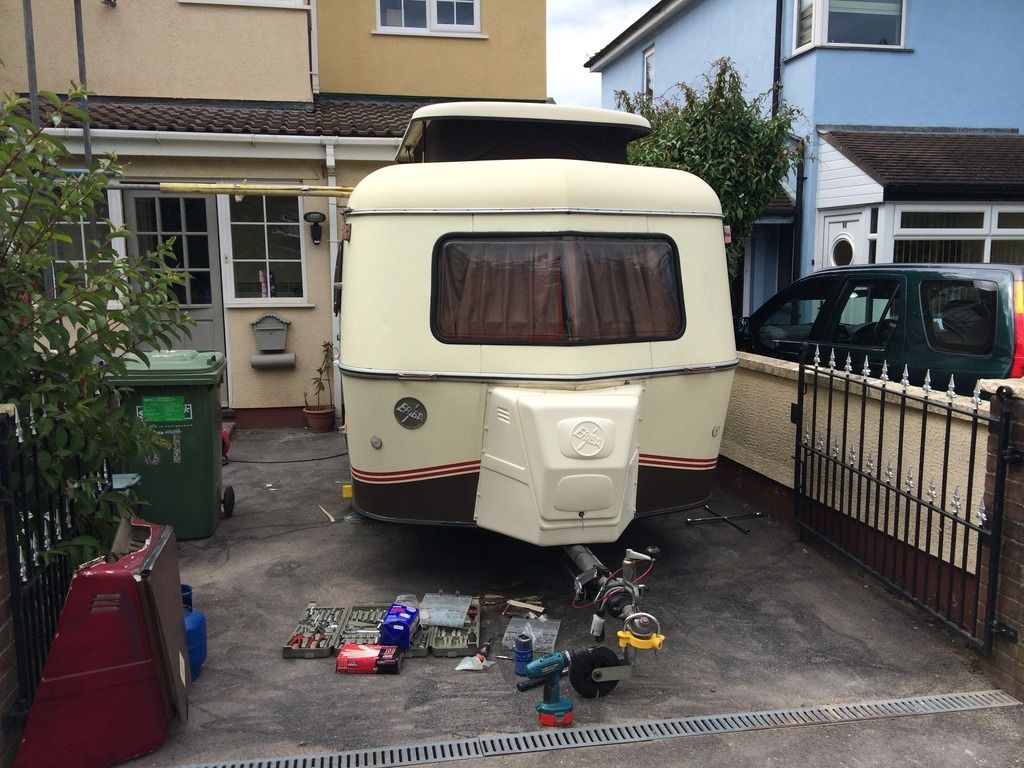
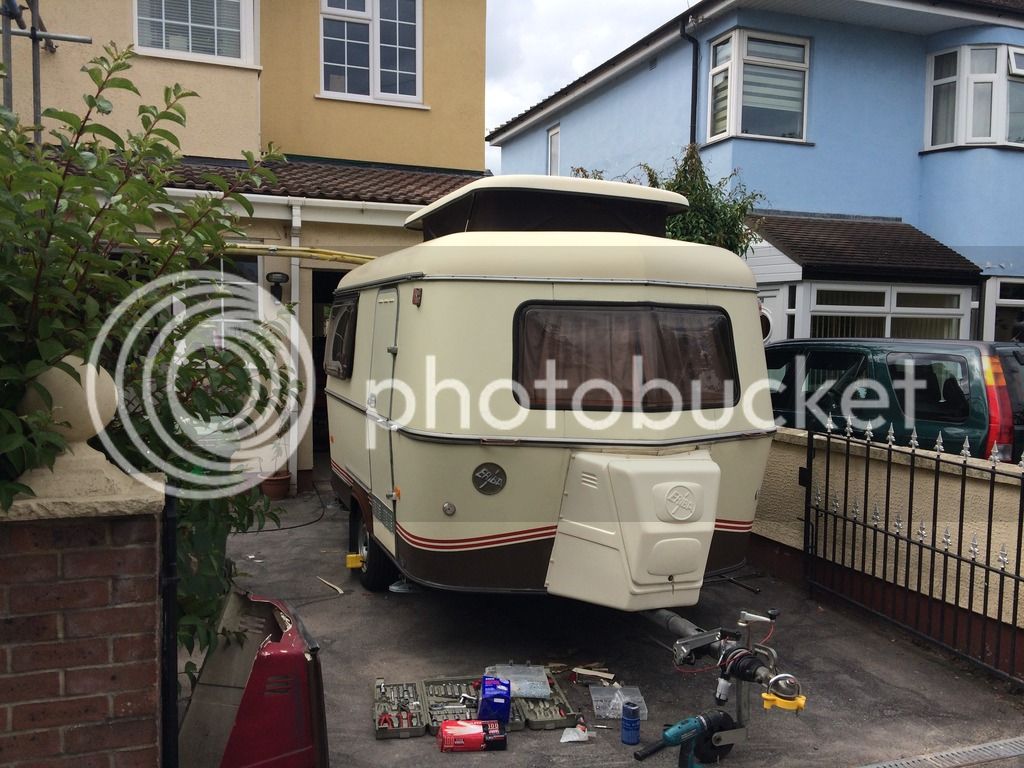
Looks better but not overly impressed with it. Got the gas working on the fridge as well! A long but fruitful day 8)
Tomorrow I'm going on a test run in the bus with the Eriba
1st off was to replace the spacers on the westy roof rack
A nice easy job to start with, the originals had just about had their day!
Now I've been missing a roof rack bar since I had the bus in 2007, so finally got around to replacing it
Next up I wanted to fit a pressure gauge so I keep an eye on the Chevy
Sender was fitted at the filter
and there she goes
There is a temperature sender on the engine, I have a sunpro temp gauge and temporarily wired it up but it didn't work. Anyone have any ideas? I'll find out how to test the sender and go from there. Just see the connection in this pic
Whilst the kick panel was off I set about looking at what was leaking on them....
You can see the plastic is delaminating and causing a leak, the cap is shagged too :lol:
Are these available??
Levitation pic 8)
I then took out the dormobile cooker & the amp as I'm taking the caravan and want to save some weight :msn4: then took everything out and gave it a damn good vacuum!
Next up was the Eriba. It's an '88 model pan familia 3 birth. It came with a knackered front box that looked awful
So stripped it down and set about trying to fit this new one
Now I'm not sure where is was made, of for what caravan for that matter :? But with A LOT of fettling with a dremmel I managed to attached it after a fashion!
Looks better but not overly impressed with it. Got the gas working on the fridge as well! A long but fruitful day 8)
Tomorrow I'm going on a test run in the bus with the Eriba
creationblue
Well-known member
Oh almost forgot, found a fuel leak on the right ICT fuel inlet. The jubilee clip wasn't holding, so changed it for a pukka fuel clip, and that was worse! Found another jubilee and sorted the leak, bloody lost a pint of fuel in the process
bertiethebus
Well-known member
A busy but fruitful day indeed! Better to lose a pint of fuel now though than your pride and joy down the road
creationblue
Well-known member
bertiethebus said:A busy but fruitful day indeed! Better to lose a pint of fuel now though than your pride and joy down the road
For sure, doesn't help the paranoia tho :shock:
With the extension nearing completion the builder cleared his gear out the garage........


Autocraft do the brake fluid reservoir http://www.autocrafteng.co.uk/shop/...rake-fluid-refill-reservoir-typ-2-68-72_2234/