You are using an out of date browser. It may not display this or other websites correctly.
You should upgrade or use an alternative browser.
You should upgrade or use an alternative browser.
71 Seattle Westy Restoration - Done, Time to go camping
- Thread starter Kev946
- Start date

Help Support Early Bay Forum:
This site may earn a commission from merchant affiliate
links, including eBay, Amazon, and others.
Kev946
Well-known member
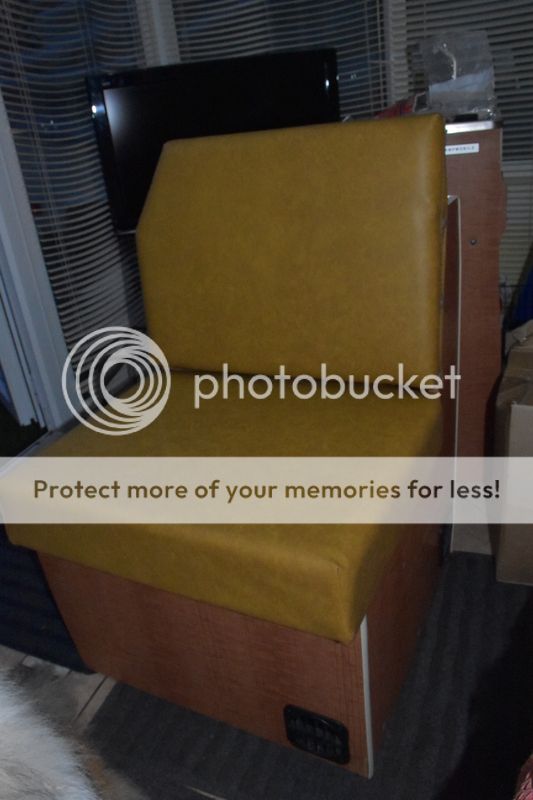
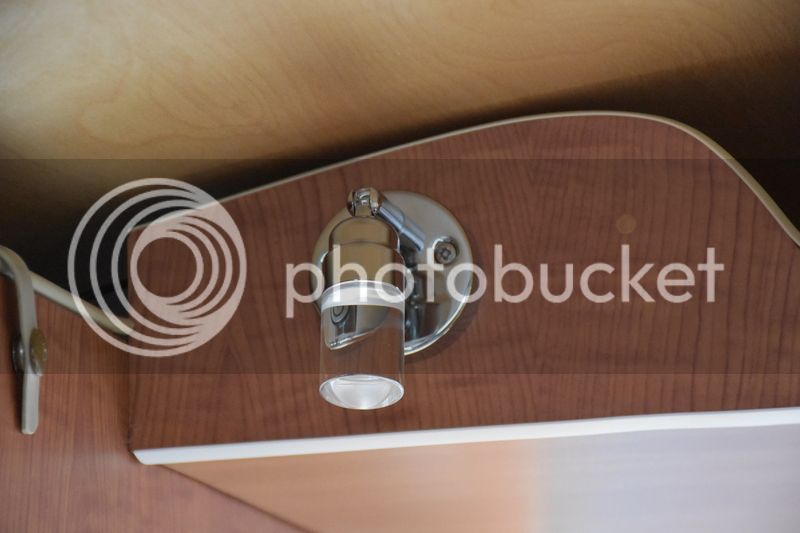
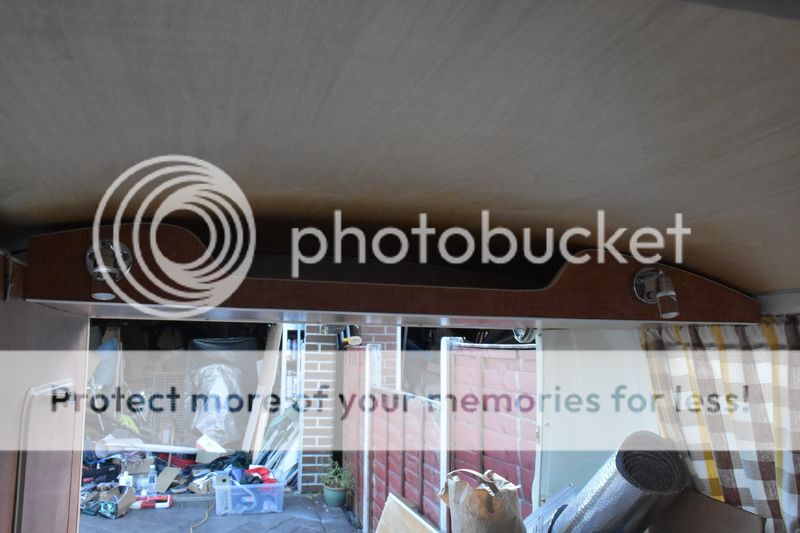
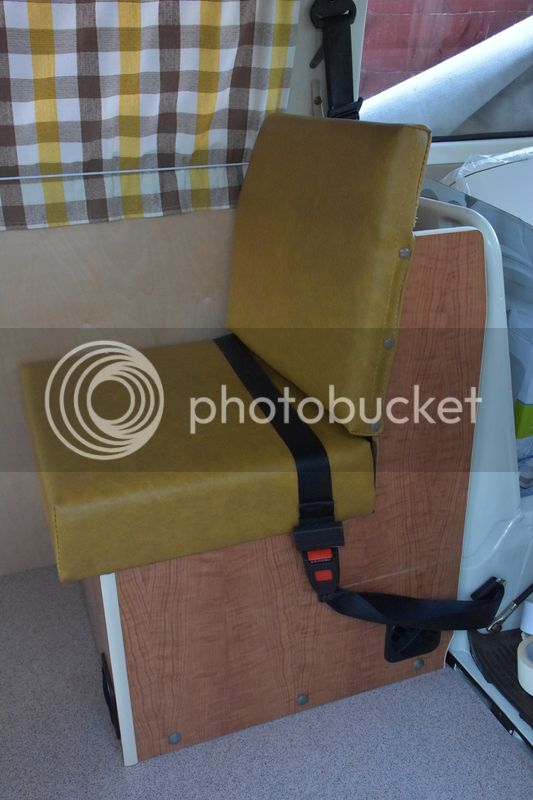
Buddy seat fitted and the overhead locker. Please with my new mini LED spotlights. The Buddy Seat didn't have a seat belt so I used the spare one from the bed which was now free after fitting the inertia belt. Trouble is this isn't long enough. So I've ordered a longer one. The correct one for a Buddy Seat is Securon 217E. The bed laptbelt is a Securon 210 if anyone is interested.


Kev946
Well-known member
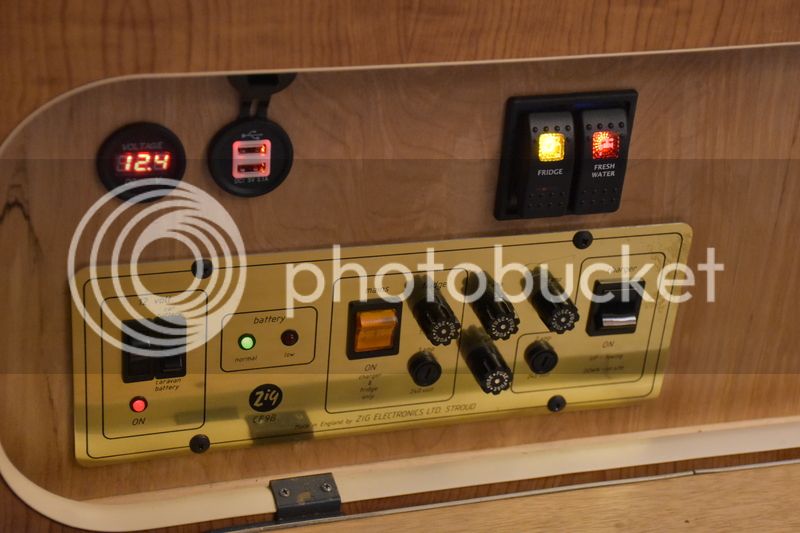
12 volt leisure electrics installed in the 71 Camper. Everything worked first time. This is using a secondhand Zig Control unit from a caravan. I've also fitted a voltage gauge, a USB charger outlet and two isolation switches for the fridge and water pump. I modified the Zig unit so the outlet for the fridge goes through the switch so that I can toggle between the leisure and car battery. A standard Zig unit suggests connecting the fridge direct to the leisure battery. I'm told this is because caravan fridges consume much more power than a compressor fridge so there is a danger you could flatten the car battery. The Webasto fridge is supposed to have a very low drain. The Zig of course has a basic low current split charger, but I've installed an heavy duty one with an intelligent voltage sensing relay so will probably not need this. I also fitted a 300w inverter. Still impresses me running a 240v light from a 12v battery. Pleased also with the new spot lights.
Next is wiring the mains consumer unit.



Next is wiring the mains consumer unit.


Kev946
Well-known member
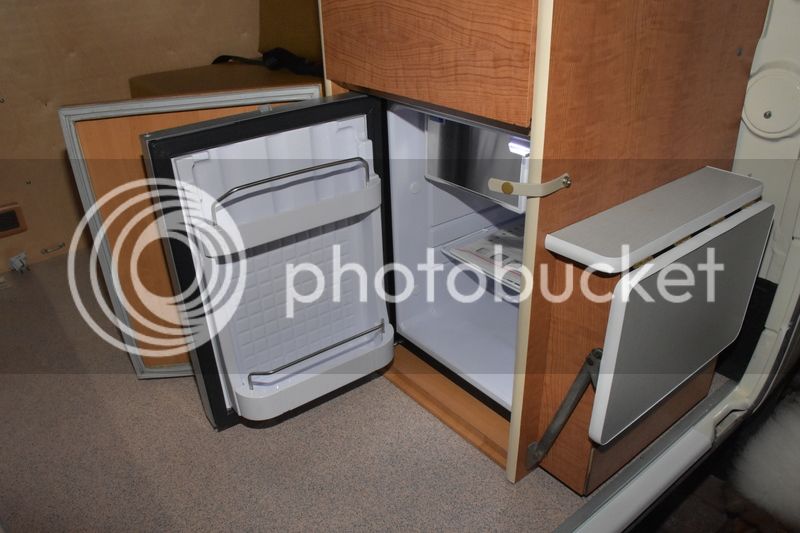
Wolfsburg West Under seat mats fitted and today I fitted the Front Seats. At the weekend I fitted the sink unit with my new fridge with new tap and pump for the sink and all working well. I need to fit the birch panel next to the sink. I found it was a bit too large and was fouling the sink. Also, someone asked how loud the fridge was. I'd say very quiet and wouldn't disturb your sleep. All electrics are fitted now but finding that the Zig unit battery charger is only kicking out 11v. I may buy another secondhand or just call Zig to ask if this is correct. I thought battery chargers needed to be in the region of 12.5v to 13v.




Kev946
Well-known member
Kev946
Well-known member

$124.78
Revell 07009 Volkswagen T1 Samba Bus Model Kit, 1:16 Scale 27.2 cm, Multi-Color, 223
Outstanding Outlet USA

$27.95 ($13.98 / Count)
Marketplace Auto Parts Window Crank Handle Set of 2 - Chrome with Black Knob - Compatible with 1968-1978 Volkswagen Beetle
Parts Geek LLC

$28.56
$32.43
Airfix Quickbuild Volkswagen Light Blue Camper Van Brick Building Model Kit, Multicolor
Amazon Global Store UK
That does look good quality material. Good effort well worth doing before fitting as you could never do such a quality job with it in place.
I really like the interior the more and more I see it. I will definitely be copying the fridge unit in the future as that was one of the things I'm going to miss most from my old bus, used it a lot when camping
I really like the interior the more and more I see it. I will definitely be copying the fridge unit in the future as that was one of the things I'm going to miss most from my old bus, used it a lot when camping
Kev946
Well-known member
Thanks guys. Rob if you want any advice on the fridge fitting then PM me. Andy the spots are from an eBay trader. They still have them. They are blue low light level or bright white.
Cheers
Cheers
Kev946
Well-known member
Very pleased with my toilet install. I came up with the idea of fitting one underneath the single buddy seat. The challenge was space. I found the Thetford Cube 335 was prefect, but the back rest was a little in the was. So I've made the back rest hinge and clip back to give better access and it works a treat. You could manage without the back rest hinging but it's much better out the way. This is a proper cassette chemical toilet with fresh water flush and clips down to the floor. When you get old like me you appreciate a toilet close by in the night lol.


- Joined
- Feb 2, 2015
- Messages
- 815
- Reaction score
- 712
- Location
- Llanasa
- Year of Your Van(s)
- 1970
- Van Type
- Early Bay
Brilliant work, really enjoyable read ... we've also got a thetford cube under our Buddy seat, best thing we fitted ... try using it without laughing ha ha ... comedy moments guaranteed
Sent from my iPhone using Tapatalk
Sent from my iPhone using Tapatalk
Kev946
Well-known member
matty74 said:Brilliant work, really enjoyable read ... we've also got a thetford cube under our Buddy seat, best thing we fitted ... try using it without laughing ha ha ... comedy moments guaranteed
Sent from my iPhone using Tapatalk
Thanks Matty. Yes very impressed with the toilet but as you say a bit of a laugh. Useful in the middle of the night when it's cold though lol
Kev946
Well-known member
I've been working on the pop top canvas this weekend. It's a new Wolfsburg West one. I decided to fit the canvas whilst the roof was in place. Aster speaking to Steve at J&S he said it allows you to offer the canvas to the roof where it's clamped down to make sure the canvas is tight enough. I found the canvas was a little too large at the front in height so adjusted this with more fold over. I also found the sides were a little long by about an inch so easy to take that up in the corners. Front corners are best as you can't really see these much. The back corner needs to be perfect as it's so visible.
The canvas is all stapled with the new plastic strip and I'm pretty happy with it. I've now clamped the canvas to the roof with the aluminium strips front and rear. These are the smaller of the 4 and no bends. So all I need to do now is fit the long sides, the roof toggles, (new Wolfsburg West ones in the correct grey colour), and a new fringe. So far 10 hours work but I am particular so a slow worker.
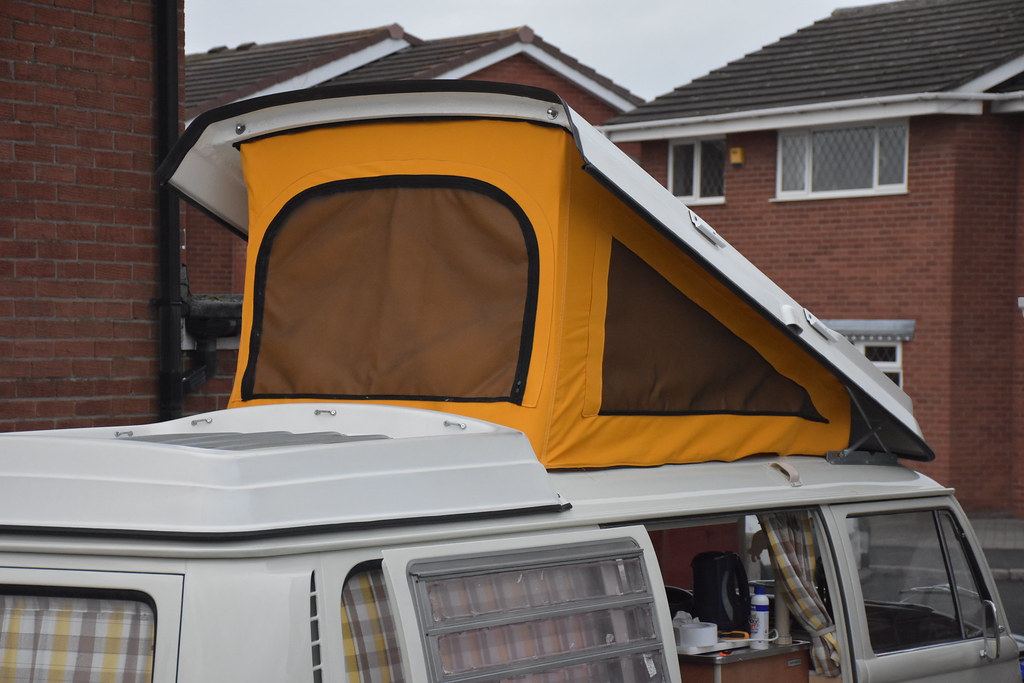 D72_7566 by Kevin Saunders, on Flickr
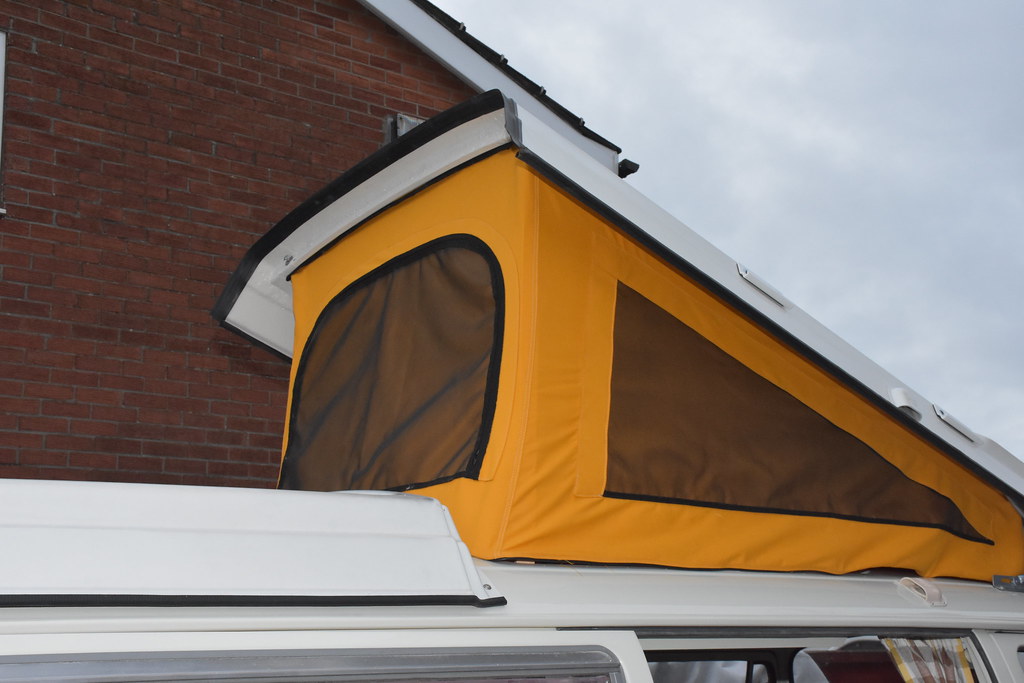 D72_7565 by Kevin Saunders, on Flickr
The canvas is all stapled with the new plastic strip and I'm pretty happy with it. I've now clamped the canvas to the roof with the aluminium strips front and rear. These are the smaller of the 4 and no bends. So all I need to do now is fit the long sides, the roof toggles, (new Wolfsburg West ones in the correct grey colour), and a new fringe. So far 10 hours work but I am particular so a slow worker.
 D72_7566 by Kevin Saunders, on Flickr
 D72_7565 by Kevin Saunders, on Flickr
Fernando Palmela
Well-known member
Congratulations, is very beautiful works............ 


Kev946
Well-known member
Pop Top canvas finished, just have the fringe to fit. Very pleased how taught I got it by fitting it whilst the roof was on the camper. I've also fitted the cab curtain. I did fit the new pop top bed but there is an issue with it. The roof won't close....doh!. A quick check and I realised it's got 1.5" foam and should be 1" foam. It also need to taper at the edges rather than be square due to the curvature of the roof. The bed itself fits great and works a treat, so at least I've made it to the correct size. So a set back but fixable. I need to take it back to get the foam swapped for thinner, then it's just a bolt back in.
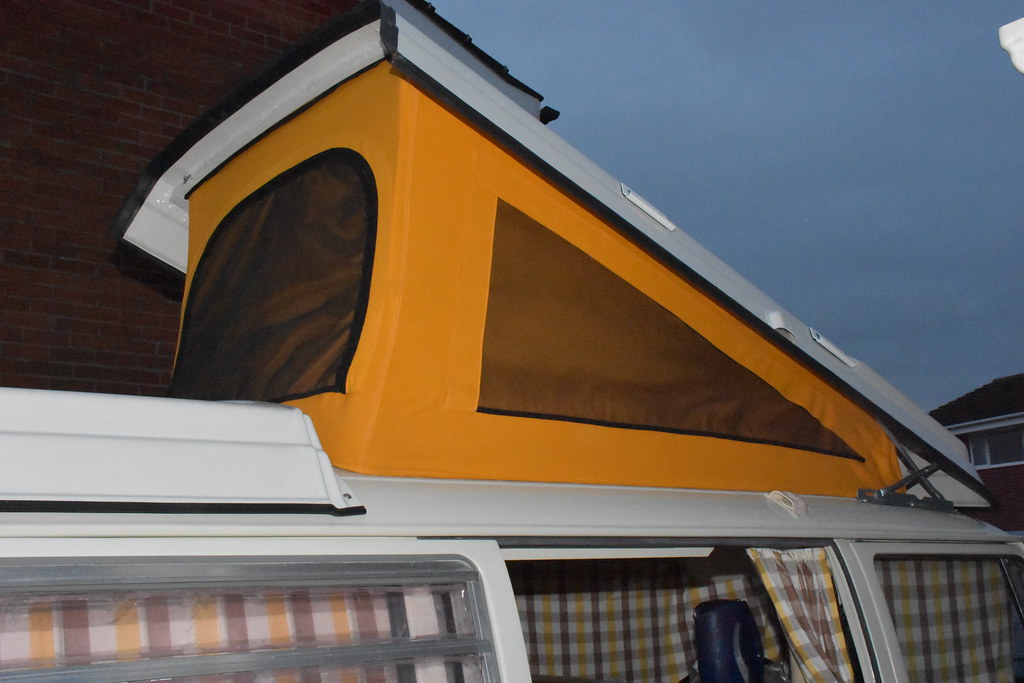 D72_7707 by Kevin Saunders, on Flickr
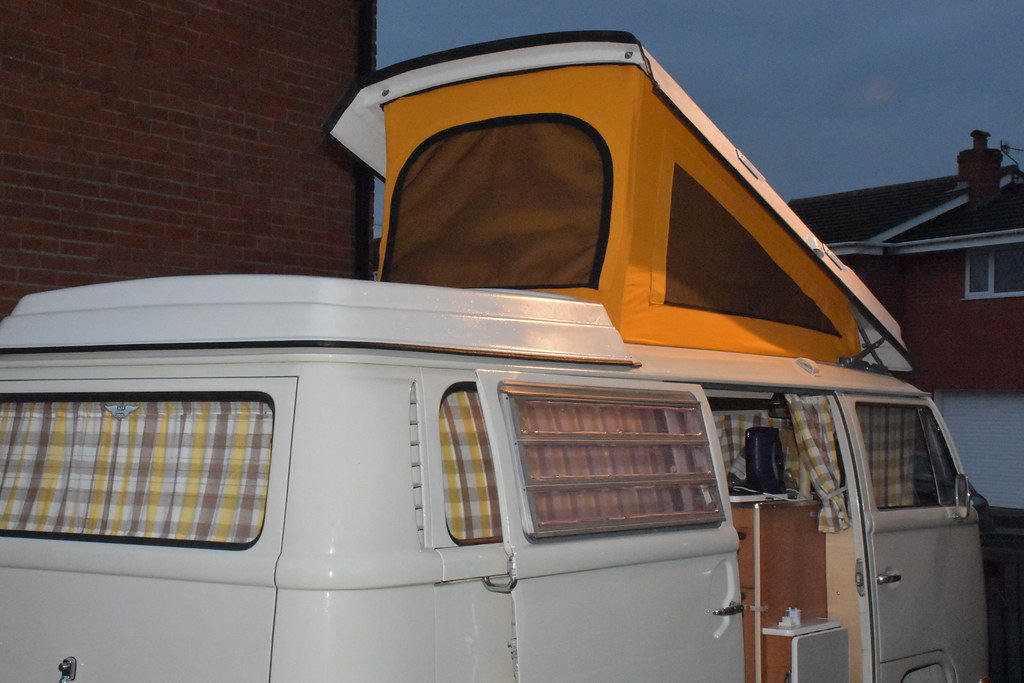 D72_7709 by Kevin Saunders, on Flickr
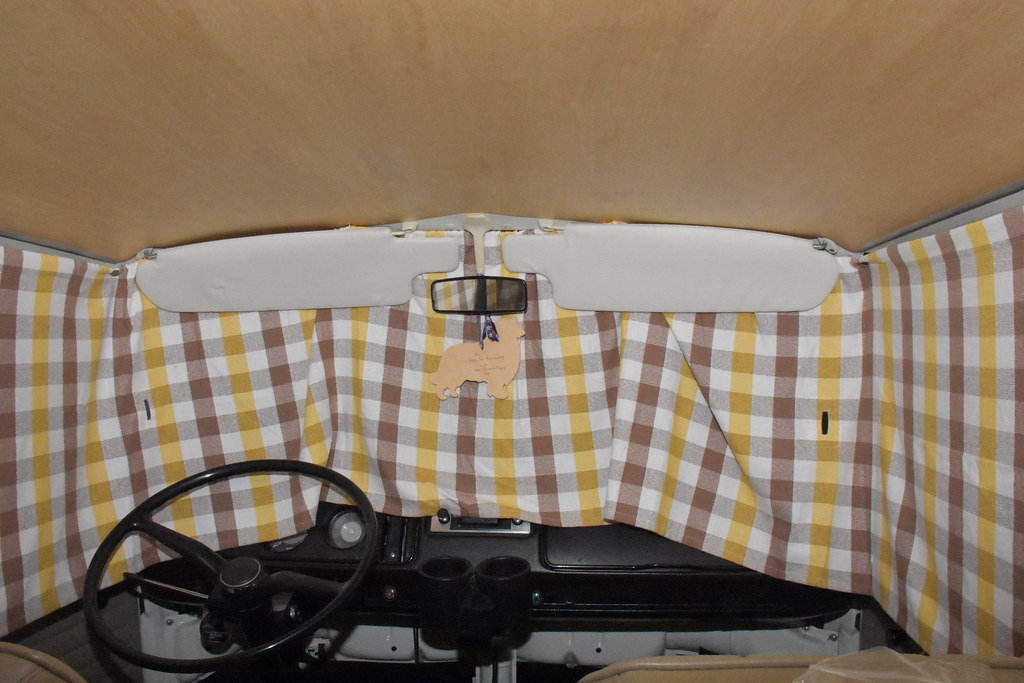 D72_7712 by Kevin Saunders, on Flickr
 D72_7707 by Kevin Saunders, on Flickr
 D72_7709 by Kevin Saunders, on Flickr
 D72_7712 by Kevin Saunders, on Flickr
Aircooler
Well-known member
Looks very nice! Good progress! Could you tell me where you got your seatbelts from?
Best regards
Reto
Best regards
Reto
Kev946
Well-known member
Aircooler said:Looks very nice! Good progress! Could you tell me where you got your seatbelts from?
Best regards
Reto
Thanks
Belts were from
http://www.kcpcarandcommercial.co.uk/" onclick="window.open(this.href);return false;
I bought them from their eBay listings.
Kev946
Well-known member
Pop Top fringe fitted. I bought off an eBay trader what I thought was white and it came with a tiny bit of gold in. But I like it and it gives it slight bit of bling in the sun light lol.
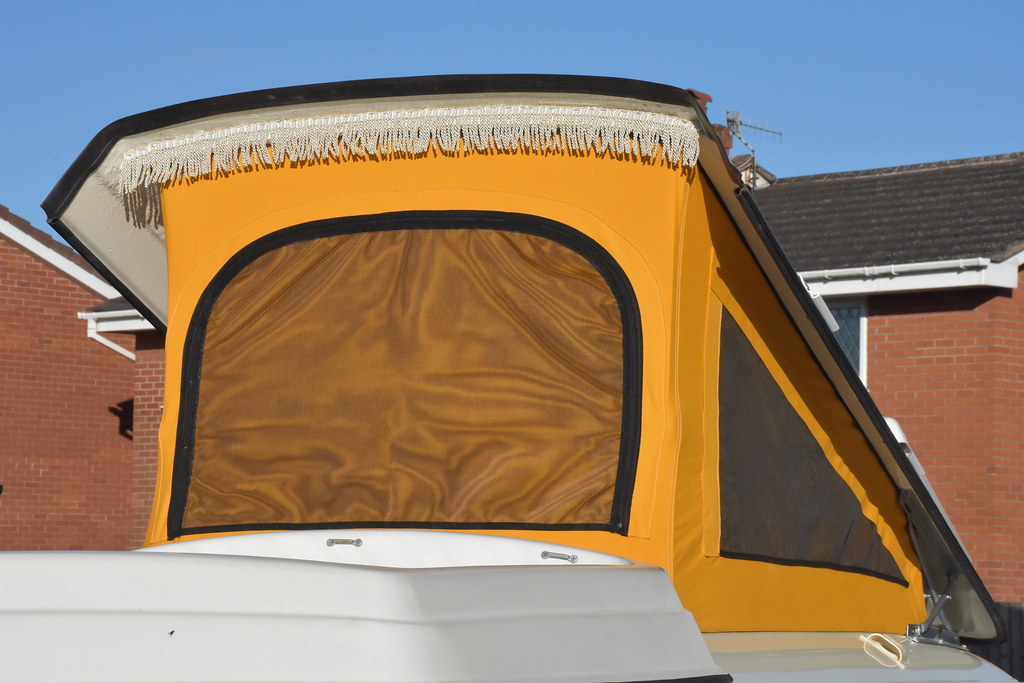 D72_7729 by Kevin Saunders, on Flickr
 D72_7729 by Kevin Saunders, on Flickr
Kev946
Well-known member
I've installed an intelligent battery charger with a 2 way switch and battery level indicator. Also a 300w inverter that can be plugged into a wall socket. Also fitted a Gaz Bottle bracket. All the cushions are back in and the bed is working well. I'm just waiting my filler cushion to go over the spare wheel well and my pop top continental bed from the upholsterers.
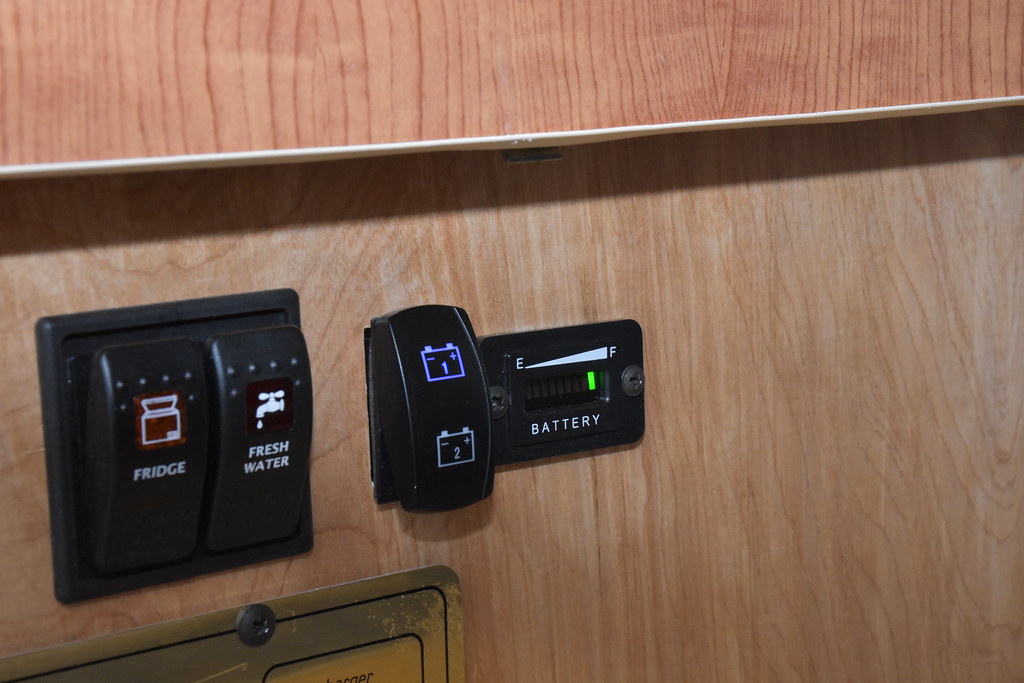 D72_7819 by Kevin Saunders, on Flickr
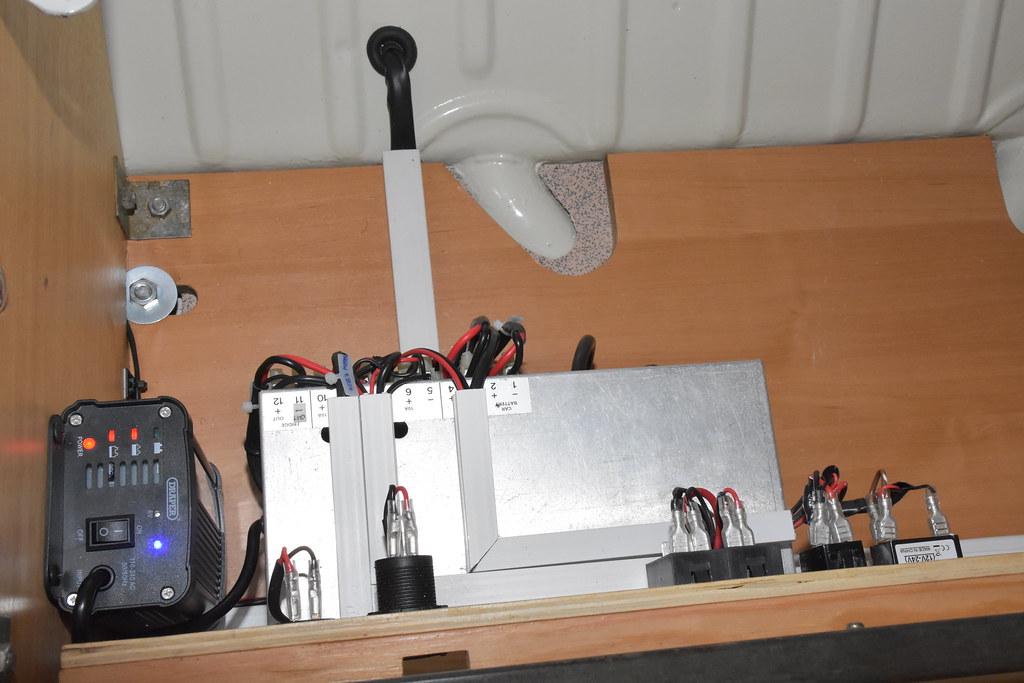 D72_7822 by Kevin Saunders, on Flickr
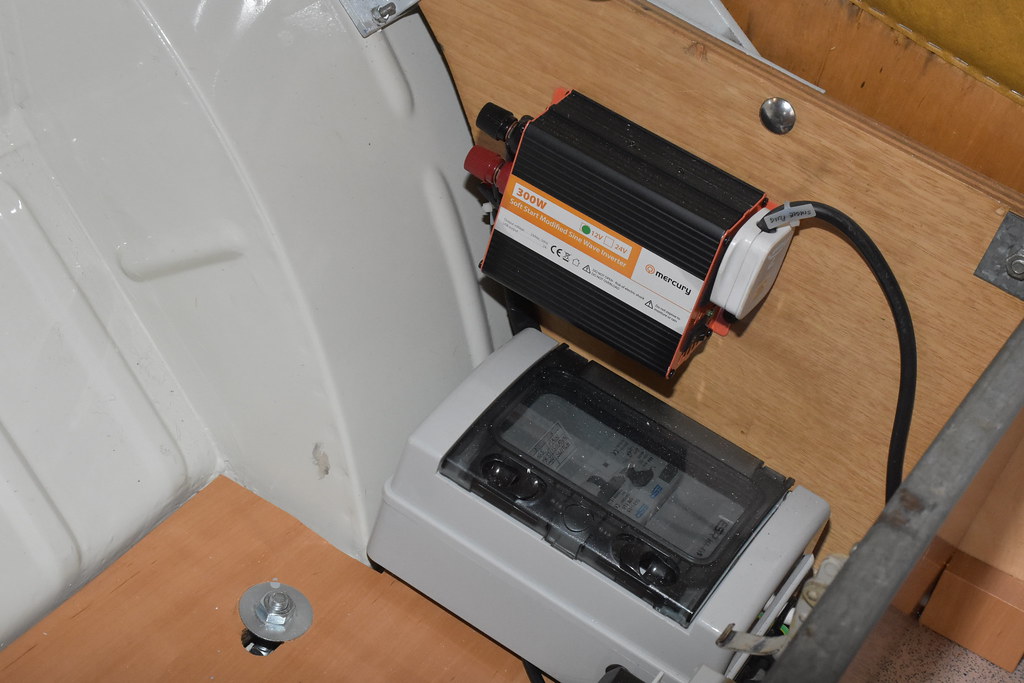 D72_7823 by Kevin Saunders, on Flickr
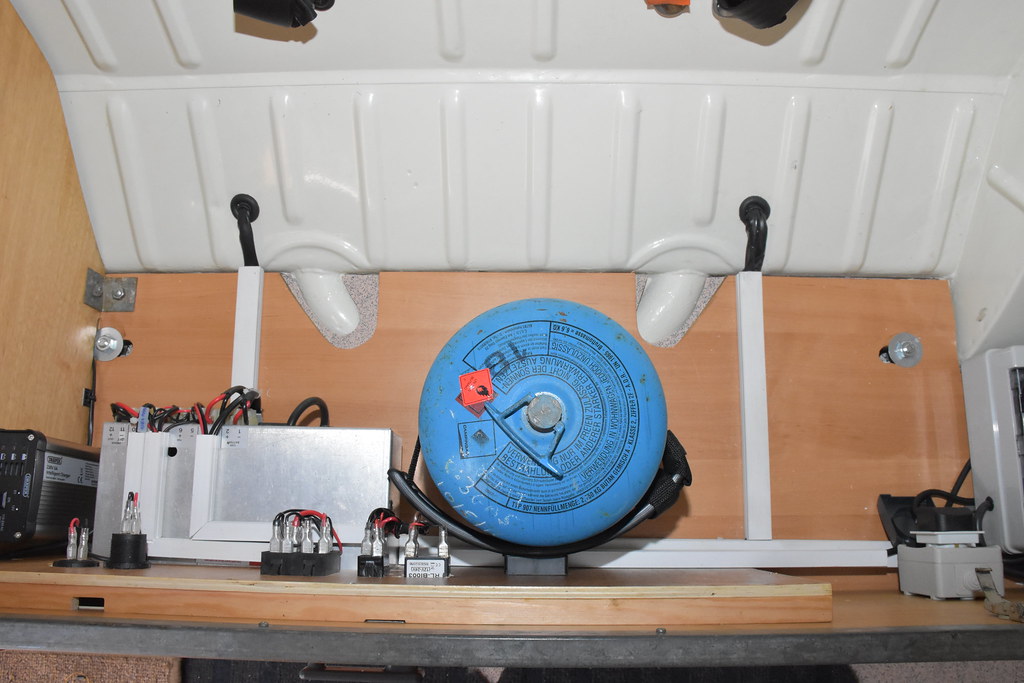 D72_7824 by Kevin Saunders, on Flickr
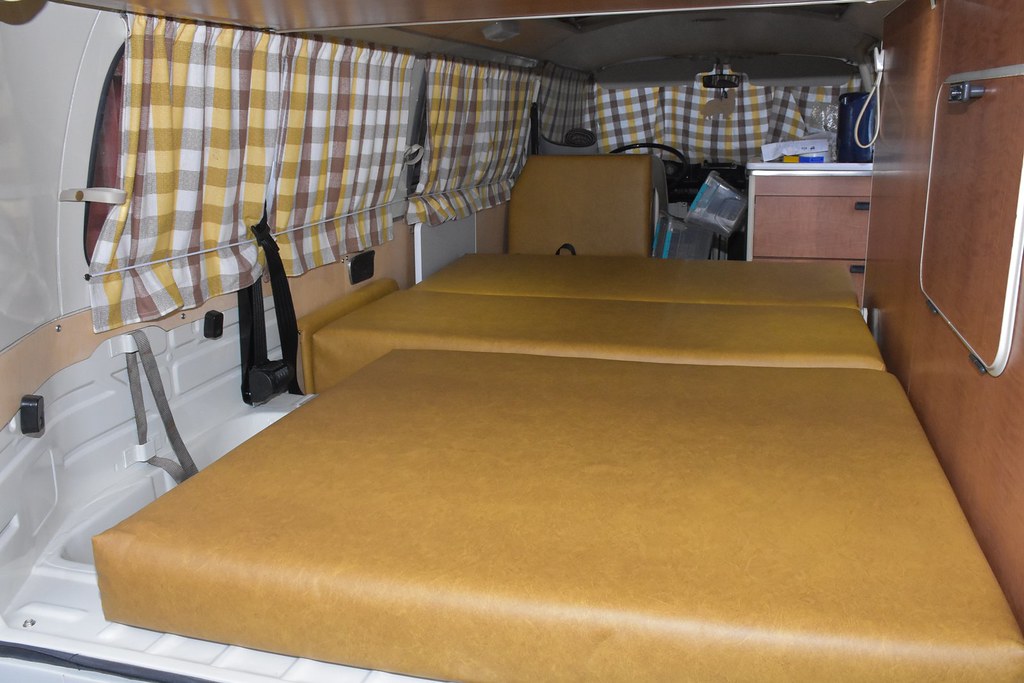 D72_7833s by Kevin Saunders, on Flickr
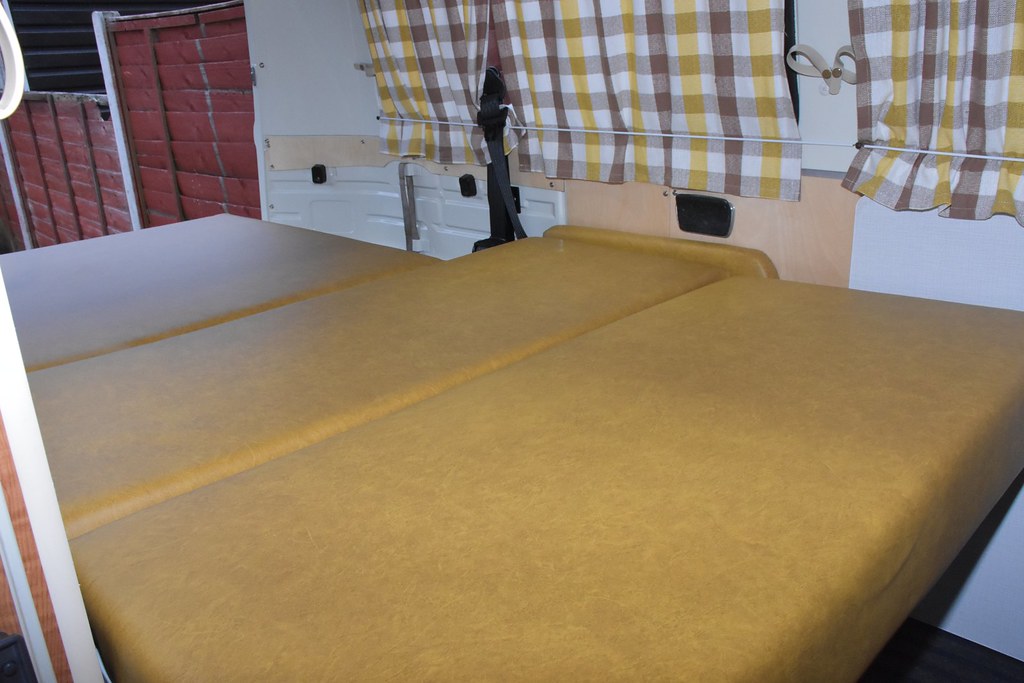 D72_7835s by Kevin Saunders, on Flickr
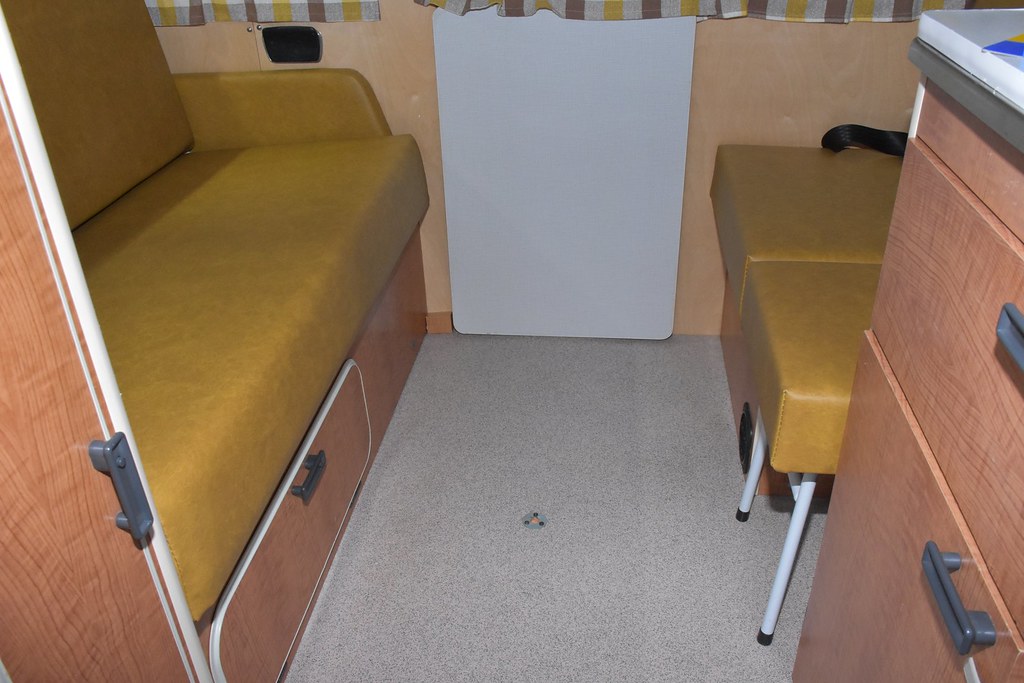 D72_7840s by Kevin Saunders, on Flickr
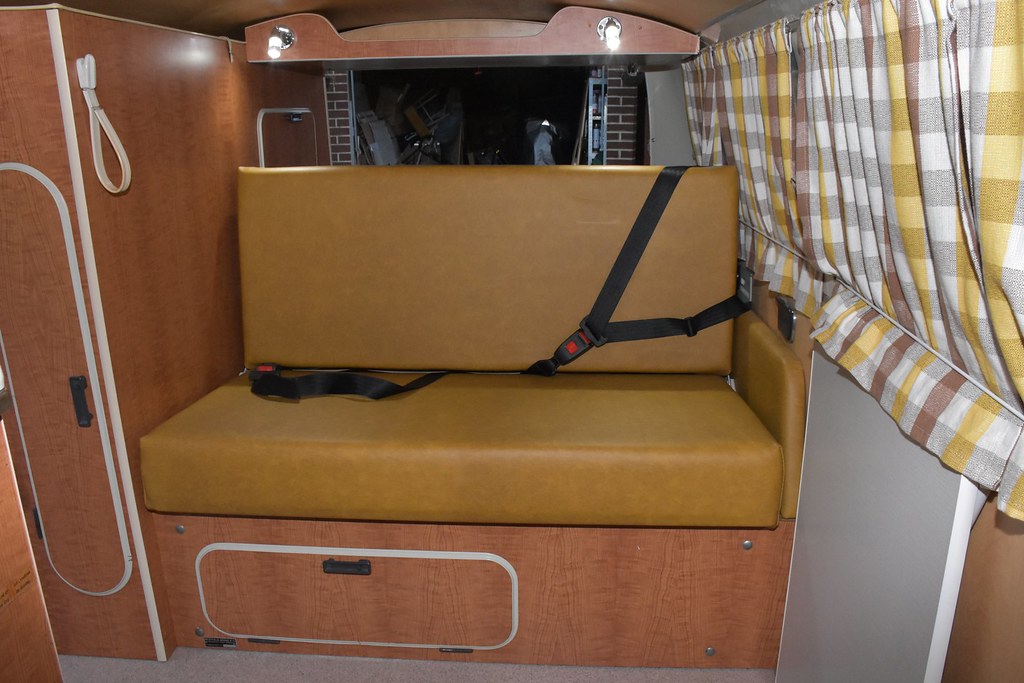 D72_7853s by Kevin Saunders, on Flickr
 D72_7819 by Kevin Saunders, on Flickr
 D72_7822 by Kevin Saunders, on Flickr
 D72_7823 by Kevin Saunders, on Flickr
 D72_7824 by Kevin Saunders, on Flickr
 D72_7833s by Kevin Saunders, on Flickr
 D72_7835s by Kevin Saunders, on Flickr
 D72_7840s by Kevin Saunders, on Flickr
 D72_7853s by Kevin Saunders, on Flickr

