Ben's 72 Bay

Early Bay Forum

Help Support Early Bay Forum:

This site may earn a commission from merchant affiliate links, including eBay, Amazon, and others.

Ben72Bay

Well-known member
Supporting Member
Joined
Jul 5, 2021
Messages
476
Reaction score
256
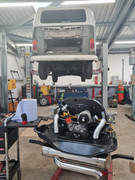
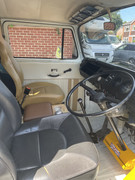
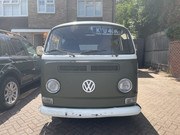
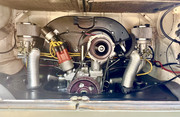
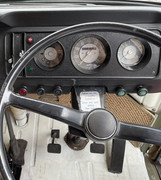
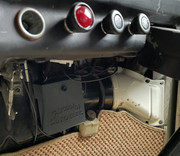
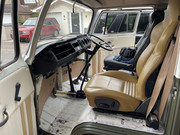
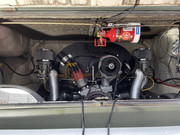
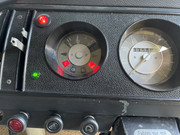
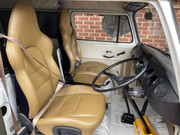
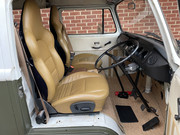
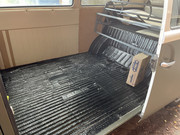
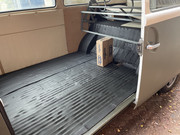
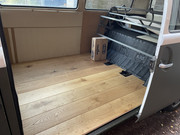
I've found the EarlyBay FB page really useful and seems to be full of a decent bunch of people, so I thought I'd start a thread on my recently acquired '72 Bay.

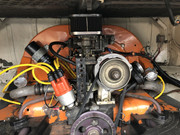
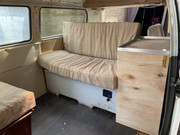
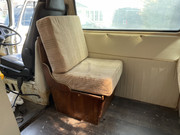
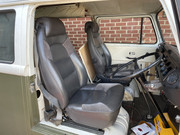
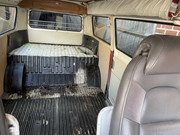
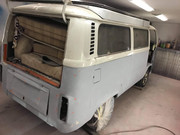
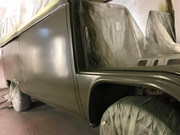
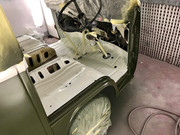
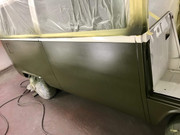
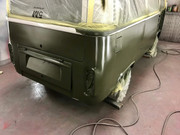
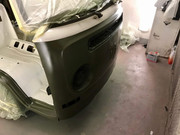
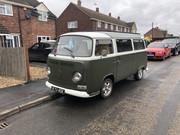
It had quite a bit of bodywork by the previous owner and repainted in Nato Green and White - it's not a show bus by a long stretch and that suits me just fine!
Something that I can make sound and enjoyable with the family :D


so it came to me as a driver, bought from a very nice guy called Wayne!
I owned my first VW in 1993, it was a '72 beetle, and as much as I loved it it tried to kill me at every given opportunity! Brakes failed, accelerator stuck on, caught fire whilst I was driving it and it broke down all the time!
This all sent me down certain path - if I wanted to own older cars then I needed to learn how to work on them as I couldn't afford to pay other people to fix them (I'm sure a familiar path to many on here!)
Since then I've always had 'interesting classics', which I have loved working on myself.
I vowed that if I ever owned another (and I had always wanted a VW Bus ever since I was a kid) then I would work my way through it and make it as safe as possible.

So - first port of call was an entirely new custom wiring loom throughout that would cater for all future upgrades I had in mind, along with separate fuses for each addition.
made by Aircooled Looms.
Spec:
- Heated front and rear screens - Justkampers
- Power steering - Litesteer.
- Fireboy in engine bay
- 3rd higher brake light.
- Heater under rear seat. Propex
- Split charge.
- Rev counter. RHS of dash pod.
- USB charge points on dash and in rear passenger area.
- Hardwire phone cradle inc charger.
- Interior lights
- Cables, including -ves, for both batteries.
- HARD START RELAY
- Power to seats. Heated seats


Main aim for fitting the new loom is that I had been in line at the VW Engine Company for an upgrade.
Out with the old 1300/ 1600 hybrid

and in with a 1776, Weber 40 IDF carb kit including bell crank linkage, coupled with a Freeway Flyer!

Didn't make any sense to me to install the new engine on the old loom which had all sorts of oddities and additions within it! Smoke coming off piggyback spade connections and all sorts, including the need to flick 2 switches that had been added to the dash in order for the ignition to work!
 
so collected and drove it the 80 miles home from the VW Engine Company guys last week.
it start and runs perfectly (also fitted a new starter motor) - had to behave and stick to the 50 mph and 3K rev limits for the first 500 miles run in, but great to have it home!
was a loud journey home! but I knew it would be so I had all the bits I needed bought and ready for sound deadening and insulating the interior.
Next step was to take out and clean up all the inside, then we can put it back how we want (have a fold up buddy seat and a full width R&R bed from Rusty Lee all ready to go in) now need to sell the bits coming out!:
3/4 R&R bed with side cabinet

Original buddy seat

SAAB black leather seats (super comfy!)

starting the clean up process!
 
Thanks for the interest!
Still got a pile of cool bits to fit and finish.

Hopefully a new steering box arriving any day, plan to fit that before the Litesteer set up goes in.
Fire boy to go in the engine bay

Just installed the Bug-tech bus shifter last week so now it's an absolute pleasure to drive!
https://www.hayburner.co.uk/products/bugtech-bus-shifter

Looking forward to grabbing another day on it this weekend!!
 
One of my good mates is an auto electrician who specialises in anything other than messing around with my old bus :lol: Every time I start talking to him about better lighting out the front, he starts rattling on about fifty year old wiring, fifty year old connections, power loss here and power drop there, rap switches, tight spaces etc etc etc. Eventually this means I keep drinking my beer and give up on him which is exactly what he wants :lol:
This has got to be one of the smartest things to do while it’s in a million pieces :mrgreen:

Ozziedog,,,,,,.,plus cleaning the lenses both sides :mrgreen:
 
New wiring loom throughout was just as much for peace of mind as anything else - fault finding and chasing someone else's 'modifications' is always a night mare!
It has definitely been worth the wait for https://aircooledlooms.com to do their thing and me fitting it really wasn't that hard once I'd talked it through with them and I had my head around it. As always it was a bit of a rush getting it all installed before the bus went off for the engine and gear box but I'm so pleased that I got it all done in time.

New steering box arrived today from https://www.facebook.com/N2Aircooled and looks great - hopefully will be able to fit that this weekend.
also picked up all the high tensile bolts and backing plates I wanted to fit the new seats this week so fingers crossed I can get those and the Rusty Lee full width R&R bed in before I then start laying down all the sound deadening.

Plenty to do as always 😁😁😁
 
Got some time on the bus this weekend, really enjoyed it.
Mainly working on interior stuff.

Porsche 996 passenger seat is in, took a while to fit it safely (high tensile bolts and race seat spreader plates to bolt through to) but great to see it in place.
New custom colour seat belt to go with it.
New glove box liner and organiser shelf thing fitted.
Buddy box thing is in place - surely got to bolt that in place some how??
Shifter in place with a custom nob on top!
Ebony and skate board veneers in the Porsche martini race colours (made by ‘builtbybasil’ on Instagram)


Few changes to the front also:
Removed the old bent front number plate, which I never really liked mounted to the bumper!
Fitted some sun visors and tied a new plate to the passenger visor so it’s normally out of the way but can be flipped down when needed.

Having filled the 4 spare wheel carried bolt holes with colour coded plugs and sprayed a new VW symbol white and mounted it the bus is feeling more and more like mine!
Also realised I didn’t have a pic of the lovely new engine, so here it is!


Picked off a few interior/ electrics jobs today.
Got the heated windows switches into the dash, along with the break warning light and the Fireboy light both into the dash cluster.


Neatened up the Aircooled Looms fuse board install and fixed it into place.


Getting there!

 
Excuse my ignorance, but why do you need a "hard start" relay when you have a new wiring loom.
Also where did you fit the 3rd brake light, I'm interested in doing this on my bus.

Great work...
 
Hi Gav,
I think it reduces the amount of high current / larger gauge wiring required to travel the length of the bus - I may be wrong though!

haven't fitted the 3rd brake light yet - still trying to figure out a neat solution. Possibly on the rear jail bars or more ideally at the top of the rear window.
 
It also means a lot less current travelling through the old ignition switch, and no voltage drop with the main current no longer going to the front and back again.


Sent from my iPad using Tapatalk Pro
 
Finally got the FireBoy in place and wired up 👍
And have started the sound deadening process - done the main cargo area floor so far. Takes a while by the time you’ve rollered it all into place.


both front seats finally in this weekend. ran power to both and adjusted them as low as possible.
both custom seat belts now in as well - all together a far more comfortable and safe place to be!
next job is to finish the sound deadening in the front cab area, then run the wiring across to the seats and connect up the heated seat loom, then carpets on top 😁👍
just in time for the colder weather to arrive!
 
Some bigs steps forward for me with the interior recently.
Front and back floors cleaned and then covered in Dodo Mat Deadn Pro.
Then the front floor had another insulating layer, then carpets.


Then in the back, over the Dodo Mat Deadn Pro went Dodo Super Liner 6mm,
Then oak engineered boards (that I had left over from my office!)


Now I can bolt in the full size Rusty Lee R&R bed. 😁

Big steps forward but always more to do!!
 

Latest posts

Top