You are using an out of date browser. It may not display this or other websites correctly.
You should upgrade or use an alternative browser.
You should upgrade or use an alternative browser.
FS Alistair's 1970 Westy SO70 Campmobile - San Lorenzo, Cali
- Thread starter aogrady
- Start date

Help Support Early Bay Forum:
This site may earn a commission from merchant affiliate
links, including eBay, Amazon, and others.
aogrady
Well-known member
*Sam* said:Brilliant that's around the same figures as the coilovers.
Who did you buy them from ?
Cheers
Sam
You can get them from Kieft and Klok or T3D IIRC, but they wanted about £350 for pretty much the same kit as mine, I was going to get like a group batch in, but wanted to fit them and test them on my bus first, I got a deal from a retailer, but i cant remember where from, I ordered it in from the US as it was much cheaper than T2D etc
Once I finish my wiring, and the underneath, I'll perhaps move onto the suspension and get them done.
You may have to look arounf the US for cheap prices, factor in import duty though...you can normally find sizes and charts, so measure what you want to run, and go from there, to use as a aid for towing/weight, I think they would be fine.
http://www.google.com/url?sa=t&rct=j&q=&esrc=s&frm=1&source=web&cd=1&cad=rja&ved=0CEYQFjAA&url=http%3A%2F%2Fwww.monroe.com%2Fen-US%2Fproducts%2FMax-Air&ei=v3szUrnAHqWM0AXk-IHoCg&usg=AFQjCNE4y8jSSKv-hzj0QJuhPI60MGTy4g&sig2=P-5xT-UG4-MTkAUtYf0cLg&bvm=bv.52164340,d.d2k" onclick="window.open(this.href);return false;
http://gabriel.com/light-vehicle/products/hijackers/" onclick="window.open(this.href);return false;
Good luck!
Cheers,
Alistair
aogrady
Well-known member
*Sam* said:Ok cheers for that T2D sell the kits for around £550 now !!!!!
Did you get the compressor from the same place as the shocks.
Hi,
£550! :shock: That's a nice mark up! I think I'll get some in, you can have a set for £300! :lol: Is that for a full set of 4?
Yes, I got my compressor from the same place as the shocks. Though you can buy compressors here in the UK, it's nothing special, not heavy duty, you could get a heavy duty one, I was thinking of replacing it, getting some kind of relay, so I could divert it to a plug in air line for things, probably never need it, but seeing that there is a compressor, may as well us it for other stuff too
Devon 4x4 do nice compressors used for air locking diffs etc, and i have seen Aldi with heavy duty truck style compressors, these would do. They can take a min or too to inflate to a high setting, but as you are not using them in a slammed bus, you wont need to be going up and down too much, if you need it quicker, then you'll need a tank, valves etc. I think Mycha is running a tank etc on his set-up
A basic setup is cheap, nice to have some adjustability, now, you will get a raise the more air you put in, that's the idea if you are towing, or lots of weight, I am carrying not far off a extra 100kgs in batterys, solar etc...plus all the other stuff, and have a saggy rear end (the bus not me) so i reckon on maybe 60psi in the rear, or whatever it takes to level it out with a little more firmess.
My dash controller is just for a pair, can be used with 4 air dampers, but i would like to be able to control then seperatly, so I may change to a dual paddle system when i get around to fitting it.
Cheers,
Alistair
aogrady
Well-known member
Hi,
OK, finally got the rest of my bits to finally finish the electrics, and rewire and relocate the solar setup and exisiting leisure battery cabling, here's the list:
T Max digital dual spilt charge and monitoring system
x2 Trojan 210aH ultra deep cycle battery bank
100Amp mega fuse and holder
5m, 25mm and 16mm multiflex copper cable for the main system
11 colours, 11A system sub loom cable
Dual battery master \\isolator switch
6 way circuit breaker switch bank panel
DC battery combo 500A S.O.C power panel meter with shunt
Temperature panel power meter
DC volts panel meter
Crimps, insulated and copper tube for battery cable
5 way 35mm double pole connector block
8 way earth connector block
Ratchet crimper tool
Towbar electric hookup
DRL LED's
5M 3528 300led SMD LED Strip Lights x2
GPS Tracker
12V DC power outlet socket, 2 USB charger point
Heavy duty battery cable crimper tool
Heatshrink tubing, red, black

......and this is just the electrics.... :shock: We wont mention the air suspension, fire extinquisher system, steering box, westy trailer refurb etc all waiting.....
Though I feel like redoing the interior wood sides, so means taking the interior out, (well, the bed at least) won't want to be doing this once i do the electrics......and i fancy replacing the insulation with wool.....
Now the weather is turning, it may be a struggle...... :?:
Alistair
CarrollEstrada
New member
- Joined
- Sep 22, 2013
- Messages
- 1
- Reaction score
- 0
Really good work man.. How much entire parts costs you? I am working on similar project so please give me some useful tips..aogrady said:Hi,
OK, finally got the rest of my bits to finally finish the electrics, and rewire and relocate the solar setup and exisiting leisure battery cabling, here's the list:
T Max digital dual spilt charge and monitoring system
x2 Trojan 210aH ultra deep cycle battery bank
100Amp mega fuse and holder
5m, 25mm and 16mm multiflex copper cable for the main system
11 colours, 11A system sub loom cable
Dual battery master \\isolator switch
6 way circuit breaker switch bank panel
DC battery combo 500A S.O.C power panel meter with shunt
Temperature panel power meter
DC volts panel meter
Crimps, insulated and copper tube for battery cable
5 way 35mm double pole connector block
8 way earth connector block
Ratchet crimper tool
Towbar electric hookup
DRL LED's
5M 3528 300led SMD led lighting x2
GPS Tracker
12V DC power outlet socket, 2 USB charger point
Heavy duty battery cable crimper tool
Heatshrink tubing, red, black
......and this is just the electrics.... :shock: We wont mention the air suspension, fire extinquisher system, steering box, westy trailer refurb etc all waiting.....
Though I feel like redoing the interior wood sides, so means taking the interior out, (well, the bed at least) won't want to be doing this once i do the electrics......and i fancy replacing the insulation with wool.....
Now the weather is turning, it may be a struggle...... :?:
Alistair


$28.52
$32.43
Airfix Quickbuild Volkswagen Light Blue Camper Van Brick Building Model Kit, Multicolor
Amazon Global Store UK


$27.95 ($13.98 / Count)
Marketplace Auto Parts Window Crank Handle Set of 2 - Chrome with Black Knob - Compatible with 1968-1978 Volkswagen Beetle
Parts Geek LLC


aogrady
Well-known member
/
Hi,
Welcome along to the forum! What van have you got, what's your plans?
I haven't kept a log of the costs, just bought what i need/want, as i go along, and then just do it how i want it to be done, most of the bits i think i have documented with ebay links, you can collect bits as you go, solar panel, regulator etc. The recent purchases are main things like cables, connectors, crimps etc.
None of the parts are expensive for any of them, the most being the solar panel, about £85, with about the same give or take for the regulator.
Now you can do it cheaper, use thinner cables for example, but with cabling, correctly fused will always be better, certainly from a voltage drop point of view.
As i go along, I will post links, pictures and details. By all means let me know if you require any info.
And get some details up of your project if you haven't done already!
Cheers,
Alistair
Really good work man.. How much entire parts costs you? I am working on similar project so please give me some useful tips..
Hi,
Welcome along to the forum! What van have you got, what's your plans?
I haven't kept a log of the costs, just bought what i need/want, as i go along, and then just do it how i want it to be done, most of the bits i think i have documented with ebay links, you can collect bits as you go, solar panel, regulator etc. The recent purchases are main things like cables, connectors, crimps etc.
None of the parts are expensive for any of them, the most being the solar panel, about £85, with about the same give or take for the regulator.
Now you can do it cheaper, use thinner cables for example, but with cabling, correctly fused will always be better, certainly from a voltage drop point of view.
As i go along, I will post links, pictures and details. By all means let me know if you require any info.
And get some details up of your project if you haven't done already!
Cheers,
Alistair
aogrady
Well-known member
Hi,
Bought a big bag of sheep's wool offcuts, double felted, nice and thick, decided to re-insulate behind the panels again, as i now ordered some new wooden panels for the interior, going to stain or lacquer them. The cork covered ones were only a temporary thing anyway.
I will take the interior out, re-insulate with the sheep's wool, fit new interior panels, and finally re-wire the charging system, split charge etc, and then that's sorted. Just the front seats and retrim the rear then... :roll:

The wool is from locally sourced sheep, and there should be more than enough to redo it. May well fit some under the cab mats if i find some nice sizes.
http://www.woollyshepherd.co.uk/" onclick="window.open(this.href);return false;
The van is away for some paint again at Restohaus, back in a week, more pictures soon.
Cheers,
Alistair
Steenfeldt
Well-known member
Nice tread I really enjoy reading and looking through your pictures.
I'm thinking of doing a solar panel like yours myself cos that is truly awesome. A nice thing is that you link and describe everything you do. keep them pictures coming 8)
I'm thinking of doing a solar panel like yours myself cos that is truly awesome. A nice thing is that you link and describe everything you do. keep them pictures coming 8)
aogrady
Well-known member
Steenfeldt said:Nice tread I really enjoy reading and looking through your pictures.
I'm thinking of doing a solar panel like yours myself cos that is truly awesome. A nice thing is that you link and describe everything you do. keep them pictures coming 8)
Hi Steenfeldt,
I don't know why many people don't have these fitted, free electric, off grid for days of wild camping with cold beers in the fridge....what's not to like? :lol:
I think there are only 2 or 3 people on here with them at most. Maybe start another thread "Solar Panels - who's got them" ??
Hopefully the links and pictures have helped you, i enjoy doing the research, and find out exactly what i want, though it does tend to take me a long while to actually get anything done! :roll:
Cheers!
Alistair
MetPeter
Well-known member
Hi Alistair,
It took some time to read the whole tread . . . but what a nice Westy you've got! Mycha attended me on the solar panel (and the cold beers 8) ).
Peter
It took some time to read the whole tread . . . but what a nice Westy you've got! Mycha attended me on the solar panel (and the cold beers 8) ).
Peter
aogrady
Well-known member
MetPeter said:Hi Alistair,
It took some time to read the whole tread . . . but what a nice Westy you've got! Mycha attended me on the solar panel (and the cold beers 8) ).
Peter
Hi Peter,
Thank you, that's very kind of you to say so!
")
No way up to what you guys do over there, your bus, Mycha and Dirty Harry are some of my favourite buses! 8) Been following your thread with interest.....
I would have thought that solar would be more suited to a warmer climate, can't see why even a tin top couldn't have one mounted to a Westy style roof rack?
I'll have some more updates soon
Cheers,
Alistair
aogrady
Well-known member
Hi!
Got some wood panels to probably stain, lacquer, wax. Would be interested to hear some options to finish the wood, I don't do wood, so it's a bit new to me, what options are there?
Pics anyway, modelled by my youngest, Billy.

Cheers,
Alistair
Got some wood panels to probably stain, lacquer, wax. Would be interested to hear some options to finish the wood, I don't do wood, so it's a bit new to me, what options are there?
Pics anyway, modelled by my youngest, Billy.

Cheers,
Alistair
aogrady
Well-known member
Hi,
OK, this is the final treatment of the Westy's undersides. UPOL Raptor Truck Bed Liner. Choose this instead of normal stone chip because, well, it's better! It seems to have many advantages over normal stone chip, and certainly seems a more permanent option. It can be tinted with any colour paint, i went for body colour, much quicker than waiting for stone chip to go off, and then painting with top coat, it only needs a maximum of 10% top coat, just fill, shake and shoot it on. Done, no reactions as you may get with normal stone chip, as the solvents can react and cause the top coat paint not to stick
Got it from here:
http://www.ebay.co.uk/itm/U-pol-Raptor-Tintable-Tough-Urethene-Coating-Truck-Bed-Liner-Kit-Trailers-/110785795320?pt=UK_Body_Shop_Supplies_Paint&hash=item19cb5914f8" onclick="window.open(this.href);return false;
Bob @ Restohaus did the work for me again, I requested to leave the running gear, axle, suspension etc in the black 2 pack coat we used last time, and concentrate the UPOL onto the wheel arches, belly pans and chassis areas, giving a good coverage on the arches and belly pans especially.
Went on really well, got all wheel arches covered, bellypans chassis area, front chassis and bellypan, will need some more to do the rear battery trays, and the middle rectangle where the heat tube goes, with another kit, there would be more than enough, i only really need maybe 2 ltrs max.
Mixed with pearle white, one shot job, better option than stone chip and then top coat. Nice finish, but could be adjusted with more or less gun pressure no doubt. It has "give" in the feel on the surface, a little like wine gums, midget gems, jelly babys, so not a solid coat, this will help resist stone chips and knocks, the colour seems well bonded into the coating, and doesn't seem to crack, though i haven't pressed too hard!
It seems quite thick in the consistency, and may well aid some element of soundproofing according to the spec of the product:
U-pol Raptor Kit - contains 4 x Raptor Tintable & 1 x Activator
U-POL's top-class super-tough durable 2-pack urethane coating against rust, corrosion, salt, damp and extreme temperatures.
Restores even the most worn and uneven truck beds or van floor to new pristine-look finish.
Dries rapidly to give scratch and stain-proof surface that is also U.V. resistant.
High adhesion, waterproof, flexible, helps deaden sound & vibrations.
Easy and quick to use, as simple as: FILL - SHAKE - SHOOT®
Kits contain 4 x 750ml bottles of base and 1 x 1L of hardener - you can add up to 10% solvent basecoat tinter to colour match to the item you are coating
Enough material to re-spray the largest truck beds.
Apply with schutz gun, roller or brush to obtain different textures.
Also available in Black
http://www.u-pol.co.uk/product-cat/83/raptor%E2%84%A2-bed-liner.htm" onclick="window.open(this.href);return false;
Here are some pictures:


On with the next job. Wiring, and new interior wood.......
Cheers
Alistair
- Joined
- Feb 29, 2012
- Messages
- 891
- Reaction score
- 126
Looking great! For wood I used beeswax on the headlining as not too shiney, and I thought it would mellow well over the years. I wanted something that would pick up a bit of patina. Think I used two or three coats with a brush on tin from local hardware store. One year on - no longer looks 'new' or out of place. D
magoo
Well-known member
aogrady said:Hi!
Got some wood panels to probably stain, lacquer, wax. Would be interested to hear some options to finish the wood, I don't do wood, so it's a bit new to me, what options are there?
Alistair
I was recommended this stuff. Put it on without the fuss of sanding and reapplying. It will be one of my jobs coming up soon.
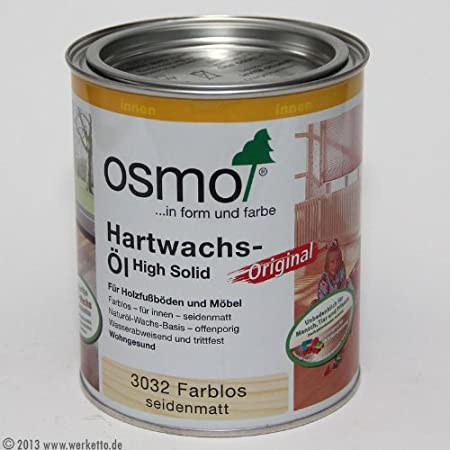
http://www.amazon.co.uk/Osmo-Polyx-Hard-wax-Oil/dp/B0058BC1T4/ref=sr_1_1?ie=UTF8&qid=1381095981&sr=8-1&keywords=Osmo+Polyx+Oil+satin+matt+3032" onclick="window.open(this.href);return false;
- Joined
- Oct 26, 2010
- Messages
- 3,247
- Reaction score
- 17
- Location
- Leeds
- Year of Your Van(s)
- 1971
- Van Type
- Panel
I'm glad to finally find someone who has tried bed-liner as after discovering it I had always thought of having it used on my van.
It's supposed to be damn near indestructible from what I've read! 8)
The finish looks a little "lumpy" in places though. How does the finish compare to stonechip texture? Hard to tell from some of the pictures
It's supposed to be damn near indestructible from what I've read! 8)
The finish looks a little "lumpy" in places though. How does the finish compare to stonechip texture? Hard to tell from some of the pictures
aogrady
Well-known member
Bluesnailman said:Looking great! For wood I used beeswax on the headlining as not too shiney, and I thought it would mellow well over the years. I wanted something that would pick up a bit of patina. Think I used two or three coats with a brush on tin from local hardware store. One year on - no longer looks 'new' or out of place. D
Thanks!, Not thought of beeswax stuff. I quite fancy trying some wax type stain on the head liner, I have used pva glue and cut out surf posters and sealed with pva. Did this some years back, would be tempted to see how a wax would darken and age it?
Cheers,
Alistair
aogrady
Well-known member
magoo said:aogrady said:Hi!
Got some wood panels to probably stain, lacquer, wax. Would be interested to hear some options to finish the wood, I don't do wood, so it's a bit new to me, what options are there?
Alistair
I was recommended this stuff. Put it on without the fuss of sanding and reapplying. It will be one of my jobs coming up soon.
http://www.amazon.co.uk/Osmo-Polyx-Hard-wax-Oil/dp/B0058BC1T4/ref=sr_1_1?ie=UTF8&qid=1381095981&sr=8-1&keywords=Osmo+Polyx+Oil+satin+matt+3032" onclick="window.open(this.href);return false;
That looks interesting..... It's a oil. so much easier to use on the wood, though not being a varnish, i would need a smooth surface, though to be honest the ply isn't rough cut anyway.
Quite like the cherry version:
http://www.osmouk.com/previewpage.cfm?bookid=book001&chapter=5&page=108" onclick="window.open(this.href);return false;
Quite pricey. May well only need the 0.75 can.....
Thanks for the link.
Cheers,
Alistair
aogrady
Well-known member
gvee said:I'm glad to finally find someone who has tried bed-liner as after discovering it I had always thought of having it used on my van.
It's supposed to be damn near indestructible from what I've read! 8)
The finish looks a little "lumpy" in places though. How does the finish compare to stonechip texture? Hard to tell from some of the pictures
Hi!
Yes, I thought it looked like a really good use for it too, I don't know why no one else hasn't used it before on a bus?
Yes, it is a little lumpy in places, probably a little bit thicker in some places. I suspect the angle to spray certain bits can be tricky, hence maybe some thicker areas perhaps. The van was just raised up a little without wheels. It would have been a easy job on a rotisserie.
I think the finish is similar to normal stone chip, but i suspect a lot more compliant, the top coat is much better, less likely to come off as it's mixed within the product. The type of sprayer, gun spray pattern, pressure etc all will make a difference to the texture. The thicker areas are where the stones are likely to get thrown up, I didn't have a issue with the textured finish, it wasn't my intention for a smooth finish anyway.
I'll take some more pictures over the weekend if you want. Are you going to use the same stuff then?
Going back to a much earlier post, and following on from another thread about soundproofing, I'll post a video up showing the difference between a soundproofed outer panel, and one that isn't. It's quite a surprising difference. I suspect the UPOL has a degree of soundproofing BTW, but i couldn't say how much.
When i fit the new wood panels, I have a look of wool to replace the other insulation, and i think i might buy another roll of the flashing i used, just to see out of interest if another layer makes a difference. I still fancy maybe doing areas in the front cab.
Cheers,
Alistair
Similar threads
- Replies
- 2
- Views
- 769
- Replies
- 0
- Views
- 2K
Vehicle For Sale
Early Bay Deluxe 1971
- Replies
- 5
- Views
- 2K
- Replies
- 7
- Views
- 3K