Project Olive

Early Bay Forum

Help Support Early Bay Forum:

This site may earn a commission from merchant affiliate links, including eBay, Amazon, and others.
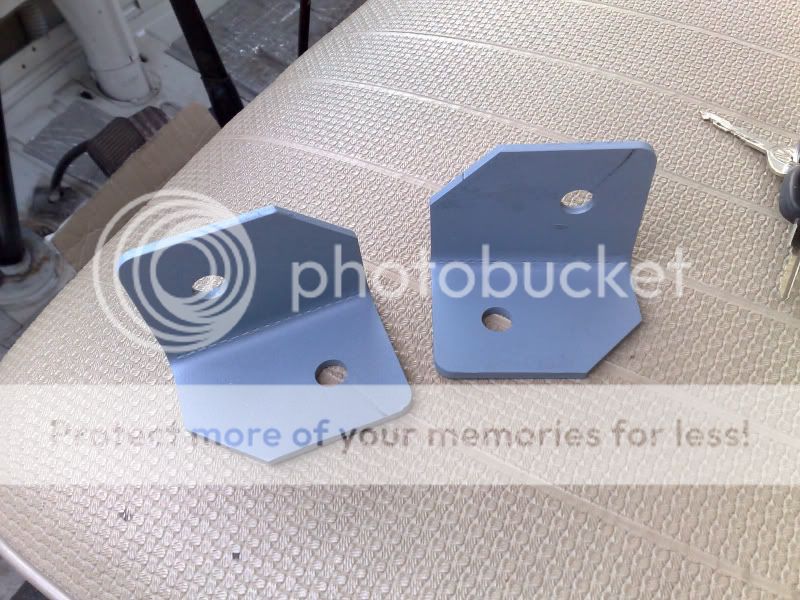
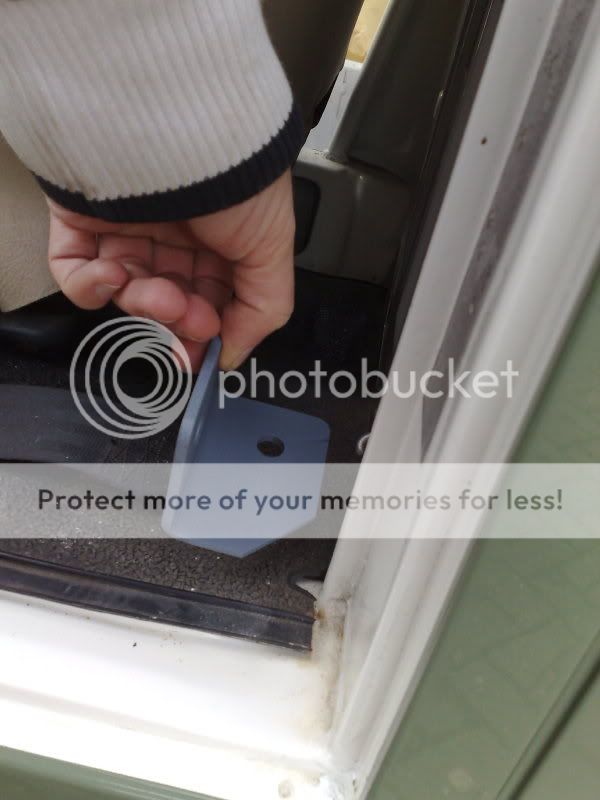
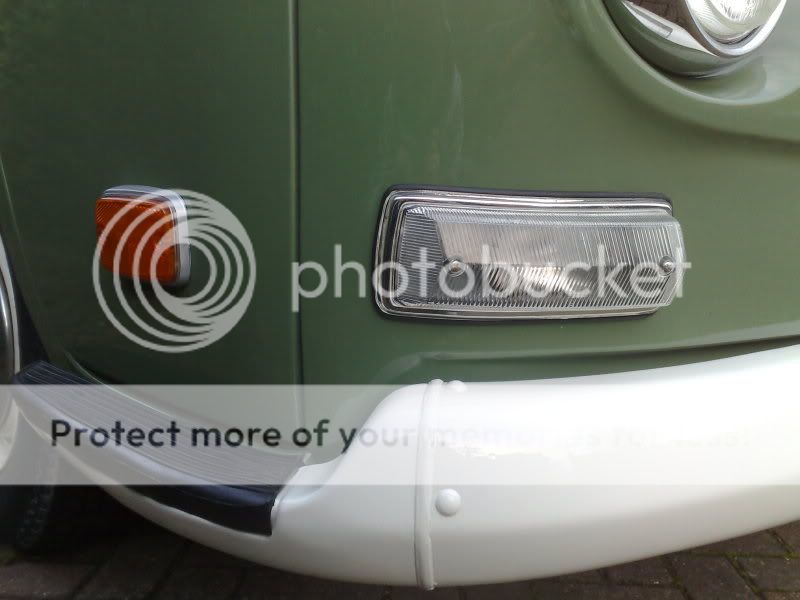
Hi Mate, i got mine from vw heritage, they arent great to say the least and if you wanted to stay true and mount them in the exact same was as the original ones they would need to be heavily modified.

my bumper simply wouldn't be able to go at the angle yours is as there are to huge prongs that slide into the chassis on the camper which keep it straight... i thought they all had that?

Anyway, the guards are just screwed to the bumper, i have left bolting them to the camper as the holes dont align up even if i wanted to.

I'll try and get some pics up the weekend.
 
Fantastic lookng bus, you must be really pleased with it. Looking to lower ours soon, will go the same route. Where do you get the spindles?
 
Lowlight72 said:
Fantastic lookng bus, you must be really pleased with it. Looking to lower ours soon, will go the same route. Where do you get the spindles?

I didn't do it myself i got a guy called Justin who is on Volkszone to do it, £300 in and out in a day...he did a very good job.
 
It was cold this weekend, VERY COLD! but i was out there saturday and sunday doing what i could whilst i could still feel my hands!

Fitted all the lights including my US spec red lenses woohoo! wanted them for ages. I used some ultra bright LED bulbs that bust through the red and still flash orange...ish :wink:
30112008093.jpg


also fitted new air line and washer jets, think i need a new switch though as the jets are slowly seeping water when pressurised?. Still, the first time round i missed connecting them to the switch all together, when i came to pressurise the tank the water flew out the jets and totally cleared the whole bus :lol: excellent i had to laugh or i would of cried.
30112008091.jpg


Made some brackets for the seatbelts as the ones supplied were flat? anyone else had this problem? havent fitted them yet as i need some rubber matting first.
30112008095.jpg

30112008094.jpg


finally just some nice shots of the new parts lights rubber steps etc. thanks for looking! more to come next week as it was too cold to fit the pinstripe i think it would of snapped! also going to make some door cards up this week.
30112008088.jpg

30112008089.jpg

30112008087.jpg
 
oh and i got the chrome reversing trims and light trims on a polishing wheel that my dad has with some autosol... came up an absolute treat, like new.

Also fitted a new engine lid seal, do they bed in? bloody tight shutting that lid down now!
 
dubman24 said:
oh and i got the chrome reversing trims and light trims on a polishing wheel that my dad has with some autosol... came up an absolute treat, like new.

Also fitted a new engine lid seal, do they bed in? bloody tight shutting that lid down now!

Had the same problem with a new engine lid seal. A new one was put in after restoring the rear end (2007). After a year, the lid now closes rather well... Be sure to open (and close) the lid lots of times :)

Your bus really looks beautiful!!! Hope mine will be in the same condition once...
 
Wow your bus looks sweet......my resto is a long way off, I'm just saving up slowly for the seals and paint etc.....

Keep the pics coming. 8)
 
bas_T2a said:
Be sure to open (and close) the lid lots of times :)

Thanks bas, is yours stuck on with contact adhesive? i've used it and it's ok, probably didn't help it being -2 and it's bloody messy :lol:
 
dubman24 said:
bas_T2a said:
Be sure to open (and close) the lid lots of times :)

Thanks bas, is yours stuck on with contact adhesive? i've used it and it's ok, probably didn't help it being -2 and it's bloody messy :lol:

Nope, just pushed the rubber seal in and it's still in place! Handy if it ever needs a replacement.
 
dubman24 said:
Lowlight72 said:
Fantastic lookng bus, you must be really pleased with it. Looking to lower ours soon, will go the same route. Where do you get the spindles?

I didn't do it myself i got a guy called Justin who is on Volkszone to do it, £300 in and out in a day...he did a very good job.

I know you said you didnt do it, but do you know what all was needed to lower? Spindles, etc. I am in the US so I dont think I could get Justin to swing by!
 
panic_fan said:
I know you said you didnt do it, but do you know what all was needed to lower? Spindles, etc. I am in the US so I dont think I could get Justin to swing by!

well im no expert hence me getting it done rather than attempting it myself, you can buy adjusters that need to be welded in place for the front, you can then adjust the height on these. then at the back I think they take the spindles out and turn them down? each turn lowers it by 'X' amount. like i said im no expert. best to have a look on the technical forum for indepth instructions. Between me and a few friends and books/web etc i'm sure we could of done it but it's an important mechanical part of the vehicle and i wanted it safe for me and the mrs so got it professionaly done for peace of mind. sorry i cant be of more help mate.

I'm not mechanical and i learn as i go, but kinda know what im looking at and how it works apart from the time i said "so where does the coolant go?" :roll: , now i can do a very basic service and thats it, saying that i still cant get my head around adjusting the points...must attempt it soon, how hard can it be!
 
dubman24 said:
I'm not mechanical and i learn as i go, but kinda know what im looking at and how it works apart from the time i said "so where does the coolant go?" :roll: , now i can do a very basic service and thats it, saying that i still cant get my head around adjusting the points...must attempt it soon, how hard can it be!

Im in the same boat as you. I love my bus and love learning to work on it. But I am new to the VW scene and still have a lot to learn! I am planning on keeping my bus original, but I would like to get it lowered like yours. Not slammed, just lowered.
Heres the link for my intro...
http://forum.earlybay.com/viewtopic.php?f=2&t=9620" onclick="window.open(this.href);return false;
 
As far as i know it doesn't have a name/code

We had a mare trying to get a match as it's not an original colour. Originally the bus was white.

The paint was going back and forth over about 6 weeks as we weren't happy with it. I would say it's a 9 out of 10 in terms of a colour match to the original.

I have a small pot of it left that i can use as a touch up.
 
bit of an update as xmas has ment i can spend some time (all be it frickin freezing) on the camper!

First off is the half height unit me and my dad have been making, well i say me, i generally make the tea :lol: his next door neighbor had some spare solid oak flooring so we thought we could make the lid out of it. It came up a real treat! i just need to cover the lower half and inside now and it's job done.
29122008096.jpg


29122008100.jpg


29122008097.jpg


29122008098.jpg


Also fitted the new seat belts and the mats that go under the seats. and as you can see TAKEN THE WHOLE DASH OUT :shock: I spent ages taking it out, all those wires it's like spaghetti junction! and the heat controls are a job to put back together too. I've got a new dash from C&C and rescued the top metal part, its all going off to paint tonight. It's going to be a mixture of the green and white. I know sometimes a painted dash can look gash but i think if it's done right it should work. also have a cool steering wheel from 56 deluxe, an empi shifter modified with a tiki head and some other cool bits to fit once i get the dash back in.

31122008106-1.jpg


31122008105.jpg


Fitted a new brake reservoir, the person before had cable tied the old one on an angle and it was leaking out all over the back of the light and bodywork as you can see.
29122008099.jpg


will add more pics once i get the dash etc back... i cant wait as it will start to look like im getting somewhere. it's felt like one step forward two steps back some of the time, one painful example is when i got the camper home from paint then decided to spay up some brackets hanging from my garage door, you guessed it the white paint drifted down the road and all over the back end of the NEW GREEN paintwork... i could of cried! i remember looking up and down the road in sheer panic then frantically rubbing t-cut into it to try and shift it...no joy. luckily the guy who painted it gave me some G3 i think it's called and with about 4hrs of elbow grease it eventually came off. also the electrics on these things are a nightmare, so unsafe with bit of old worn out wire hanging everywhere and a lifetime of bodge jobs one on top of another. it really is worth getting a auto electrician to take a look over it all, luckily for me a good friend is one!
 
Hi all bit of a floor update, finally got the oak laminate down! I ran all my speaker wire in the groves of the floor and drilled a few holes in the bulkhead. i know, i know i was cringing doing it too but thought it was the best hide away solution to getting a modern ice system installed and they will be covered by the buddy seat. I put down 12mm ply with a few screws then a piece of underlay and single sheets of laminate screwed in the corners and a few more screws that will hold it down behind the kick panel.
it looks boss...take a butchers!

18012009122.jpg


18012009123.jpg


18012009125.jpg
 
slammedresto said:
nice flooring, i gotta dynamat under my bed and on the wheel arches when i get the time

same here 8)
 

Latest posts

Top