The Buss-E '71

Early Bay Forum

Help Support Early Bay Forum:

This site may earn a commission from merchant affiliate links, including eBay, Amazon, and others.
Tidied the corners


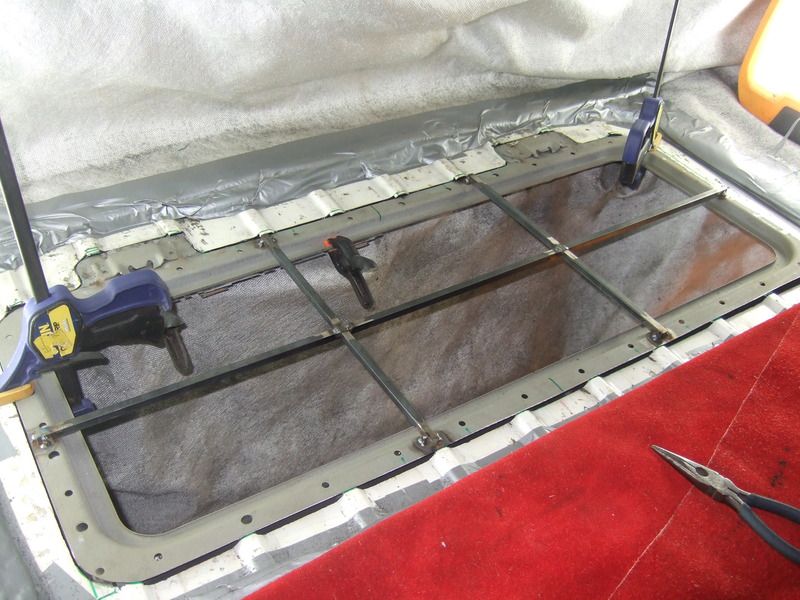
so I could do a first fit of the frame


Offered everything up, marked it all out and cut a little more away


I'm leaving these little tabs on top of the pressed deck a little longer so I can tap them down after the frame is welded in to make it all look as factory as possible.


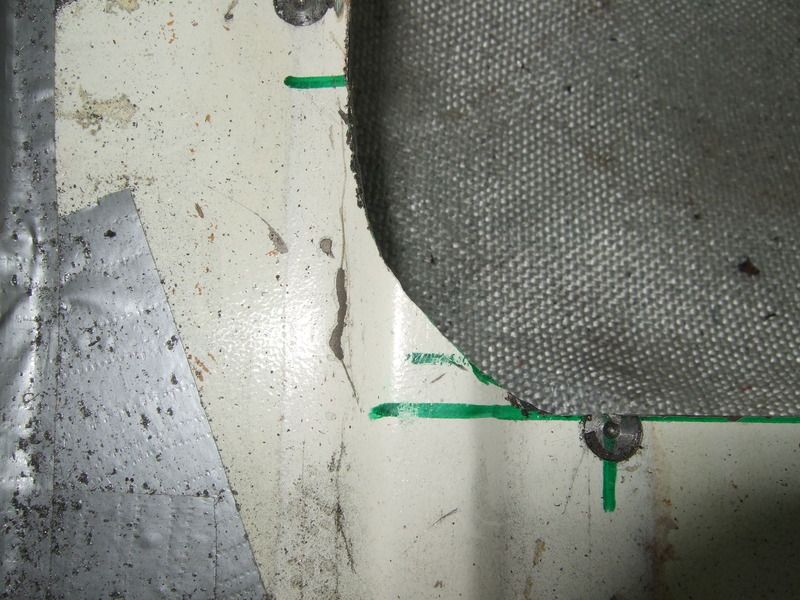
Next thing was to sort out the firewall retaining tab. It's the bit the firewall slots up and into between the fuel tank and the engine bay.


It didn't take much to take out as it was attached to the bottom of the deck panel I removed earlier. It needed bending flat but as a result it ended up with a gentle curve along it's length due to me hitting it with a hammer on an anvil to get rid of the creases. Another half hour spent gently tapping with a hammer to encourage the bend to disappear. Even after half an hour I couldn't get rid of one point where it was bad. In the end I cut the strip at this point which turned out quite handy. In order to weld this to the underside of the new frame I would need to put a new 90 degree bend in and my bending machine can only take something 600mm long so problem solved.

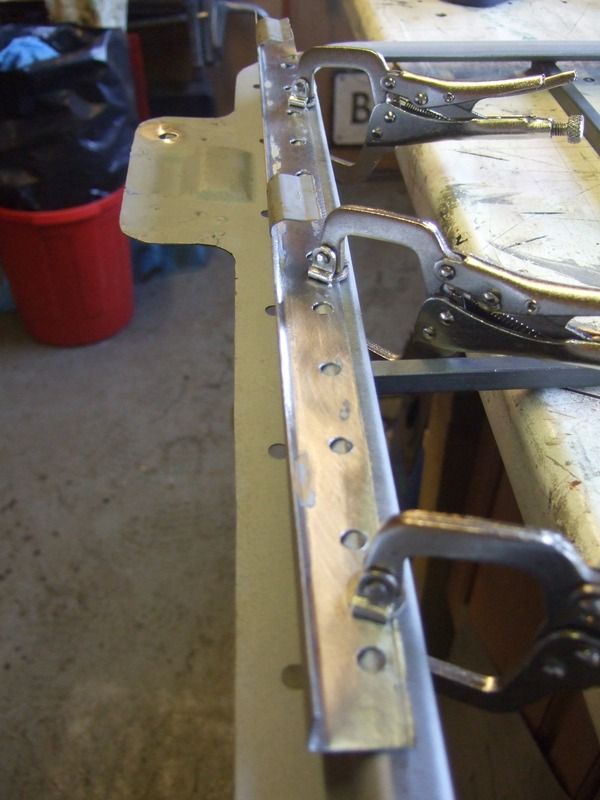
Offered up one of the pieces before trimming it


Then set about welding the two parts to the frame using new plug weld holes

 
All welded and ground. The firewall retainer strips are on the right hand side.


All finished and a quick coat of zinc primer ready for later.

Next up the locking tabs for the new inspection hatch lid locks. I removed these from the original frame, again drilling out the spot welds. The holes remaining in the tabs were then used to plug weld onto the original frame in the back of the bus.


Next I offered up (for the millionth time) the frame and committed to plug weld in.


Where I had drilled out the original spot welds married really nicely with the positioning of the existing engine bay structure


pretty pleased with the results so far. A bit lumpy in a few places but I'm still learning.


Spent and hour grinding the plug welds flush.


Then set about tacking the frame in place.


The tacks are spaced about 25-30mm apart.


Then ground all these down as well


On with the main welding.


I did small sections at random points around the frame, welding no more than 25-30mm at a time. This meant I wouldn't over heat any of the metal and cause warping.

nearly done except for the detail at the edges of the panel moulding. I can't do these until the weekend so protected it all with more zinc primer


That's as far as I got today. Once this is done I've got a few other small repairs to do and then I can set about prepping the underside and dealing with the rust treatment. Then underseal and the suspension can all go back together along with some shiny new rear disk brakes.

As a foot note. Anybody care to comment about my welding feel free. I'm still learning and appreciating just how hard this is to get right. I think I'm doing OK but if anyone has any feedback I'd be glad to hear it, can't know too much. Cheers :D
 
Nice job and the welding looks pretty good 8)

Very brave to tackle this and will look very good (and be useful) when finished ;)

Keep up the good work !!
 
Looks incredibly well executed. A properly planned bit of work! Imagine it'll look factory when it's done if you keep up that standard!
 
Hey buddy, great to read some updates! :mrgreen:

Buss69 said:
Cunning Plan was right I decided to do everything underneath from the rear belly pans back so I took out the engine and gearbox too (gulp).

:lol:

Rubbish eh? I just wanted to cruise around in my bus for the summer. That was years ago. :?

georgeyv said:
Looks incredibly well executed. A properly planned bit of work! Imagine it'll look factory when it's done if you keep up that standard!

+1

Buss69 said:
On with the main welding.


(I am learning about welding, so a genuine question as I do not know) - How does this work? Do you aim the welding gun slightly to one side to create the arc? I assume if you aimed for the middle, the wire would just flow through the gap without sparking the arc to weld? :|

Buss69 said:

How did you know where to drill the old spot-welds out, that must have looked flat before you started? :?:

Buss69 said:
Marked out the frame in the back of the bus

The same with this, what spot welds? How do you know where they are? TELL ME MAN! :lol:
 
cunning plan said:
Hey buddy, great to read some updates! :mrgreen:

Cheers dude you're not the only one. It was starting to look like you where gonna outdo me on the progress front. I Gotta keep a hand in. :D

cunning plan said:
(I am learning about welding, so a genuine question as I do not know) - How does this work? Do you aim the welding gun slightly to one side to create the arc? I assume if you aimed for the middle, the wire would just flow through the gap without sparking the arc to weld? :|

Hmm... Well, it all starts with welding on the tacks. Once done you have to grind the surface off them flush. The gap between metal needs to be no less than 1mm, I'm also using 0.6mm welding wire as it helps to keep the panel from over heating, you use less current and also less likely to blow holes in everything. The one thing I did was a lot of practise, it's taken over a week off farting about with scrap to get to know my welder better.

When you start the weld you have to use the centre of the tack, working towards you so you are looking right down the line you're gonna weld and the gun angled so it's about 70-80 degrees tilted towards you at the top. (I hope this makes sense).
Pull the trigger and use the tack to get going, you have to use short bursts of just under a second and keep a close eye on the weld pool, it's small and need to keep it that way otherwise you get blow through.

cunning plan said:


How did you know where to drill the old spot-welds out, that must have looked flat before you started? :?:

Buss69 said:
Marked out the frame in the back of the bus

The same with this, what spot welds? How do you know where they are? TELL ME MAN! :lol:

This is pretty simple but you have to look closely. You have to look underneath or the place where metal/ panels are joined, they're normally located along this connecting area. I'll take some more pics and hopefully illustrate.
 
gninnam said:
Nice job and the welding looks pretty good 8)

Very brave to tackle this and will look very good (and be useful) when finished ;)

Keep up the good work !!

Cheers bud, never considered it brave, I think doing the exterior panels must be harder. I'm not gonna lie though I was pooping myself when I cut the deck out, super paranoid I'd get it wrong. Measured and checked about 20 times... I hate making mistakes.

And yes very useful, no more knuckle scrapes playing with spark plugs and carbs.
 
georgeyv said:
Looks incredibly well executed. A properly planned bit of work! Imagine it'll look factory when it's done if you keep up that standard!

Thanks, aiming for a factory finish, it's a lot of work to achieve, fingers crossed. Other EB members have been a massive influence on me to get it all right.
 
squareweave said:
Nice work!! A very useful mod. You're making it look easy which it definitely isn't!! Keep up the top shelf quality, it's nice to see.

Cheers Rich, you're one of the benchmarks bud. Watching your builds has truly been inspiring.
 
Just a quick up-date. Not had much time to do much today, hopefully more tomorrow.

So I ground down the welds done so far. Because of the type of method of weld, there is not too much to grind away.


Really just a little work to take back the worst. After the detailing it should require a thin skim of filler to finish off before painting.


Also got a few parts back from the powder coaters including the engine inspection hatch. Did a quick fit of the unrestored handles and very pleased that everything sits nice and flat.


Underside


Hoping to get another crack at things tomorrow.
 
OK, just a tiny bit more progress today. Welded up all the rib ends. They're not too lumpy but will need a little filler to get them to look better and give the whole area a bit of flatting off.


Whole lot done and ready for filler


Another trial fit to make sure the rib ends don't interfere with the hatch


That's as far as I got so on with another coat of zinc primer 'till next weekend


As you can see quite a bit of tidying

 
cunning plan said:
How did you know where to drill the old spot-welds out, that must have looked flat before you started? :?:

The same with this, what spot welds? How do you know where they are? TELL ME MAN! :lol:


Here you go Cunning. When you're looking for the spots sometimes a little hand sanding in the rough area you think you might find a spot... and all is revealed.


Here are another couple of shots. In this one there are two spots between the two ribs still covered with paint.


Well it's been 9 months since I posted. In that time I've had 2 prolapsed discs in my lower spine. I can't bare the boredom and decided to get back on the bus.
Have to say, I wish it hadn't been so long but I didn't really have much choice in the matter.
Managed to get some filler on the welds around the hatch/ inspection thing.

I dry sanded down with a machine, first with a 120 grit and then 180 grit papers.
Several more skims later and I'm happy enough to mask up and get priming.

I've used an acid etch primer (#8)

Not a bad result so far. I've never used the primer before but it seems to go on well and appears to have quite a high build.
Hopefully tomorrow will reveal any pin holes. I'll probably go over again with a knifing filler after I've given it another rub down.
At last, back on it. YES!
 
Welcome back to busfetish.com, urrr, I mean, earlybay.com

We missed you! :party0047: :shadey: :party0021:

Now upload some more pictures of your hole............. :shock: :D :lol:
 

Latest posts

Top