71' Swiss Microbus Resto

Early Bay Forum

Help Support Early Bay Forum:

This site may earn a commission from merchant affiliate links, including eBay, Amazon, and others.

Barkafer

Well-known member
Supporting Member
Joined
Apr 10, 2010
Messages
751
Reaction score
1
Location
Land of Crow, Lincolnshire
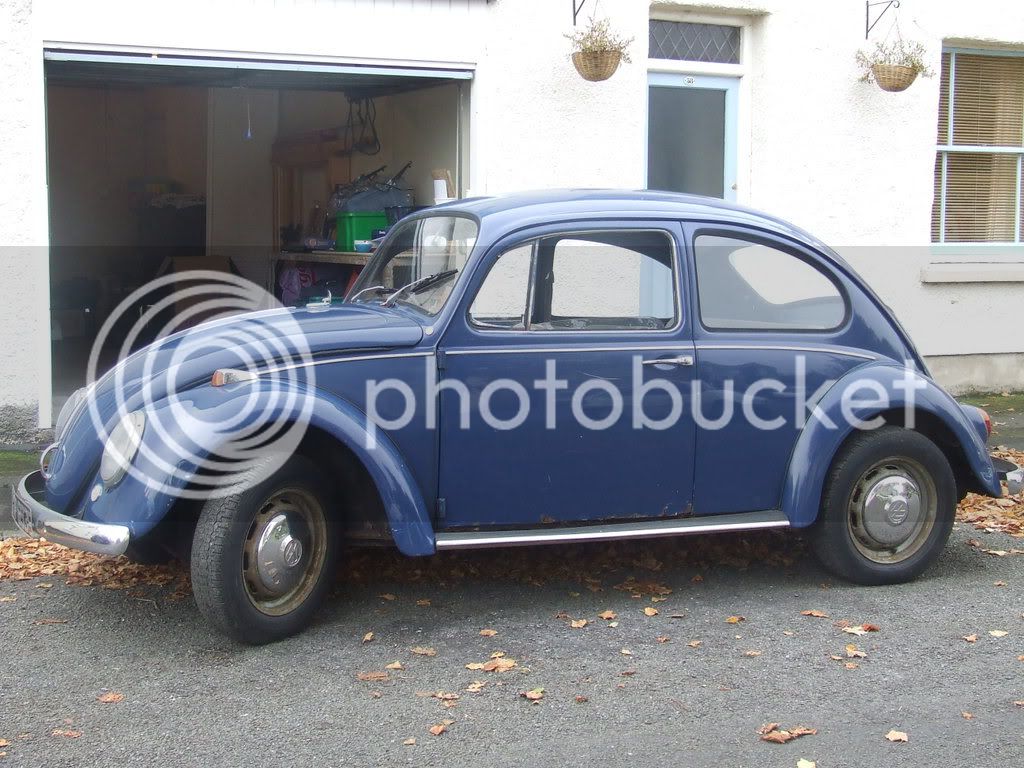
This is my somewhat knackered former Microbus. One of the previous owners had attempted to restore it by poprevetting it together :shock: I now have it at home in my small garage and am slowly putting it right. Progress is slow due to the usual commitments.

Briefly this is what I started with.
19062009216.jpg

19062009219.jpg

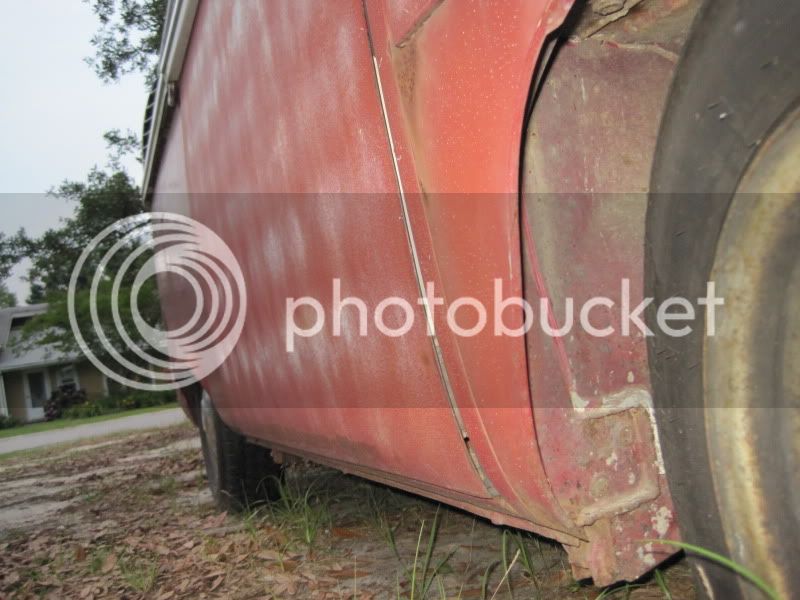
I'm starting at the r/o/s corner and working my way around the bus.
07092009319.jpg

19102009348.jpg

24102009357.jpg

23102009355.jpg

25102009362.jpg

Found the original Pastel white paint while repairing a small patch on the butt end!
06122009415.jpg

Took the tank out and was amazed to see a nearly mint unit! I kid you not it was like new when I removed the lid, take a closer look at the photo's. Shame the rest of the bus isn't as good as this bit.
05042010551.jpg

05042010552.jpg

05042010554.jpg

05042010556.jpg

This is the next bit of fabrication and welding I'm looking forward to.
14032010507.jpg

It's my first resto and a steep learning curve I can tell you! Off to BigBang with the kids tomorrow to buy some bits. :D
 
Looks like a good project, enjoy Dude. Check out 71 Dormys build thread, that'll give you inspiration :mrgreen:
 
Looks like you have your work cut out :shock:

And popped riveted.... What's all that about :p :oops:

Enjoy yourself ;)
 
Yep, got my work cut out alright!

Leep, here are some photo's of my othe rproject, a T1 '67 spahr kafer.
051.jpg

Poppyjpg.jpg


Been collecting parts. Got this NOS rear valance from Sweden for £200.
DSC001711.jpg

To replace this bondo bodge :shock:
Bug10.jpg


Back to the bus, got a pair of rusty rat look slider covers for 8 notes at BB. Bargain! Also a flywheel oil seal and 'O' ring. Gonna replace them this afternoon, with any luck. :D
 
Cool projects- the '67 looks pretty good, might need some new doors from the looks of it. The bus need much more than doors :confused0068: !

In the States those front fenders have the later style upright headlights, though a lot of times people replace them with the early style.

Looks like the rear corners are donor pieces, but what about the rest? Are you making your own patch panels?
 
Yep, I'm making patch pieces for the odd place or two. Should have just replaced the whole wheel arch in hind sight, but I figured it would be good to practice. Will learn lesson and do the near side differently. Patching takes too much time.
The rear corner is a bought replacement panel though, not from a donor. It's rough, but it's my first shot at welding. I will get smoother and stop blowing holes eventually :oops: Gotta be quick on the trigger, short accurate bursts are best. Easier said than done :lol:
 
Progress has been sloooow! Got a bit side tracked (see '71 deluxe oh patina thread in Gallery) Took ages to get the flywheel bolt off. I had a 4' bar on it and was jumping up and down whilst my 15 yr old was sitting on the motor......until the flywheel lock sheared off :shock:

My neighbour came to the rescue with his windy gun......though it took him a good 15 mins before it eventually moved.
Are these things Locktited in place, because there was an awful lot of crap in the threads?
Cleaned the filthy flywheel too ready for the new clutch.

Anyhow, she now has a new oil seal and 'O' ring fitted and I've just finished adjusting the valve clearances too.

Gonna purchase a couple of floor H supports and all the sills for the next repair. Schofield seem to be just the ticket!
 
Got most of my bits from Schofields and Heritage - good luck
 
Got the temp floor out to start on replacing the floor supports. Rather alot of rot.
DSCF6640.jpg

Cut off the rotten H end sections
DSCF6668.jpg

Trail fitted the inner sill
DSCF6676.jpg

DSCF6677.jpg

Removed the crap dog leg. Took 3 minutes :shock:
DSCF6657.jpg

DSCF6660.jpg

DSCF6658.jpg

DSCF6661.jpg

Took the pop rivets out of the inner wheel arch panel. Wonders never cease :lol:
DSCF6663.jpg

Not surprised at what lurked beneath!
DSCF6664.jpg

DSCF6667.jpg

This bit was rivetted on too! What is the point!!!
DSCF6666.jpg

All the necessary parts arrived very promptly from Schofields. Great firm, lovely people.
Here's half the reason I get nothing done fast on this project :lol:
14042010576.jpg

14042010581.jpg

Me and my budding enthusiasts with our noses under the lid of a cool bus at a local show last summer! No the engine wasn't running and yes he was going to get his little fingerprints all over the shiny stuff!
DSCF6055.jpg

I want this bus to be loooow!
14042010583.jpg


Now the fun starts :D
 
Mah Gawd that bus is rotten!

When do you expect your super pimp "new" bus to arrive?

I can't wait until my little one is old enough to fetch me a wrench!
 
Yup, rotten as a pear, but nothing that can't be chopped and replaced. Just spent £250.00 on parts so all I have to do is weld them in. Simples, not!

My little one loves helping on the bus, but mostly we just sit in the front and he drives me to the beach! :lol:

The super pimp mobile will leave in the next couple of days and will take 5-6 weeks, around the same time as my fifth little vdubber is due!
 
Bit more done today. Mostly cutting out the bad stuff and grinding back to shiny. The bottom of the 'B' post where it joins the top of the slider chanel is rotted through in a couple of places. Ground it back to shiny and gonna try to build it up carefully with spots of weld. we'll see how it goes tomorrow.
DSCF6786.jpg

DSCF6787.jpg

another trial fit.
DSCF6788.jpg

DSCF6789.jpg

aiming for looking like this
IMG_09531.jpg

More welding tomorrow.
 
Bugger! I ran out of gas again. Bitten the bullet and bought a refillable bottle of Arg/co2 off ebay. 10L bottle delivered for 92 quid.
I got as far as tacking the 'B' post on.
DSCF6794.jpg

Cut the chassis top hat and trial fitted.
DSCF6796.jpg

DSCF6797.jpg

Got bored and cleaned door card and panels.
DSCF6806.jpg

DSCF6801.jpg

Next jobs are extend the middle sill and fab 'C' pillar.
DSCF6792.jpg

Don't know how I'm gonna do that 'C' pillar though. Oh well, off to bed! :?
 
Got another few hours on the bus yesterday. I bit the bullet and bought a large refillable gas bottle off ebay. Great service arrived as promised in two days. You can see it in one of the photo's.
Tackled the middle sill extension and a bit of the 'C' pillar repair using the old disposible Argon. Not great.
DSCF6813.jpg

DSCF6816.jpg

Made this piece ages ago and now it's time to go on :D
DSCF6817.jpg

DSCF6818.jpg

Strengthened the middle sill prior to extending using the new gas.
DSCF6824.jpg

DSCF6825.jpg

Before.
DSCF6807.jpg

After.
DSCF6827.jpg

The Argon weld is on the left and Argon/CO2/Oxygen weld is on the right. Both using the same setting on the Mig. Judge for yourself!
DSCF6829.jpg

More popped rivets! WTF!
DSCF6819.jpg

DSCF6821.jpg

'A' post bottom, chassis leg and inner front valance to repair.
DSCF6822.jpg

The welding is a bit hit and miss. I have got to clean the surfaces properly, then it's good.
 
She's a challenging one, this one :roll:
Thanks Nelly.
Had a little bit of a, er....mishap with an angle grinder yesterday! :shock:
DSCF6842.jpg

Stings a bit. I was cleaning the paint from the edge of the 'B' post outer when the grinder switched off (faulty switch). I had removed the guard (naughty) and as I turned it back on I lost grip of it and thats the result. :oops: TWAT! Very lucky I didn't do more serious damage.
Anyway, carried on and welded 'B' post on. Not entirely happy with the result (slight overlap) and may have to remove it and start again.
DSCF6844.jpg

DSCF6843.jpg

DSCF6845.jpg

This is the space I have to work in. More than some, not as much as others I dare say.
DSCF6840.jpg

Gave it a rest today. Will be purchasing a new angle grinder tomorrow :roll:
Bit more cleaning. Seats this time. Anyone know how to get the vinyl completely clean? Started off with a brown dirty stain (removed with Bleach) and now got a yellowish stain that I can'y shift.
DSCF6856.jpg

Havn't started this one yet.
DSCF6857.jpg

Later!
 
Removed the 'B' post outer and started again as I was not happy with the fit. Better now
DSCF6861.jpg

DSCF6859.jpg

Red oxide on the inner.
DSCF6858.jpg

Tacked the inner arch repair panel
DSCF6862.jpg

Seemed the top hat in
DSCF6863.jpg

And seemed it to the outrigger
DSCF6864.jpg

Started welding up the rest of it
DSCF6868.jpg

Inner sill to top hat
DSCF6867.jpg

And then welded the 'B' post to the inner arch repair. Bit rough, don't think I got all the paint off :?
DSCF6874.jpg

All went a bit snotty prior to that and so I took the torch shroud off and found out why!
DSCF6865.jpg

Just got the other side to do now :shock:
DSCF6870.jpg

Later!
 

Latest posts

Top