rusty old nail to sow's ear

Early Bay Forum

Help Support Early Bay Forum:

This site may earn a commission from merchant affiliate links, including eBay, Amazon, and others.
All that was missing in that pic of me was the cigar! :D


creationblue said:
Nice to meet you too Doug! Do you do the voice overs for Dom Jolly? You sound very much like him :D

I'll have to go and have another listen of him I think! Anyone out there needing voice overs? :lol:
 
sparkywig said:
I probably may have to fit one Karlos.
Running at 65 on the motorway for 20 miles seems to be just too much for the stock cooler.

Wouk be an idea mate. Use a sandwich plate on the filter head. When up to temp it opens an allows it into the cooler.
 
jonboylaw said:
Looking good Simon!

Doug, I had a rattle under braking and cornering, turned out to be an old socket rolling about under the seat :D

:lol: It started straight after I collected it from my local garage, following work on the front brakes, so you could be right Jon! Will have another poke about, next time I go over to my bus!
 
I wasn't happy with where the previous repairs had blown just under the slider track, a consequence of working outside in rain and freezing temperatures.

OzhIY.jpg


So I attacked the side panel with a DA sander, etch and high build primer and a few top coats.
And then it rained before I could finish.

XfnmW.jpg


I then spent an hour or so removing wet masking tape residue. I still need to deal with a couple of runs when the paint has hardened fully, and then give it a polish. It makes the rest of the paintwork look tired, really ought to get it fully painted.

AFucm.jpg
 
So after starting a debate on aerials on General, I've fitted mine.
Maybe should've sorted the stone chips on the front panel first, but couldn't be bothered.

PlGeB.jpg


I think I've cured my triple speed flashing indicators now though, the earth tag had broken off the indicator body.

YlRFp.jpg


ryxXC.jpg


Just need to wind the rear back down a couple of inches now I'm not towing the Rapido for a while.
 
Aerial looks good :D

Hours of fun with the key wafers to come then..!!?? ;)
 
sparkywig said:
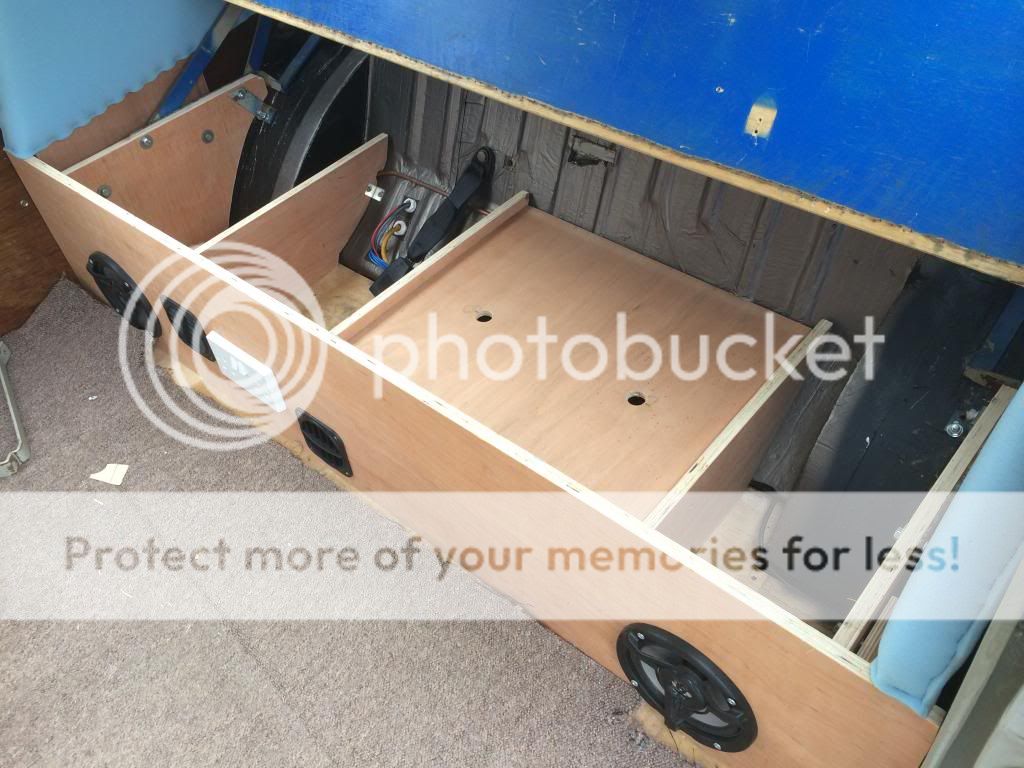
And cover for the Propex and 12V wiring done.
Just need to get some U profile steel for the top of the ply where the bed supports rest and some upholstery fabric and we're almost ready for Easter.


Amazing work on your bus. I was interested in this picture, how come you covered the propex? I like this a lot as I want to store my propex there, but don't want to lose the storage space completely and on lots of the installs the propex looks vulnerable if you were to put other things in that area.
 
sparkywig said:
I covered the Propex for exactly the same reason, I didn't want to lose any of the storage space I've just gained.
It also slightly reduces the noise levels when the Propex is running.

Cheers, I might have to copy this idea if that's ok. Looks a lot cleaner and safer.
 
Supertramp said:
sparkywig said:
I covered the Propex for exactly the same reason, I didn't want to lose any of the storage space I've just gained.
It also slightly reduces the noise levels when the Propex is running.

Cheers, I might have to copy this idea if that's ok. Looks a lot cleaner and safer.


There's about 2" clearance between the top of the Propex and the ply cover. I've allowed this much because I want to add a layer of 1" insulation inside the "box" to aid noise reduction and still leave 1" air gap.
 
Westfakia interior almost complete, just need some decent handles.

2cE9A.jpg


H51fh.jpg


FZg8R.jpg


I knew there would be a use for a broken windbreak pole. ;)
Buddy seat comes out to be replaced by fridge when flying solo, and I think I'll adapt a spare cooker box liner as a splashguard.
 

Latest posts

Top